Use an action container
In our example we have set the content to use in the action mail to "Content from your basket" and used ~BASKETABANDON.BASKETCONTENT~ to display it. Presume the contact has different items in his basket. Then we want to display each item in the email, within a certain layout. Instead of storing flat content in the field BASKET, we're going to store it in a structured way, in a JSON or XML format. Using an action container we can define a layout for each item in the JSON string. The default structure of the JSON string is the following:
[{"ID":1,"PARAM":"ACTIONCONTAINERNAME","CONTENT":{"FIELD1":"Content for field 1","FIELD2":"Content for field 2"}},{"ID":2,"PARAM":"ACTIONCONTAINERNAME","CONTENT":{"FIELD1":"Content for field 1","FIELD2":"Content for field 2"}}]
You can use an online JSON parser, like http://json.parser.online.fr/, to parse the JSON string:
[ { "ID":1,
"PARAM":"ACTIONCONTAINERNAME",
"CONTENT":{
"FIELD1":"Content for field 1",
"FIELD2":"Content for field 2" } },
{ "ID":2,
"PARAM":"ACTIONCONTAINERNAME",
"CONTENT":{
"FIELD1":"Content for field 1",
"FIELD2":"Content for field 2"
} } ]
Alternatively, you can use an XML string:
<PARAMETERS>
<PARAMETER NAME="ACTIONCONTAINERNAME">
<ARTICLES>
<ARTICLE ID="1">
<FIELD1><![CDATA[Content for field 1]]></FIELD1>
<FIELD2><![CDATA[Content for field 1]]></FIELD2>
</ARTICLE>
<ARTICLE ID="2">
<FIELD1><![CDATA[Content for field 1]]></FIELD1>
<FIELD2><![CDATA[Content for field 1]]></FIELD2>
</ARTICLE>
</ARTICLES>
</PARAMETER>
</PARAMETERS>
We will use a JSON string with 2 items, and 2 fields per item: NAME and PRICE. The name for the action container (PARAM) we will use is 'BASKET':
[{'ID':1,'PARAM':'BASKET','CONTENT':{'NAME':'Item 1','PRICE':'150'}},{'ID':2,'PARAM':'BASKET','CONTENT':{'NAME':'Item 2','PRICE':'55'}}]
1. Create a new record in the action list for testing. On the 'Data' tab (at the bottom) of the action list, click 'New record' from the top bar. Fill in the following fields:
- CREATED_DT (automatically filled in)
- MODIFIED_DT (automatically filled in)
- LISTID (the list ID of the audience list)
- USERID (ID of a contact in the audience list, use your test user record id)
- ACTIONCODE = 'BASKET'
- BASKETCONTENT = '[{"ID":1,"PARAM":"BASKET","CONTENT":{"NAME":"Item 1","PRICE":"150"}},{"ID":2,"PARAM":"BASKET","CONTENT":{"NAME":"Item 2","PRICE":"55"}}]'
Make sure you have the JSON string on a single line.
2. Remember the ID of the record you just created. You will need it when testing the action container.
Create the action container
2. Delete the text ~BASKETABANDON.BASKETCONTENT~ from the email and drag an "action container" from the 'Components' tab in its place.

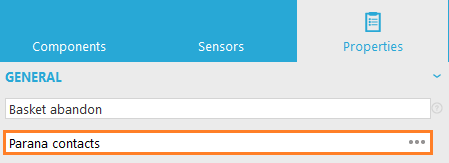
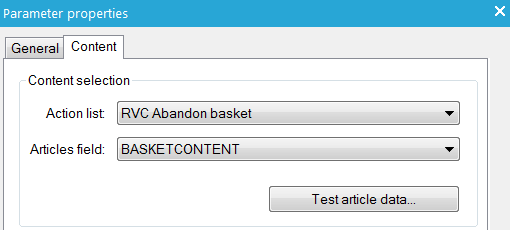
3. In the properties of the action container, enter the name "BASKET". On the 'Content' tab select your action list and the field "BASKETCONTENT" from the drop down. Click 'OK' when done.
The action container will appear under "Used in this email" in the 'Components' tab.
4. Right-click the action container and select 'New field' and name it 'NAME'. We have to add a field for each 'field' used in the JSON string. So do this again for the field 'PRICE'. Under 'Used in this email', click the action container to see the fields.

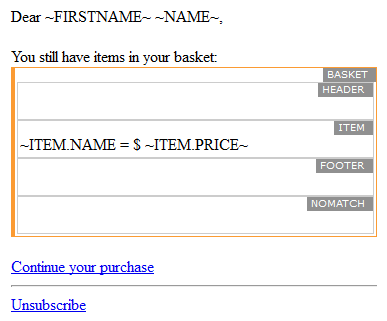
5. Similar to an article container, an action container consists of 4 parts for which you can add content:
- Header: content shown before all items
- Item: content is repeated for each item
- Footer: content shown after all items
- NoMatch: content is shown when there are no items available for the user
In the Item section we can add content, layout and fields from our JSON action list record. This will be repeated for each item.
Add "~ITEM.NAME~ = $ ~ITEM.PRICE~" in the Item section. Alternatively, you can select the fields under the action container, right-click a field and click 'Insert'. Your email now looks like this:
In the 'Source' tab you can see the html code for the action container:
<div id="MACONTAINER" maconstraint="" macontenteditable="false" maparameter="BASKET" >
<div id="MAHEADER" macontenteditable="true"></div>
<div id="MAITEM" macontenteditable="true">~ITEM.NAME = $ ~ITEM.PRICE~</div>
<div id="MAFOOTER" macontenteditable="true"></div>
<div id="MANOMATCH" macontenteditable="true"></div>
</div>
We do not use the Header, Footer and NoMatch parts, so you can remove them if you want:
<div id="MACONTAINER" maconstraint="" macontenteditable="false" maparameter="BASKET" >
<div id="MAITEM" macontenteditable="true">~ITEM.NAME = $ ~ITEM.PRICE~</div>
</div>
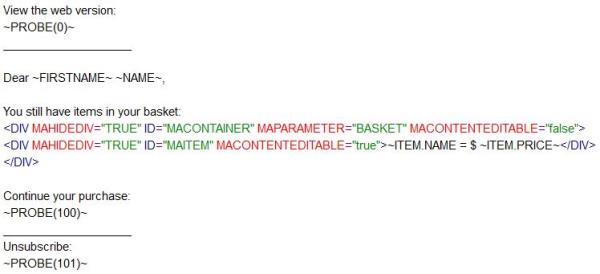
6. Copy and paste the code above in the text version of your email:
7. Activate the journey. You should receive your action mail. After the email is delivered, put the journey 'on Hold' to avoid extra load on the server. Otherwise the journey keeps running forever as we have not set an end date.
Back to example Abandon basket
