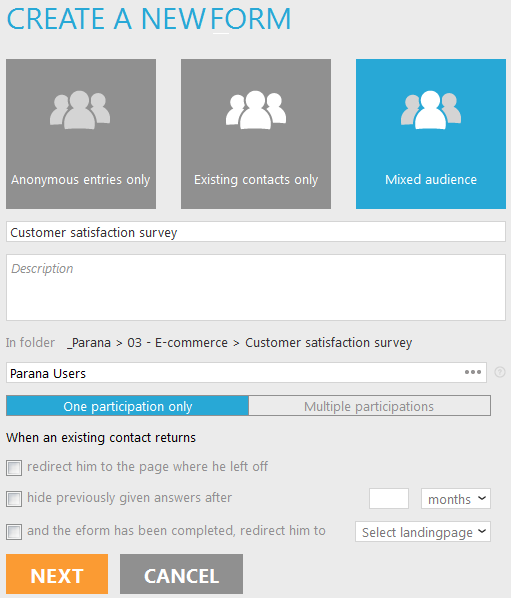
1. Select 'Form' from the main menu on the left. Select a folder and create a new survey "Customer satisfaction survey". Set the audience to "Mixed" and select your test audience list.
2. Select 'One participation only'. The contact will only have one record for their participation in the survey list. If they participate more than once, their record will be overwritten (i.e., their answers will be updated). The survey list will have a 1-on-1 relation with the audience list. This is an extended profile of the audience list.
3. Click 'Next' to create your survey.
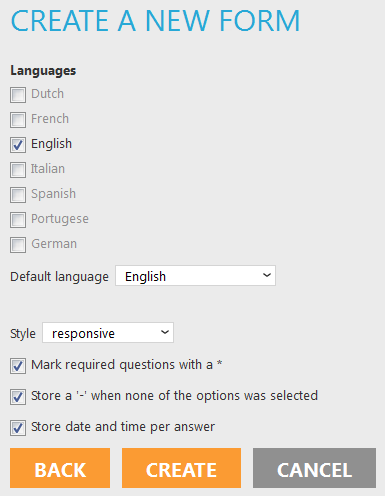
4. In the next step select the language and a stylesheet. We will use the 'Responsive' stylesheet.
5. Check the box 'Mark required questions with an asterisk (*)'
6. It is possible to hide certain questions with rules. of course the contact cannot answer hidden questions. This will result in empty values in the survey list. If you select 'Store a dash (-) when none of the options were selected', you can make a distinction between questions the contact did not see (empty value) and the ones they did see but did not answer (-).
7. The option 'Store date and time per question' will keep track of the exact moment each question is answered by storing the date and time in a separate table called 'SURVEY_XXX_DT' with XXX being the number of the survey.
8. Click 'Create' when finished.
Survey overview
When you create a new survey the survey overview is displayed. You can always go back to this screen by clicking the survey name in the top right 'This form' panel. Below the survey name are the pages. A new survey has 2 pages. A first 'question' page and a 'finish' page. Each survey should always end with a finish page. When the contact reaches this page a flag 'Completed' will we set in the survey list, indicating the contact completed the survey. A third page type is an 'Exit' page. You can use it to redirect the contact to if they already completed the survey (set in the survey properties).
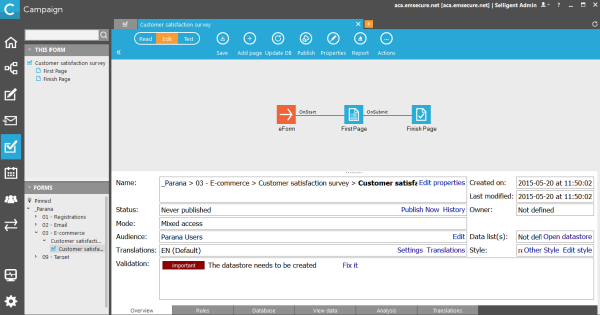
At the bottom of this panel you can:
- Edit the survey properties
- Publish the survey
- Change the audience list
- Define translations
- Open the data store (survey list)
- Change the style
Below these survey properties there are several tabs:
- Overview: this panel
- Rules: Skip questions and pages based on answers given in previous questions or based on data of the contact's profile (audience list and profile extensions)
- Database: An overview of all the fields in the survey list. Each field is linked to a question.
- View data: An overview of all the data stored in the survey list
- Analysis: The survey reporting
- Translations: lists the translations of all questions, error messages, buttons etc.
9. Under 'Validation' you can see we have one error. The survey list is not created yet. Click 'Fix it'. It will open the 'Database' panel.
Updating the database
This panel provides an overview of all the fields addressed in Form: fields from the audience list, any profile extension or in the survey list. When you add a form element (component) and its input data should be stored in the survey list, a field needs to be created in the list. Right now, the survey list is not yet created.
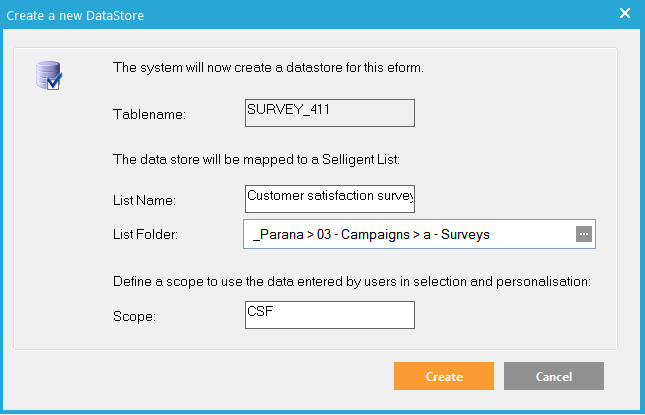
10. At the top click 'Update DB'. The 'Create a new data store' panel will open. You can't change the table name, but you can change the name of the list. Select a folder and enter 'CSF' as a scope. A scope is used to identify the relation between the audience list and the survey list. In the first step we have selected 'one participation only'. The survey list will have a 1-on-1 relation with the audience list. Thus, is an extended profile of the audience list. The 'scope' name identifies this relation.
11. click 'Create' when done.
Back to 'Customer satisfaction survey'
