The basic optout journey
Create the journey
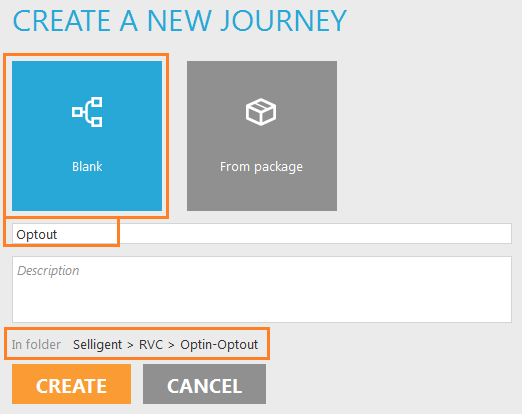
1. Select 'Journeys' from the main menu on the left and create a new journey "Optout" in the same folder where you created the pages.
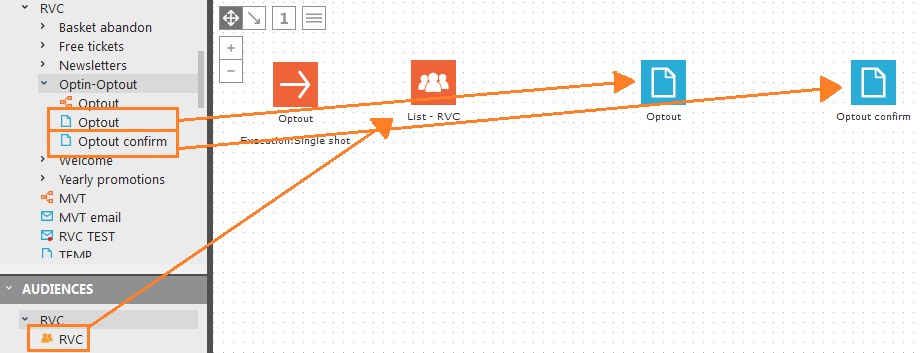
2. From the tree view, drag your test audience list and the 2 pages "Optout' and "Optout confirm" on the journey.
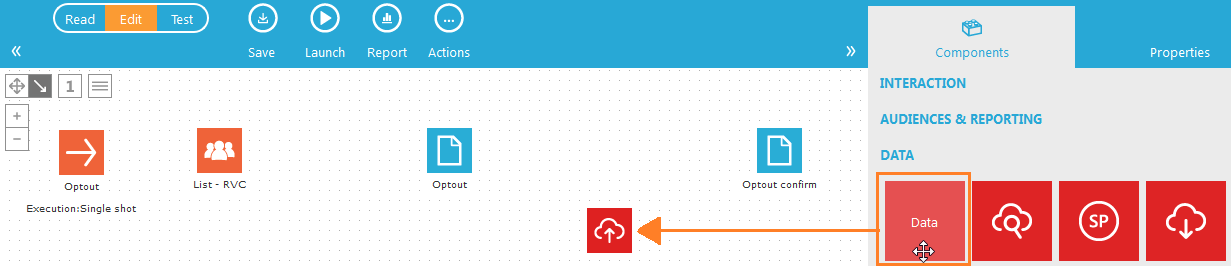
3. When a contact clicks the unsubscribe sensor on the first page, we need to change to value of the contact's field OPTIN_PROMO_YEARLY to zero (0) so they are unsubscribed. Add a Data component in between the two pages from the Components panel on the right side.
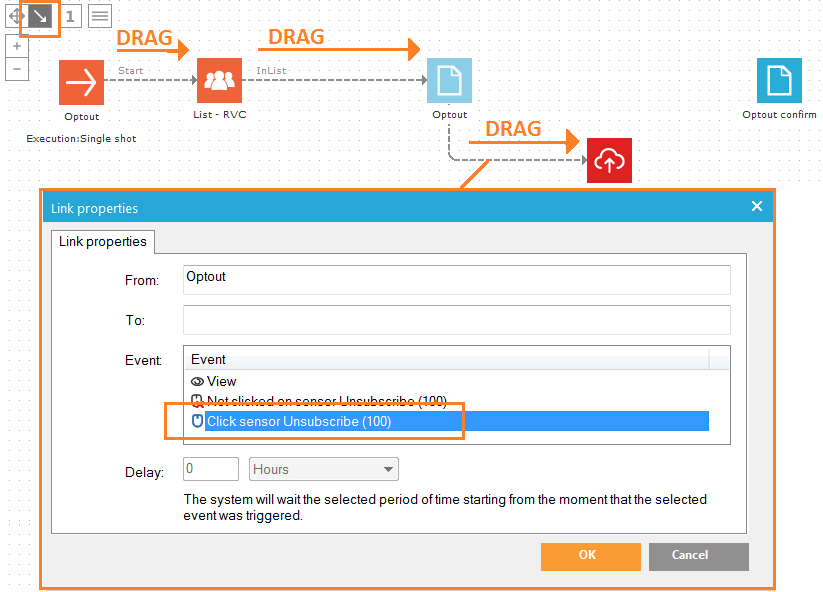
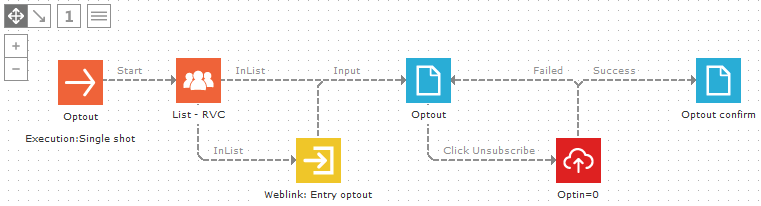
4. Make sure the 'Connect' icon is selected in the top left corner. Connect the components as illustrated below. Drag an arrow from the Start component to the Audience component, from the Audience component to the Optout page and again from the Optout page to the Data component. When you drag this last arrow (also called a trigger), a panel will popup where you can select the 'event'. Here, this is when the contact clicks the unsubscribe sensor - we need to change the OPTIN_PROMO_YEARLY value to zero (0) in the Data component - so select "Click sensor Unsubscribe (100)".
The "(100)" in the event "Click sensor Unsubscribe (100)" refers to the sensor ID. It should match the number in the Sensors overview panel in the editor. Sensors can have the same name, but never the same ID.
5. Let's unsubscribe the contact, right-click the Data component and select 'Properties' (or double-click the Data component to open its properties). In the properties panel there are 3 tabs
- In the first tab 'List selection' the audience list is preselected because the Data component is connected in the journey to the Audience component. Give the Data component a short descriptive name 'Optin=0", it will be displayed in the journey.
- The 'Validation' tab is used to validation form values, we do not need it here.
- The 'Update data' tab is used to store values in the audience list.
In the 'Update data' tab, find the field OPTIN_PROMO_YEARLY and enter the value zero (0). Click 'OK' when done.

6. The Data component has 2 possible events: 'Success' and 'Failed'. If everything is stored (and in case of forms validated correctly), 'Success' is used to continue in the journey. 'Failed' is usually used with forms. When a form value does not validate, you can return to the form to display error messages defined on the Data component's 'Validation' tab. We do not have a form yet, but we will draw the 'Failed' event anyway.
Drag 2 times:
- From the Data component to the "Optout confirm" page, select the 'Success' event.
- And from the Data component back to the "Optout" page, select the 'Failed' event.

7. As a sensor's redirect, you can select "Send the contact to an existing journey". This is used to go from one journey to another. This is what we will also do with our email and this optout journey. The yearly promotional emails will be in different journeys and the unsubscribe sensor in these emails will all redirect to the optout journey. This way, we only have to create the optout journey once, for all emails. But to redirect to a journey in a sensor, the journey must have an 'Input component'. You can think of this as the journey's entry point for all other journeys, in our case all "yearly promotional email" journeys.
Drag an 'Input component' from the Components panel on the right side, between the Audience component and the "Optout" page.

From the unsubscribe sensor in the email, we want to enter and continue to the "Optout" page. Connect the Input component to the Optout page (Input trigger). Next, also connect the Audience list to the Input Component (InList trigger). Double-click the Input component to open its properties. Give it a name "Entry optout". This name will be used when you set the unsubscribe sensor's redirect later on.
You must always make sure you have uninterrupted arrows
(triggers) from the Start component to an end component, e.g. Start ->
Audience -> Input -> Page. A journey can have multiple end components,
like the example below. But all end components must have an uninterrupted
connection from the Start component.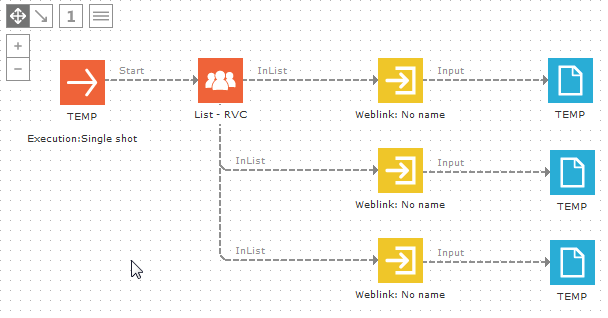
8. Save the journey, you should see '0 Errors & Warnings" at the bottom of the journey.

Test the journey
We will test starting from the Input component and go through each step to see if everything works correctly.
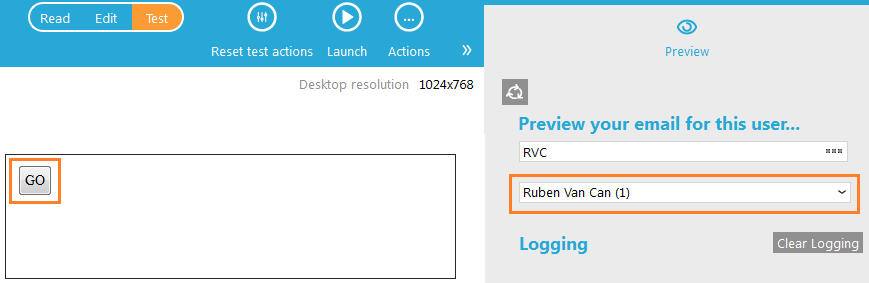
1. Select the Input component and click 'Test' from the top multi-tab bar. In the 'Preview' panel on the right, select your test contact record. An Input component will always display a 'GO' button, click it to start the test.
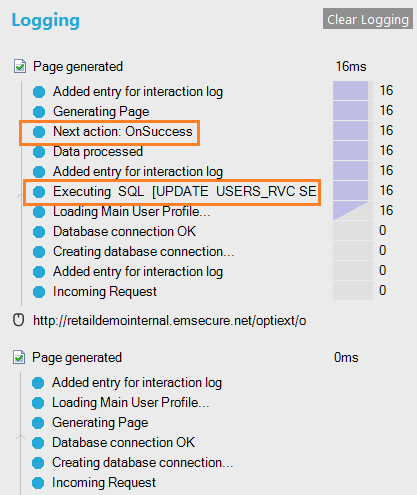
The most recent log items are displayed first.
Congratulations, the basic optout journey is ready! Lets continue and adapt the unsubscribe link of the "Spring sales" yearly promotional email.
