Import HTML
First, we need to import the HTML. On the support portal, under 'Tips, Tricks & Guidelines' you can find a zip file 'Parana-basic-email.zip' with the example HTML to import. Download and unzip it on your local drive. It contains one HTML file 'parana-basic-email.htm' and an 'images' folder next to it.
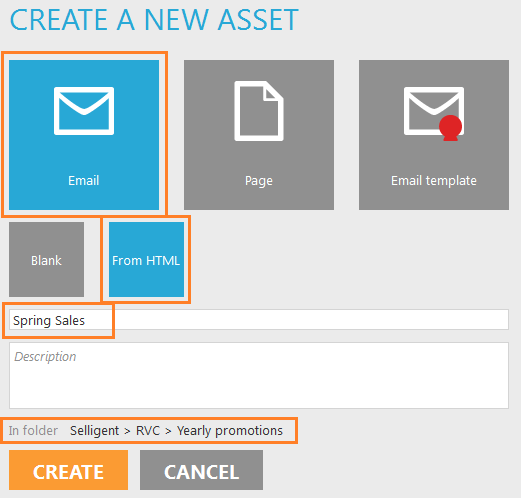
1. In the editor, select a folder and create a new email from HTML. Give it a name "Spring sales".
NOTE: It is a good idea to maintain some kind of folder structure. This email could go under "Yearly promotions > 2015" for instance. If you do a lot of mailings, it is always a good idea to include the date in your folder and file naming.
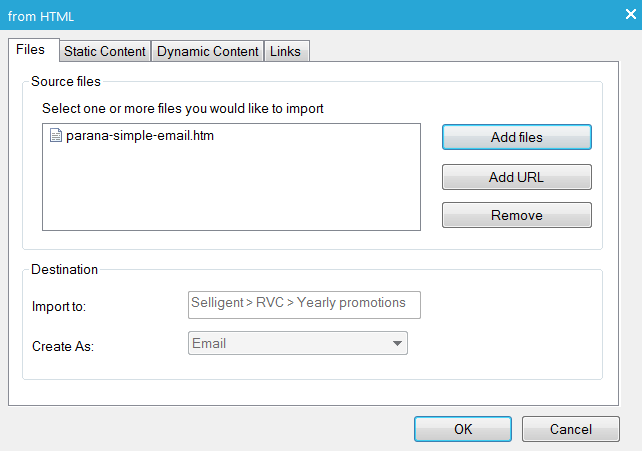
2. When the 'from HTML' dialogue pops up, click 'Add files' and select the example HTML file "parana-simple-email.htm"

Utf-8 is a character encoding capable of encoding all possible characters
and is now the dominant character encoding for the web. This means you
can use special characters like é,è,ç,à etc. in you HTML source code.
Most email clients support utf-8 but not all. That's why HTML files with
special characters are sometimes created in the local character set. For
western Europe this is ISO-8859-1. If you choose a non utf-8 character
set, Adobe Dreamweaver for instance, will use HTML entities instead of
the special characters. "é" will be inserted as "é"
in the source code. HTML entities are
always the safest to use in emails. In Adobe Dreamweaver, once
your email is created using HTML entities, you can convert it to utf-8
character set. If you see the warning in the editor, but are sure the
characters are ok, you can choose to add the file anyway.
If the HTML file contains multiple hyperlinks
pointing to the same location (URL), Campaign will ask you if you want
multiple sensors for these hyperlinks or just one sensor. It
is best practice to create multiple sensors, because in the reporting
you can identify the clicks separately. Click 'Yes' in the dialogue.
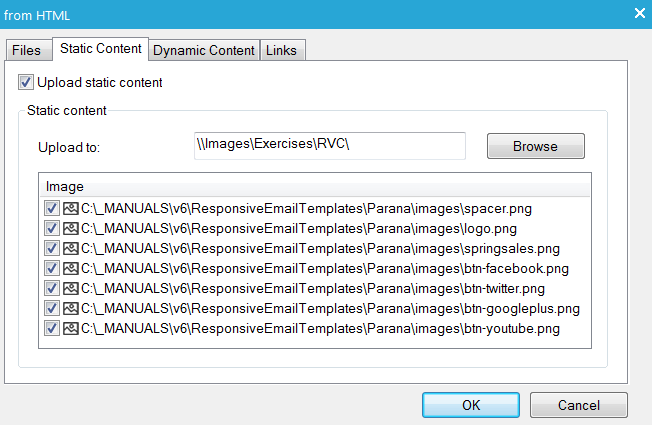
3. Under the tab 'Static Content' select the folder where you want the images to be uploaded. Make sure 'Upload static content' is checked.
In the HTML file's source code the image references are pointing to your local drive (images/imagename.png). When you select a folder here, all references to the images in the email's source code will be converted to the correct location on the server automatically at import (http://yourdomain/yourfolder/imagename.png). So you do not have to find/replace this in the source code after import, it will be done for you automatically.
4. Under the tab 'Dynamic Content' uncheck 'Upload dynamic content'.
Dynamic content refers to external CSS and JavaScript files linked to the HTML file. You can also choose to upload these files to Campaign. Like in the previous step, all references to the external files in the email's source code will be converted to the correct location on the server automatically at import. Dynamic content is for pages, not emails, since you cannot refer to external files in an email anyway.
Do not add JavaScript to an email, even inline. Mail clients do not support JavaScript, given the obvious security risks involved. It will not be executed and your email will most likely be considered as spam or a phishing email. Also avoid Flash or video content, and even forms. A form will most likely be blocked from sending or the email client will show scary security warnings.
5. Under the tab 'Links' keep 'Convert hyperlinks to sensors' checked.
It will convert all hyperlinks to sensors in the email at import. For
an image, the image's ALT attribute will be used as sensor name, for a
regular hyperlink the text itself. You can change these sensor names after
import. They are important for reporting, so give them a short, unique
and descriptive name.
In step 2, we created multiple sensors for the same URL, this is what you
see here: 2 sensors pointing to the same location. This is good, because
in the reporting we will see how many contacts clicked the image sensor
(first one) and how many the textual sensor (second one).
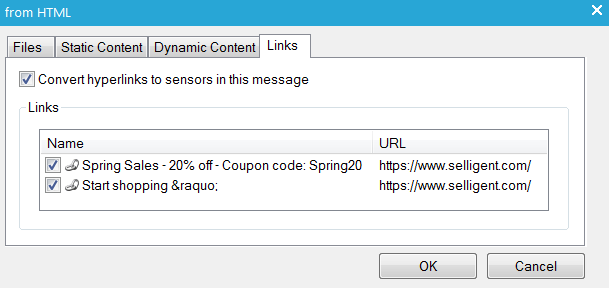
The HTML file only has two real hyperlinks
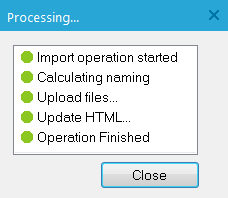
6. Click 'OK' when done. You will see a panel showing the import status, click 'Close' when the HTML files has been completely imported.
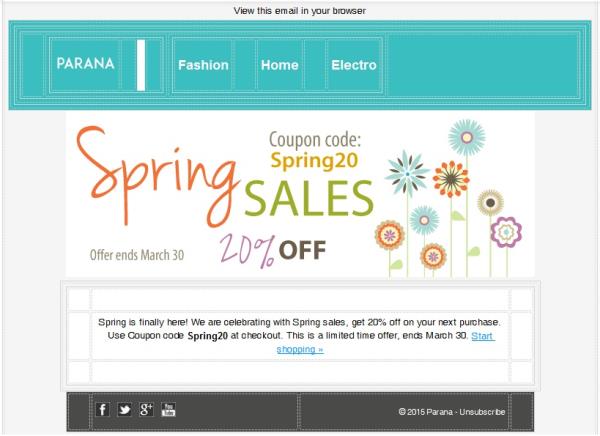
The email looks like this in the editor: