Basic email journey
Create a new journey
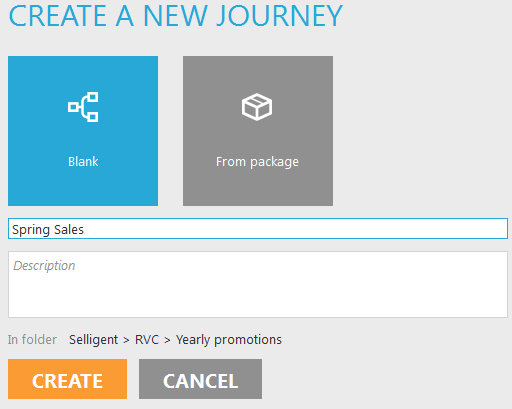
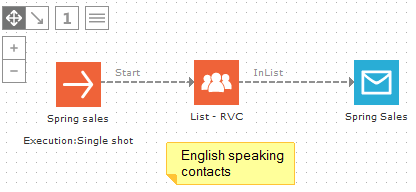
1. Select 'Journeys' from the main menu on the left and create a new journey "Spring Sales" in the same folder where you created the email.
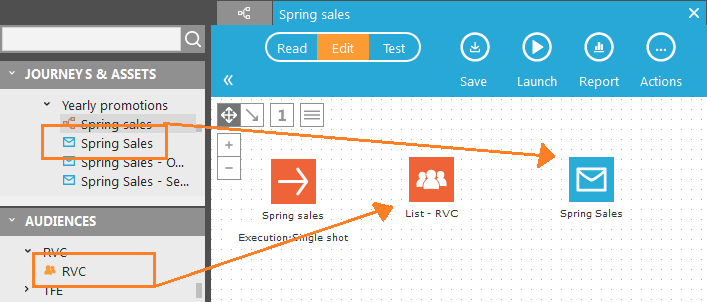
2. From the tree view, drag your test audience list and the "Spring Sales" email on the journey.
If you haven't already created the email, you can see the example: a basic email, step by step
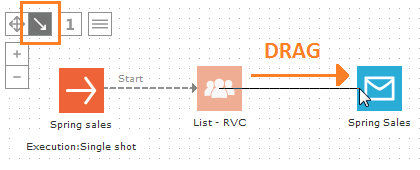
3. Make sure the 'Connect' icon is selected in the top left corner. Connect the components by dragging an arrow from the Start component to the Audience component, and again from the Audience component to the Email component.
To drag, click the source component, hold the mouse button while moving the cursor to the destination component and then release the mouse button
4. We are going to select only the English speaking contacts. Double-click the Audience component to open its properties. Click 'Design' to open the Filter Designer. The 'Filter Designer' provides a visual way of creating SQL constraints. Under 'Attribute', select the 'LANG' field from the audience list. Because this field has an option list linked to it with all the possible language values, we can simply check the value "EN" under 'Values'. Your constraint is ready, click 'OK' when done.
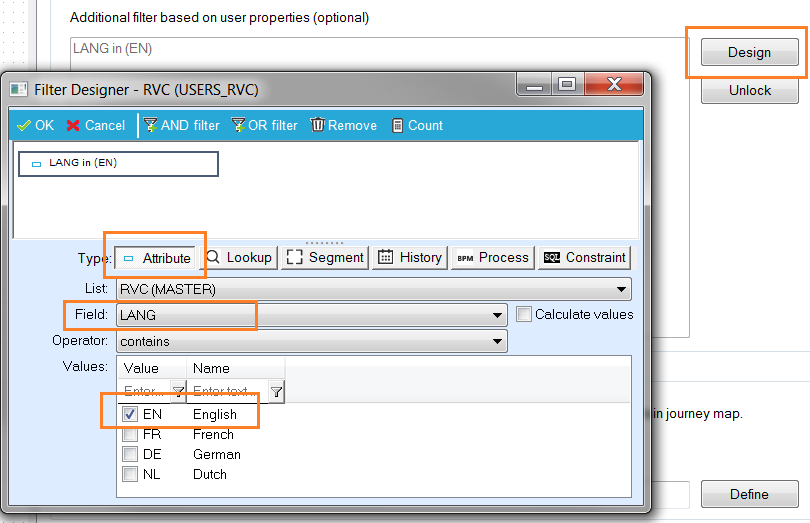
The selection is based on a contact field "LANG", if you do not have a field defining the contact's language, create one in your test audience list
5. There is no indication in the journey that we've set a filter on the Audience component. Right-click anywhere in the journey and select 'Insert comment'. Write a comment "English speaking contacts" and put the comment near the Audience component.
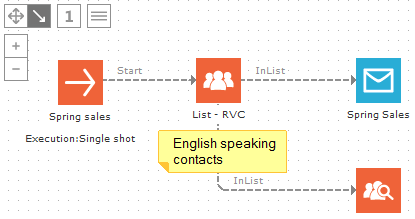
6. It is always a good idea to check if the target audience is correct. Drag a Report component from the components panel on the right and connect it to the Audience component. The arrow should go from the Audience component to the Report component.
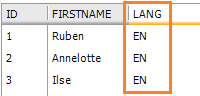
7. Right-click the Report component and select 'Report'. Make sure only the contacts with value "EN' in the column "LANG" are selected. You can also click 'Drill' and select the field 'LANG'. The pie chart should only show one value, "EN"
8. The journey is ready, save it, you should see "0 Errors & Warnings" at the bottom of the journey.
Test the email
Testing an email is the same as testing in the editor, which is already explained in a previous topic.
Launch the journey
Now comes the exciting part! You've verified the target audience and tested the email, time to launch the journey. Click 'Launch' from the top bar, you can select between 'Active' and 'Test':
- 'Active' will activate the journey and send the email to all contacts in the target audience
- 'Test' will only send the email to all test users in the target audience
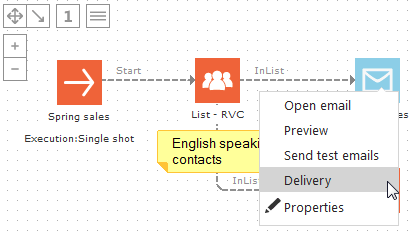
Absolutely sure you've used the test audience list in the journey? Ok, put your flow in 'Test'. Campaign will start generating emails. When all emails have been generated, the journey will 'Pause' (stop). You can check the delivery of the email. Right-click the email and select 'Delivery'.
Congratulations! You've send the "Spring sales" promotional email.
