Tell a friend journey.
In this case an email will be sent NOT to the contact in the Audience list, but to a friend. In the example below the ‘friends’ are stored in the same Audience list as the one initially used for the journey. However it is perfectly possible to store these friends in a completely different list, linked to the first list.
Go through the complete example to get a better understanding of the CIF option:
1. Create an Audiencelist (called Parana users) and add the following fields to that Audience list:
PARENT_ID (numeric) => this field stores the id of the contact that has invited the ‘friend’
CIF_MAIL_ID (numeric) => this stores the id of the mail (or page) that was send initially to the contact
CIF_Result (numeric) => this field stores the outcome of the journey execution
NOTE: in this example the initial Audience list is the same as the one used to store the ‘invited friends. It is however perfectly possible to separate initial contacts from invited friends by using two distinct list. In that case the above fields should be added to the second list storing the invited friends.
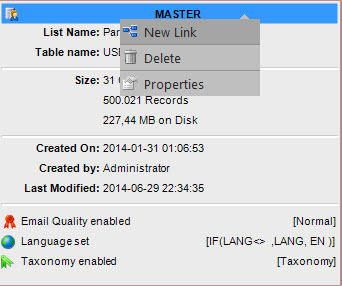
2. Next, for this Audience list, go to the tab ‘Relations’ and define a new relation by selecting the table block and selecting ‘New link’ from the toolbar:
The following dialog is displayed:
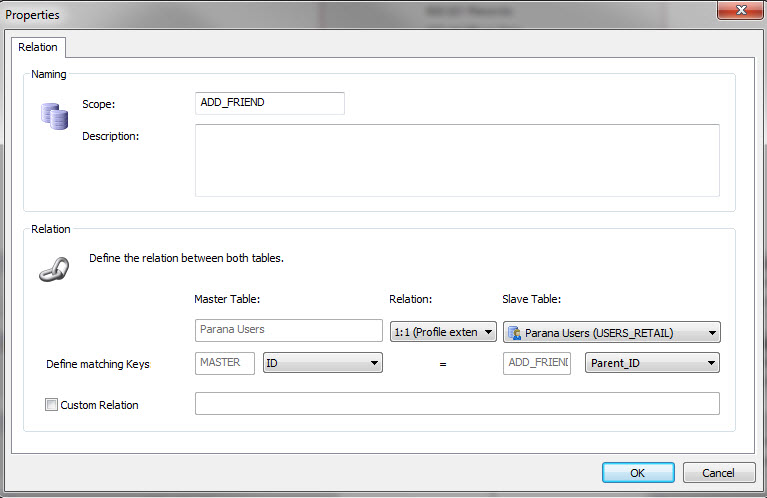
In here a relation must be defined between the ID (this is the unique ID of the contact) and the PARENT_ID. In this example both fields are stored in the same list (USERS_RETAIL).
It is a 1:n relation as one contact can introduce 1 or more friends.
The above relation is used to be able to identify which new friend is introduced by which contact.
3. Next, a newsletter (mail) must be created and name it 'CIF original message'. It looks like following:
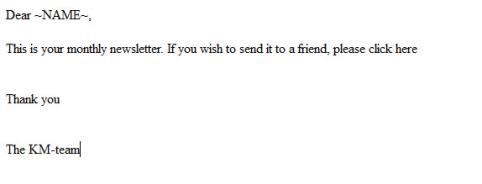
A personalization field is displayed. This field comes from the user list we previously created (PARANA_USERS).
A sensor must be configured for the ‘here’ hyperlink to send the contact to another journey called ‘Send to friend’. Because that journey does not yet exist, the configuration of the sensor is completed later on.
The journey ‘Send to friend’ will store new invited contacts (friends) in the Audience list PARANA_USERS). An email address of that friend will be saved in the list together with all information required for the CIF functionality.
So this journey must contain a form (to allow the contact to enter information on the friend), and a thank you page and error page is added as well.
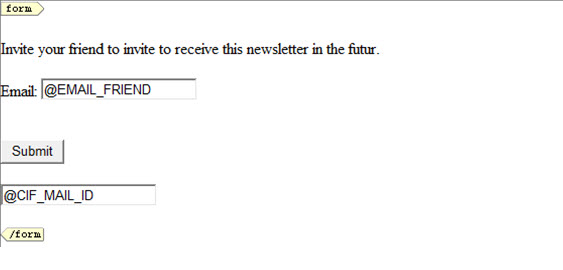
4. Start with the form: create an input field to enter the mail address (@FRIEND_EMAIL), a hidden input field for the CIF_MAIL_ID (this information must be sent as a parameter to this journey when the contact clicks the sensor in his mail). A Submit button must be added as well to the form but the sensor behind it will be defined at journey level.
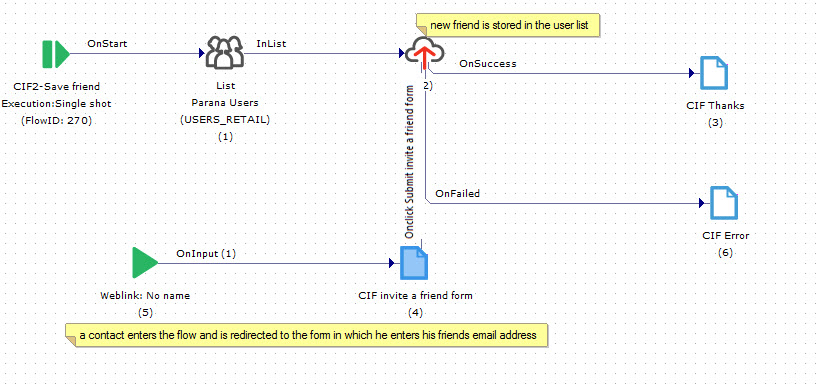
5. Create a journey ‘CIF2-Save Friend’. Add following components to the journey:
- Data component: to store the information in the Audience list
- audience list component: this is the Audience list in which information is stored on the friend
- A page component: this is the form in which the contact enters the information on his friend
- Input component: through here enter the contacts that have clicked the sensor in the mail and want to invite a friend
- A ‘thank you’ page and ‘error’ page. These pages are linked to the Data component. OnSuccess the Thank you page is displayed. OnFailed, the CIF error page is displayed.
The journey looks like following:
6. Now, the Input component must be configured as following (right click the Input component and select properties):
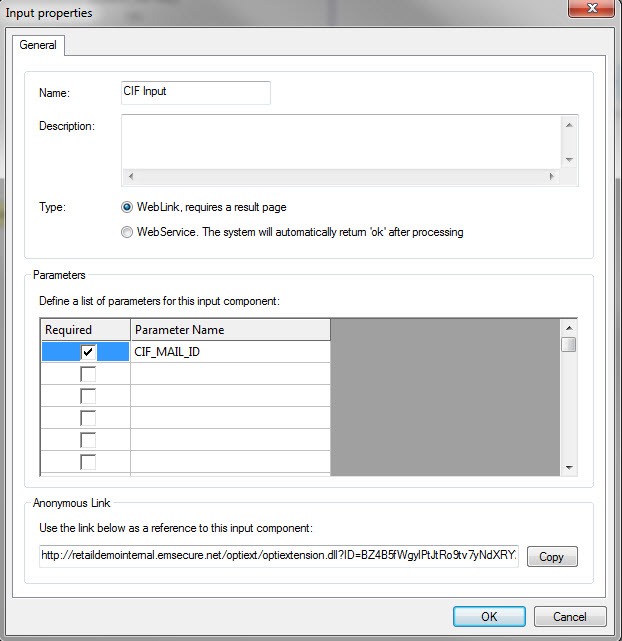
Select ‘Weblink’ as type of input and make sure the parameter ‘CIF_MAIL_ID’ is defined as a required parameter for this Input component (the information in this parameter comes from the sensor). This information will be stored in the form in the hidden field.
7. Next, configure the Data component:
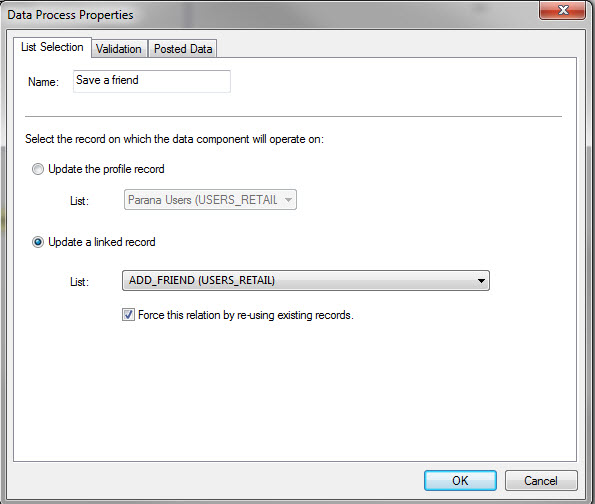
Select the option ‘update a linked record’ and select the relation created earlier for the list PARANA USERS). The purpose is to create a new record for that friend.
NOTE: in this example, the linked record is stored in the same table as the initial contact record.
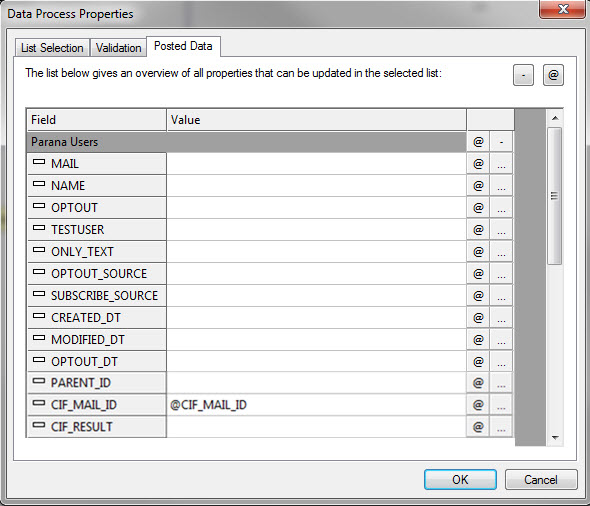
On the ‘Posted Data’ tab enter the values that must be retrieved from the form and stored in the linked record:
8. Remember that we still need to configure the sensor in the original mail (CIF Original message). This is now possible because the journey to which the sensor redirects now exists:
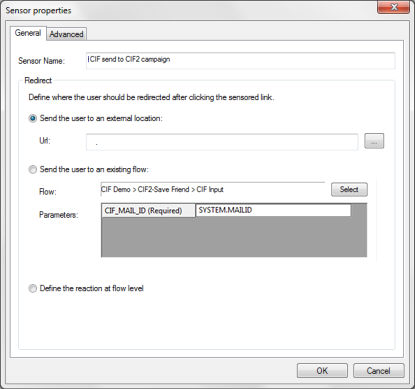
So go to Assets, select the original email and right click the sensor (here) in the mail to configure it:
Select the option ‘Send the contact to an existing journey’ and browse for the journey ‘CIF2 Save friend’.
Select the Input component. Notice that the parameters that were defined for the Input component are listed here. Match the parameter to the SYSTEM.MAILID. This is a system variable containing the id of the original mail. This way the sensor will send the MAILID to the Input component where it will be used further on in the journey.
9. The next step is creating the journey that sends out the original message ‘CIF original message’. This journey is a simple journey with an Audience list (PARANA USERS) and a mail component (containing the original message):
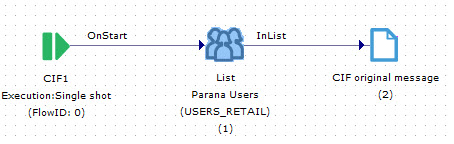
No special configuration options need to be defined in here.
10. The last step is the creation of the third and last journey which is responsible for sending out the mail to the ‘invited friend’.
This journey has an Audience list (PARANA USERS) and an email component.
This email component can contain any email, it will be the original mail that will be sent thanks to the CIF parameters defined in this component.
A filter must be placed on the Audience list to take into account only the invited friends in that list and not the original contacts: PARENT_ID NOT EMPTY.
The mail message used in this third journey must be configured as well. Right click the mail component in the journey, select Properties and activate the last tab in the dialog:
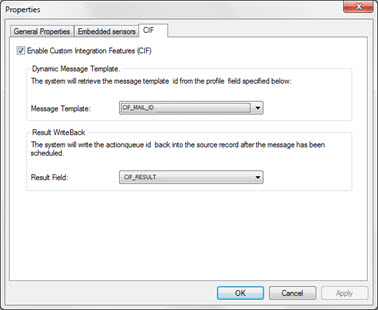
Enable the CIF functionality by flagging the option.
Select ‘CIF_MAIL_ID’ for the ‘Message template’ field. This field contains the id of the original mail, allowing SELLIGENT this way to send the original mail to the friend.
Select ‘CIF_RESULT’ for the ‘Result Field. This field will store the outcome of this execution: was the mail successfully sent or not.
The journey is now complete.
