File Based Interfaces
Creating the interface
To create a new File based Interface, select the option 'New File Interface' from the toolbar of the 'Interface' tab:

The following window is displayed.
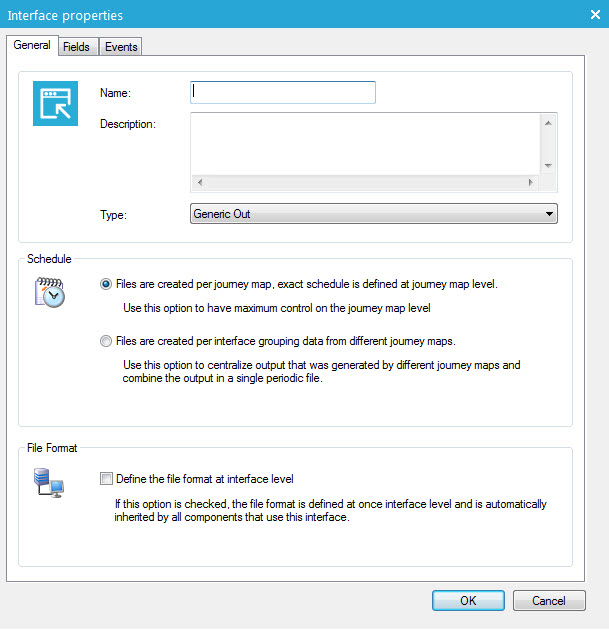
General: setting the type and schedule options
- Name
- Description
- Type: type of interface. This type determines the icon used for the interface
Following types are taken into account by communication cadence: Direct print, Outgoing SMS, Outgoing call, Onsite intervention
- Schedule – Files created per journey: all information related to the file creation is defined in the journey using the interface. Each journey has its own separate file.
- Schedule – Files created per interface: one file is created per interface, which means that results from various journeys are merged into one single periodic file.
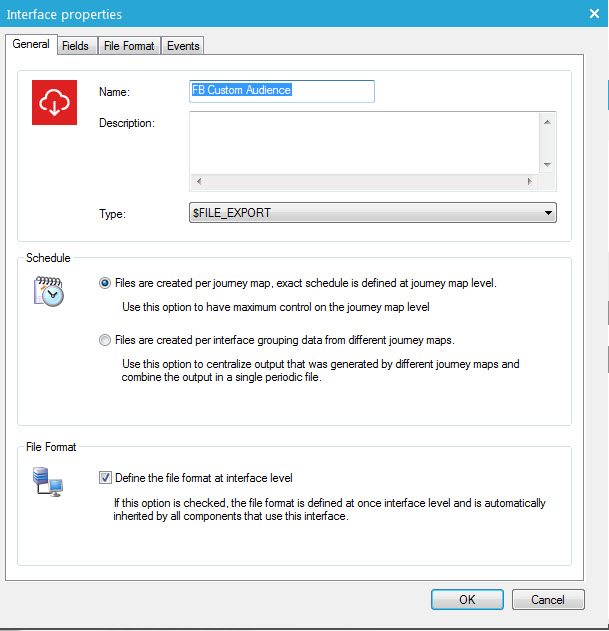
- File format: Define the file format at interface level: when activated, an extra tab called “File Format” is added to the interface configuration. It defines the structure of the file created by the interface. If this option is not activated, the file format has to be defined in each component using the interface (in the journey).
File format
Before defining the file format in the interface, an Audience list has to be selected in the“Fields” tab:

By selecting an Audience list, all fields in the selected audience list and linked lists are available for use. Next, the file format can be defined in the corresponding tab:

The following information can be configured:
- File type: defines the structure of the created file (excel, SPSS ...)
- Columns: configures the field values included in the file.
- Sorting: applies a specific sorting on the exported records.
Fields
In the 'Fields' tab additional parameters can be specified. These parameters can be used to store information that is not stored directly on the contact's profile. E.g. for an SMS-interface, if not specified by the corresponding DLL-file, the cellular-number would be a parameter.
NOTE: parameters can only be defined in here when ‘No module’ has been selected on the‘General’tab. When a specific module is selected, the parameters are defined within the corresponding dll and are displayed automatically on the 'Fields' tab. They can not be edited.
Following functionality are available:
- Delete
- Add parameter
- Properties: view/edit a selected parameter
An interface can also be limited to a specific audience list. The drop down list at the bottom of the window allows the selection of the required list.
Creating or editing a parameter displays its ‘properties’ :
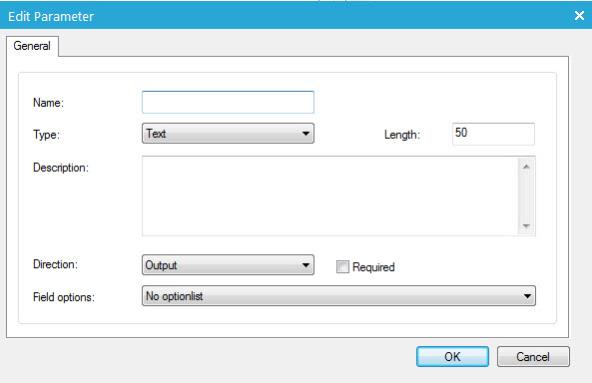
The following information can be defined:
- Name
- Type: type of the parameter (Text, Long Text, Numeric, Date Time)
- Length: length of the parameter-field
- Description: optional description of the parameter
- Direction: direction of the data (Output, Feedback, Both)
- Required: mandatory field or not
- Field options: select an existing Optionlist if required
Events
Before being able to create events, the interface must be created first!
Define feedback events and assign a flag. These events can be used in the journey after an interface component. Define constraints and specify the activation method.
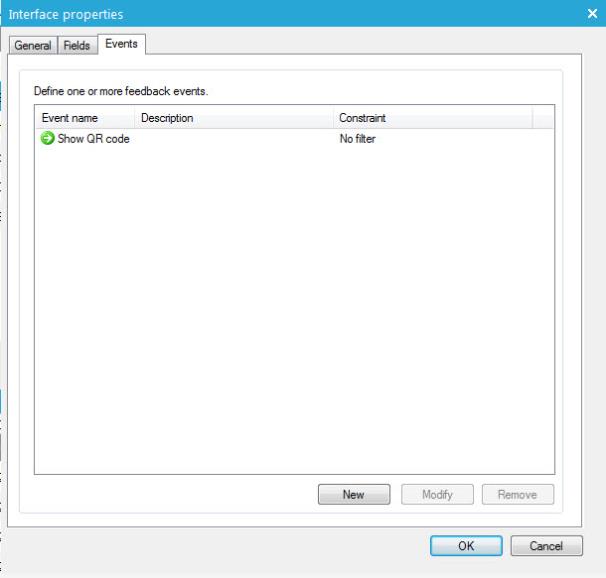
- To add a new feedback event, press the ‘New’
button:
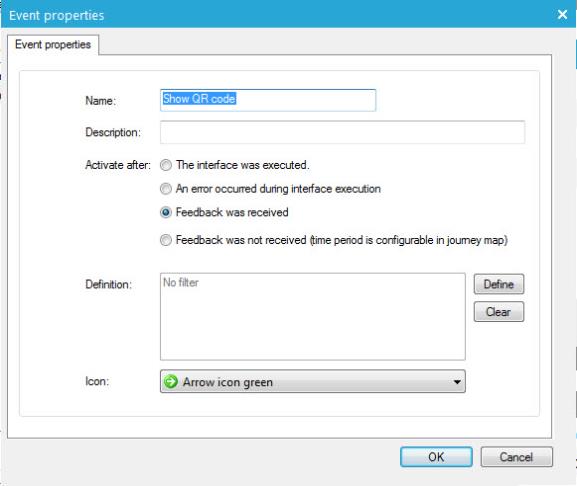
- Enter a name and description for the feedback event.
- Select the event that triggers the feedback. Following options
are available:
- The interface was executed.
- An error occurred during interface execution
- Feedback was received
- Feedback was not received
- Select the icon to be displayed in front of the feedback:
- Finally, validate the creation by clicking the ‘OK’ button. The new feedback is added to the list.
NOTE: feedback for an interface can be received via either a file that is imported (manually or automatically) of via the individual API.
Using the interface in a journey
All interfaces defined in Selligent Campaign can be retrieved from the “Interfaces” folder in the tree view:
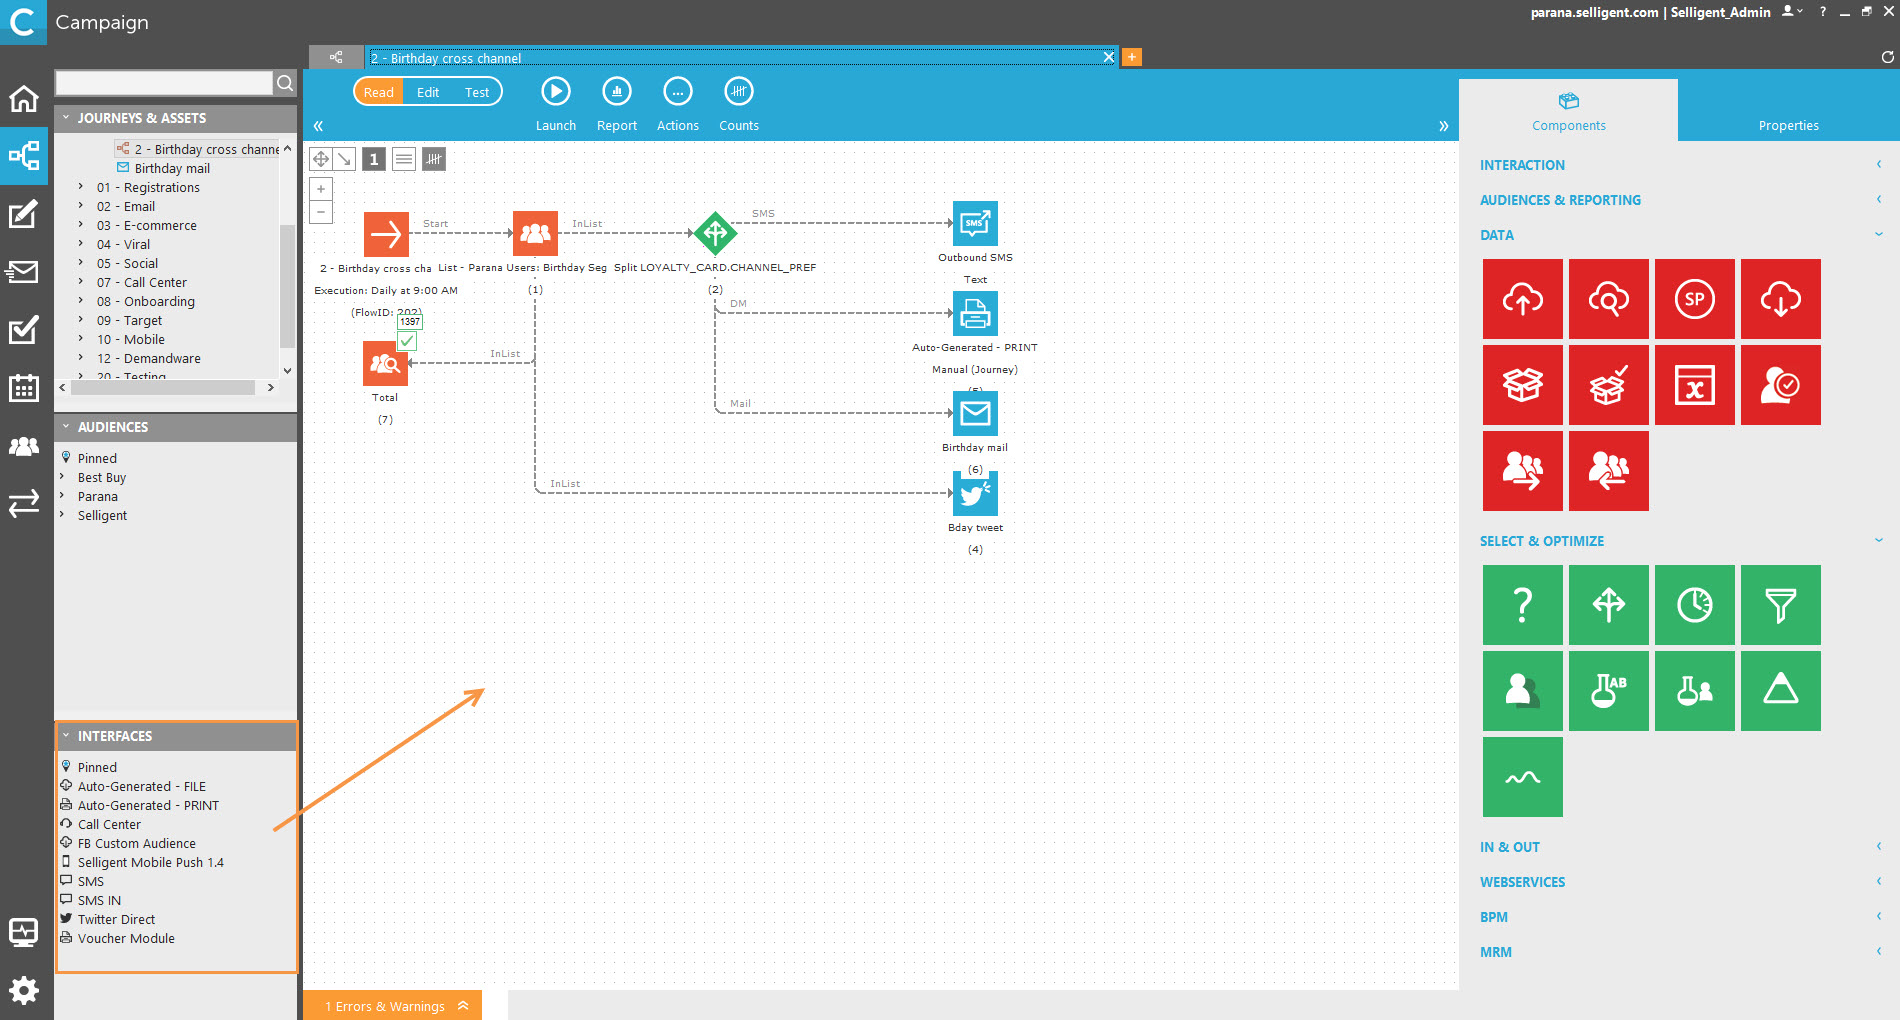
Inserting an interface into a journey can be easily done by performing a ‘Drag & drop’ of the selected module to the canvas.
NOTE: an interface component can only be followed by a scheduled email and not an instant email.
The properties of the interface need to be set.
The purpose of file based interfaces is to create a physical file. For every record in the interface table, a record is generated in the output file. The files can be contain records from different journeys or from one. The file is then transported to the required destination. File based interfaces are always output interfaces and the feedback has to be processed manually.
Using a file based interface can be divided in the following steps:
- Define the file format of the exported file
- Schedule exports, specifying batch files
- Create and managing feedback events
Define the file format of the exported file
In this step, the number of included columns, the type of generated file and the record sorting are defined. As explained in the ‘General properties’ of file interfaces,the file format can be configured at the interface level (shared by all journeys using this interface) or at the journey level (each journey can have its own file format). If the file format was defined at interface level no 'File format' tab is displayed
NOTE: if the file format is defined on interface level, fields in the contact profile can't be included in the generated file unless the interface is limited to a specific audience list.
Schedule exports, specify batch size
The scheduling represents the time when the export is triggered, the minimum and maximum number of records exported per file (batch size) and the physical medium used to transport the file (local, FTP, email). As for the file format, it can be defined at the interface level (one file per interface) or at the journey level (one file per journey).
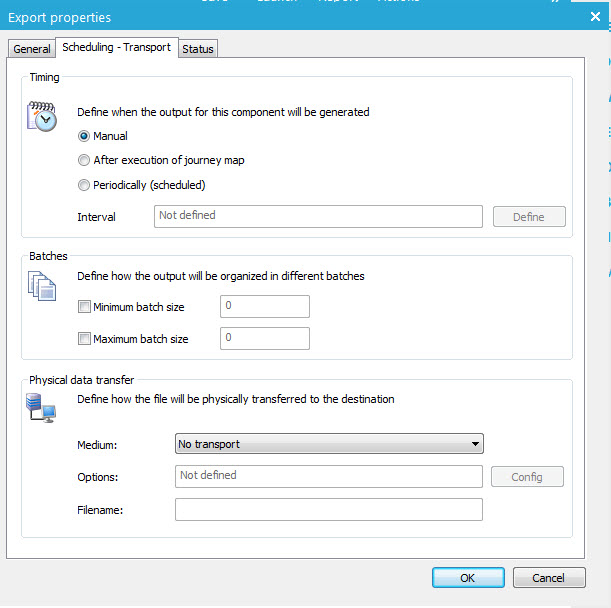
Timing
- manual: manually create a file in the 'Status' tab of the interface component. The 'Status' tab displays the list of files generated by this interface. Press the 'New file' button to create a new one.
- after execution of the journey: each time the journey is executed. It depends on the scheduling options for the journey. This option is not available if scheduling options have been defined on the interface level.
- periodically: set up an execution schedule for the interface. Use the 'Define' button.
Batches
For each record in the interface table, a record is generated in the output file. This execution can be done in batch mode. Files will be generated when there is a minimum batch size of X and will have a maximum batch size of y.
Physical data structure
This defines how files need to be transferred. Possible options are
- No transport: the file is created but not sent to a specific location
- local storage: files are stored on the selected location
- File transfer protocol: files are placed on an FTP server
- Email: files are sent in an attachment in an email
Depending on the medium selected different options need to be set. Use the 'Config' button to configure the transport options.
Last, define a file name. System parameters can be used in the naming. (E.g. ~SYSTEM.YEAR~_ExportFile.csv)
Create and manage feedback events
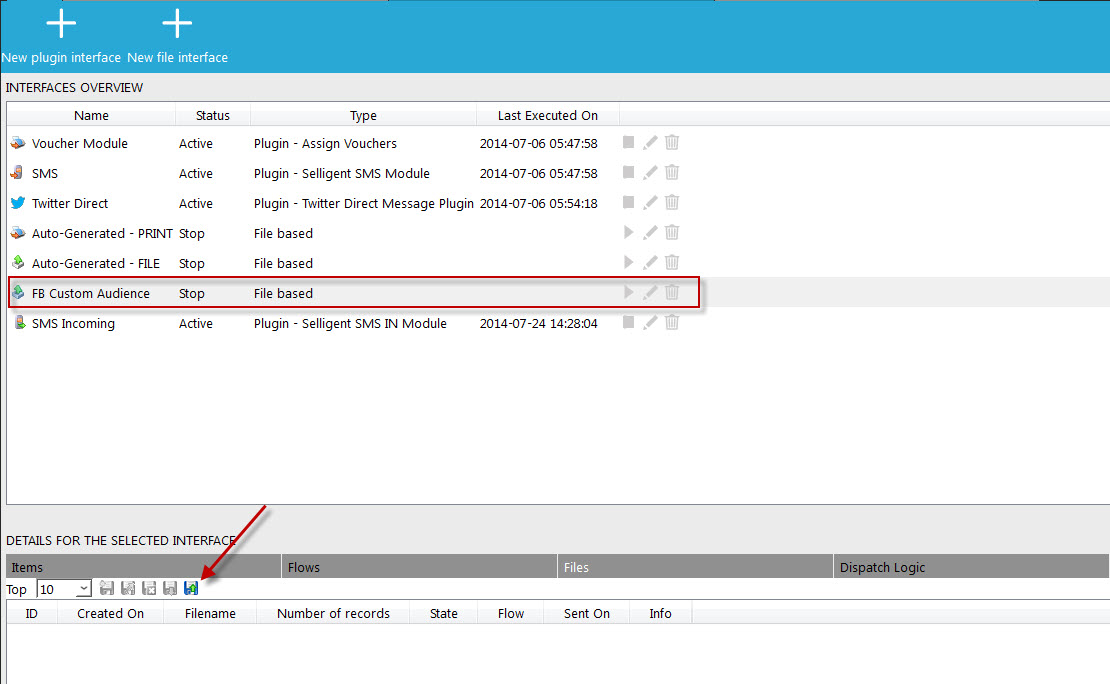
Typically, file based interfaces export data which can be processed by an external service (e.g.: a call center). It’s possible to import this processed file in the Selligent environment using the ‘Import Feedback’ functionality available from the'Files'tab in the Interfaces section. This way, the loop is complete and actions can be taken to manage the updates. Before being able to use this functionality, it’s mandatory to add the ‘CQID’ (Channel Queue ID) field to the structure of the exported file:
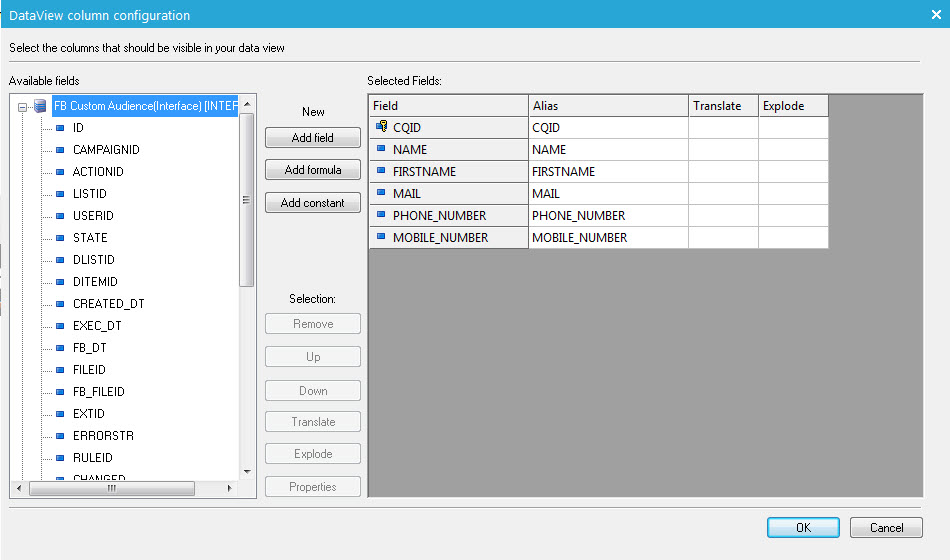
The CQID is used to identify a record processed by the interface. Without this field, inserting a feedback would not assure the data integrity. That’s the reason why this ‘Import Feedback’ button is disabled when it is not present in the file structure.
NOTE: The CQID field is entirely managed by Selligent system.
Then, if the file format has been defined at the interface level, the ‘Import Feedback’ button is available in the interface details on the'Files'tab:
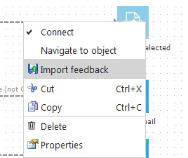
If it has been defined at the journey level, this option is available from the interface contextual menu:
When the option is selected, the following window is displayed:
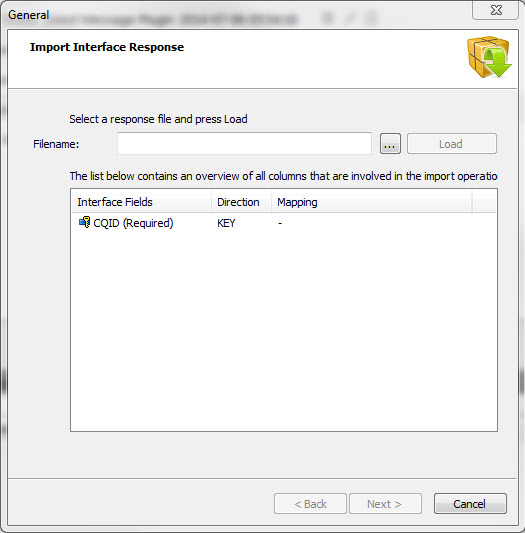
Select a response file and press 'Load'.
Click the‘Next’button to get the overview of updated records.
Once the import is successful, a confirmation message is displayed.
