User Guide : Journey Authorization
Custom Journeys with Input Components have an optiext URL associated to them, which can be called to for example allow contacts to enter the journey after a click in an email. But also external applications, such as Grow, can make use of optiextension to provide data. However, Optiextension URLs, when known, can be misused by hackers.
Example: A custom Journey in which a lookup of a contact and update of the profile is done. When the Input Component is not protected, anyone with the correct URL can enter the journey and update a profile wrongly.
Custom Journeys with Input Components can however be protected against unauthorized access by adding an extra layer of security on journey level.
Configuring Journey Authorization
In the properties of a Custom Journey with Input component, go to the left menu 'Advanced':
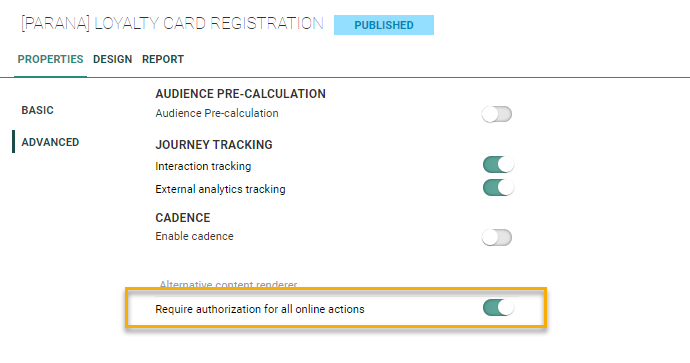
Enable the option 'Require authorization for all online actions'.
Next, click the Input Component in the Custom Journey to access the properties and back up the anonymous link that becomes available after publishing the journey. This anonymous link is your access point to this journey.

Once authorization is activated for a journey, you need to set up a service account of type Rendering.
Go to the Admin configuration/Access Mgmt section and activate the Service account entry.
Create a new service account of type rendering.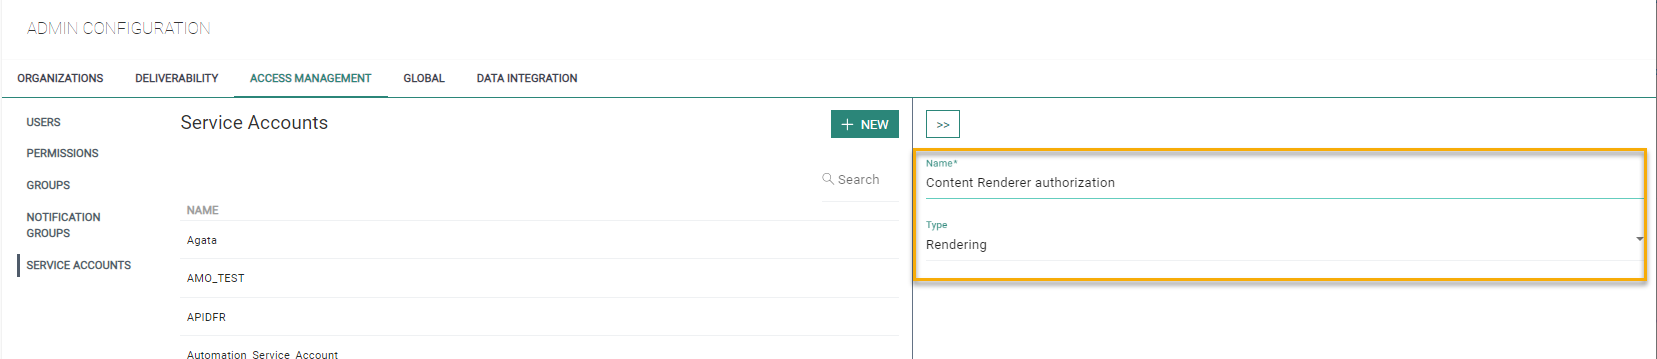
Once saved, copy the key and secret for later use.

Journey Authorization and Content Rendering
Previously, secure content rendering was done by using IP filtering in combination with a list of allowed journey IDs. When triggering one of these journeys using the /secure/ url (check: https://your_domain/renderers/swagger/ui/index#/Content) , a check is done to see if the user is allowed to load the content of the related journey. However, when using the same anonymous link without the /secure/ path it will still allow you to load the content without an IP check.
Adding authorization on journey level will allow to only load authenticated journeys by using the secure path. This way, only users with a valid IP can access the journey content. Using the same anonymous link without the /secure/ path will result in an error.
Have a look at the below steps on how to use journey authorization in the content renderer.
Updating the Content Renderer Configuration Table.
The CFG_CR_IPSEC table has been used to include secure rendering for journeys. It contains the list of whitelisted IPs and journey IDs as well as the key that is used for journey authorization.
The field ‘SERVICEACCOUNT_KEY’ is an optional field that can be used to choose which journey should use the service account credentials that have been created above. However, when you want to load content from a journey from where authenticate is enabled, you’ll need to add a configuration within this table:
| Field | Example | Description |
|---|---|---|
| ID | 1 | The record identifier which is auto-filled |
| NAME | Invoice | name of the configuration setting |
| JMS | 451,815 | list of journey IDs. Use a comma to separate multiple IDs. |
| IIPS | 10.0.5.8,172.0.5.7 | List of whitelisted IPs. Use a comma to separate multiple IPs |
| SERVICEACCOUNT_KEY | FIreOJ545fezvv87Qz4vez== | The key generated for the service account of type Rendering |
Note:
To retrieve the journey ID of the journey created in step1:
SELECT ID FROM CAMPAIGNS WITH(NOLOCK) WHERE NAME = '{YourJourneyName}' ORDER BY ID DESC
Use this ID to insert a record into the CFG_CR_IPSEC table.
INSERT INTO CFG_CR_IPSEC(NAME, IPS, JMS, SERVICEACCOUNT_KEY)
VALUES('{YourConfigurationName}','{OneOrMore_Ips}', '{OneOrMoreJourneys}' , '{YourServiceAccountKEY_From_Step_2}')
Testing the Secure Content Renderer
Content renderers with path /secure/ will use the CFG_CR_IPSEC configuration table to authenticate.
Using the anonymous link from the custom Journey with an operation without the /secure/ path will result into 200 - no content (or sometimes an error depending on the setup).

When using a operation with the ‘secure’ path, you’ll receive the actual content (unless your IP doesn’t fall within the CFG_CR_IPSEC list. During this check, the log file will log the IP if the authentication fails).

Journey Authorization and Other Engage Solutions
When an Engage application wants to call a journey for which authorization is required, best practise is to add the authorization header directly to the application.
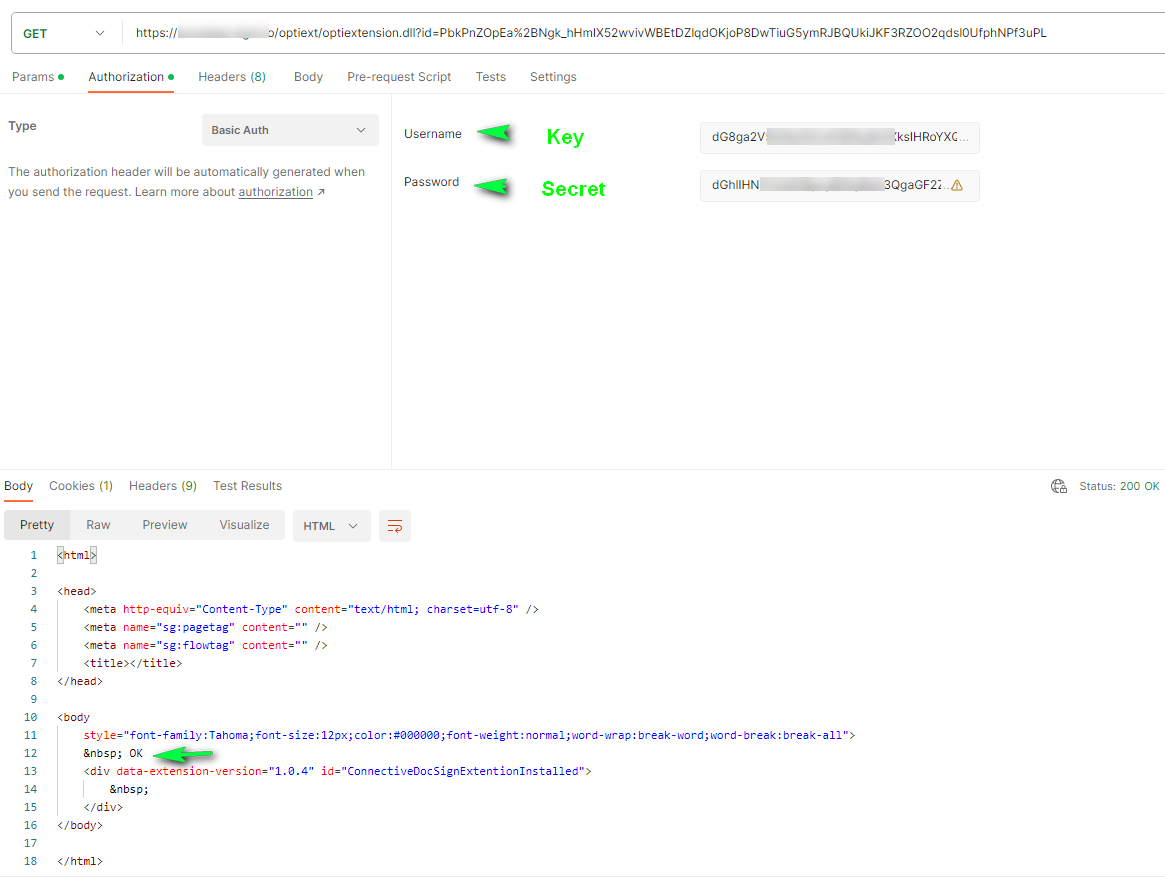
Following is an example using Postman.
Using the anonymous link without authorization, result in the following error:
Using the same anonymous link but with basic authorization using the key and secret generated by the service account, returns the content correctly: