![]()
The Custom Component lets you include custom tasks in a journey, such as calling a web service, or executing a Stored Procedure. These tasks can be executed as the result of a specific event in the journey, such as a click on a link in a message, and give you a high level of flexibility for data processing in a journey, while at the same time keeping it simple.
The Custom Components are created and configured once in the Data Exchange entry (by a user having the required access rights). Then in the journey, you only select the one to use in the journey. This way of working splits the actual use and the technical configuration, making it easy to create a journey and still perform advanced data processing tasks.
Properties
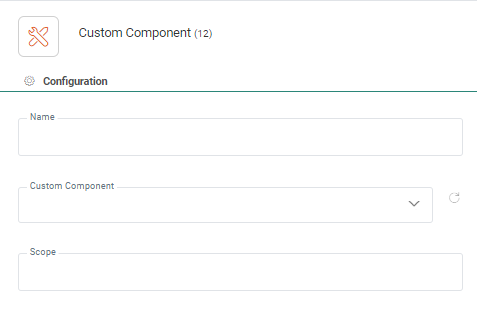
Name — Set a name for the component. This name is displayed on the journey canvas.
Custom Component — Select the Custom Component from the drop-down list. Custom Components are created and configured in the Data exchange entry and you can only select one here. Depending on the type of component, the properties panel displays the extracted input and output parameters.
Scope — The scope field lets the user define a specific scope for the content or output generated by the Custom Component.
Example:
There are two Custom Components added to the journey. Each one generates an output called Address. The first Custom Component is given the scope 'Delivery' and the second is given the scope 'Invoice'. To be able to use the information returned by the Custom Components, the scope is used. (Check the description of the output field for the syntax.)
Note: If no Custom Components have been defined yet for this organization, a button Create one now is available. Click on it to go straight to the Data Exchange section and create a new Custom Component.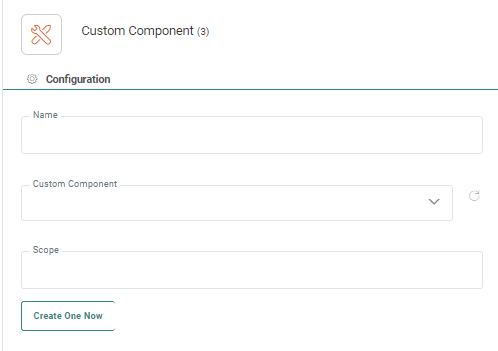
Input — The input section lists all input parameters detected in the selected Custom Component, excluding parameters that are set as non-editable in the configuration of the Custom Component. You can fill them out manually, with values retrieved from a form, or values from the Audience or linked lists. You can add them via the Personalization Dialog or by using the following syntax:
- [%requestValue('FieldName')%] for form field values.
- MASTER.FIELDNAME for fields from the audience
Headers — The Headers section lists all headers detected in the selected Custom Component, excluding headers that are set as 'non-editable'. You can fill them out manually, with values retrieved from a form, or with values from the Audience or linked lists. You can add them via the Personalization Dialog or by using the following syntax :
- [%requestValue('FieldName')%] for form field values
- MASTER.FIELDNAME for fields from the audience
Note: When no Header section is shown for the selected Custom Component, no headers have been configured for the Custom Component or all configured headers are set as non-editable.
Headers that have been configured as 'sensitive' do not display the value by default. Use the eye icon to toggle between the clear value and the masked value.
Body — The Body section lists all body parameters detected in the selected Custom Component, excluding parameters that are set as non-editable in the configuration of the Custom Component. You can fill them out manually, with values retrieved from a form, or values from the Audience or linked lists. You can add them via the Personalization Dialog or by using the following syntax :
- [%requestValue('FieldName')%] for form field values
- MASTER.FIELDNAME for fields from the audience
Example:

Output — The output section lists an overview of the output generated by the Custom Component. This output can be accessed by using the following expression: [%componentValue('Scope.Variable')%] where 'Variable' is the name of the output parameter.
Example:
The Custom Component is of type 'web service' and retrieves the ID and name for a given email. The value for the email is retrieved from a form. The ID and name are returned by the Custom Component.
Events
Two events are generated: Onsuccess and Onfailure.

Note: For more information about this, please see the related topic.
Validation
When entering a value or using an expression as value for an input parameter of a Custom Component or a Custom Channel, the type and length (when available) of the entered value will be compared to those of the audience field used in the expression.
If the field is not found in the Audience List or if the length or type is not compatible, a warning will be displayed (one warning per issue).
Warnings are shown :
- as pop-ups after entering a value and clicking anywhere outside the input field.
- in the Validation pane after clicking a Save, Validate or Publish.
Example : A Custom Journey with Custom Channel (*) component is being used.
Because of a type mismatch between the Input field and the input value, a warning is displayed.
Another warning appears for a field that's not found in the Audience List used in another input value.
(*) This works equally for Custom Components as for Custom Channels.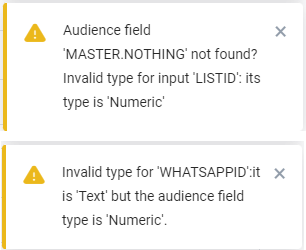
Example : Setup and use a Custom Component of type Stored Procedure in a Custom Journey
