The Custom Channel Custom Component lets you include custom tasks in a journey, such as calling a Custom Channel (this relates to other channels such as direct print, Export and so on), or executing a CRM Message Sync.
The Custom Components are created and configured once in the Data Exchange entry (by a user having the required access rights). Then in the journey, you only select the one you want to use. This way of working splits the actual use and the technical configuration, making it easy to create a journey and still allow interaction with external channels.
Note: A Custom Channel component can be used after any entry point (input, recurring batch, single batch) or event entry point (inbound event, etc.).
Properties

Name — Set a name for the component. This name is displayed on the Journey canvas.
Custom channel — Select the custom channel from the drop-down list. Custom channels are created and configured in the Data Exchange entry and you can only select one here. Depending on the type of channel, the properties panel displays the extracted input and output parameters.
Scope — The scope field lets the user define a specific scope for the content or output generated by the Custom Component.
Example:
There are two custom channels added to the journey. Each one generates an output called Address. The first custom channel is given the scope 'Facebook' and the second is given the scope 'Snapchat'. To be able to use the information returned by the Custom Channels, the scope is used. (Check the description of the output field for the syntax.)
Note: If no custom channels have been defined yet for this organization, a button Create one now is available. Click on it to go straight to the Data Exchange section and create a new Custom Component of type Custom Channel.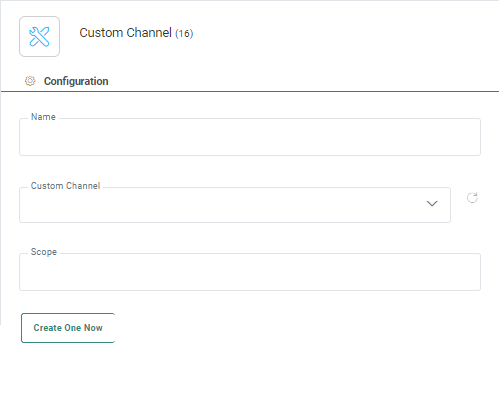
Send the same message multiple times — If this option is selected, the same message can be sent multiple times to the same contact.
Note: This property is only available for Single Batch and Recurring Batch Journeys.
Enable deduplication — If there are duplicate contacts in the journey's audience, you can use Deduplication to select a unique contact based on a field or a combination of fields. This avoids sending the message or creating the record more than once for the same contact.
You can define the following settings:
- Unique key — You can define the field in the Audience List that should be used to perform deduplication. This can be a combination of fields as well, for example the name and phone number for a contact can be used to detect duplicates.
- Prioritization — Here you define what field in the Audience List should be used to define the record that has priority over the others in case duplicate records are found. For example, you can use the last update date as a prioritization rule.
- Sorting — Choose from ascending or descending to define the record that should be kept.
Note: This property is only available for Single Batch, Recurring Batch and Custom Event Journeys.
Connector notification — Slider to enable/disable an email to be sent to users in the organization or not at Salesforce side.
More info on this can be found here (triggerUserEmail field) : https://developer.salesforce.com/docs/atlas.en-us.api.meta/api/sforce_api_header_emailheader.htm
Note: This property is only available for the Salesforce connector Message Sync.
Input — The input section lists all input parameters detected for the selected custom channel. You can fill them out with default values, values retrieved from a form, or values from the Audience or linked lists. You can add them via the Personalization Dialog or by using the following syntax:
- [%RequestValue('FieldName')%] for form field values.
- MASTER.FIELDNAME for fields from the audience
Note: When an input parameter is linked to an Option List, the field value can be selected through a combo box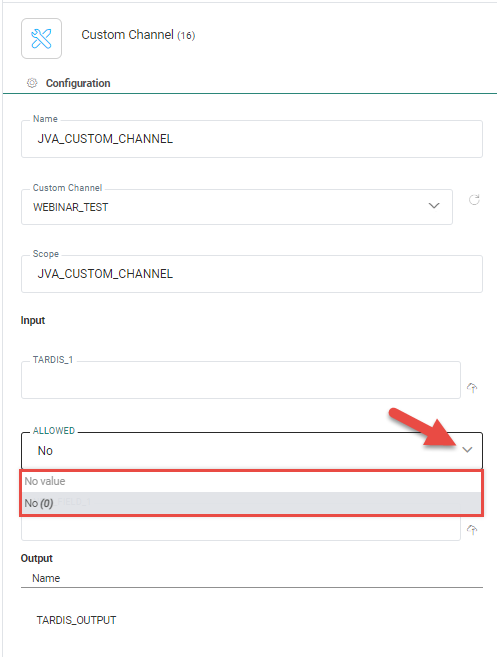
Output — The output section lists an overview of the output generated by the custom channel. This output cannot be accessed at this point.
Events
Two events are generated: Onsuccess and Onfailure.
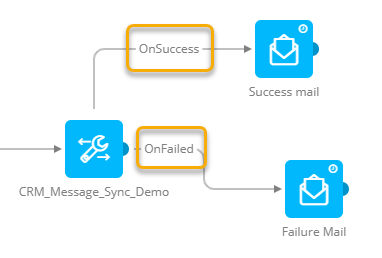
Additional events are available when these have been defined for the Custom Component using a custom channel.
Note: For more information about this, please see the related topic.
Validation
When entering a value or using an expression as value for an input parameter of a Custom Component or a Custom Channel, the type and length (when available) of the entered value will be compared to those of the audience field used in the expression.
If the field is not found in the audience list or if the length or type is not compatible, a warning will be displayed (one warning per issue).
Warnings are shown :
- as pop-ups after entering a value and clicking anywhere outside of the field.
- in the validation pane after a Save, Validate or Publish.
Example :
A Custom Journey with Custom Channel (*) component is being used.
A warning appears for a type mismatch of an input value.
Another warning appears for a field that's not found in the audience list used in another input value.
(*) This works equally for Custom Components as for Custom Channels.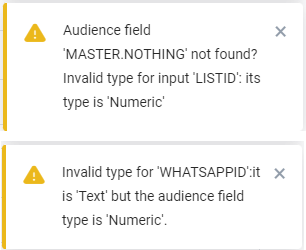
Example journey
Here you can see an example of a Custom Journey using Custom Channel Components :
A 25% off stock sale code is generated each week and sent to (not yet targeted) contacts through an email message.
If they have not used the code after a week, they receive a newly generated 35% off stock sale code and an email is sent to them to notify about the new code.
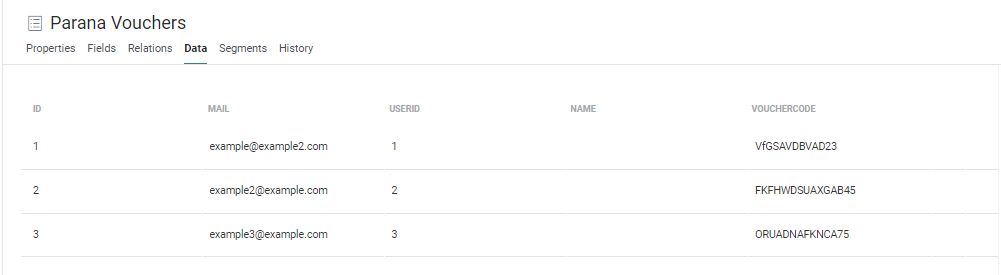
Note: Both Custom Channel Components in this journey use the same Custom Channel Endpoint to generate sales codes and save them in a profile extension list that's linked to the Audience List.
- Custom Channel setup, linked to the channel endpoint :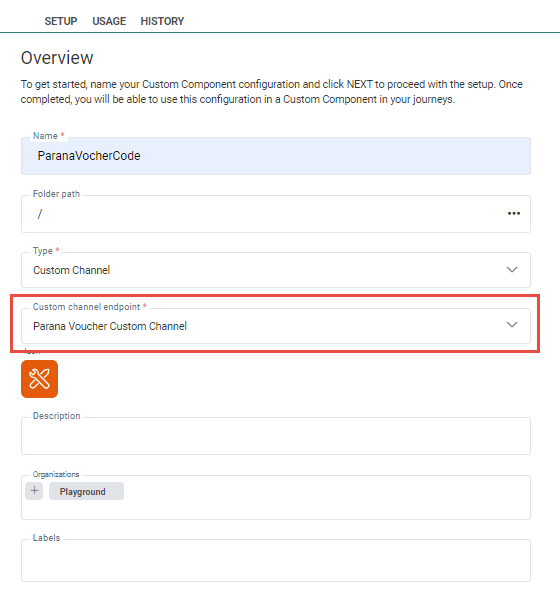
- The profile extension list, containing the sales codes :