![]()
The Email Component allows sending an email to an audience as a result of a specific event.
When an Email Component is placed onto the journey, there are some specific functions available. Right click the component to access them.
- Edit selected email — This will take you to the Content Editor where the message is displayed in Edit mode and changes can be made to the message. Note that these changes need to be published before the new version will be used in the journey. The user is informed when validating the journey if the message they use in the journey has been modified after publish of the message.
- Send test email — This will take you to the Content Editor where the message will be displayed in test mode and a test email can be sent.
- Create new email — This takes you to the Content Editor where a new message can be created. From the Content Editor, you can go back to this journey using the 'Back to journey' button in the toolbar.
Note: When an Email Component is used in a journey with a Recurring Component, a count is displayed of the number of contacts for the next journey execution. This count is calculated when the journey is published. If the journey has changed (eg. a filter on the audience) the count is displayed in orange, indicating that it is no longer in line with the current status of the journey and that a publish is required to update the count. A question mark is displayed when no count is available yet.
Please keep in mind the following rules when using a Email Component in a journey:
- The selected email must have a fallback language
- All links defined in the email must be used as a event in the journey
Properties
There are 3 tabs in the properties panel: the Configuration tab containing the component properties ;the Data tab with the target contacts' details; the Insights tab showing the distribution of the targeted audience.
Configuration tab:
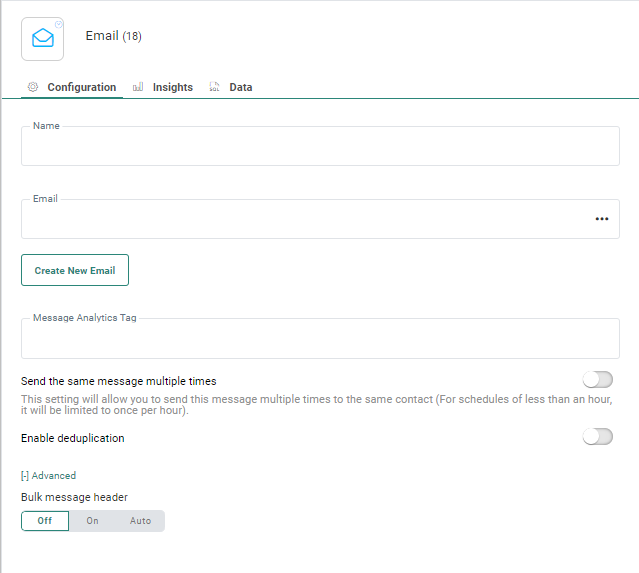
- Name — Set a name for the Email Component. This will appear on the design canvas.
- Email — Select the actual message to use. An Asset selector is available to choose the content from. All published messages are available to choose from.
- Create new email — When the email needed for the journey does not yet exist, you can create it by clicking this button; This will take you to the Content Editor where a new message is created. From the Content Editor, you can go back to this journey using the 'Back to journey' button in the toolbar..
- Tag — Tag the Email message. This tag value will be passed on to the tracker when activated. Personalization fields and emojis are available when entering the text.
- Enable deduplication — If there are duplicate contacts in the journey's audience, you can use Deduplication
to select a unique contact based on a field or
a combination of fields. This avoids sending the email more than once to the same contact
because the contact is in the Audience List more than once.
You can define the following settings:- Unique key — You can define the field in the Audience List that should be used to perform deduplication. This can be a combination of fields as well, for example the Name and email for a contact can be used to detect duplicates.
A maximum of 5 fields can be selected. Fields of type longtext, boolean, float and datetime are not allowed.
Prioritization — Here you define what field in the Audience List should be used to define the record that has priority over the others in case duplicate records are found. For example, you can use the last update date as a prioritization rule.
Sorting — Choose from ascending or descending to define the record that should be kept.
Note: Deduplication in Recurring Batch Journeys takes into account the different runs of the journey. This means that if on run 1, a contact with email 'me@meetmarigold.com' got the email, they will not get the email again in later runs.
If on the second run a new contact is added to the Audience List, with exactly the same email address 'me@meetmarigold.com', they will not receive the email, because deduplication is performed on the entire Audience List and this email has already been sent to that address.
However, if contact 1 with email 'me@meetmarigold.com' was removed from the Audience List after run 1, and another contact was added for run 2 with that exact email address, this new contact will receive the email.
When Deduplication is activated on the Email Component, the icon on the design canvas of the Custom Journey will reflect this (in the top left corner of the icon) : ![]()
- Send as Notification — When you activate this option for an email, you can enter an email address or select a notification group from the drop-down list (Notification groups are defined on Organization level). This sends a notification message to the selected email addresses, customized with the data from the contact enrolled in the journey.

Note: Notification emails can only be sent for instant messages, e.g. after a click in a page or email, as the result of a transactional API call, etc.
Notification emails are not available for messages sent as the result of an instant custom event.
Example: As a response on a newsletter, the contact has enrolled for a session. The customer receives a confirmation message of his enrollment but with a notification email, the account manager or customer care agent is alerted and will be able to follow up on this.
When the Email Component is used in combination with the Recurring Batch Component, an additional option is available:
- Send the message multiple times — Select the option if you want the same message to be sent multiple times to the same contact but only once within the selected time frame of the Recurring Batch Component.
- Add Bulk Precedence header — To improve deliverability on Google domains and increase Inbox placement, it is now possible to add a special header to your bulk emails: the Google Precedence Header. By adding this header, Google considers this email as a non-spam email. The feature must be activated explicitly for your environment to be able to access it in the properties. You can choose to always add the header (On), never add the header (Off) or add it automatically when more than 5000 emails are sent (auto).
Data tab:
The Data tab provides an overview of all contacts in this step of the journey, with their name, email and unique ID. You can search for a specific contact in the list using the Search field.
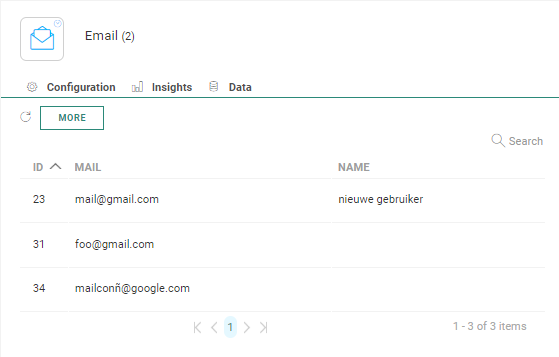
Note: The records listed are taking into account all filters on the component, such as optout. The Data in this tab is as a result not necessarily the same as in the event leading to this step.
Click the More button to display a dialog with more in-depth information for these contacts.

A default set of fields from the Audience List is provided, but you can add additional fields for an even more detailed view on these contacts. Click in the 'selected columns' field to access the drop-down of all available Audience fields and select the ones to add to the overview:
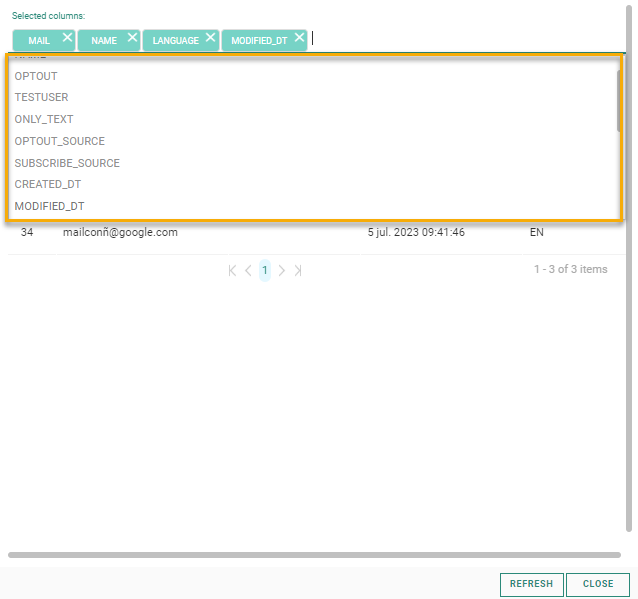
The columns are now added to the overview:
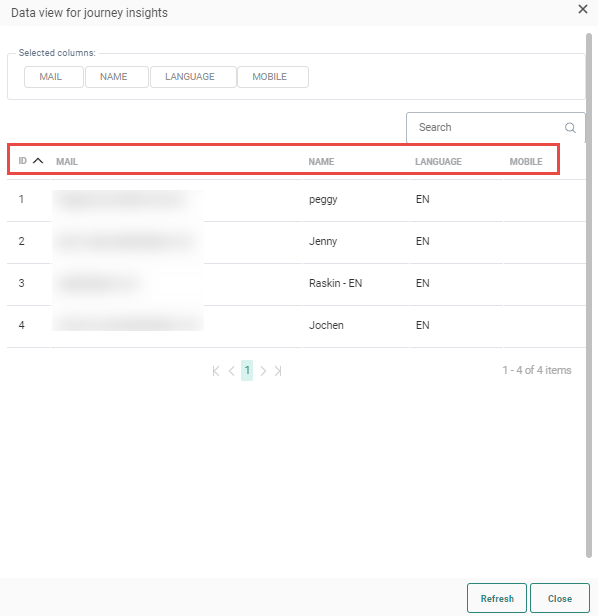
You can sort the results using any of the columns as well as search for contacts.
Note 1: Only users with the 'Personal data' permission will have access to this tab.
Note 2: When there is an issue with the journey and the contact data cannot be calculated, the user is informed. Correct the journey and consult the Data tab again.
Note 3: To get the latest data, a refresh of the Data is required when changes have been made to the journey.
The Insights tab provides detailed aggregated insights in a pie -chart format on audience distribution based on a field selected from the Audience List.
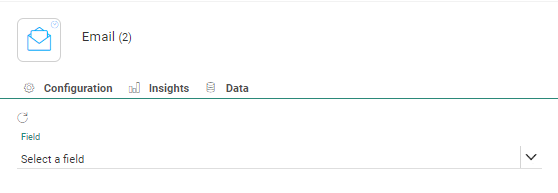
For example, how are contacts in this step of the journey distributed over different languages.

Note : When there is an issue with the journey and the insights cannot be calculated, the user is informed. Correct the journey and consult the Insights tab again.
Note 2: To get the latest data, a refresh of the Insights tab is required when changes have been made to the journey.
Events
- Clicks on links — When the email message contains a link of type 'Define the reaction in journey', these links can be used as an event from the Email Component to another component.
- On Send — The On send event can only be used in combination with the Wait Component.
