![]()
An Input Component is the entry point to the journey. The Input Component can be the starting point in a journey, but contacts can also enter the journey on any other point, thanks to this Input Component. Links in emails and pages, or a Redirect Component in another journey can point to the Input Component to forward a contact from one journey to another.
Journeys with an Input Component are always triggered and cannot be launched as such. Once such a journey is published it is available and contacts can be redirected to it.
When using an Input Component in a journey keep in mind the following rules
- A journey with Input Component must end in a page.
- It is not possible to use the Wave component together with an Input Component.
Properties
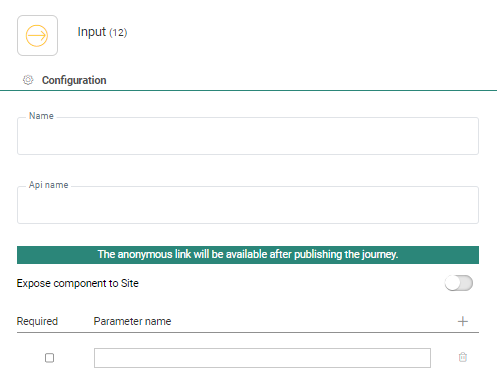
- Set a name for the Input
Component. This will be visible from the Design canvas.
Set the API name. This is the name that will be used by the API to trigger this component.
A remark is displayed saying the anonymous link will be made available after publishing the journey. Once published, it looks as follows:
The anonymous link can be used to send anonymous contacts to the journey. (Eg. from a website, anonymous users can be redirected to this journey)
Note: You can
double click this link to access the journey directly. This will also
allow you to test the different steps in the journey.
If you add the following code to the URL of the anonymous link, the pages will be displayed in the language of your choice:
&SG_LANG=code
where code is the language code
Expose Input Component to Site — Check the option to make this journey available in Site. As a result, pages in this Custom Journey can be used to be displayed as a pop-up, pop-in or content in an offer on the website. The option is available only if the Site module is activated.
When the journey is activated for use in Site, three additional read-only parameters are added:
- CONTENTID — Holds the unique identifier of the content. This is a combination of the offer, action, placement and content and allows tracking clicks on external content (such as pop-ups, pop-ins)
- OFFER — Holds the name of the offer from where the call to the journey is made
- ACTION — Holds the name of the action in the offer that generates the call to the journey
In the Parameters section, the user can enter the parameters that need to be passed to the journey.
Enter the parameter name and tick the Required check box if the parameter value is mandatory (This option is only taken into account by the API, it is not used when called in a browser). Use the + button to add additional parameters. The values passed to the Input Component in the journey can be retrieved on the first page following this Entry Component.
Note: Parameter values are only available during one request, i.e. until the next page in the journey. After this page, the data is gone (just like a posted value from a form).
Technical note:
Values can be retrieved by using the following function : [%requestValue('PARAMETERNAME')%]
Note: If you want to use a parameter value in an email, the value can only be retrieved if it has been stored in the database, in for example a profile record.
Events
It generates the following event:
- OnStart— Whenever a new contact or list of contacts enters the journey, the next step in the journey is executed.
