1. To create a new email from scratch, there are several options :
- From the Home page, use the 'Create Content' button in the toolbar and then select the right content type from the wizard.
- From the Content Start page, click the 'New ' button in the toolbar and then the right type from the wizard.
- From the Content fly-out menu in the navigation bar on the left, select the right type from the drop-down or click Create New and select the type from the wizard.

The Message creation wizard is displayed:

2. Select first if the email is created in the Design editor, the HTML Source editor or from an imported HTML.
- Responsive Design Editor — The creation of the message is completely done through an easy to use drag and drop interface. Content components are available for drag and drop on the design and the properties panel lets you edit the properties and view the results immediately in the design.
- Source mode:
- Blank source — Start creating the email from scratch in HTMLContent components can be added to the HTML code and a WYSIWYG editor lets you make visually changes in the source.
- Import HTML file— Import an existing email in HTML and edit it by using the drag and drop content component and WYSIWYG editor.
- Or, when available, you can choose to create the email using a Quick Start email. By doing so, all properties from the Quick Start are copied to the new email message. Note however that changes made to the Quick Start at a later stage do not impact the email messages created from these Quick starts.
Only published Quick Starts in folders to which you have access are listed here. When no Quick Starts are available the user is informed.
Note: Upon creation of a new email message from a Mail Component in a Custom Journey, and using a Quick Start, the Audience field is already prefilled and non-editable. The reason for this is that the audience is defined on Journey level. In addition, only Quick Starts with the same Audience List as the Custom Journey are listed.
3. When the type of email is selected, the properties panel is displayed.
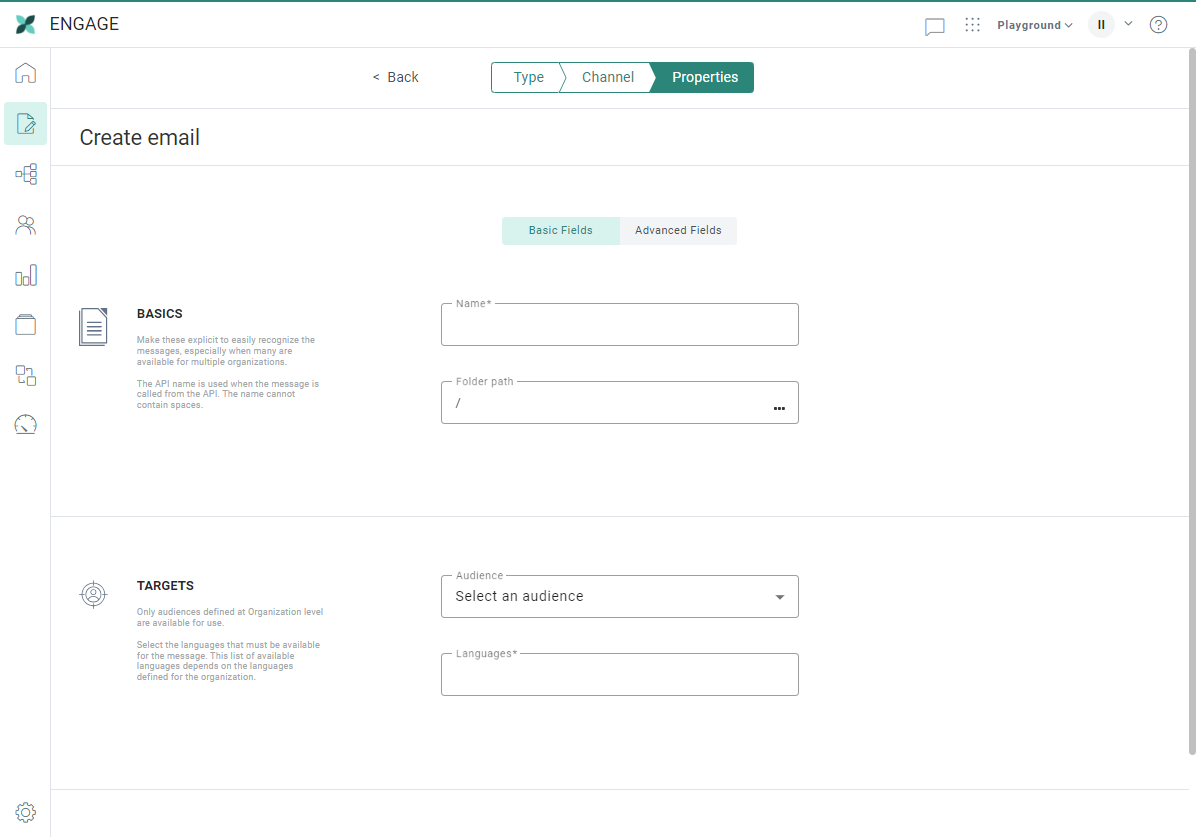
4. The properties are grouped by type of information. By default only the Basic fields are displayed. Switch to the Advanced fields tab to display all other fields. On the left hand side of the properties, on-screen help is provided. This helps the user filling out the form with accurate and comprehensive information.
Basic fields tab:
Basics:
- Folder Path — This is the folder in which the email is created. By default it takes the folder that is currently selected on the Start page at asset creation. You can change the path if required by clicking the folder field to select a different folder.
When using a Quick Start, the folder path is automatically filled out with the default folder path defined for the Quick Start. - Name — The name is used to identify the email. The description is an optional annotation for describing the asset. It is recommended to document the purpose of this email for others to understand its function.
Targets:
- Audience — Select the audience that
will be the target of this email. Only audiences defined for the organization
are available for selection. Omitting an audience means contact fields are unavailable when adding personalization fields to the message.
When using a Quick Start, the Audience field is already filled out. - Language — Select languages for use with this email. At least one language must be selected; a separate translation must appear for each selected language (e.g.: selecting three languages requires the content to be written in the three different languages). The Language field is pre-filled with the default languages defined at Organization level.
When using a Quick Start, the language fields are automatically filled out.
Note: When default languages have been selected on organization level, these languages will already be selected for the email. You can still add other languages or remove one or more default languages
Advanced fields tab:
Basics:
- API name —The name used when the content is used in an API call
- Asset label — The label(s) assigned to this asset. Select one or more labels from the drop-down. (These labels are configured in the Admin configuration.) Users with the proper Access permissions can also create new labels here by typing the new label value in the field.
- Description — Set a clear description of what this content is used for.
Data selection:
- Event Data — From this drop-down list you can choose from following options:
- No event data — In this case the email behaves as a normal message.
- transactional data — Select this option to make the email available to create Transactional Journeys from. By selecting the option, the email is marked as a Transactional message, transactional data can be defined and used and the email will only be available for use in a Transactional Journey.
- Custom event — When Custom Events have been defined for the selected audience, the marketer can use the data in the Custom Event to personalize the email that will be used afterward in a Custom Journey triggered by the Custom Events. Emails using Custom Event data can only be used in event-driven journeys. .
5. When done with the properties, click 'Create message'. You can now start designing the email.
