A Batch Task is a series of subtasks that are executed sequentially. Its purpose is the same as for SQL Tasks (aggregate data, update tables in the database, etc.).
The result of the execution of a subtask determines if the Batch Task fails, passes, or if the next subtask is to be executed.
A Batch Task can be created in two ways:
- From the fly-out menu available from the Data Exchange entry in the left navigation bar. Click New and select the type of task from the drop down.
- In the Start page, select New > Batch task. A wizard guides you through the creation and configuration process.

Note: The steps overview displayed at the bottom can be used to go straight to a specific step when editing a task.
Set the General properties
Properties
- Folder path — Set the Folder path for the task. This is the location in the folder structure where the task is stored.
- Name & Description — Set a Name and Description for this task. Make sure to make it as explicit as possible to easily recognize the task in the Start page. For easier identification, it is recommended to use a prefix or naming convention which indicates the type of a job like: data load, data export, SQL, (parallel) batch and priority.
- Asset label — The label(s) assigned to this asset. Select one or more labels from the drop-down. (These labels are configured in the Admin configuration.) Users with the proper Access permissions can also create new labels here by typing the new label value in the field.
- API-Name— This name is used when the task is executed via the API. By default, the API name is filled out with the name given to the task.
Schedule
The schedule switch indicates whether this task should have its own scheduling. This is unnecessary if this task will be part of a batch execution of tasks (batch job) – it inherits the scheduling of the parent batch job in that case.
The Schedule section defines the validity period of the task as well as the execution occurrence.
If the task needs to be scheduled, toggle the option on and define the schedule .

Start and End date — You can set a start date and/or end date for the task. For example, your task can start now but needs to run indefinitely.
Periodicity — Indicate when the task should run:
- Daily — Select the hours of the day on which the task should run. You can select more than one.
- Weekly — Select the day of the week on which the task should run. The task can run more than once a week. You can also set the start time.
- Monthly — Select the days of the month on which the task should run. You can also select the time of the day at which the task should start.
- Periodically — Set the recurrence of the task, expressed in minutes. For example, the task runs every 10 minutes.
Note: The scheduled time will be executed based on the server's timezone. The currently configured server's timezone is mentioned next to the info icon.
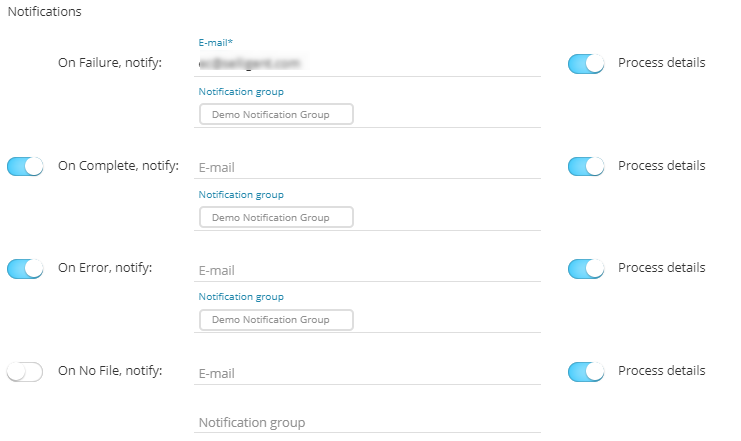
Notifications
A message can be sent either
- * OnFailure — When the process fails. At least one email address is mandatory
- OnComplete — When the task is completed successfully,
- OnError — Completed with errors (job was completed but one or more tasks generated errors/exceptions)
- On No file — When no file could be found
A message can be sent when the task is completed successfully, or completed with errors (job was completed but one or more tasks have failed) or when it failed (when you end up in the Fail component). The details of the process can be included in the message. Additionally, the instance on which the problem occurred is included in the subject of the message.
To activate the option, simply flag the check box and enter one or more email addresses. (Multiple email addresses are separated by a semicolon). You can also select a notification group. These notification groups are created in the Admin configuration.
Note: Notification emails for when the task fails is mandatory. The other notifications are optional.
When done, press Next.
Set the scheduler (optional)
Note: The Scheduler section is only visible if there are schedulers configured on your environment. By default, there is 1 scheduler in which case this section is not shown as this default scheduler is used. If there is more than 1 scheduler configured, you will have access to the Scheduler section.
When multiple tasks, imports or exports are running it might be a good idea to use a different scheduler to make sure that long running tasks do not interfere with smaller tasks. Selecting a scheduler is optional and if you keep the default one all tasks/exports/imports will still run but if there is a bigger task, the smaller one will be executed only when the bigger one has finished.

You can choose between 3 different schedulers: the default one, custom scheduler 1 and custom scheduler 2. By selecting different schedulers for your tasks, they will be executed in parallel, without interfering with one another. So if you have long running tasks it might be a good idea to run these on a different scheduler.
Define the task sequence
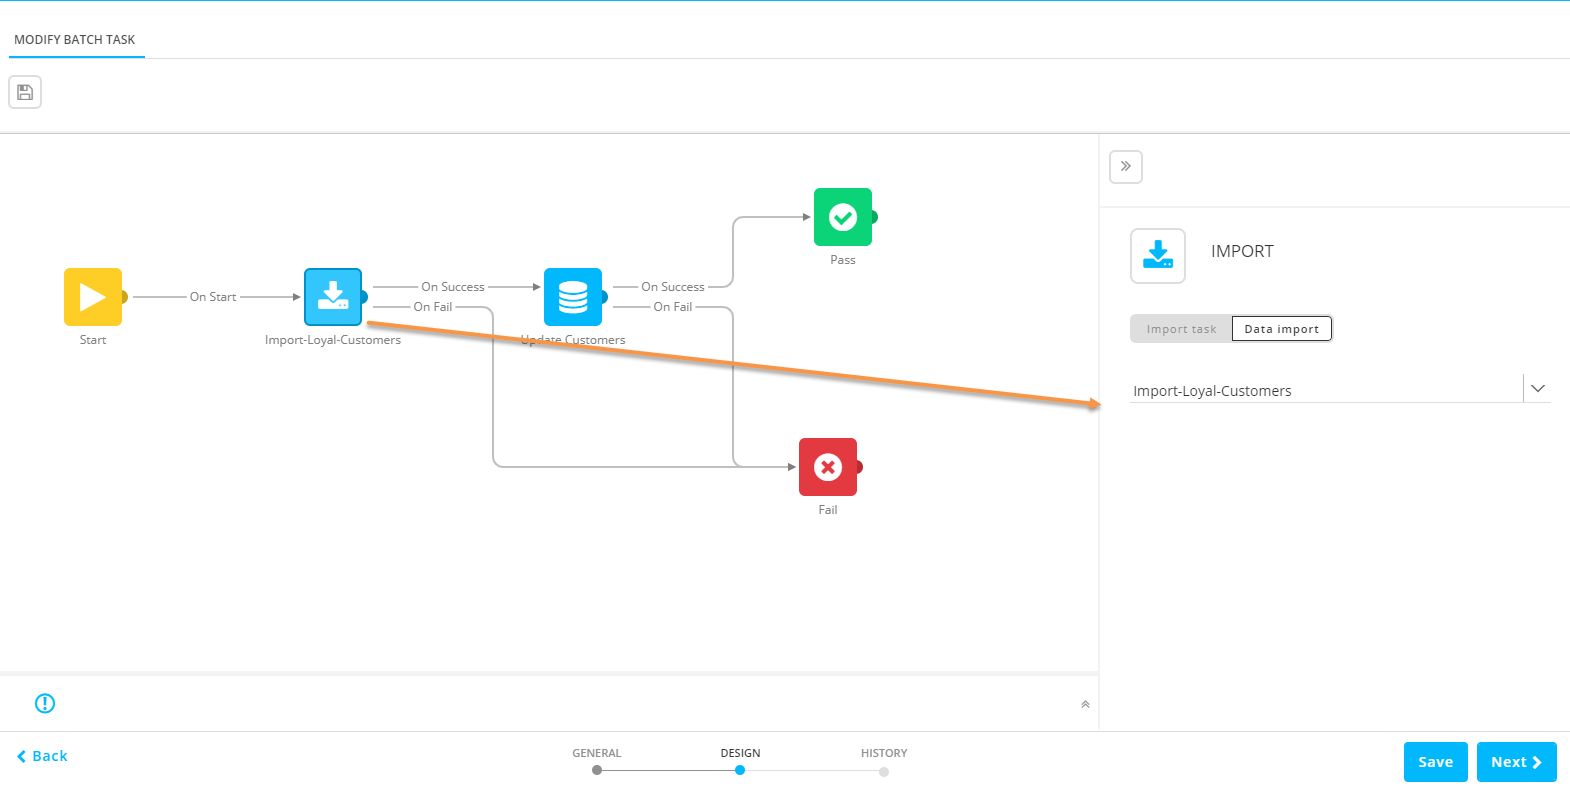
The design of the Batch Task is performed in a visual interface, with drag-and-drop components that determine the sequence of the task. A default Fail and Pass Component allow you to indicate when the Batch Task has failed and when it succeeded. The result of a sub-task will determine if the next task is executed, if the batch failed, or if it succeeded.
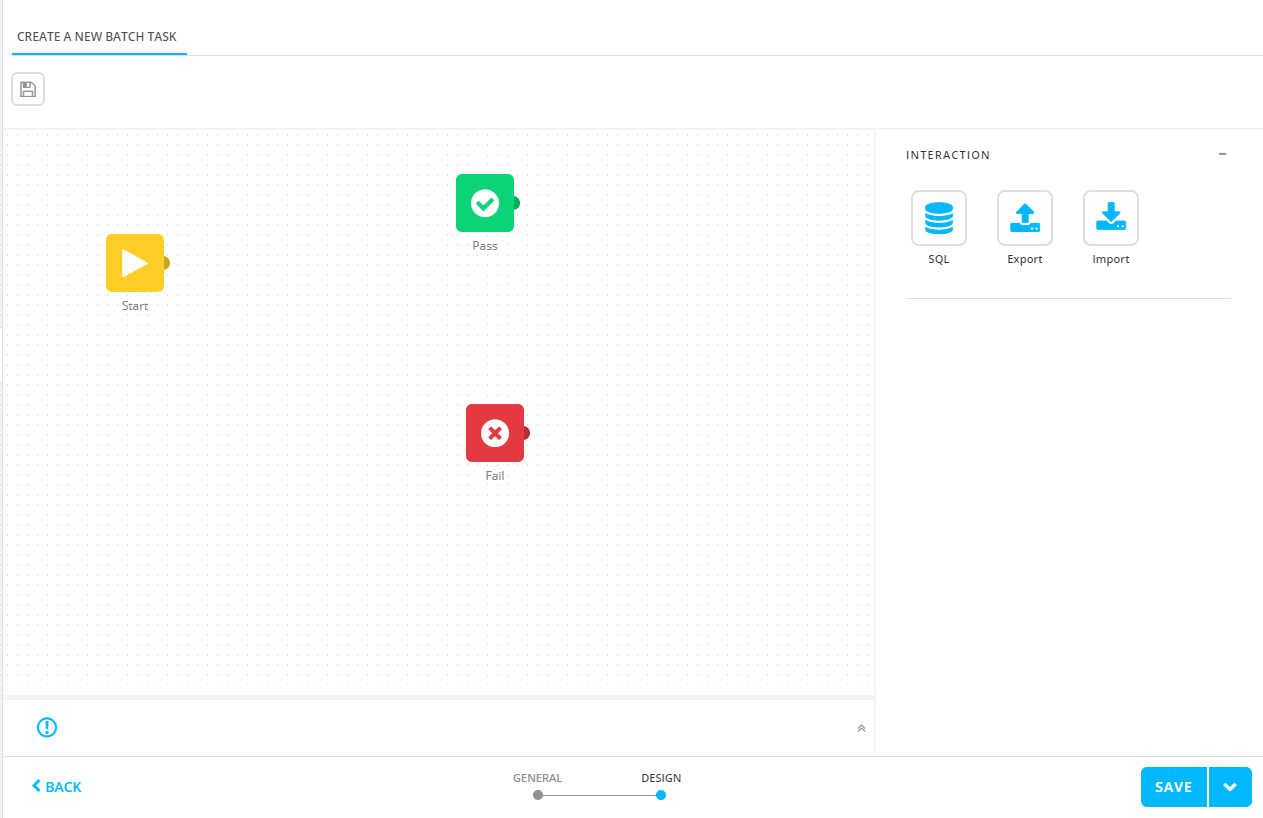
To add the sub-elements to the sequence, drag and drop the required type of component from the components panel on the right. You can choose between SQL Task, Export Task, Import Tasks and Data Exports and Imports.
What is the difference between adding an Import task or a Data import? With Data imports you can import data from an external file into a list. This is not possible in an Import Task where data is imported into a table. However, Batch Tasks allow to include SQL Tasks for data manipulation for example. Combining a Data Import with an Sql Task in a Batch Task, leverages the functionality of each of the elements used.
When a component is dropped, click it to display the properties panel and select the exact task or Data import/export to execute.
- Sql - Select the SQL Task from the drop down.
- Export - Click the Export Task tab if an Export Task needs to be added. Click the Data Export tab if you want to use a data export.
- Import - Click the Import Task tab if an Import Task needs to be added. Click the Data import tab if you want to use a data import.
What is the main difference between Export Task and Data Export? With a Data Export you export a selected list and and/or segment to an external file for which field mapping can be provided. In an Export Task, you use a stored procedure to retrieve the data from the tables and export it to a file.
Connections between the tasks are created by linking the dots. When a connection is created between the building blocks, automatically the 'onsuccess' event is attributed. You can change it in the Events properties. When the second connection is made, the other non-used event is attributed automatically.
You can add as many components as required. You need to ensure that every component event results in either another component, the Fail component, or Pass component.
Note: Validation messages indicate when the task flow is incorrect or incomplete such as Task components with no task selected, components with a missing outgoing connection and so on. A click on the validation message takes you to the task generating the error.
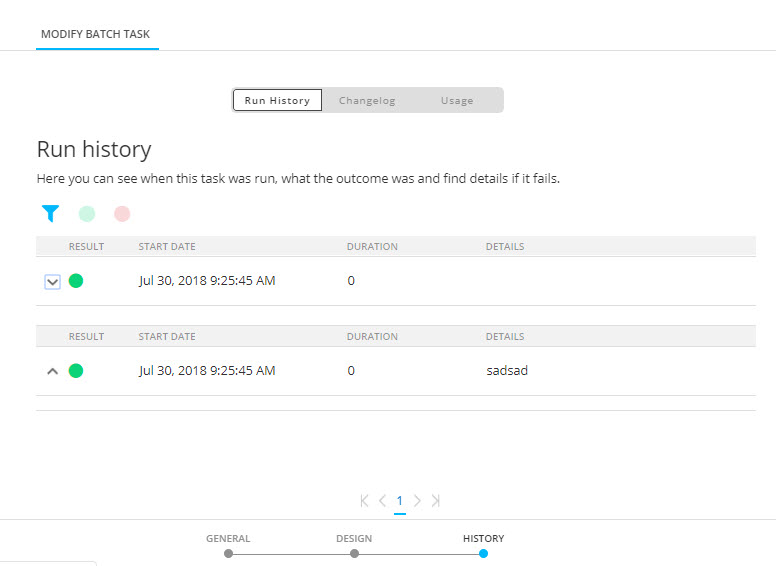
History
The History provides information on
- when this task was changed (updated, deleted) and by whom. This information is available from the Changelog tab.
- when the task was executed and the status of that execution. This information can be found on the Run history tab. If the task comprises subtasks, the execution history of these tasks can be consulted as well.
- where the task is used. This information can be found on the Usage tab.
Use the filter icons at the top to filter the Run history.