Transactional fields are used to personalize a transactional message with values passed on from the API when the message is sent.
Define transactional fields
In the properties of the message, upon selecting transactional data to use in the content of the message, click the ... button to edit the Transactional data.
Note: The button is only available if the message is first set for use in a Transactional Journey.
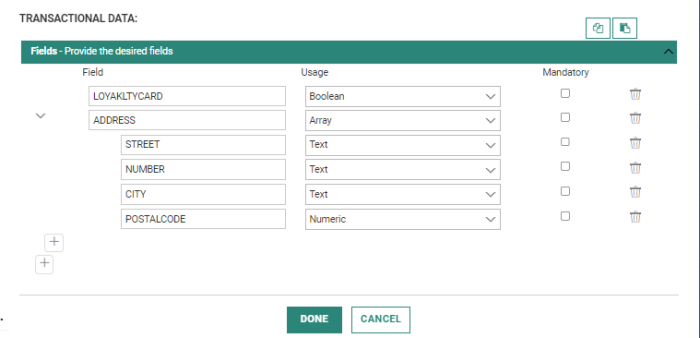
The following pops up to create the transactional fields:
1. To add a field, click the + button.
2. For each field enter:
- the field Name. A maximum of 50 characters is allowed.
- the Usage — Define how this field will be used (numeric, date, datetime, boolean, string, Long, array). Data types are checked for each of the values passed on.
- if it's Mandatory — Check the box if values are required.
3. To add an extra field, click the  icon again
Note: You can create as many transactional fields as required.
When array is selected as field type, the different fields within the array have to be defined as well.
Note: A maximum of 25 array fields is allowed. Each array field can have a maximum of 25 characters.
Example:
An array is created that contains all the address
information (see above image). Within the array, a field is added for the
street, one for the number, etc. Use the + button to add extra fields
to the array.
4. When finished press 'Done' and save the changes to the properties.
Note: The structure of the Transactional fields can be copied to the clipboard and pasted in another Transactional message.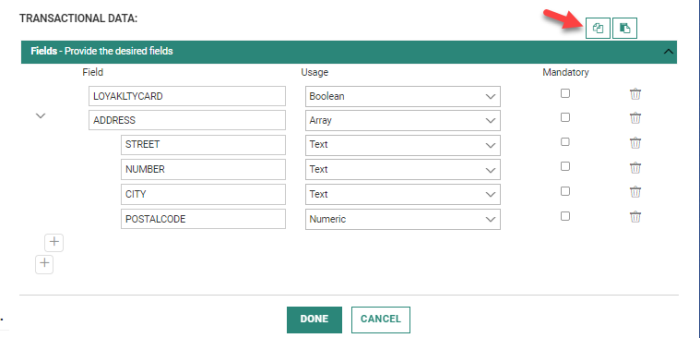
When the Transactional array or fields in the array already exist, these will not be overwritten. Only new fields and arrays are added when pasting the structure.
Use transactional fields to personalize the message
Each one of the basic transactional fields (boolean, text, numeric, date, datetime, etc) can be used directly to personalize the message.
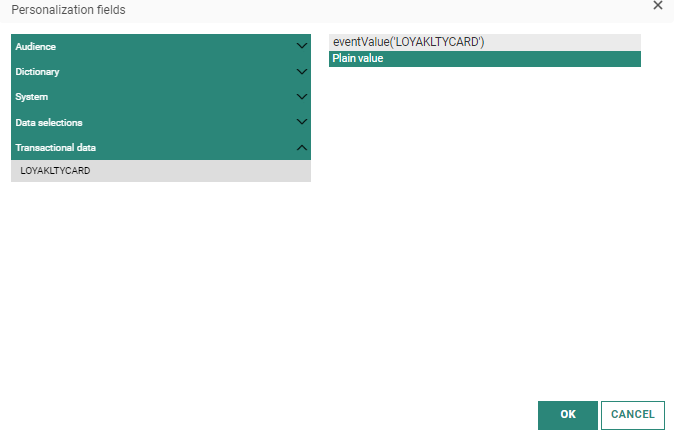
1. Click the personalization icon in a Text, Image, or Button Component or in the subject of the message. Below is an example of a personalization field added to a Text field. The Personalization Dialog pops up.
2. From the Transactional data folder, select the field and on the right the format to apply to the selected field. Only 'non-array' transactional fields are listed here.
3. Click OK.
Note: Transactional fields can also be added manually to the message. Use the following function to do so: [%eventValue('FieldName')%]
Note: These fields can only be populated via an API call in a journey, they will not be populated when previewing the transactional message.
Use transactional array fields in Repeaters
Transactional fields of type 'Array' can contain a series of items, such as a list of items purchased, favorite shops, etc. This data can then be shown as content in Repeaters. To be able to do this, the transactional array field must be added as a data selection to the message.
Example:
1. The 'Address' array field is created as a transactional field in the message (with street, number, postal code and city.)
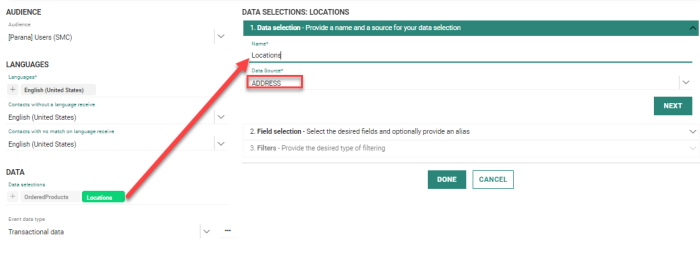
2. To make this Address field available for use in a Repeater, click the + icon in the 'Data selection' field to create a new data selection.
3. Give a Name to the data selection and select the Source.
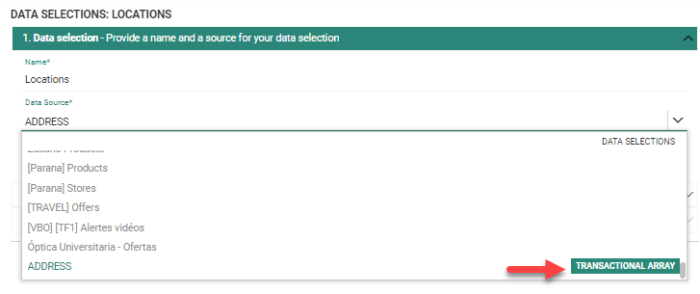
4. From the drop-down list, we have access to all transactional array fields that have been defined for the message. In our example, there is one: ADDRESS and we select it.
Note: This drop-down field also contains all available data selection lists. All data sources are grouped per type.
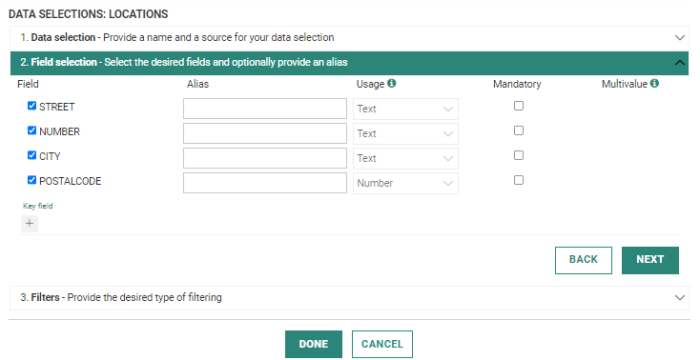
5. In the next step, we have to indicate what fields are used and which are mandatory. This is done in the same way as for any data selection (check out this topic for more details).
6. In the last step, we can define a Filter. (Check out this topic for more details.)
7. When finished, we click Done and our transactional data is ready to be used as a data selection for repeaters (more info on this topic).
Example : Creating a Transactional Message
Example : Creating a Transactional Journey


