Create an 'Abandon/Checkout cart' Journey
A Journey of type 'Abandon/Checkout cart' needs to be created. This type of Journey works more or less in the same way as the Retargeting Journey, explained in the previous section.
To set up the complete process in Campaign you need:
- an action list with action codes to trigger the execution of the Journey
- a Journey set as 'Abandon/Checkout cart'
- an Audience list in the Journey that uses the action list
- an Input component in the Journey through which the Site visitors enter the Journey
- Use the cart information in your email
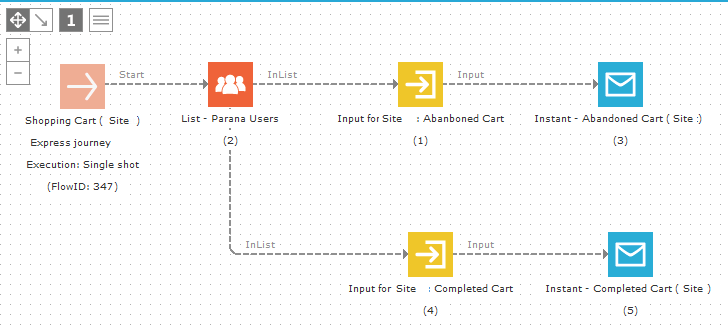
In this example we use emails to interact with the visitor, There will be one email sent when the contact abandoned his cart and a second email when the contact finalizes the purchase and thus completes the cart. To be able to do this in one Journey, two Input components are required.
Now cart follow-up is based on action records in an action list that triggers an execution for specific action codes. These action records are created automatically when Site triggers the Journey. If input parameter values are passed on from Site, they are automatically stored in the action list and can then be used to personalize the message. In this case there are two default parameters passed from Site to the Journey: PRODUCTS and CART.
Following is an example of a Journey where two emails are sent, one if the cart is abandoned, and one if the cart is completed.
Important! The emails need to be set as instant!
Create an action list with action codes
Create an action list (e.g. Shopping Cart (Site)) and add fields to store the input parameter values for PRODUCT and CART. (You could add extra fields to store custom parameters if you want)
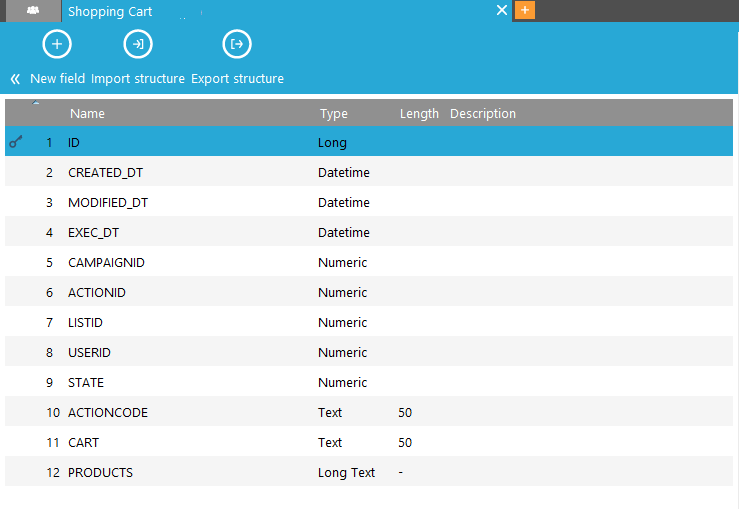
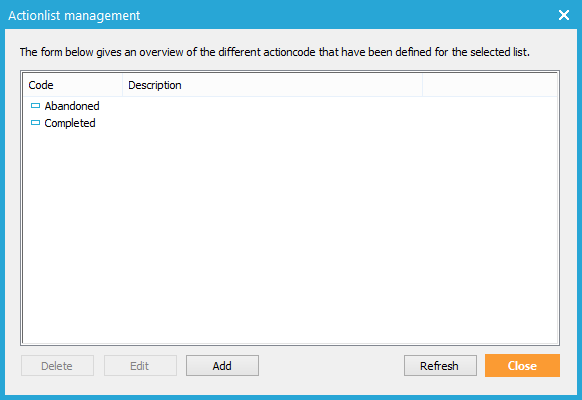
Add the action codes. (E.g. “Abandoned” and “Completed”) to the action list. We need both because there are two different situations in which a Journey can be triggered.
Link the action list 1:N to the Audience list (eg. Parana users) that is used in Site.
Set Journey as Abandon/Checkout cart
In the properties of the Journey, under 'Site', set it as a 'Abandon/Checkout cart' Journey. The universe drop down list is limited by the user’s asset rights (see above).

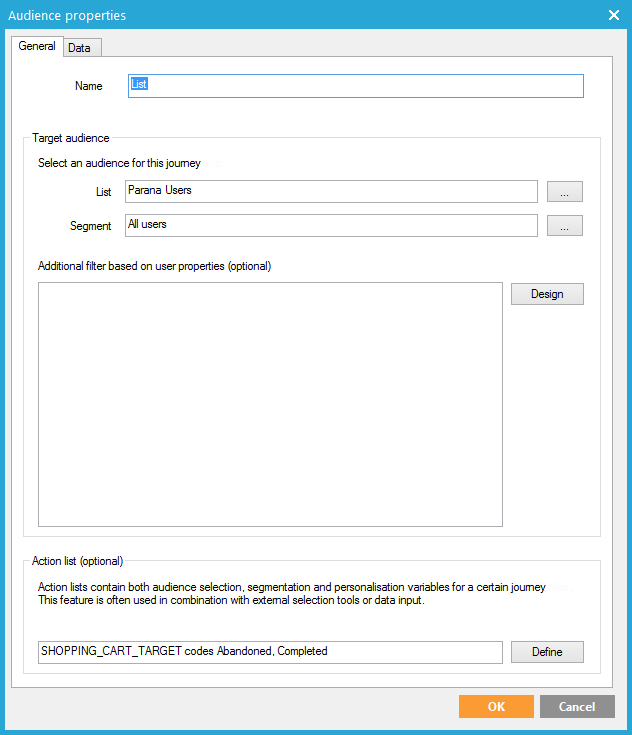
Configure the List component in the Journey
In the Journey, in the properties of the List component, select the action list and the action code(s) that should be used in the Journey. (In this exampleboth action codes need to be selected as we will treat both situations in one single Journey)
Configure the Input components in the Journey
As we will trigger the Journey as well for cart abandonment as for cart completion but send a different email, two input components need to be added to the Journey.
An action code must be added to each one of the Input components. This ensures that when Site triggers the Journey and Input component that an action record with that specific action code is generated for that visitor.
To do so, go to the properties of the Input component. Select type “Abandon/Checkout Cart with action code” and from the drop down select the action code (e.g. “Abandoned” or "Completed").
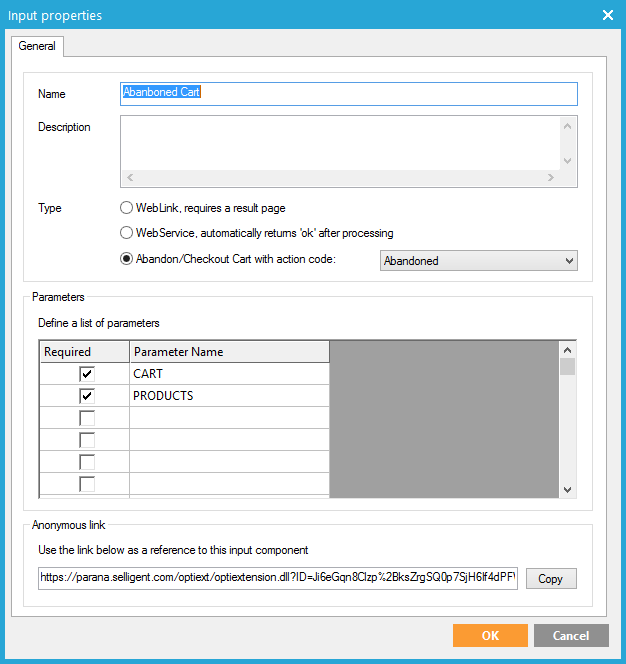
Two default parameters are automatically created. Their values will automatically be filled in by Site:
- CART: holds the cart public name which made the call
- PRODUCTS: the list of products in the cart. The structure of the parameter is as follows:[{"ID":"8","CONTENT":{"QUANTITY":1,"PRICE":399.0}},{"ID":"11","CONTENT":{"QUANTITY":2,"PRICE":649.0}}]
When the Journey is triggered from Site an action record with action code “Abandoned” (or Completed) is created. The incoming Site values for parameters CART, PRODUCTS are also stored in their respective fields. This Input component will trigger the instant email with the created action record (action code “Abandoned”).
Use the Cart information in your email
The email that is sent to the contact may contain information on the products in his cart. This information is passed on to the Input component, through the PRODUCTS parameter.
To use this information in the email, you need to use a lookup container:
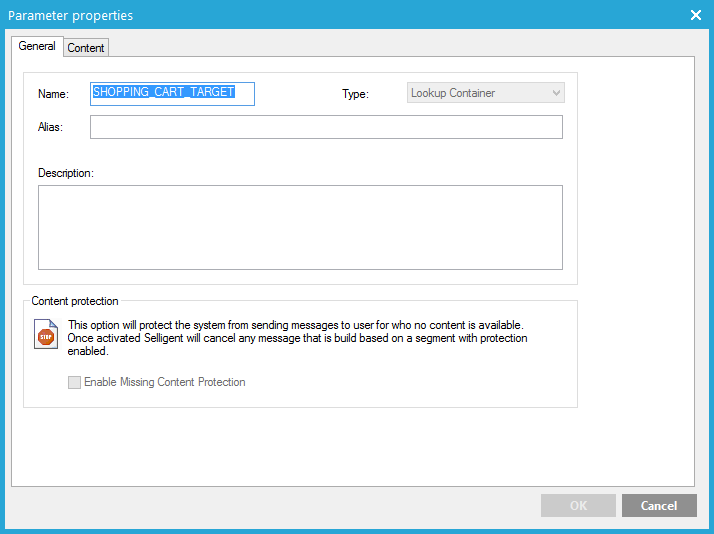
On the 'Content' tab set the following:
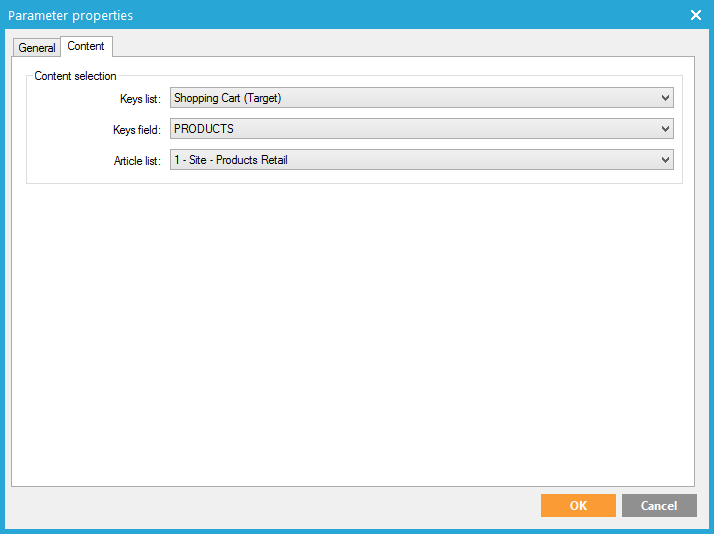
Where
- Keys list is the action list created earlier (Eg. Shopping Cart (Site) ) which contains one record for every contact who abandoned (completed) his cart.
- Keys field is the field in the action list that contains the information on the products in the abandoned (completed) cart (i.e. PRODUCTS field). The format of the information in the PRODUCTS field is a JSON and looks like this: [{"ID":"8","CONTENT":{"QUANTITY":1,"PRICE":399.0}},{"ID":"11","CONTENT":{"QUANTITY":2,"PRICE":649.0}},{"ID":"1","CONTENT":{"QUANTITY":1,"PRICE":124.0}},{"ID":"2","CONTENT":{"QUANTITY":1,"PRICE":204.0}},{"ID":"4","CONTENT":{"QUANTITY":1,"PRICE":354.0}}]
For every product in the cart we get the id of the product, quantity and price. The ID of a product corresponds to the ID of an article in your article list (catalog)
The quantity and price comes from the website, although the price also exists in the article list but may differ.
- Article list is your product catalog. The ID of an article in the article list matches the ID in the PRODUCTS field.
Now, to be able to use the information on the quantity and price, you need to add two additional fields to the lookup container:
- KEYCONTENT_QUANTITY
- KEYCONTENT_PRICE
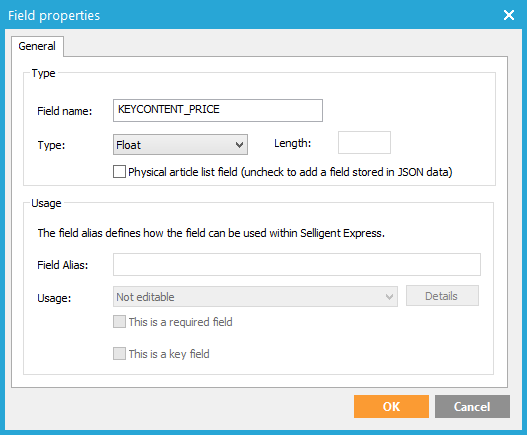
Note: important to uncheck the option 'Physical article list field'! When unchecked , this allows to use fields that are stored in JSON data (which is the case for the PRODUCTS field in the action list
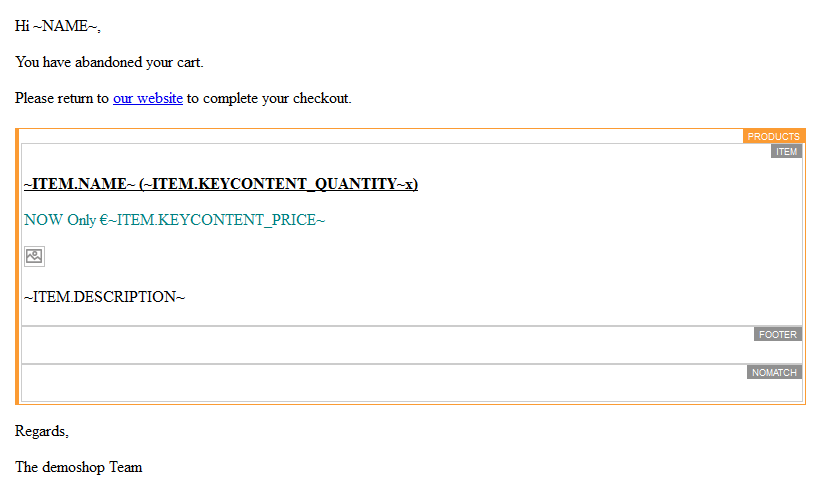
Last step is to insert these fields in the email:
.