Introduction
Pages can be created inside Campaign journeys. However, customers often ask how to include these pages in a client website. Basically, there are 2 options:
- iFrames (Client-side integration)
Placing an iFrame inside the existing web site often is a quick way to integrate pages. In this case it is the client browser that retrieves content from different locations. However, there are some disadvantages compared to the server side integration.
- The dynamic area is often fixed in size which results often in a scroll bar on the page.
- Shared style sheets cannot be used
- There is a risk of privacy or security (SSL) warnings
- Search engines will not pick up the content as part of your website.
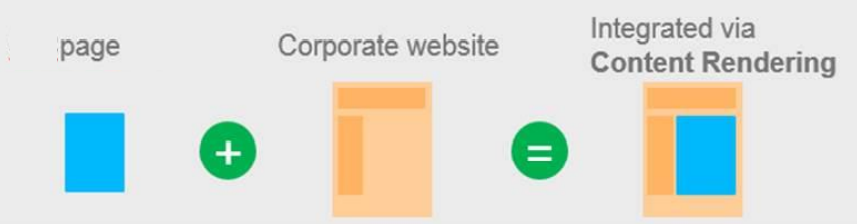
- Content rendering (Server-side integration)
This document describes how content rendering works on the Campaign side and the programming logic which should be set up on the client's website to get this to work.
Visualization of how content rendering works
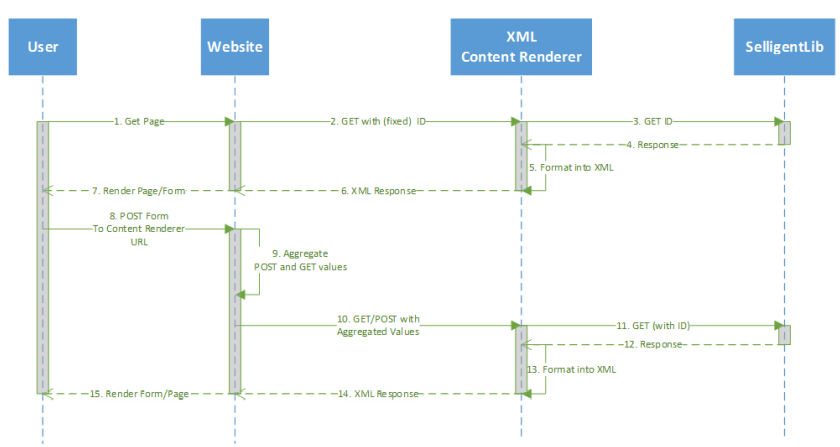
1. The user requests a page from the website. This website page contains a Campaign page or form.
2. The website knows the Campaign hash ID of the webpage/form. It requests the page from the Content renderer with a GET HTTP request containing at least the hash code in its query string.
3. The hash code is then passed to the Lib component.
4. The lib interface component returns all personalized data. The core data contains the page or form. If a form is returned, the form action URI will be of format https://customer_website/[webpage]/?ID=[hash]. So the webpage on the customer website must be able to receive a HTTP POST request.
5. The Content renderer encapsulates all data into an XML structure.
6. The XML content is delivered to the website
7. The website renders the page/form on the user requested page of step 1
Now, if the requested page is a form, additional steps are added:
8. The user submits the form to https://customer_website/[webpage]/?ID=[hash] via a HTTP POST request. This uri must be configured on the journey as a content renderer (Advanced properties of the journey) or alternatively, the XML content rendered could configure the content renderer URI dynamically. This way the optiextension.dll that is used by the Lib knows to use this URI as its HTTP POST Form action.
9. The website receives the HTTP POST form values and aggregates all form values together with the hash ID (passed by the query string in the received HTTP request) into a HTTP GET request to the Content renderer.
10. The website sends then the HTTP GET or POST request with all aggregated data from step 8 to the XML Content renderer.
11. The Content renderer passes the received vales to the Lib component.
12. The lib component calls the optiextension.dll to receive the data
13. The Content renderer encapsulates all date into an XML structure.
14. The XML content is delivered to the website
15. The page or form is rendered and delivered to the user. If the submitted form contains validation errors, this error can be displayed to the user. Afterwards the described sequence will continue from step 8.
Requirements
On the Campaign install of the client the Content rendering module should be set up.
This module consists of several universal structured data exchange types, but we’ll cover the XML version in this document. For other types the logic should be the same.
IMPORTANT: Do not use any form of caching on the website pages loading Campaign content. This will cause content to be displayed for different persons.
Usage
Basic explanation
Once the Content Renderer module has been deployed on your Campaign install, you will be able to address the below URL (replace [CUSTOMERDOMAIN] with the domain of your Campaign install).
https://[CUSTOMERDOMAIN]/contentrenderer/xml.ashxThis URL is expecting at least 1 GET parameter, the ID parameter (always use capital ID). This will give you the following result:
https://[CUSTOMERDOMAIN]/contentrenderer/xml.ashx?ID=Ji6JLxuipBD6wVfHxuoJ8RFkNlBcnNBlLBhbaEQcmmAJpoJRQW1xCXxEJPwLev91p1IOYEGMmNYou can find the ID in the properties window of an input component on your desired journey.
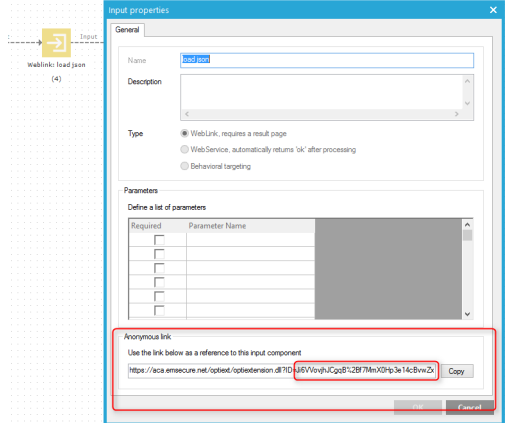
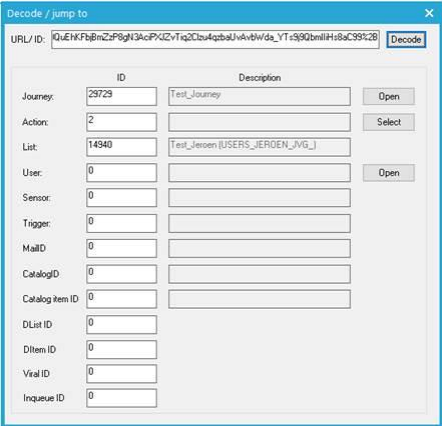
This ID is the same ID which is used in Optiextension URLs. If you look at a certain page through the Optiextension URL, using this ID in the content renderer module URL (xml.ashx), the content renderer module will return the HTML content in a very simple XML structure. These ID’s will change from user to user, journey to journey, action to action. This ID will define which user is on which page in a certain journey. The visual below will show on which parameters a URL is depending.
The folder ‘contentrenderer’ could be different, this could be CR or some other folder. Your Marigold contact will be able to help you with this.

Campaign changes
When you want to use a specific journey in a Content Renderer, you need to specify this in the journey in Campaign. This is located under the Properties tab of a specific journey.
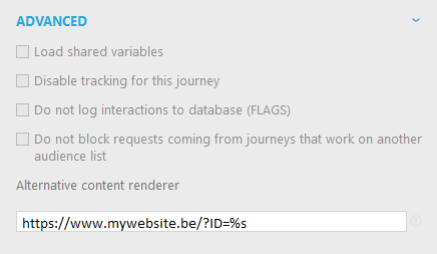
In this Alternative Content Renderer field, you’ll have to specify the URL of the page where it will be displayed. When rendering the content of pages in this journey, Campaign will replace the default Optiextension URLs with the URL you specify.
If your links point to an external URL, the content that we return will be a Javascript snippet like below:
Document.location='https://www.google.com'. This will redirect your visitor to the location specified in the Link.
Keep in mind to add %s after the ID= string!
Website logic
On your website backend, you’ll need to communicate with this XML Content Renderer. You can use the following logic:
//Define empty variables
$selligent_id = "";
$param = "";

//Check if an ID is set, if not use the default anonymous ID of an Input component
IF($_GET['ID']==''){
    $selligent_id = [The ID of a specific journey ];
}else{
    $selligent_id = $_GET['ID'];
}

//Collect all variables from POST and GET variables, these will be passed to Selligent
foreach($_POST as $name => $value) {
    if(strtoupper($name)<>"ID") {
        $param = $param . "&" . $name . "=" . urlencode($value);
    }
}
foreach($_GET as $name => $value) {
    if(strtoupper($name)<>"ID") {
        $param = $param . "&" . $name . "=" . urlencode($value);
    }
}

//Capture the return of the XML Content Renderer by attaching the ID and the parameters that we collected above.
$xml = curl ([CUSTOMERDOMAIN]/contentrenderer/xml.ashx?ID='.$selligent_id.$param])

//Store each XML node in a separate variable – this is optional
$head = $xml->head;
$bodyattr = $xml->bodyattr;
$body = $xml->body;

//Print the variables on your page.
<head>
<?php echo $head;?>
</head>
<body onload='<?php echo $bodyattr;?>'>
<?php echo $body;?>
</body>
CMS Modules
If you are working in a CMS and you’ll often have to include a journey /content into your CMS pages, you could develop a 'Campaign page' class. This will be a CMS page that inherits everything from a normal page but adds a ‘Default Marigold ID’ attribute.
If your end-users or CMS content admins need to publish a new page and need to display content from a Campaignjourney, they will have to fill in this default ID (i.e. the anonymous ID from an input component in a Campaignjourney).
By doing this you’ll only have to develop this functionality once and your end users can use it for multiple simple pages or advanced map integrations
