MSDynamics CRM365 XRM Tooling Setup
Creating an App
When using the integration with CRM366 XRM Tooling, an app ID is required when configuring the connector in Engage. How to do this is explained in this section:
1. To create an app, connect yourself to azure active directory in the target organization of MSDynamics365.
For our test, the user is "CRMAdmin@CRMSelligent.onmicrosoft.com" and the organization it belongs to is "CRMSelligent".

2. Go to App registrations.
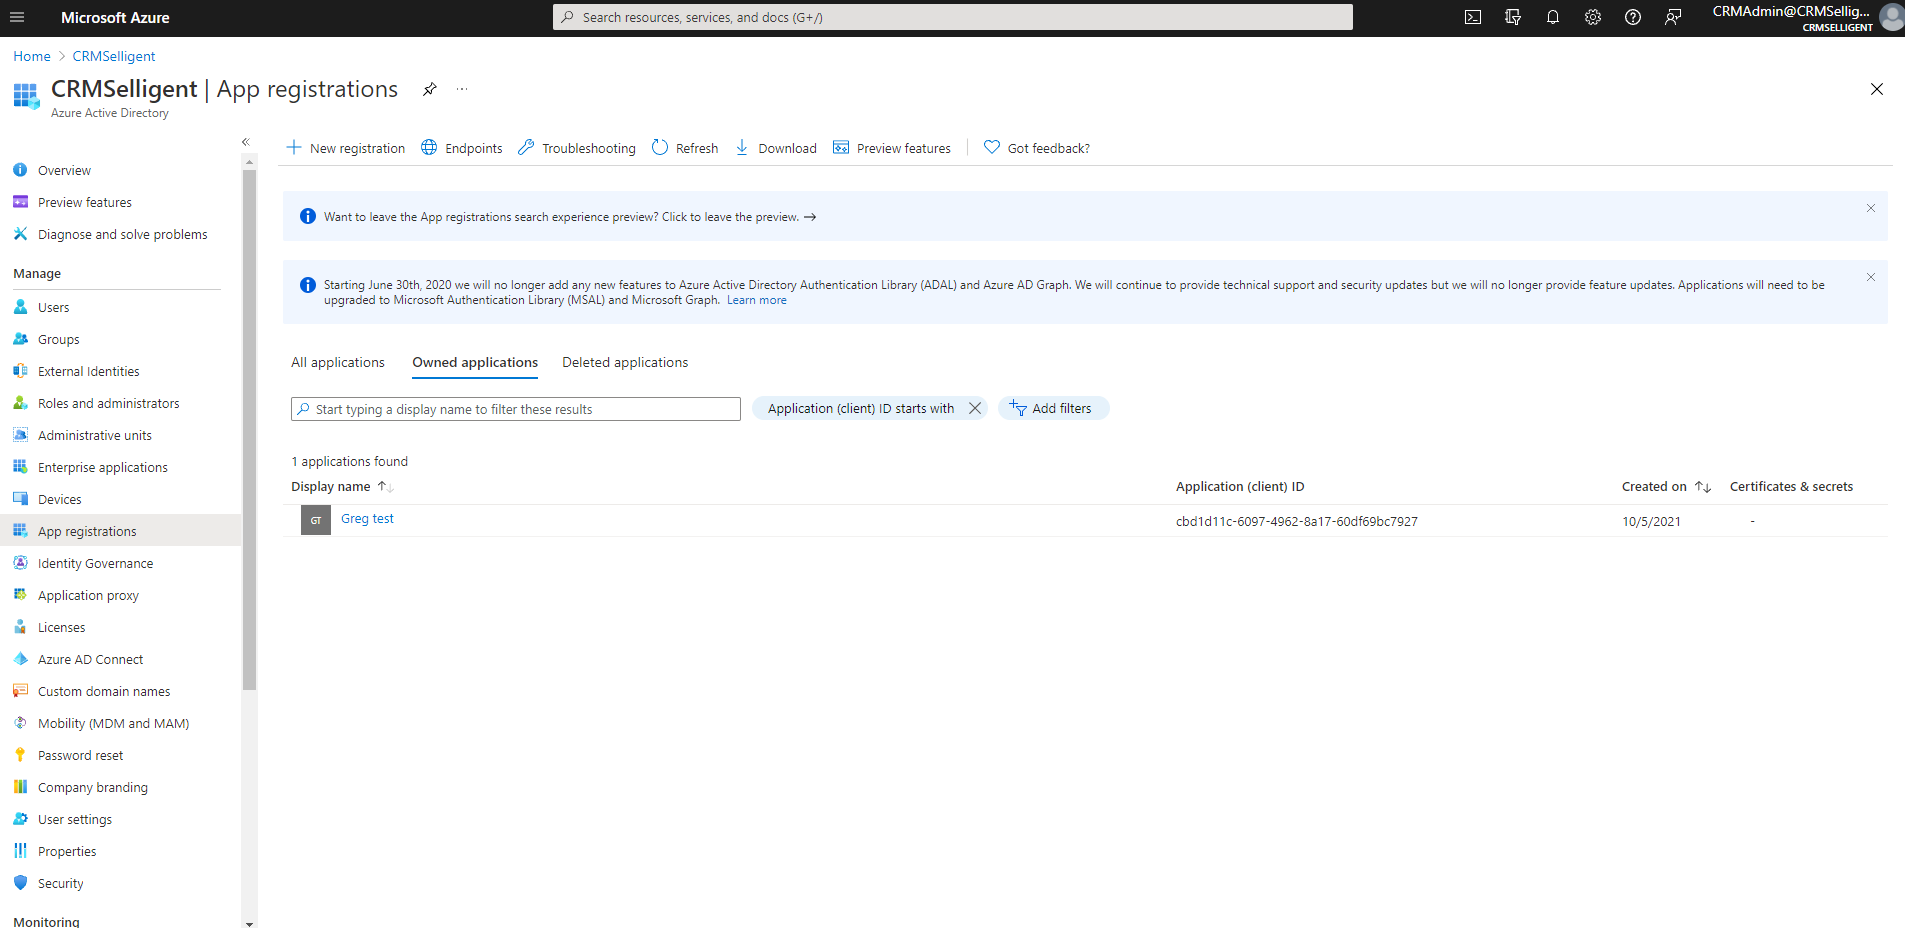
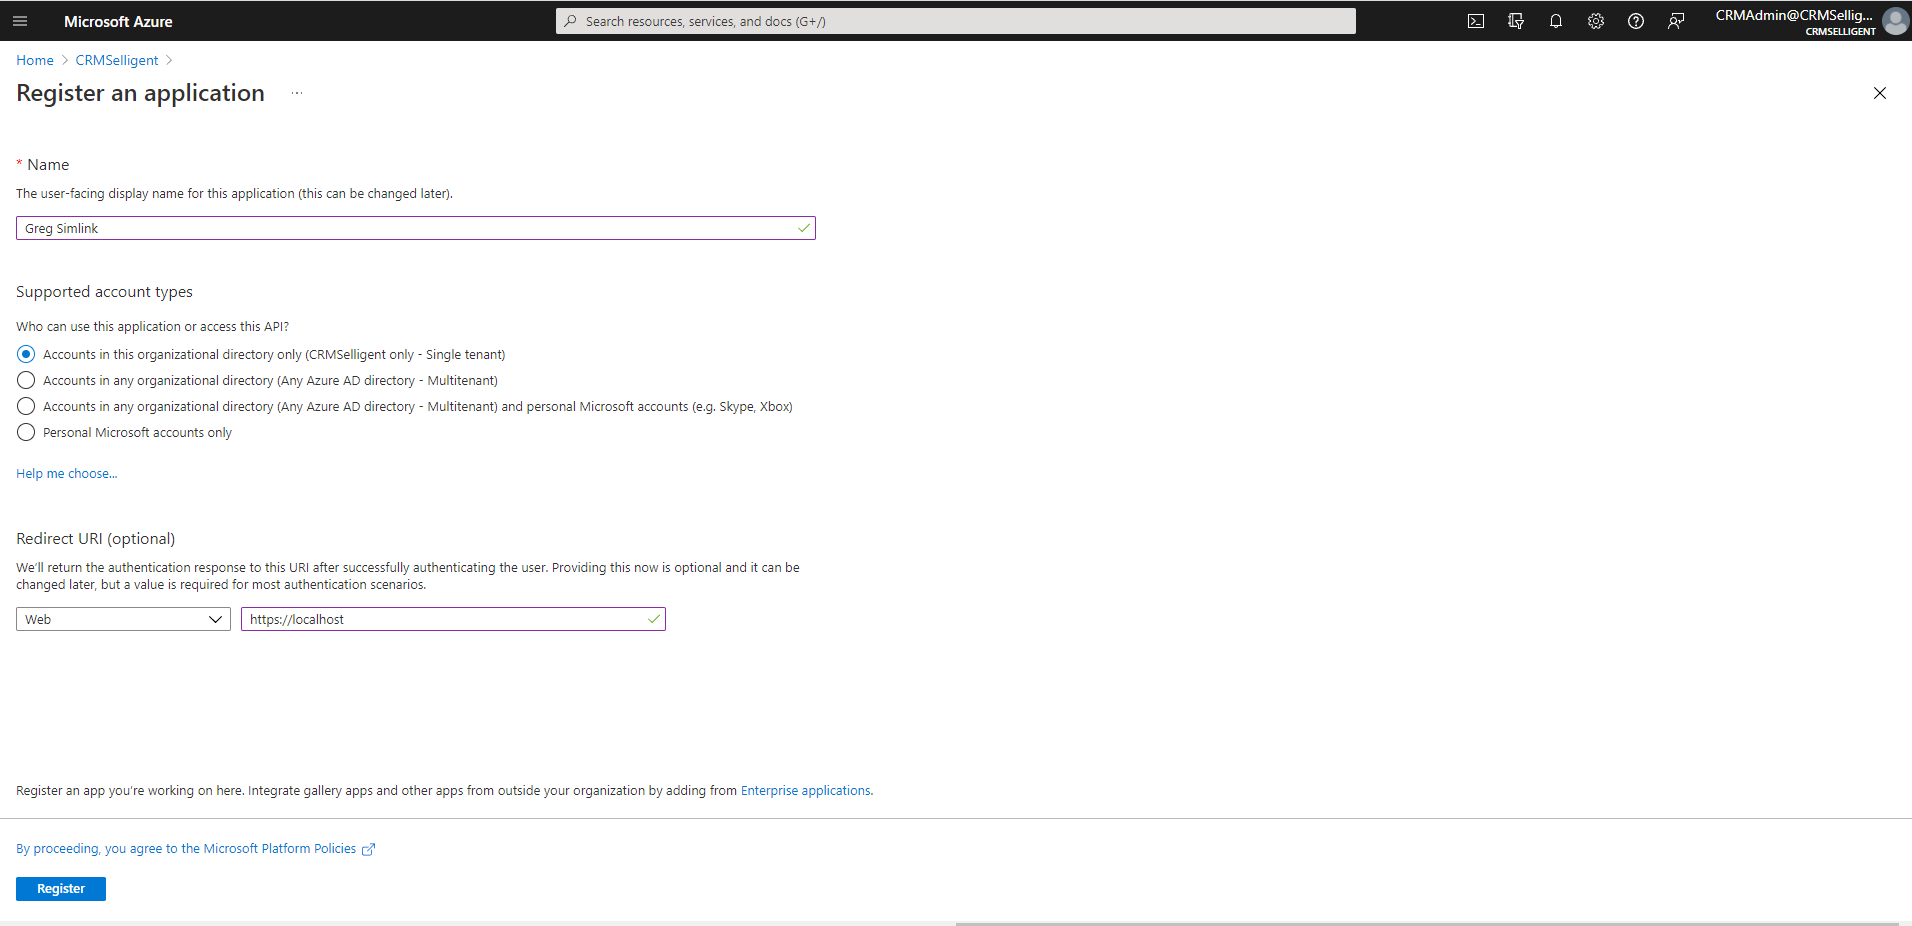
3. Create a new app as follows.
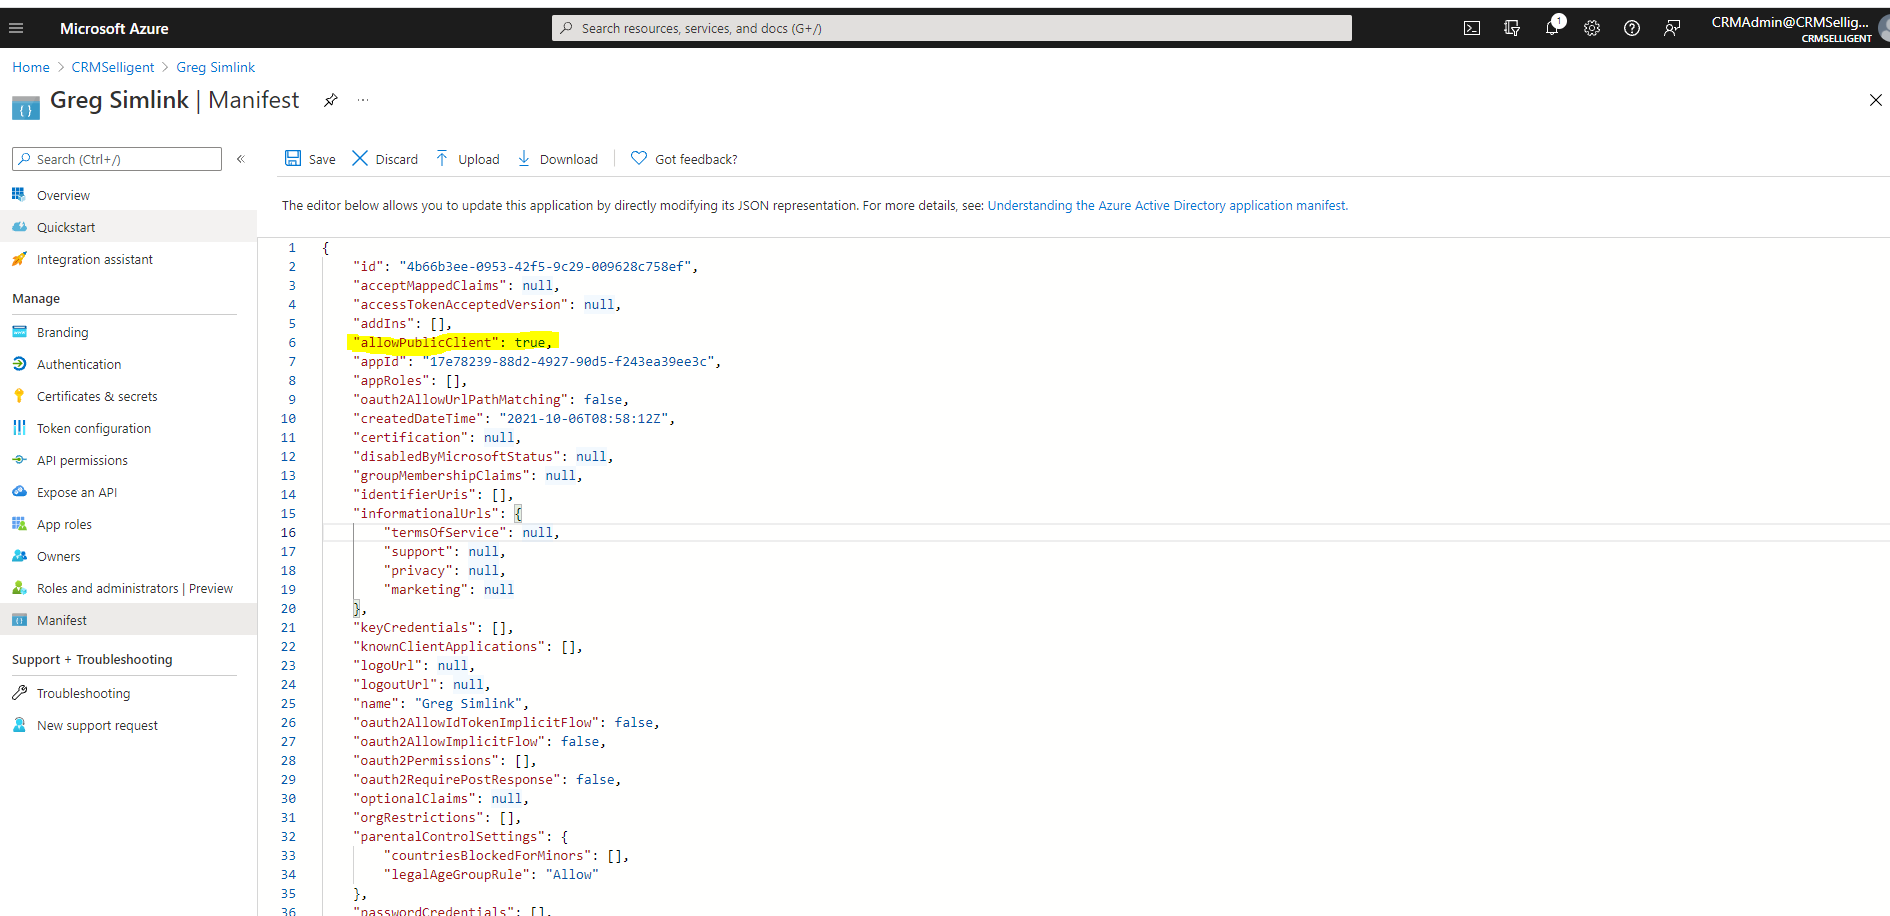
4. When the app is created, go to the Manifest section and set "allowPublicClient": true as shown below.
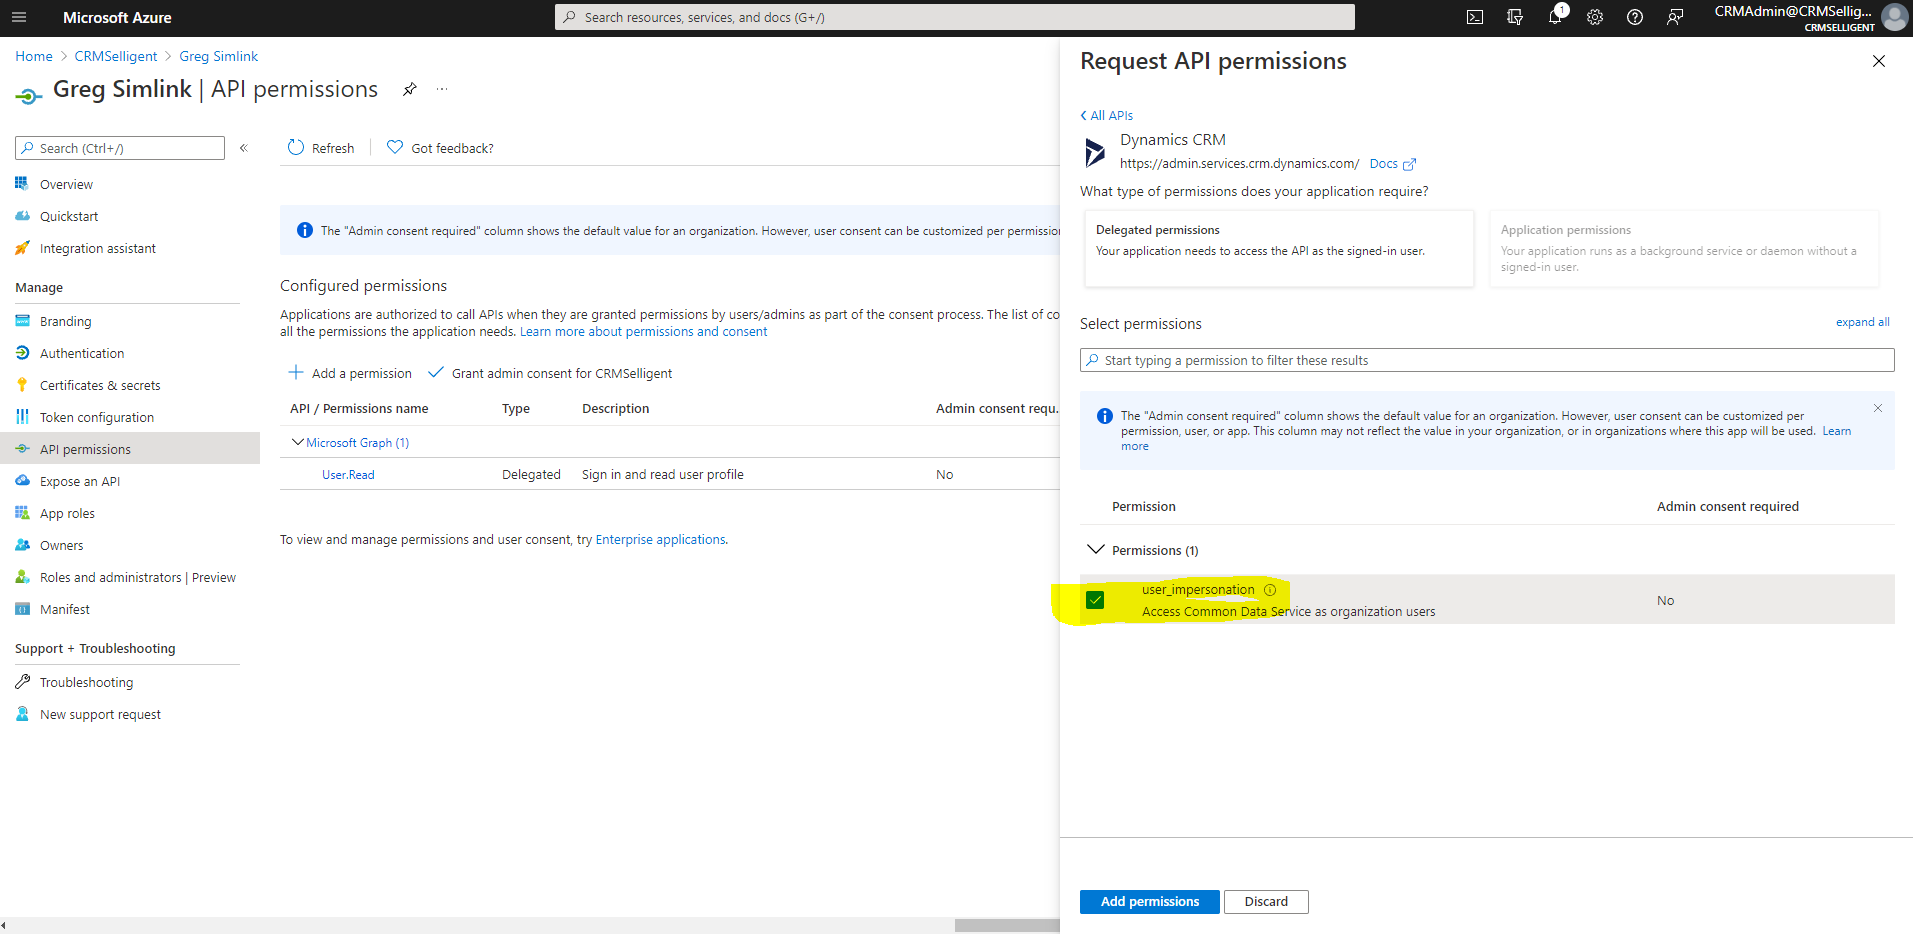
5. Go to Api permissions and click on Add a permission. Choose "Dynamics CRM" and add user_impersonation.
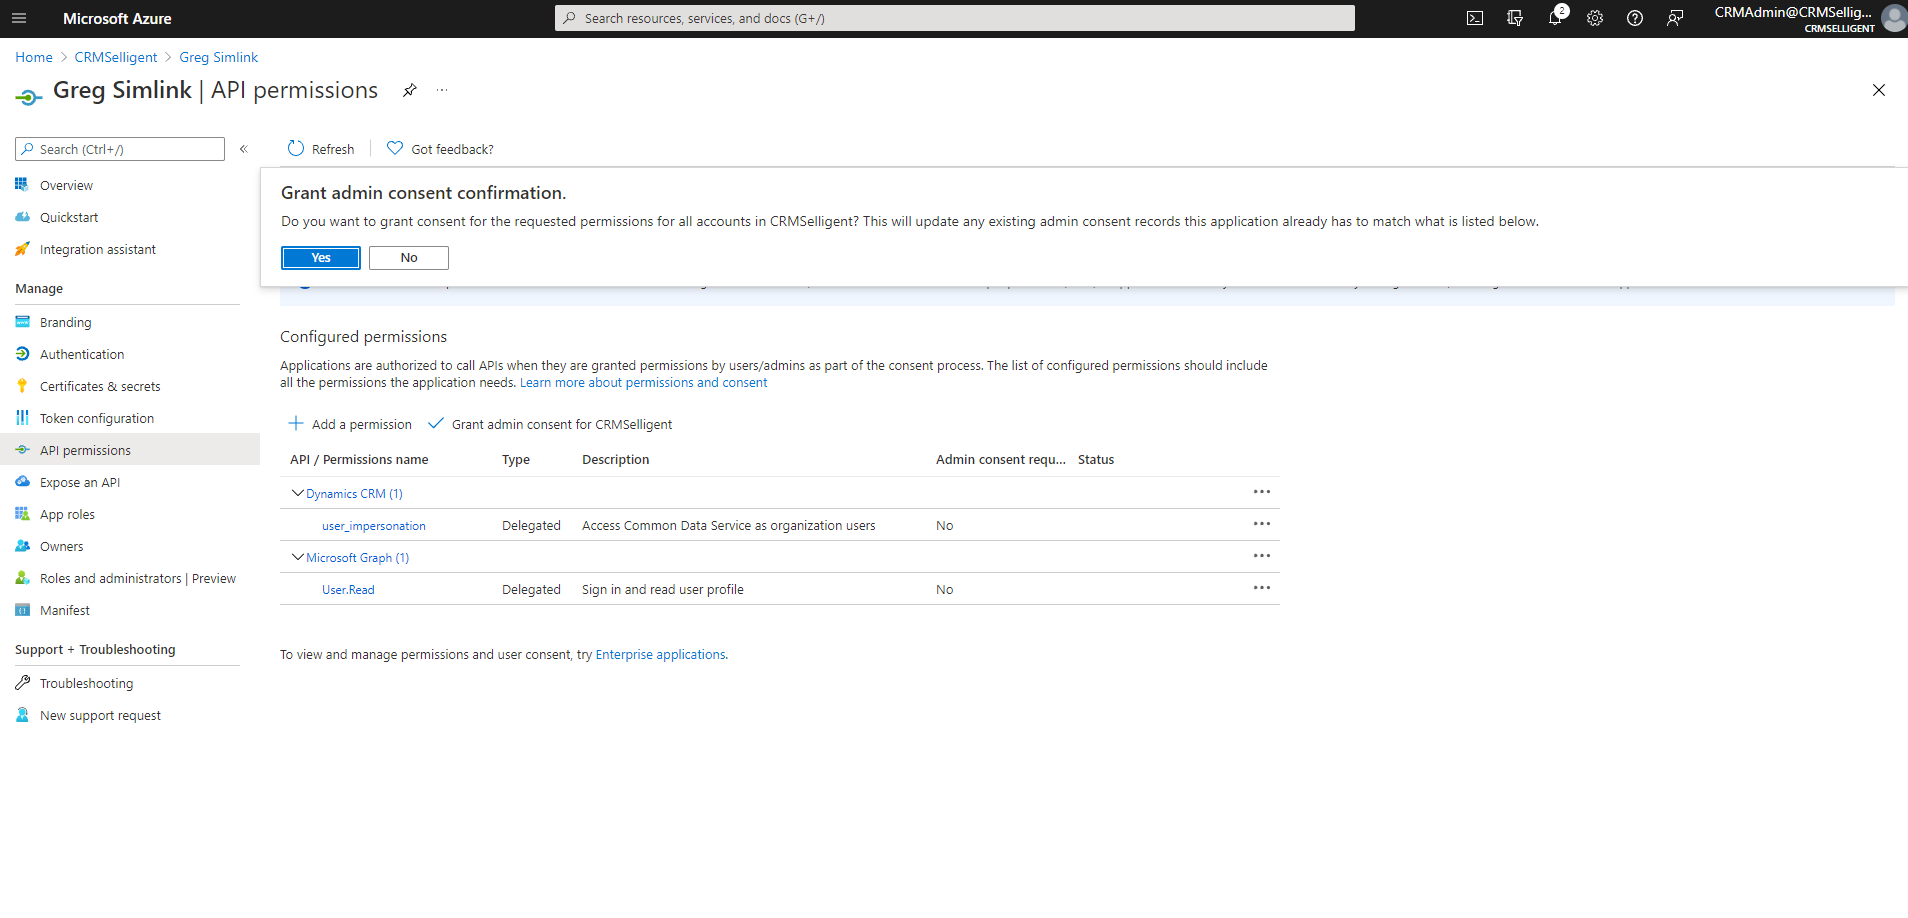
6. Final step: Grand admin consent for your org.
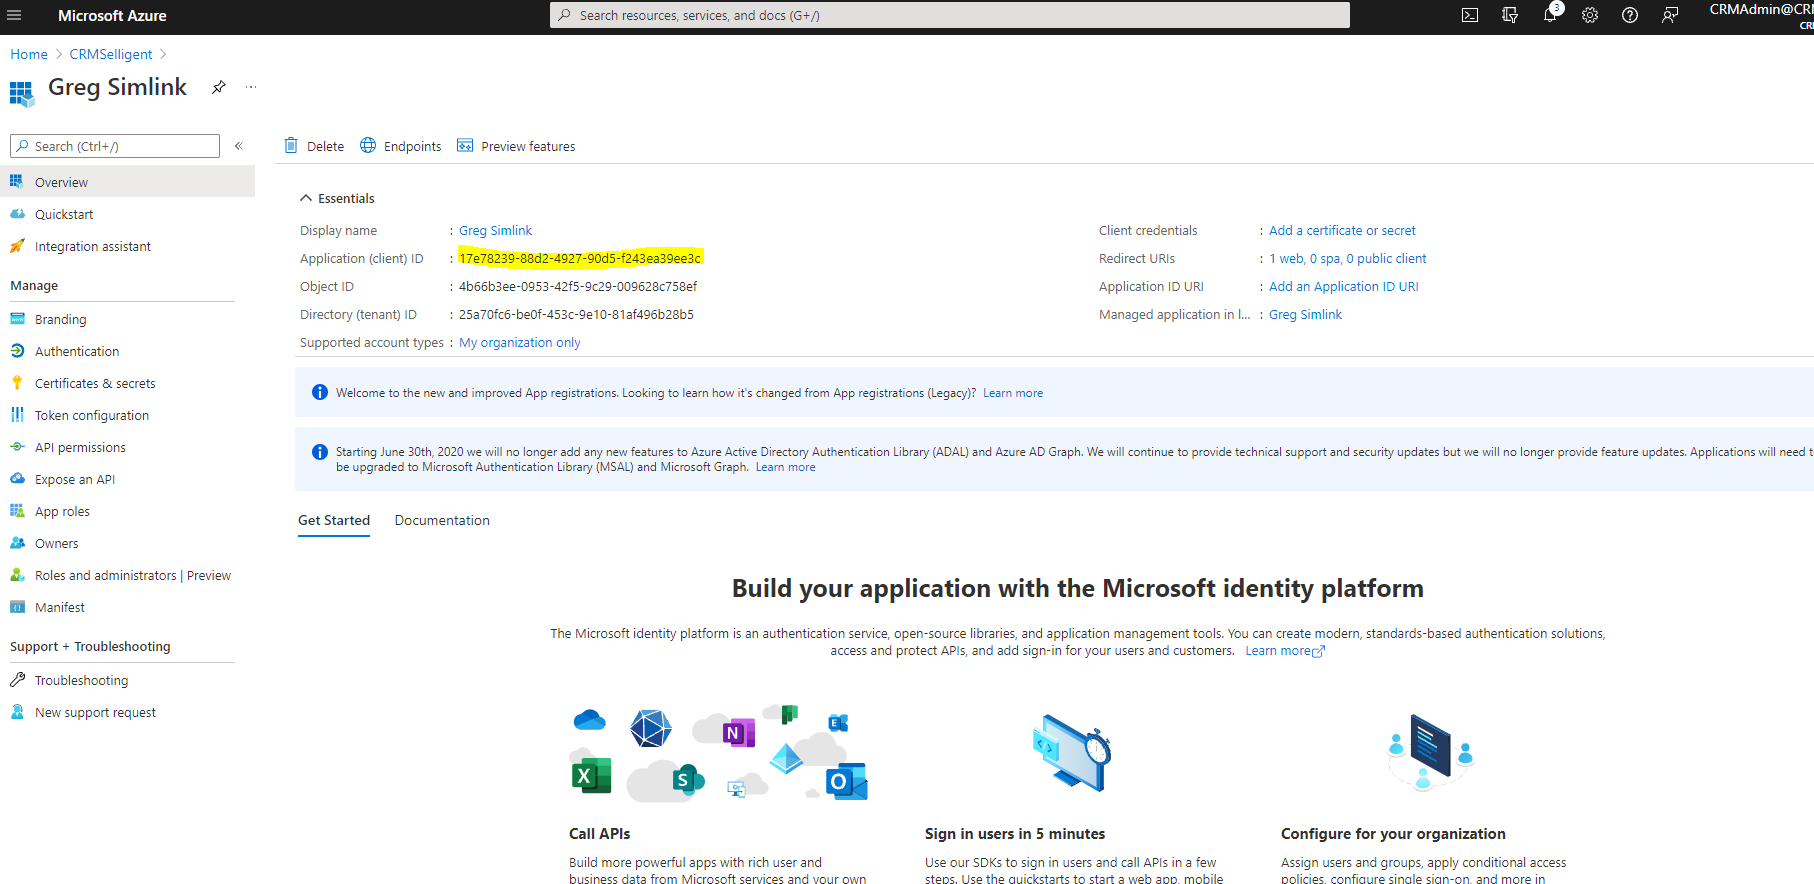
7. In the connection string of the code, we can then use the application id created and the redirect uri "https://localhost ".
Importing the Configuration in CRM
A lot of fields, pages and classes have to be created in the CRM environment to use Engage data in CRM.
All configurations required on the CRM side are stored in a zip file, delivered by Marigold. This simplifies drastically the manipulations required to set up the integration between Engageand CRM.
A first step consists of importing the file in the CRM environment.
1. Connect to the CRM environment.
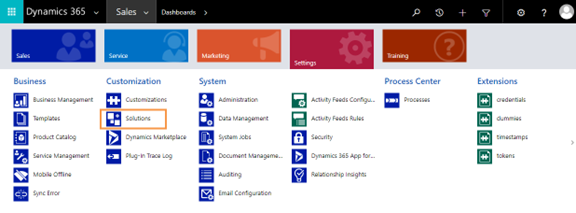
2. Select from the Sales drop down Settings. (Or whatever entry is active at the time)

3. Next, from the Settings drop down, select Solutions:
4. Press Import and search for the location of the zip file SelligentFrontEnd_2_5_managed.zip.

5. Press Next.
6. Information on the imported solution is displayed. Press Next.
7. Tick the option to activate any processes and enable SDK message processing steps. Press Next.
The import process can be followed on screen. When the solution is imported it is listed among the available solutions in the Import dialog.
8. Press Close and return to the CRM environment. The Engage solution is listed.

9. Reload the CRM application before continuing the rest of the configuration (CTRL F5).
Technical note:
When importing the config file, numerous entities are generated. Below is an overview of what exactly is created in MSDynamics:
SIM_credentials: This entity is used to store the credentials to authenticate with the Engage Automationservice.Crm2011FrontEndSolution: This is a plugin for MSDynamics which contains a .NET dll. This dll is used to make server-side requests to the Engage automationservice and to get current timestamp from the MSDynamics install.
Crm2011FrontEndSolution.RetrieveContactPlugin: RetrieveMultiple of sim_dummy: This is the trigger on which the serverside .NET dll will be called to get a new authentication token from the Engage Automationservice.
Crm2011FrontEndSolution.RetrieveContactPlugin: RetrieveMultiple of sim_timestamp: This is the trigger on which the serverside .NET-dll will be called to get the current timestamp from the MSDynamics install.
Sim_dummy: This entity is only used to trigger the retrieval of a new token from the Engage Automationservice.The token is later on used to authenticate the Engage reporting.
SIM Analytics: the main dashboard to display the Engage Reporting
Sim_analytics: a webresource that helps loading the Engagereporting.
Sim_functions: a webresource containing shared functions that are used by sim_analytics and sim_informations
Sim_informations: a webresource used to load the Engage 360-view on the contacts form
Sim_informations_helper: a webresource used by sim_informations
Sim_jquery191: a webresource that contains JQuery 1.9.1 which is used by the other webresources
Sim_setting: a webresource that contains the loglevel for debugging
Site Map : the site Map contains an entry to the Sim Analytics Dashboard
Sim_timestamp: an entity used to trigger the retrieval of the current timestamp of the MSDynamics install. This timestamp is used by the SIMLinkservice to be able to correctly sync data between MSDynamics and Engage
Sim_token: entity used to store tokens (per user) retrieved from the Engage Automationservice.
Synchronizing Marketing Lists With Engage
Synchronization allows synchronizing marketing lists with Engage static segments. In this case the segment of contacts is defined in CRM and synced with Engage where they can be used for marketing journeys.
Note: It would also be possible to have a data sync of the contact list and create the segment in Engage after the synchronization.
Synchronization between CRM marketing lists and Engage Audience Lists can be set up from both sides.
Note: If you create a CRM marketing list that starts with ‘SIMSync_’, all marketing lists answering to this condition will be synchronized with Engage. In that case not further configuration is required. Or you can create a custom field SIMSync in the marketing list. All lists for which this option is flagged are synchronized with Engage as well. This requires some additional configuration but once defined the method is easy to use.
When a CRM marketing list is synchronized with Engage a static segment is created and linked to the audience list for which a data synchronization has been defined with the CRM marketing list.
When a static segment in Engage is synchronized with CRM, a marketing list is created.
Note: Synchronization must be selected in the configuration of the CRM Connector instance.
Note1: A data synchronization must be defined for the marketing list first.
Note2: Execution interval is defined in the properties of the CRM connector interface.
Note3: If the marketing list is removed from CRM, the static segments remains in Engage.
Note4: You can only synchronize contacts or leads, not a mix of both in a CRM marketing list. In Engage these records are stored in different tables.
Defining Marketing List Synchronization in CRM
1. To be able to synchronize CRM marketing lists with Engage, a dedicated field called Synchronize with Engage needs to be added in the CRM environment. This field will allow to yes or no synchronize a marketing list with Engage.
1. Go to Settings/Customization and select Customize the system:
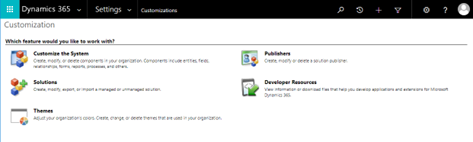
The following is displayed:
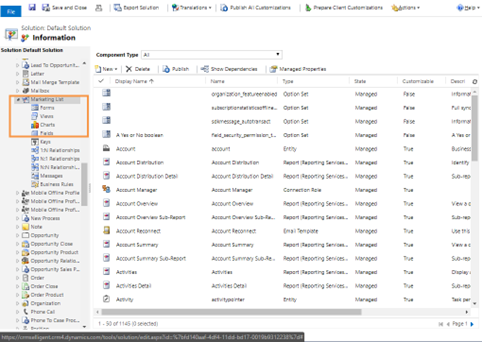
2. In the navigator on the left, expand the folder Components and go to Entities/Marketing list.
3. Select the Fields node.
4. Next, press New in the toolbar.
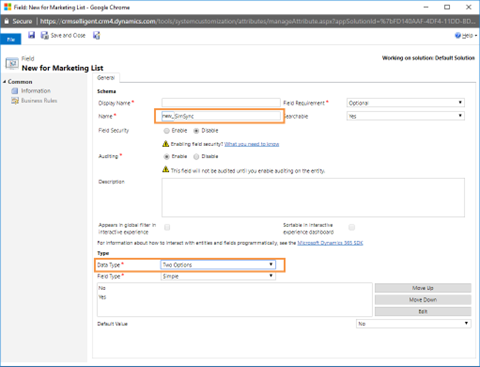
5. In the above window, set the name to new_simsync, enter a display name (for instance Synchronize with Engage) and ensure that the value Two options (Yes or no) is selected for the Type.
Note: Make sure the name ‘new_simsync’ is correctly spelled.
6. Click Save and Close. The next step is to add this field to the main form for marketing lists.
7. Next, select the Forms node in the navigator on the left. The following is displayed:
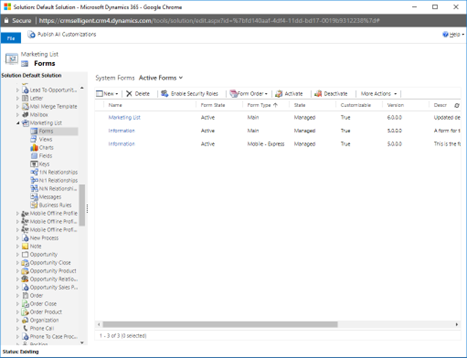
8. Click the item Information with form type Main:
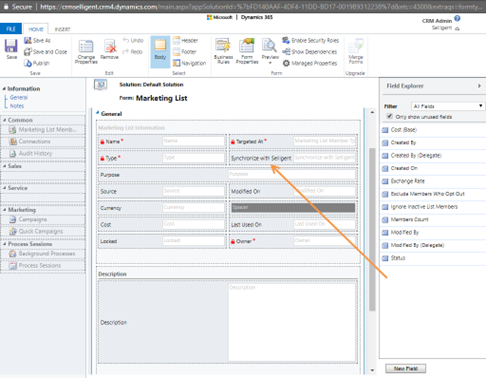
9. From the Field explorer on the right, drag the field Synchronize with Engage onto the form:
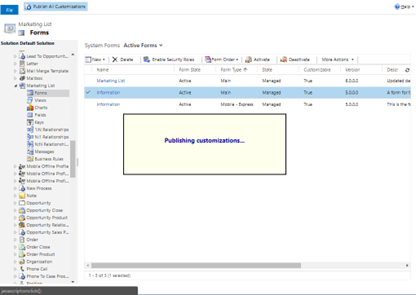
10. Click Save.
11. Next, click Publish:
Now that the field Synchronize with Engage exists in CRM, it is possible to indicate the CRM marketing lists that need to be synchronized with Engage. In this case the Marketing list will be created as a static segment in Engage.
12. To synchronize CRM marketing lists with Engage static segments, do the following:
-
First, add the contacts to the marketing list.
-
Go to the Contacts entry and select the contacts that need to be added to the marketing list.
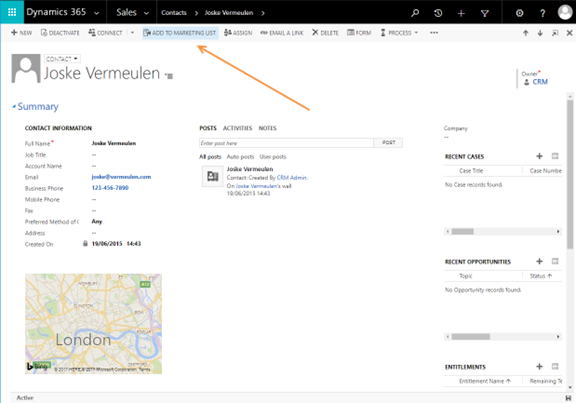
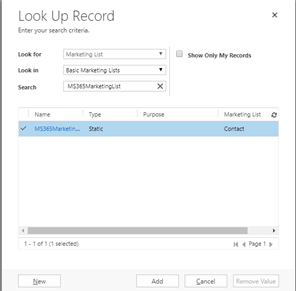
13. Select the option Add to marketing list from the toolbar. The following dialog is displayed:
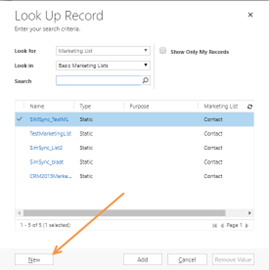
14. Click New.
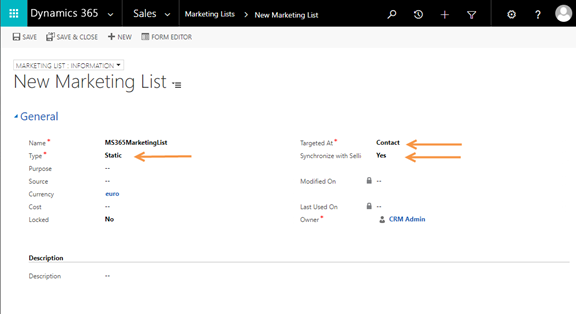
15. Define a name for the marketing list and make sure the option Synchronize with Engage is set to Yes. The type of marketing list must be set to Static. Member type is set to Contact.
Note: You can only synchronize static marketing lists with Engage.
16. Click Save and close. The marketing list is now available:
17. Press the Add button. A confirmation dialog pops up.
18. Press OK.
Note: The marketing list will be created as a static segment, linked to the audience list that is defined and configured to be synchronized with Microsoft Dynamics.
