SimLink Connector And Setup
SIMLink Web Module
The SIMLink web module is the component of CRM connector that is to be installed on the Engage server.
If load balancing is used and several servers are installed, the installation of the web module is required on one server only.
Prerequisites
Following prerequisites must be respected:
- Web server IIS 6 or 7
- The server must have direct access to the Engage database
- .NET framework 4.0 or higher
SimLink Web: Installation
1. Extract the zip file SimLinkWeb.zip to a dedicated folder (example: c:\program files\Marigold\Simlink\SimlinkWeb ).
Two files are copied or extracted to the root folder:
- DataSync.aspx
- Web.config

When extracting the zip file, a folder called ‘bin‘ is created within the root (example: c:\program files\Marigold\Simlink\SimLinkWeb\bin).
The following files are copied or extracted within that folder:
- Optilib20.dll
- Selligent.SimLink.Interfaces.dll
- SimLinkLib.dll
- SimLinkWeb.dll

2. Next, in the IIS (Internet Information Services) manager, create a virtual directory with an application. Call it SimLinkWeb.

The physical path must point to the location where the datasync.aspx file is stored.
3. Once the virtual directory is created, convert it to an application (this is done to make sure that the process runs in a dedicated process and not within the IIS process itself): Right click the virtual directory and select Convert to application from the menu.

4. Press OK in the dialog. At this point the application is linked to the default application pool.
However it is recommended to create a dedicated application pool.
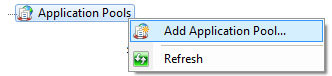
5. Right click the Application Pools entry and select Add Application Pool from the pop-up menu.
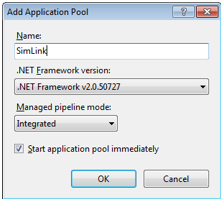
6. Enter a name in the following dialog and press OK:
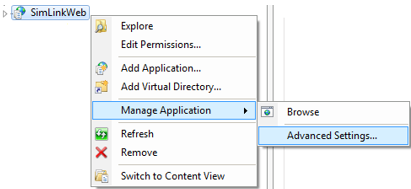
7. Link the above application pool to the application SimLinkWeb, created earlier. To do so, right click the application SimLinkWeb and select Manage Application/Advanced Settings from the menu.
8. In the following dialog, select the Application Pool created earlier:

Note: After this configuration, the page should be available in the browser. However, as the page is expecting parameters to be passed, an error is displayed. This is perfectly normal.
SimLink Web: Configuration
Within the root folder, you’ll find the configuration file: Web.config
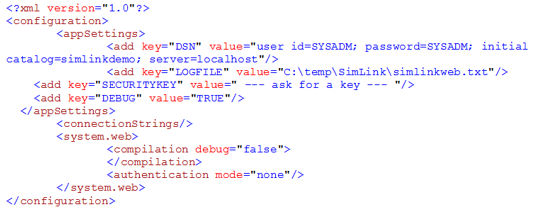
This file contains all parameters for the SimLink web module. These parameters are stored within the <appSettings> tag:
-
The connection string to the Engage database: This comprises the user ID, password, the server name and the name of the Engage database.
-
The security key to use: This key is to be requested and is used to secure communication and access to the page. A security key will also be defined for the SIMLink service later on, related to the security key in this Web config file.
-
The log file to generate: This is the complete path and name of the log file that will be generated.
-
The debug option: By default debug is set to false. When it’s set to true, additional debugging information is stored in the log files.
Installing SimLink Service
The SimLink service is an NT service that needs to be installed and configured on the application server of Engage when the CRM environment is accessible from the outside (online), or when the CRM system is on the same environment as Engage and can communicate.
If the CRM system is not accessible from Engage (because it’s not on the same environment for instance), the Simlink service is installed on the CRM server. In this case, Simlink Web is required on the Engage side.
Its job is to do the following:
-
ask if records are changed in the CRM system and send in-Engage-changed records to the CRM system (data synchronization).
-
ask if there are CRM selections (called e.g. ‘Marketing Lists’ in MS Dynamics) for which static segments need to be created in Engage and vice versa (campaign synchronization).
-
send commands to create new objects (new opportunity, etc.) (messaging) and ask if there are changes on earlier, in-Engage-created objects (messaging feedback).
The SIMLink service handles when to synchronize, what records should be synced, etc. The connector DLL, which comes with the service, handles how to connect to the CRM system and is specific for each CRM system.
Prerequisites
The following prerequisites are required:
- .Net Framework 4 (the most recent version is advised)
- CRM connector
- Latest version of Engage and Automation API
Installation
1. Extract the SIMLink Connector service zip file to a dedicated folder. The following files are listed:

2. Create an Instance.ini file which contains the name of the SimLink service instance.
3. The SimLinkService must be installed. To do so, launch the command prompt in admin mode and go to the folder where the SimlinkService.exe file is saved.
4. Type the following command:
SimLinkService –i
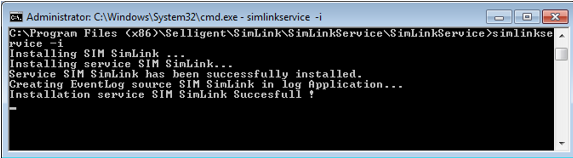
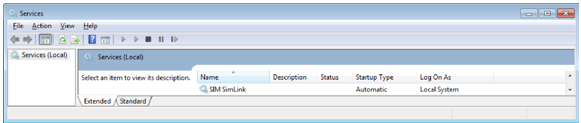
The service is now available from the Service control manager:
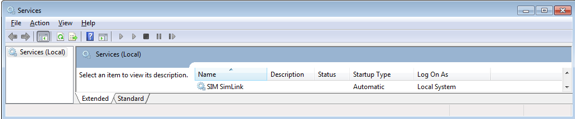
Note: Do not start the service now. First the connector needs to be installed.
Also, there can only be one SIMLink service active at a time per installation. However, multiple instances can be created, but they will all be executed by the same SIMLink service.
Configuration
Within the folder where SimLinkService.exe is present, the file SimLinkService.exe.config contains the configuration of the service.

The following parameters must be defined within the <appSettings> tag:
-
URL: The complete URL to the web module and the datasync.aspx page.
-
Logfile: The location and name of the log file that will be generated.
-
Security key: This security key must be requested and is used to secure the communication and the access to the page. The same security key is defined in the configuration file for the SimLink web module.
-
Communication:
-
The value ‘DIRECT’ indicates that no SimLinkWeb is required. The parameters “URL” and “security key” are ignored in that case. A direct access to the CRM database is possible.
-
The value ‘WEB’ indicates a communication using SimLinkWeb. This is when the Simlink service cannot access the CRM’s web API from the outside. Then, the Simlink service is installed on the CRM server, and the service requests Engages ‘SimLinkWeb’ API what should be done: when syncs should occur (which interval), if records need updates, etc.
-
Batch Size and Interval
The number of records you can transfer to create, update, etc. depends on the combination of the possible batch sizes per call (e.g. 500 records) and the calls per time interval (e.g. 10 minutes).
The amount of calls and the allowed batch size influences the speed.
For example : if you only use a data sync to update 10000 records, and you do a call every minute with a batch of 500 records, it will take 20 minutes to do the transfer.
Batch size for data synchronization and messaging are defined in the Advanced tab of a “CRM Data Synchronization” blade in Engage.
Installing the CRM Connectors
The CRM Connector has been designed to work with different plugin connectors. This allows Engagecommunication with multiple CRM applications.
The following section explains the installation of the different CRM connectors.
Note that a connector is an absolute requirement for the SimLinkService to work.
Prerequisites
The following prerequisites must be installed:
- .Net framework 4.0 or higher
- The SimLinkService
Installation
The installation of the connector is performed in one single step, and depending on the type of CRM Connector:
-
Microsoft Dynamics: The file ‘MicrosoftDynamicsConnector.dll’ must be copied in a subdirectory ‘Module’ of the SIMLinkService folder.
-
Salesforce: The file ‘SalesforceConnector.dll’ must be copied in a subdirectory ‘Module’ of the SIMLinkService folder.
-
SugarCRM: The file ‘SugarCRMConnector.dll’ must be copied in a subdirectory ‘Module’ of the SIMLinkService folder.
Start the simlink Service
Once the connector is installed, the SimLink service may be started.
Note: The SimLink service needs to be restarted when a new CRM connector is configured in Engage.
Note 2: Keep the SimLink service running. If you stop the service for a longer period of time and restart if afterwards, all non-treated feedback and syncs will get executed at restart and this might take a lot of time.
Plugin Setup
In order to connect and use the CRM Connector in Engage, a plugin interface needs to be setup (this can be done through Engage).
Note : Get in touch with your Marigold contact for the setup of this plugin.
Verifying the Log Files
When the SIMLink service is started, a trace file is created, with detailed information on the actions performed by the service.
The location of this log file is defined during the installation procedure, in the SimLinkService.exe.config file. The name of the log file incorporates the date.
You can check the log file for errors during synchronisation.
