Highlights in Engage
November 2023
Versions 5.52 - 5.54
Asset Labeling 
BACKGROUND:
When running marketing campaigns, a lot of different assets are required, ranging from emails, pages, SMS, to Content Blocks, imports , Audience Lists, Dictionaries and Journeys. Having all these assets in a non-structured way might clutter your view and have you end up with a wide range of tags defeating the goal of structuring and managing your assets in a structured way. Also, tags are currently not included in generic exports (for example for external reporting) or reporting within Engage.
SOLUTION:
To manage tagging of assets in a structured way and to be able to use them for external and internal reporting, asset labels have been introduced. Asset labels are a managed list of labels, and by assigning one or more labels to an asset, it is possible to group these assets in a logical way and generate better insights across multiple campaigns. Labels are supported in the following assets: lists, Custom events, segments, content, journeys, every element in the Data Exchange chapter, Content Blocks, and Cadence plans .
Note: Asset labels replace the current Search Tag system and a migration is required . The Asset Labels feature needs to be activated on request.
So how are labels different from Search Tags? Tags are free text fields, where asset labels are a managed list of values from which the user needs to choose. As a result, the labels can be used in generic exports and, at a later stage, for reporting in Data Studio.
What does this feature look like in Engage:
Asset labels are subject to permissions. Depending on the assigned Access permission, you are able to create new assets, in the Admin configuration or directly in the asset properties:

Users with Read-only permission can only view the labels in the Admin Configuration. Note however that every user, regardless of their permissions will be able to assign labels to assets, If they have access to that asset.
In the Admin Configuration, Asset labels can be managed. New ones can be created and existing ones can be merged if necessary. When labels are merged, all assets linked to the old label are transferred to the new label.
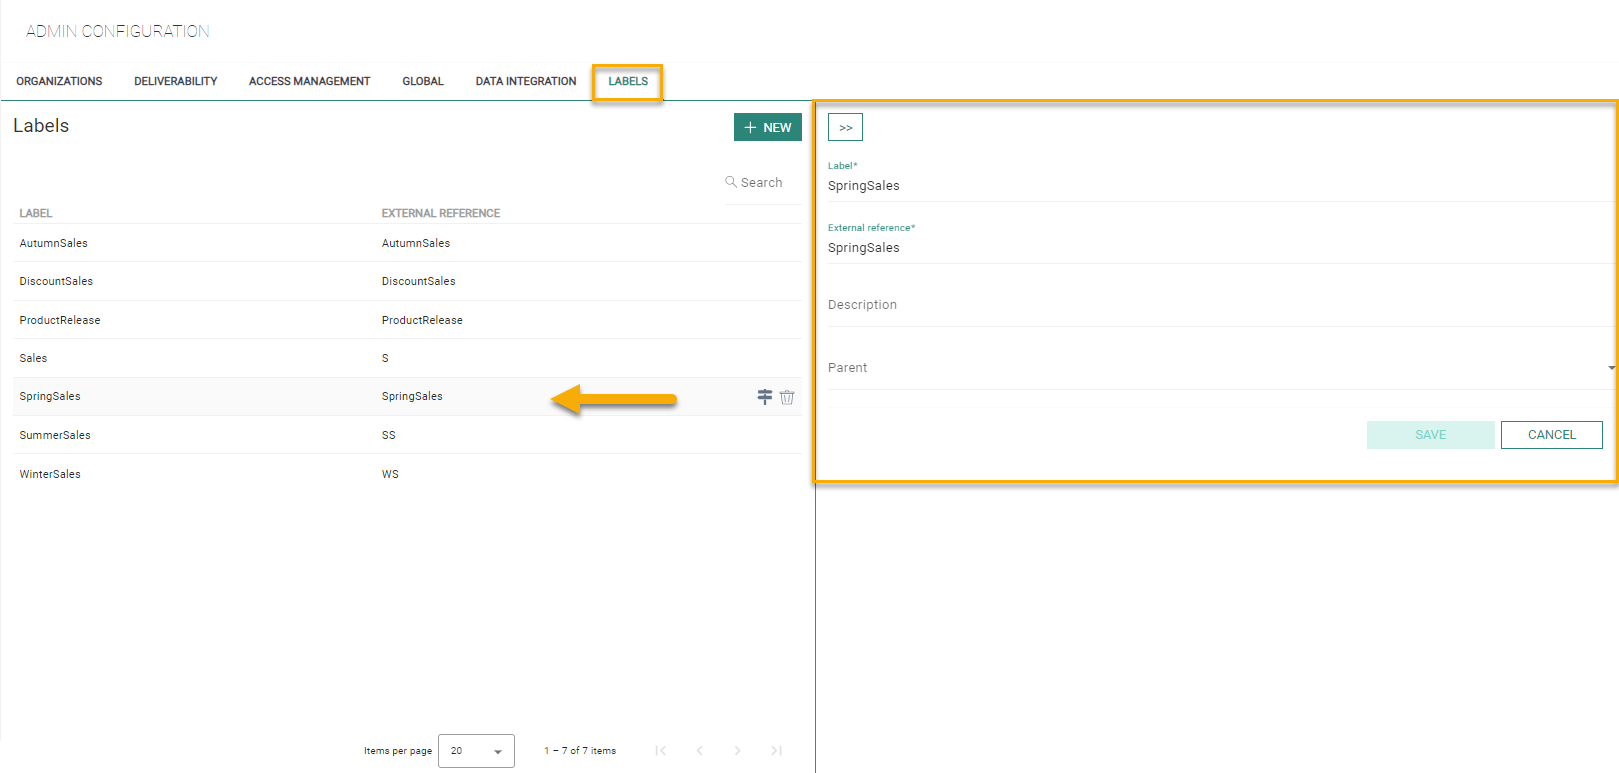
Labels can also be assigned a parent label. For example, the parent label 'Sales' is assigned to the label 'Summer Sales'. This is especially interesting for reporting as it allows for more detailed reports on specific labels as well as grouped reports.
The label value is what users will see and use in the Engage platform. The External Reference is for your use and can be the same as the label value. However, you can freely change it to easily manage any internal references you are using.
Labels are assigned to an asset directly from within the properties of the asset. Take for example an email message.
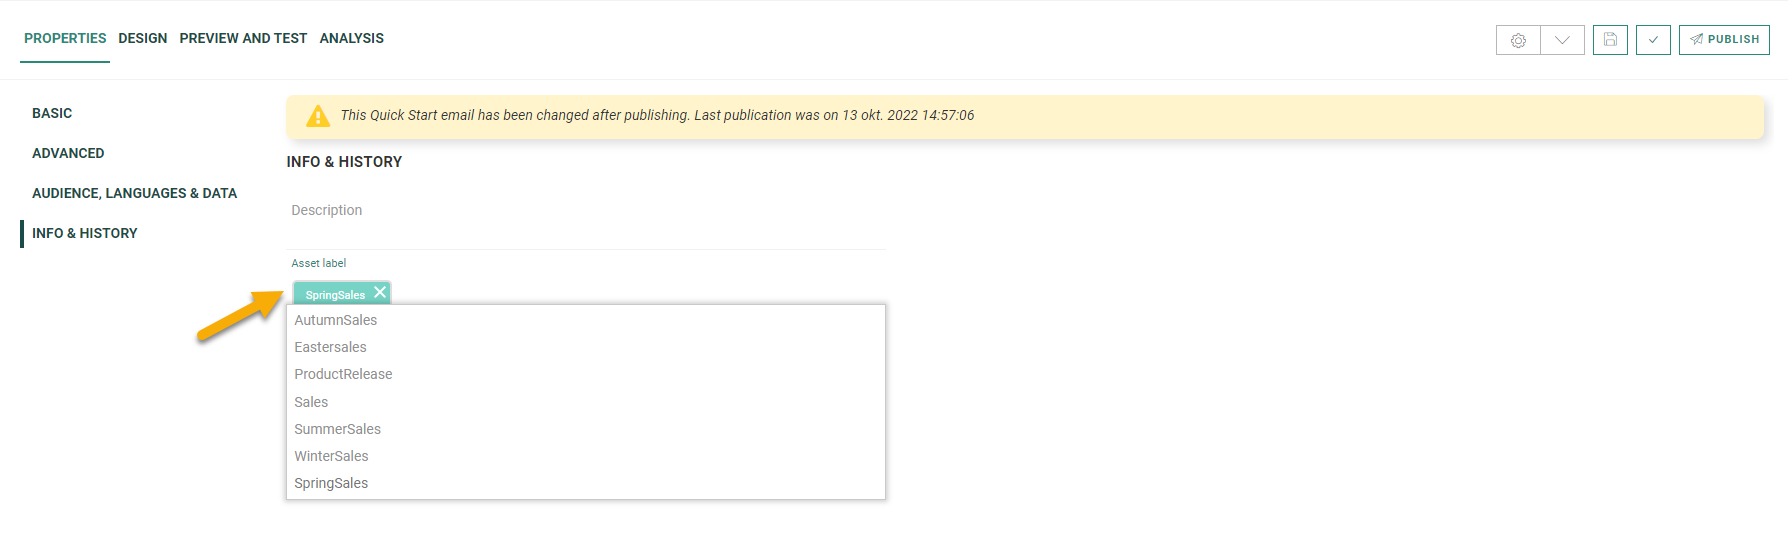
Users with the necessary access permissions have the ability to create new labels directly from within the asset. In the 'Labels' field of the asset, enter the new label and next click outside of the field. A message pops up indicating no such label exists and asking the user how to proceed:
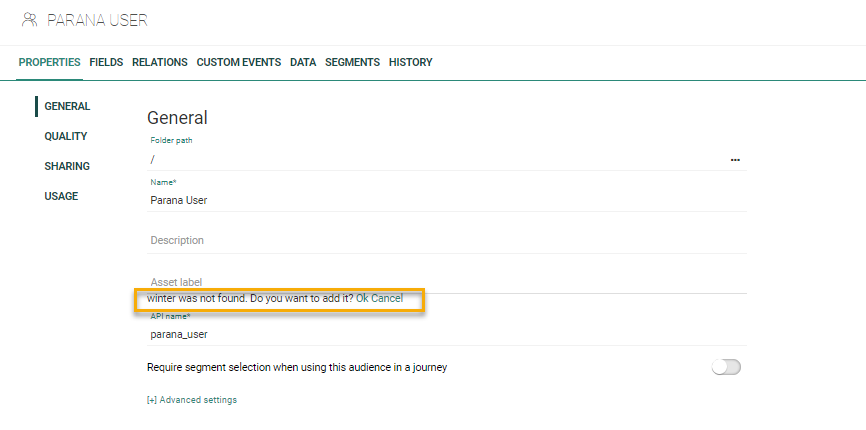
The user can choose between adding the new label to the list, or canceling the action. In case the user chooses 'ok', the label is automatically assigned to the asset.
Note: Saving the asset with the new label is a mandatory step for the new label to be added to the list of labels available for others to use. Once the asset is saved, check the Admin Tool for this new label.
Venn Diagrams in Data Studio
BACKGROUND:
One-dimensional diagrams, such as bar charts, provide a view on the numbers per individual category, but do not provide insights on intersections between these categories.
SOLUTION:
Venn Diagrams allow marketers to compare multiple overlapping data sets in order to view the relationship between them. This is a great feature for identifying loyal customers, or to identify those that you may wish to understand the characteristics of, to drive lookalike targeting.
Example :
Identification of user groups:
When looking at transactional data and making a VENN-circle per sales year, it enables you to identify interesting user groups.
- Clients that only bought during the most recent year are new clients
- Clients that both in previous years, but not in the last year are churned clients
- Clients that both in 3 subsequent years are loyal clients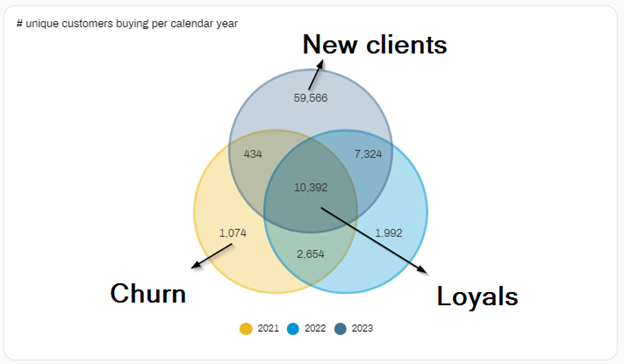
Native MMS Support
Note: This feature needs to be activated on demand and is available for US clients only.
BACKGROUND:
SMS messages are often used to confirm appointments, purchase orders, delivery status and more. However, SMS messages are limited in length and do not allow for media files to be attached.
SOLUTION:
MMS or Multimedia Messaging Service allows MMS users to send multimedia content, such as images, audio, phone contacts and video files. MMS messages in Engage have a character limit of 1600.
What does this feature look like in Engage:
MMS messages are added as a new type of content that can be created from the Content chapter:
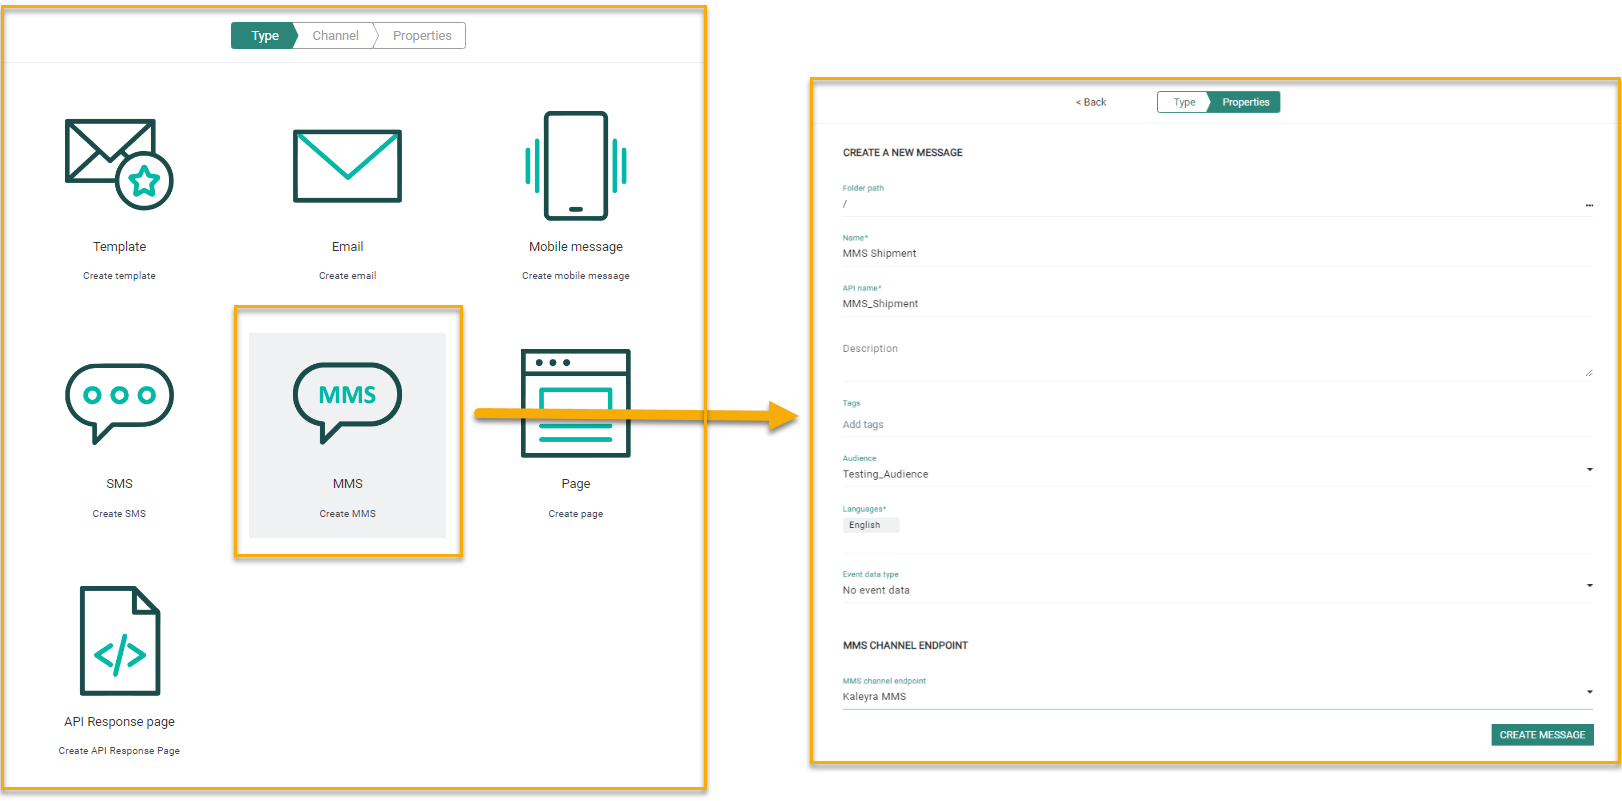
In the MMS message, you can define the type of media to be added to the message, in this case an image:

Note: Expressions and personalizations (through the Personalization Dialog) can be used in both the MMS content, and in the Media URL.
An MMS Component is now available in Custom Journeys to add the MMS to your marketing journey:

Content AI Assistant
BACKGROUND:
Writing up a text from scratch is sometimes time consuming and can be a blocker to move forward fast. It also requires a lot of effort to generate and review text, free of spelling and grammar errors.
SOLUTION:
AI for text is now available in Engage, generating content adapted to the context of your message. It is available on request, for emails, pages, mobile messages and SMS/MMS. The generated text is adapted to the type of message that you are sending out.
Note: The Content Assistant feature is an early access feature, activated on request only and a contract addendum for usage needs to signed.
What does this feature look like in Engage:
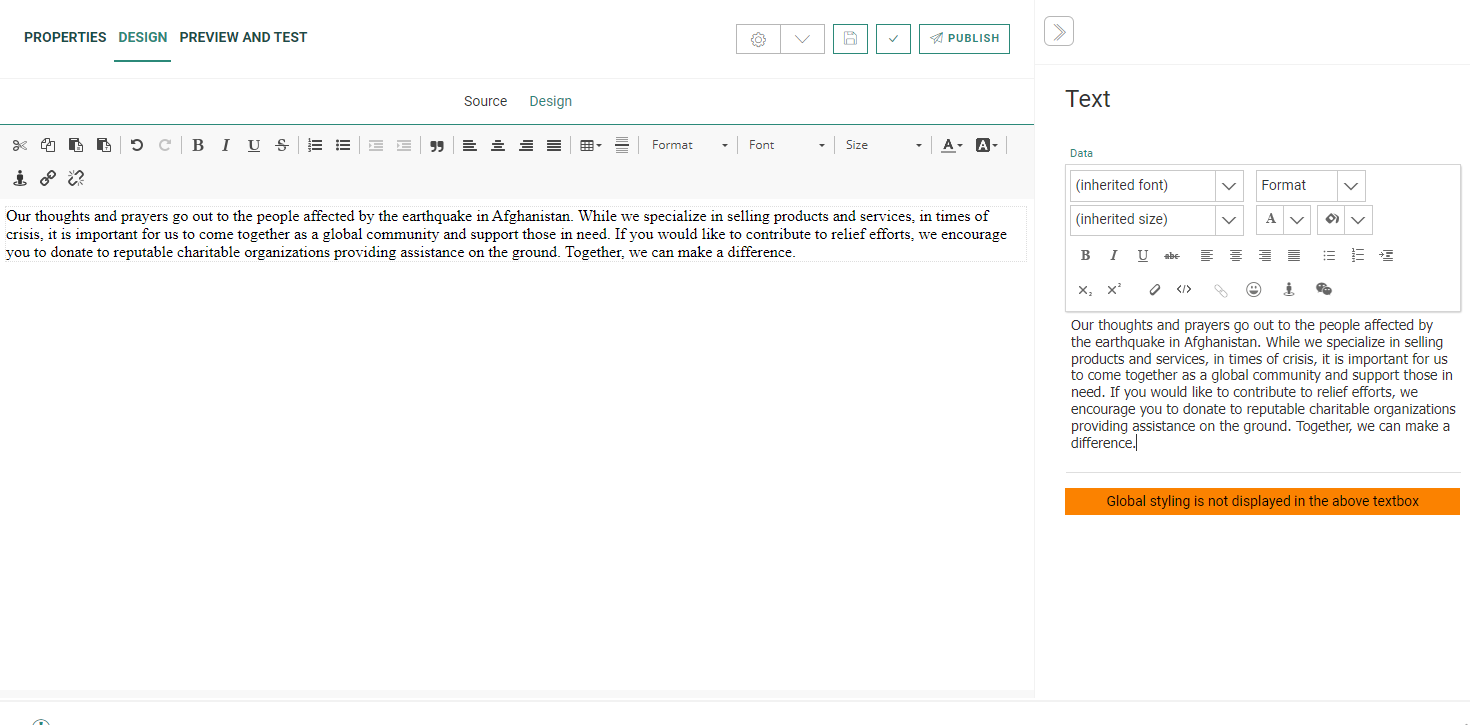
When adding a Text component to an email message, a new icon is now available from the toolbar: Generate text with AI:
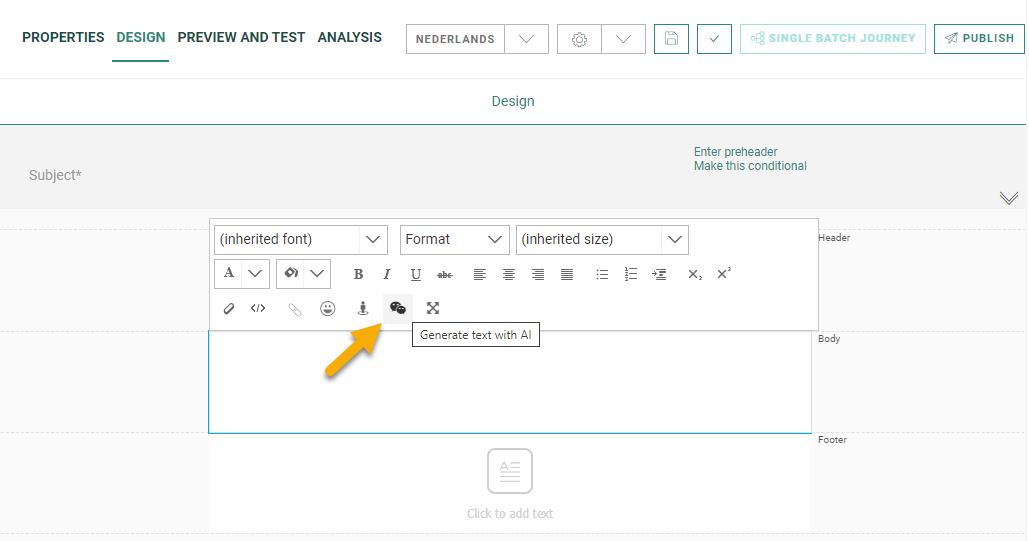
A dialog pops up where you can enter some keywords or a question. Click the arrow to display the AI generated result:

The generated text is adapted to the email format, with a header and footer. If you agree to use this content, click OK and the generated text is copied to your message.

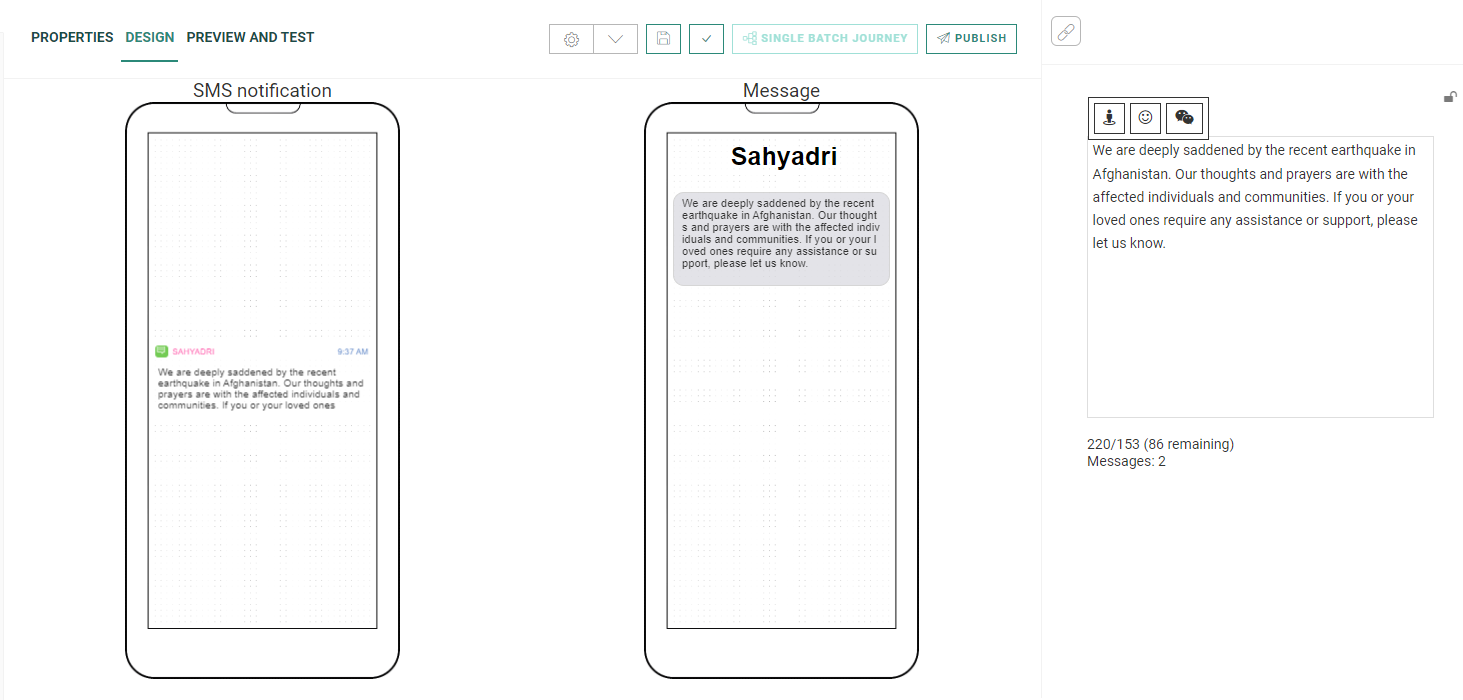
For SMS, this looks like following:
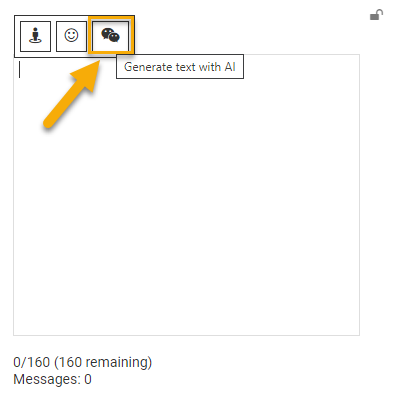
After entering your question, the result is returned, creating a shorter version of the AI generated text message intended for SMS:

Click Ok to use this text in your message. This results in the following to be added to the SMS:
In Pages, the result of the AI generated text is again adapted to the format of a page:

This result in the following text to be added to the page:
Audience Insights In Custom Journeys
BACKGROUND:
When contacts travel through the different paths or steps of a journey, it is interesting to know which contacts are in what specific path of the journey.
SOLUTION:
Now, marketers can get a proper view on how the audience is distributed and what contacts are in a specific path of the journey. A Data tab and Insights tab provide the marketer with this information. Note that these tabs are available for the Audience Filter and Rule Based Split component and the events coming out of these components, as well as message components such as email, SMS and mobile message .
Note: Access to the information in the Data tab is subject to a privacy permission, allowing only certain users access to this information. This permission is managed from the admin section.
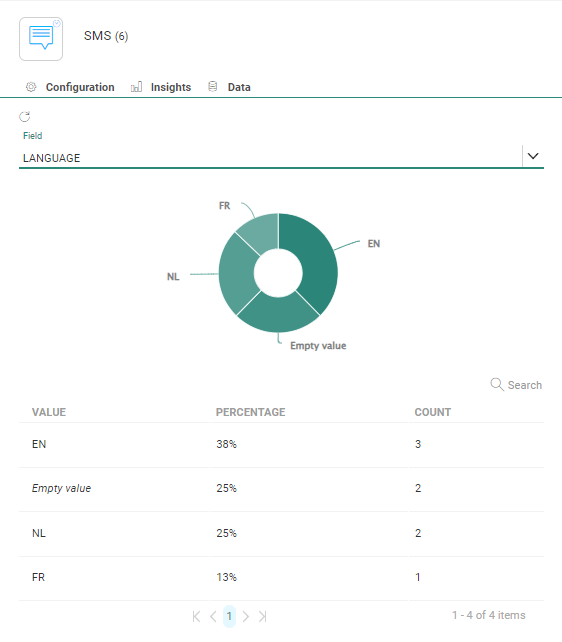
What does this feature look like in Engage:
In the Properties panel of the component, a Data tab provides the marketer with a list of contacts that are currently in a specific step of the journey. A limited set of fields are shown by default but the marketer can dive deeper into the data via a More button and add additional fields to the overview.

An Insights tab provides the marketer with insights on how the contacts are distributed in a specific step. Any field in the Audience List can be used to set the conditions for the distribution stats. A count as well as a percentage of the distribution are provided in addition to a diagram.