Action containers are used in 'action emails', which are sometimes in marketing referred to as "triggered" mails. Each time the contact does something (action), an email needs to be sent. For example, the contact orders an item, abandons their basket, doesn't pay their invoice on time, these would be triggers to send an email.
A journey can send an email each time the contact has a new record in the Action list. This means that the contact can be targeted multiple times within a single journey. With an Action container, data from the Action list record can be used to personalize the email. For example, you could use an action container to read from an Action list the products the user bought and then send them an order confirmation email. Or you could use an Action list to find and display the items still in their basket, and then send an abandoned basket reminder email.
A field in the action list contains this content that must be presented in the action container. It has to be stored in a structured way in the action list field as a JSON or XML format. Using the action container in the action mail, we can define a layout for each item in the JSON string. The default structure of the JSON string is the following:
[{"ID":1,"PARAM":"ACTIONCONTAINERNAME","CONTENT":{"FIELD1":"Content for field 1","FIELD2":"Content for field 2"}},{"ID":2,"PARAM":"ACTIONCONTAINERNAME","CONTENT":{"FIELD1":"Content for field 1","FIELD2":"Content for field 2"}}]
You can use an online JSON parser, like http://json.parser.online.fr/,
to parse the JSON string:
[ { "ID":1,
"PARAM":"ACTIONCONTAINERNAME",
"CONTENT":{
"FIELD1":"Content
for field 1",
"FIELD2":"Content
for field 2" } },
{ "ID":2,
"PARAM":"ACTIONCONTAINERNAME",
"CONTENT":{
"FIELD1":"Content
for field 1",
"FIELD2":"Content
for field 2"
} } ]
Alternatively, you can use an XML string:
<PARAMETERS>
<PARAMETER NAME="ACTIONCONTAINERNAME">
<ARTICLES>
<ARTICLE ID="1">
<FIELD1><![CDATA[Content for field
1]]></FIELD1>
<FIELD2><![CDATA[Content for field
1]]></FIELD2>
</ARTICLE>
<ARTICLE ID="2">
<FIELD1><![CDATA[Content for field
1]]></FIELD1>
<FIELD2><![CDATA[Content for field
1]]></FIELD2>
</ARTICLE>
</ARTICLES>
</PARAMETER>
</PARAMETERS>
Check out the technical note for more details on this action list.
NOTE: Action containers cannot be used in Express templates nor pages. They can only be used in action emails.
Technical
Note: Whenever an email is
sent from an action list it loads the articles for its action containers
from a field in the action list record. Action containers do not cache
their articles for re-use like standard containers do. The articles are
always loaded from the action list item.
Because the action list item is part of the user profile (see note below)
there’s no real impact on the performance of the mail agent when using
action containers. There is just a look-up of a user profile field that
is already loaded in memory at that time.
Creating the action container
1. First an email needs to be created (or edited) in which an action container can be used. In the properties of the email you need to select the audience list you are going to use in the journey and where the action list is linked to (1-N).
2. Drag and drop the 'Action container' component from the Dynamic components section to the right onto the email. Automatically the properties dialog is displayed:
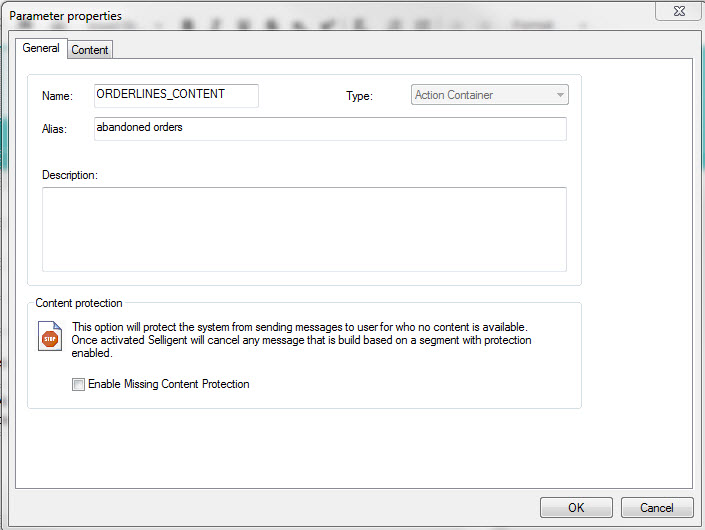
General:
Define aname, descriptionand analias.
NOTE: The name used in here for the container has to be the same as the one used in the XML (<PARAMETER NAME="ACTIONCONTAINERNAME">) or JSON code ("PARAM":"ACTIONCONTAINERNAME") stored in the action list.
TheTypefield is filled out automatically based on the selected component.
TheContent protection sectionis used to indicate if the email can be sent out or not in case content is missing. ((default for an article container, not needed for action containers).
Content:
Select the action list that must be used to provide articles for this container. A drop down list is available to choose from.
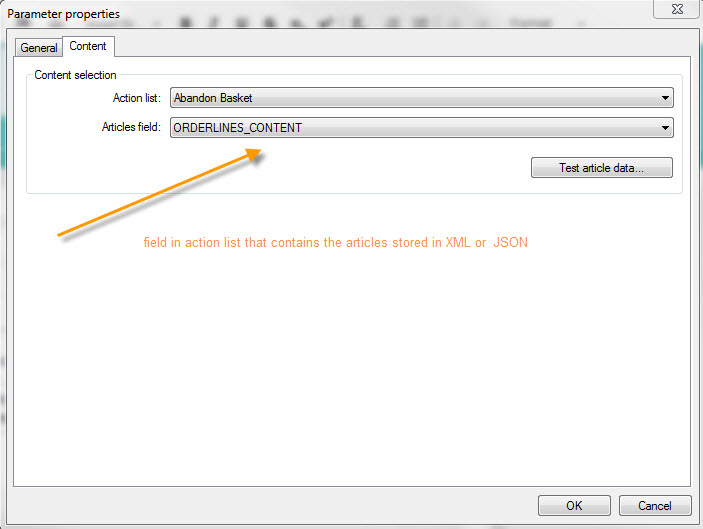
NOTE: only action lists linked to the Audience list are listed. If no action list is shown, you need to select the user audience list where the action list is linked to (1-N).
Next, select the field in the action list that contains the JSON or XML string.
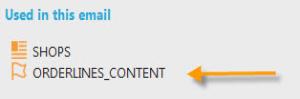
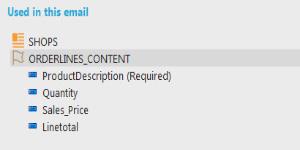
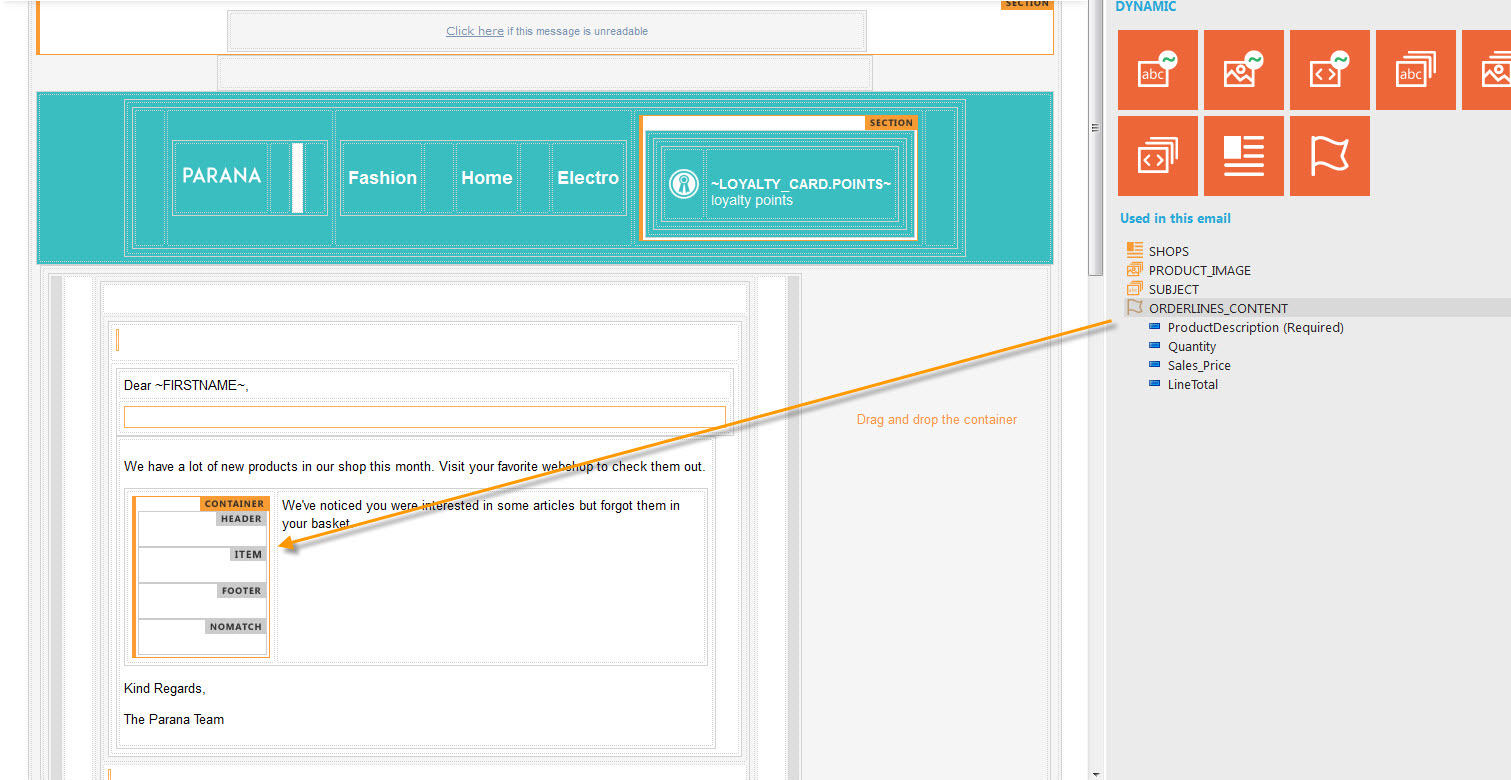
When the properties are set, the Action container is added to the section 'Used in this email':
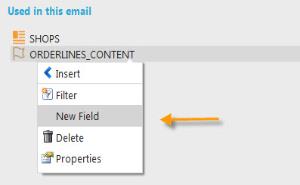
Adding fields to the action container
When an action container has been created, it is automatically listed under the 'Used in this email section. But the action container does not have any fields in it yet. So the next step is to create these fields in the container. These fields must correspond to the fields used in the JSON or XML.
NOTE: the fields can be generated automatically in the action container when testing the JSON (explained in the next step)
Example in the action list 'Abandon basket'
[
{"ID":1,"PARAM":"ORDERLINES_CONTENT","CONTENT":{"ProductDescription":"Notebook","Quantity":2,"Sales_Price":699.99,"LineTotal":1399.98}},
{"ID":2,"PARAM":"ORDERLINES_CONTENT","CONTENT":{"ProductDescription":"USB Stick","Quantity":5,"Sales_Price":14.99,"LineTotal":74.95}}
]
To add a field to the container, right click the container and select 'New field'.
The fields added are as follows:
If the field is set as required and information is missing for that field, an alert is returned indicating a bad template.
Testing the action container
Once the action container is created and the action container fields have been defined, it is possible to test the data provided in the action list. Under the 'Content' tab in the article container properties, click 'Test article data...'. The following dialog pops up.
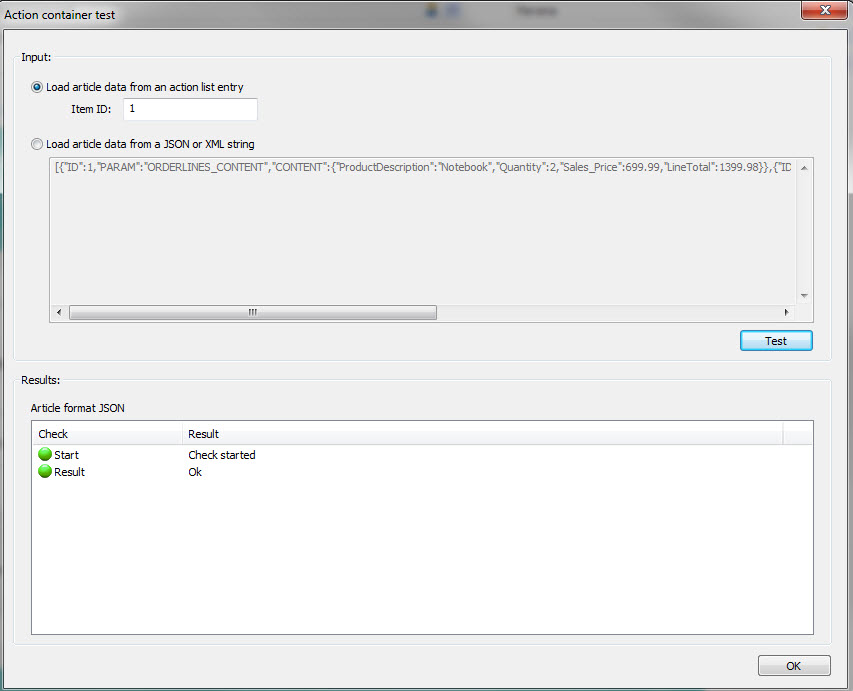
There are two ways to test the data:
- Enter the ID of a record in the action list: the system will load the article data from this record.
- Enter JSON or XML formatted article data directly in the provided text field
The test checks if the XML or JSON code is correct, if all article IDs are present and valid, if the articles have parameters names and if there are indeed articles in the record. Within the articles, a check is made for mandatory information and if all fields are present.
A button 'Create missing fields from article' allows generating automatically the fields in the action container instead of creating them manually (as explained in the previous step)
When the test passes, the data can be considered as valid.
Placing the action container in the email and adding fields
If you have not dragged and dropped an action container component on the message. you can add the article container to the message by right-clicking the container in the components panel and select '+ Insert'
When the article container is added to the message, it looks like this:

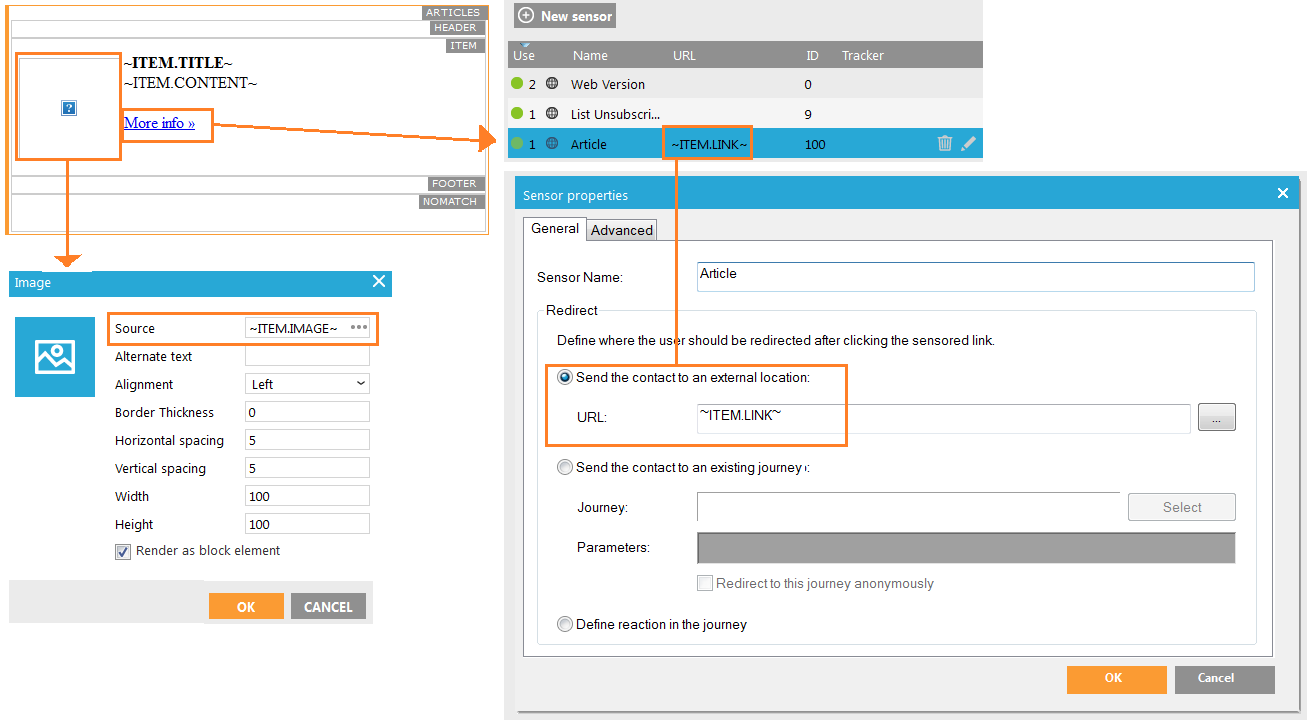
1. Header: is shown once, above all articles. this is not mandatory
2 Item: this section will contain the actual articles. It will be repeated for each section and is mandatory
3. Footer: is shown once, below the articles. This is not mandatory
4. NoMatch (default for an article container, not needed for action containers).
Source
code: maparameter holds the article container name
<div id="MACONTAINER" maconstraint="" macontenteditable="FALSE"
maparameter="ORDERLINES_CONTENT" matype="">
<div id="MAHEADER" macontenteditable="true"></div>
<div id="MAITEM" macontenteditable="true"></div>
<div id="MAFOOTER" macontenteditable="true"></div>
<div id="MANOMATCH" macontenteditable="true"></div>
</div>
The 'Item' (MAITEM) section will hold the layout for each article. The article fields act as placeholders for the article content (article title, text, image, link, etc.). Use the scope ITEM to refer to these article container fields. In the image below the layout is set with an image on the left, the title in bold, etc. All article container fieldsmust be placed within the 'Item' section (MAITEM). To add fields to the container drag and drop the fields into the section. You can also add fields manually, by using the Item scope. Example ~ITEM.TITLE~
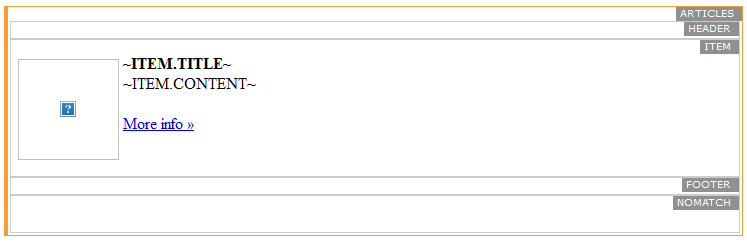
In the image above, "More Info" is a sensor using ~ITEM.LINK~ - an article container field - as URL. This works because the sensor is used within the 'Item' section. This will not work outside the Item section (MAITEM). The same goes for the image, the image source is an article container field ~ITEM.IMAGE~ and will also only work within the 'Item' section (MAITEM).
Source code:
<div id="MACONTAINER" maconstraint="" macontenteditable="FALSE"
maparameter="ORDERLINES_CONTENT" matype="">
<div id="MAHEADER" macontenteditable="true"></div>
<div id="MAITEM" macontenteditable="true">
<img src="~ITEM.IMAGE~"
/>
<strong>~ITEM.TITLE~</strong><br />
~ITEM.CONTENT~<br />
<a href="~PROBE(100)~">More
info »</a>
</div>
<div id="MAFOOTER" macontenteditable="true"></div>
<div id="MANOMATCH" macontenteditable="true"></div>
</div>
Like an article container you can set also a reporting field, and span the articles over multiple columns. See article container for, more information on this
Check out this 'Basket abandon' example on how to use an action container.
