1. Click the 'First page' in the top left corner.
Each page consist of a header, page and footer. The components (i.e. form elements) you add to the header and footer will appear on every page. The components you add to the page part will appear only on this page. We will add a survey name and progress bar to the header and back and next buttons to the footer.
First, let's look at the page properties. The bottom part of the screen consists of a number of tabs depending on the page or component you have selected. the first one is 'Page properties'.
2. Change the page name to "Intro". In the page properties you can also change the page type and layout if needed. You can leave the defaults as is.
Header
3. Drag a 'Language specific content' component to the 'header' part of the page. At the bottom of the screen, on the 'General' tab', rename this component to "Title".
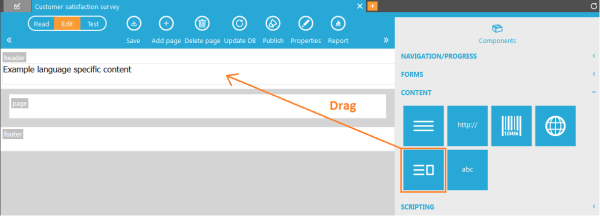
4. On the 'Content' tab replace the text with "Customer satisfaction survey". We want to display this as a header, not a simple paragraph. Switch to the 'Source' tab at the bottom and replace the P-tags with H1-tags. The source code should look as follows:
<H1>Customer satisfaction survey</H1>
We have added a 'language specific content' component instead of a 'universal content' component although we only defined one language. If, in the future, we needed to add additional languages, we can easily add content for each language with a 'language specific content' component. This is not possible with a 'universal content' component. Its content is the same for all languages.
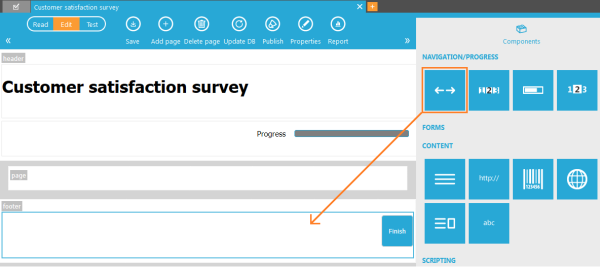
5. Just below the title, but still in the 'header' part of the page, drag a 'Progress bar' from the components panel. You can rename it to "Progress bar". Each component has its own options. You can leave the progress bar options as is.
Footer
6. Add the 'Back / Next' component to the footer. It will show only one button 'Finish', this is because we only have 2 pages at the moment and the second (and last) one is the Finish page. When we add more pages, the back and next buttons will appear. Leave the options as is.
The Intro page content
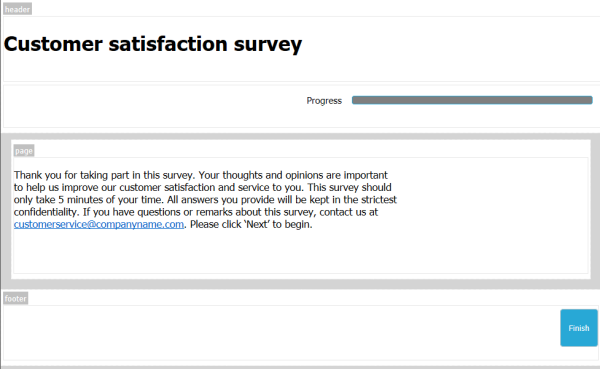
7. Drag another 'Language specific content' component to the 'page' part of the intro page. Name it "Intro". Copy and paste the content for the intro in the 'Content' tab of the component.
You can find all the content in the "Customer satisfaction questions" topic.
If you see a warning that a html tag is illegal, change the user rights. Disable 'Enable HTML screening'. With this setting disabled, the Form user can however use any HTML tag and attribute within the Form tool. If you do not have access to user rights or do not disable this setting, simply remove the hyperlink. Select the text and click 'Unlink' from the WYSIWYG editor toolbar.

8. You can also personalize your survey with the contact's audience list data. Add "Dear ~$PROFILE.GENDER~ ~PROFILE.NAME~," as a new paragraph in front of the intro text. With the scope PROFILE, you can select data from the audience list. Without the scope name, the data would be from the survey list. the dollar-sign ($) in ~$PROFILE.GENDER~ indicates the translation (option list value) has to be used instead of the actual field value. Here, we've linked a "Salutation" option list to the audience list GENDER field.
