Adapt the optout journey (advanced)
We could create basic optout journeys for each email type: the standard newsletter, news flashes, yearly recurring promotional emails and ad hoc promotional emails. But we will adapt the optout journey, so it can be used for all email types. From each email, we will pass a value to the optout journey, so we know for which email type we have to display content on the optout pages and which optin field value we need to set to zero in the audience list: OPTIN_NEWSLETTER, OPTIN_NEWSFLASH, OPTIN_PROMO_YEARLY or OPTIN_PROMO_ADHOC. The value we pass from the email, will be the Message Category, set in each email properties.
Passing the value from within the email will be discussed last. First we will adapt the optout journey, step-by-step.
This requires some technical knowledge about posted
values. A 'posted value' only lives during one request. Meaning from the
submitted page until the next page (default HTML behavior). In a
journey you can retrieve the posted value in between those two pages,
using @PARAMETERNAME, where PARAMETERNAME is a name of any GET or POST
parameter. You can use it to validate and store in a Data component, in
a constraint in a Decision component, in a lookup in a Lookup component,
etc.
The posted value of the parameter can be retrieved on the next page with
~@PARAMETERNAME~, after the parameter has been submitted.
You can assign the posted value to a new parameter or a new form element
(input field) on this next page. After that parameter submits you can
use the posted value again. This is called 'posting a value along'.
Preparation: create Message Categories
At the end of the exercise we will pass Message Category values to the optout journey for each email type. These have to be created first.
If you do not have user rights to create categories, or you do not want to add test categories to existing Message Categories, you can still pass a fixed value for this exercise, such as "yearly promotion", to the optout journey.
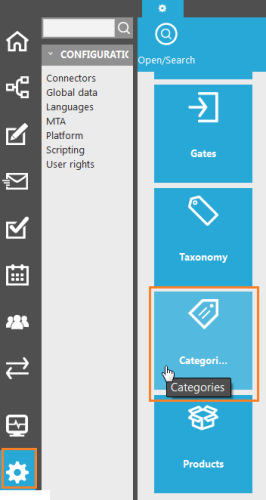
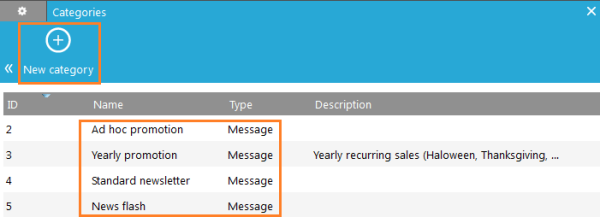
Under 'Settings, Global Data' click 'Categories'. Create 4 'Message
categories': "Ad hoc promotion, Yearly promotion, Standard newsletter
and News flash"
If needed, start each name with "TEST". These are global parameters, thus available
throughout the application.
Input parameter
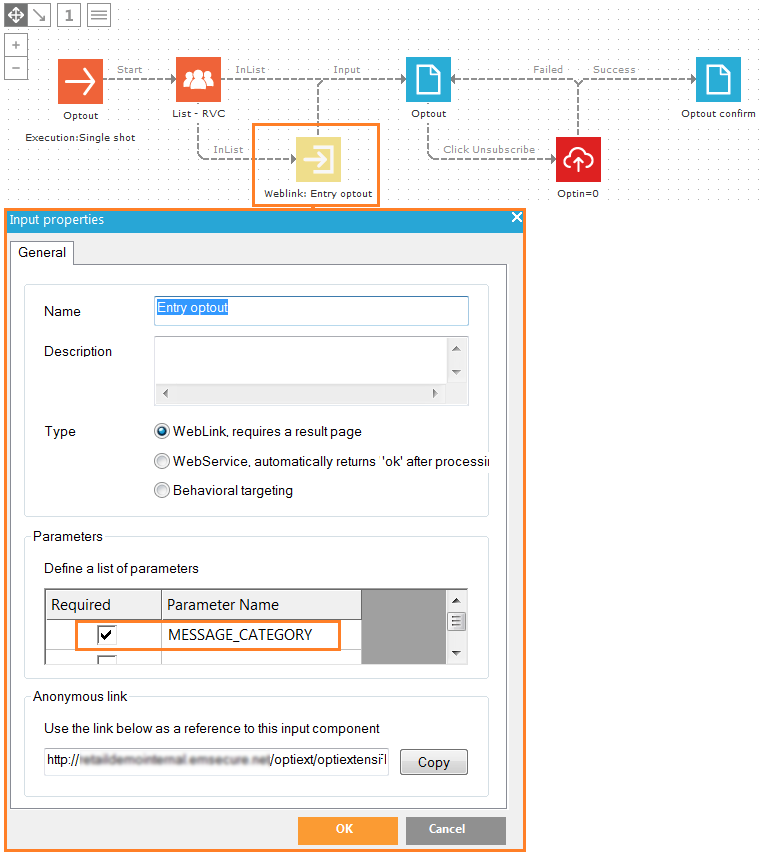
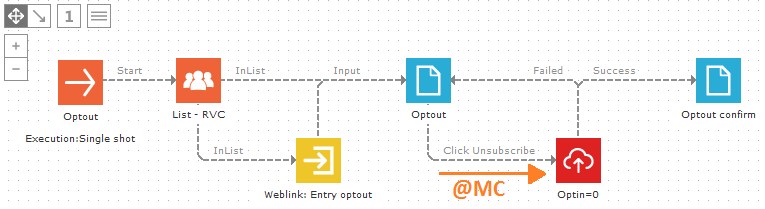
When a contact clicks the unsubscribe sensor in the email, the sensor is redirected to an Input component in the optout journey (see previous step in this exercise). The Message Category can be passed as a value to this Input component. But first we need to define a parameter to receive this value. The parameter is defined in the Input component properties, that's why it is also called an 'Input parameter'.
1. In the optout journey, double-click the Input component to open the properties, define a parameter "MESSAGE_CATEGORY" and check 'Required'. When a sensor wants to redirect to this Input component, it has to give a value for this parameter.
Posted values
As we've learned from the technical note above, a 'posted value' only lives during one request. The posted value of this Input parameter can be retrieved with @MESSAGE_CATEGORY on the next "Optout" page, but not after this page. But we still need to check in the Data component which optin field should be set to zero (0) depending on the value. So we will 'post the value along', by creating a new parameter 'MC' and setting its value to @MESSAGE_CATEGORY. We will add the new parameter 'MC' to the unsubscribe confirm link (as a GET parameter) in the "Optout" page.
We will also display different content depending on both pages, depending on the posted value, @MESSAGE_CATEGORY for the "Optout" page, @MC for the "Optout confirm" page (next request). When the value is "Yearly promotion" or "Standard newsletter" you need to display different content. Let's start with this.
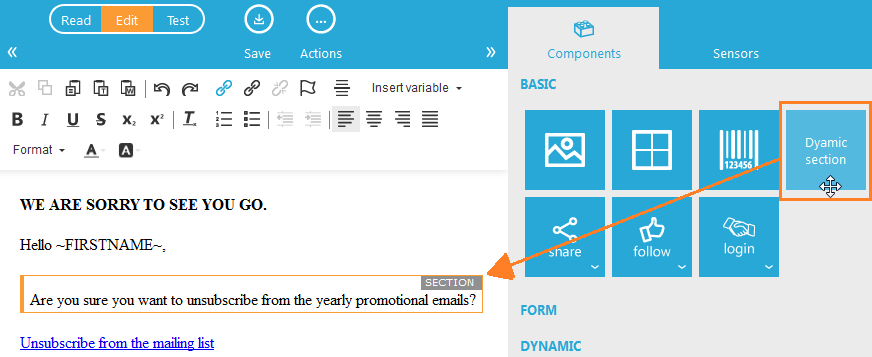
2. Edit the "Optout" page in the Editor. Drag a Dynamic section from the components panel on the right and add it in front of the text "Are you sure you want to unsubscribe from the yearly promotional emails?". Move the text into the Dynamic section.
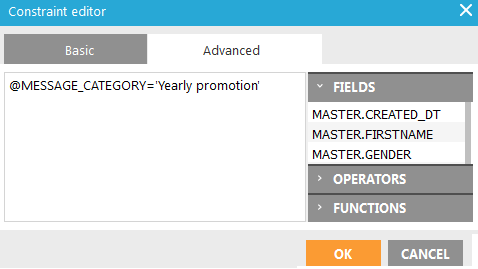
3. Hover over the Dynamic section and click the constraint icon  . In the constraint editor, under the advanced tab,
add the constraint @MESSAGE_CATEGORY='Yearly promotion'
. In the constraint editor, under the advanced tab,
add the constraint @MESSAGE_CATEGORY='Yearly promotion'

4. Do the same for the other three message categories, using the message category names as values:
- @MESSAGE_CATEGORY='Ad hoc promotion'
- @MESSAGE_CATEGORY='Standard newsletter'
- @MESSAGE_CATEGORY='News flash'

What if the value for @MESSAGE_CATEGORY is none of these four values? And how are we going to change the optin values in the Data component in the next step if it is none of these four values? Always define a backup. We will create two Content Sections to split the message: one for this content if @MESSAGE_CATEGORY is one of the 4 values, and a new one with content if @MESSAGE_CATEGORY is none of the 4 values.
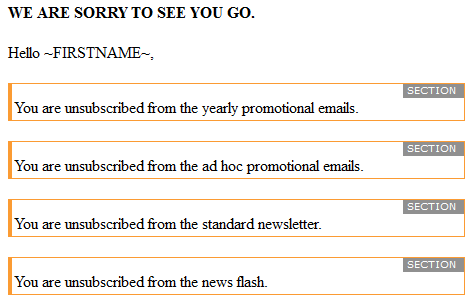
5. In the editor, right-click somewhere below the content of the "Optout" page and select 'Add section'. A new empty section is added and, all the content should be in the first section.
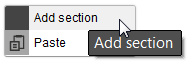
Add the following content for the second section:
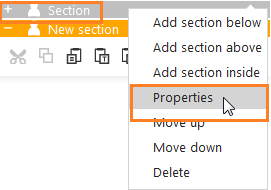
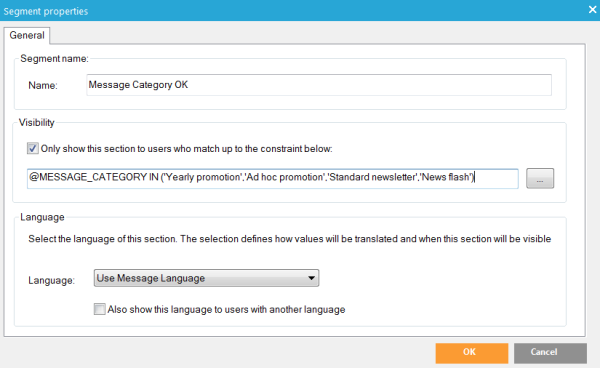
6. Right-click the first Section
and select 'Properties'. Give the section a name "Message Category
OK". Under 'Visibility' check 'Only show this section to users who
match up to the constraint below'. Enter the following constraint:
@MESSAGE_CATEGORY IN ('Yearly promotion','Ad hoc promotion','Standard newsletter','News
flash')
7. Right-click the second Section
and select 'Properties'. Give the section a name "Message Category
NOT OK". Under 'Visibility' check 'Only show this section to users
who match up to the constraint below'. Enter the following constraint:
@MESSAGE_CATEGORY NOT IN ('Yearly promotion','Ad hoc promotion','Standard
newsletter','News flash')
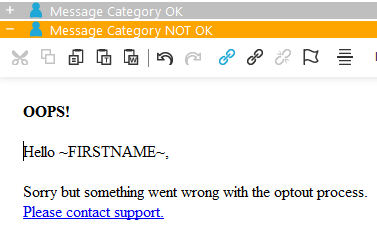
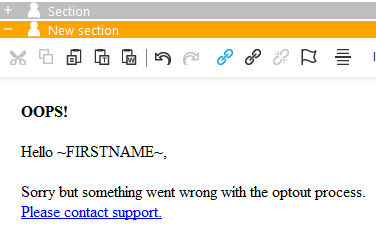
If something went wrong (it shouldn't), and the contact sees the second section, they can contact us and we can take action.
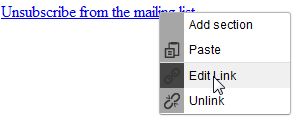
The sensor "Please contact support" redirects to a URL in this example.
8. Lets add the new parameter 'MC' to the unsubscribe confirm link (as a GET parameter). Select the first section, right-click the sensor and select 'Edit Link'. Behind the URL "~PROBE(100)~" enter "&MC=~(URLENCODE(@MESSAGE_CATEGORY))~".

The function PROBE(100) will generate a URL that
can be measured,
e.g. http://DOMAIN/optiext/optiextension.dll?ID=nLUnOP0tLditU2YgOcC5yjLF8DEi
Behind this URL we now added a parameter, and set the value to @MESSAGE_CATEGORY:
http://DOMAIN/optiext/optiextension.dll?ID=nLUnOP0tLditU2YgOcC5yjLF8DEi&MC=Yearly+promotion
URLENCODE is a function that will return the URL encoded version of the
parameter. If the parameter contains spaces or other special characters,
it will change this to a value usable in an URL. "Yearly promotion"
(with space) will become "Yearly+promotion"
9. Go back to the optout journey. We can now use the posted value from the GET parameter "MC", to check in the Data component which optin field should be set to zero (0).
- If @MC='Yearly promotion', we should set OPTIN_PROMO_YEARLY=0
- If @MC='Ad hoc promotion', we should set OPTIN_PROMO_ADHOC=0
- If@MC='Standard newsletter', we should set OPTIN_NEWSLETTER=0
- If @MC='News flash', we should set OPTIN_PROMO_ADHOC=0
In the properties of the Data component, use a Campaign IF function to set the values. Double-click the Data component, under the 'Update data' tab enter the following values :
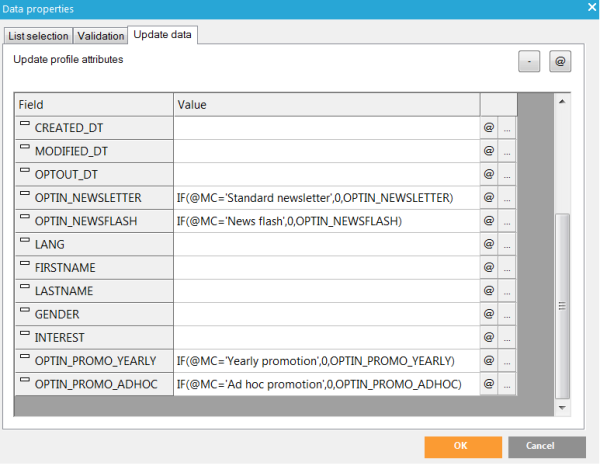
If @MC is not a certain value, the IF function returns the value which is already stored, e.g. IF(@MC='Yearly promotion',0,OPTIN_PROMO_YEARLY). This way the value remains what it was, if @MC is not the correct value for a certain optin field.
A pdf file with all Campaign functions is available from the Support portal.
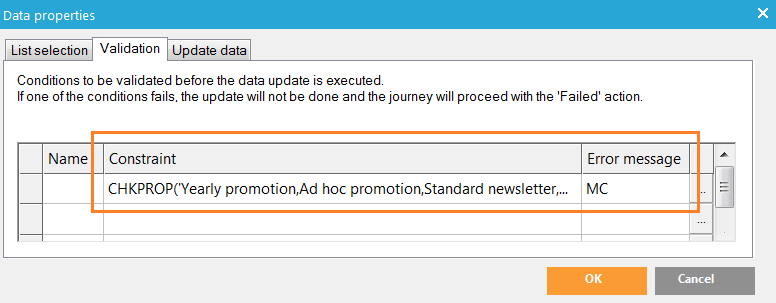
10. What if someone changed the value for the 'MC' parameter? This is easily done, it is simply added behind the URL. Someone can copy the hyperlink, change the value and submit it in his browser. Best we validate the posted value @MC to make sure it is still one of the four possible values. If not we will show an error on the "Optout" page.
Select the 'Validation' tab of the Data component. Under 'Constraint'
enter:
CHKPROP('Yearly promotion,Ad hoc promotion,Standard newsletter,News flash',@MC)=1
CHKPROP is a Campaign function that searches a multi-value (pipe or comma separated) string for the occurrence of a value, and returns 1 if found
Under 'Error message' enter "MC". Click 'OK' when done.
If @MC is not one of these four values, an error message is shown. The error message can be displayed with ~DATA_ERROR~ on the "Optout" page. But we will update the constraint of the second section on the "Optout" page, checking if the parameter DATA_ERROR contains the error message "MC". This way the second section is also shown when @MC is not one of the four values, instead only the error message itself.
11. Save the journey, you should see '0 Errors & Warnings" at the bottom of the journey.

12. In the Editor, on the "Optout" page, right-click the second Section and select 'Properties'.
Under 'Visibility' change the constraint :
@MESSAGE_CATEGORY NOT IN ('Yearly promotion','Ad hoc promotion','Standard
newsletter','News flash') OR CHARINDEX('MC',DATA_ERROR)>=0
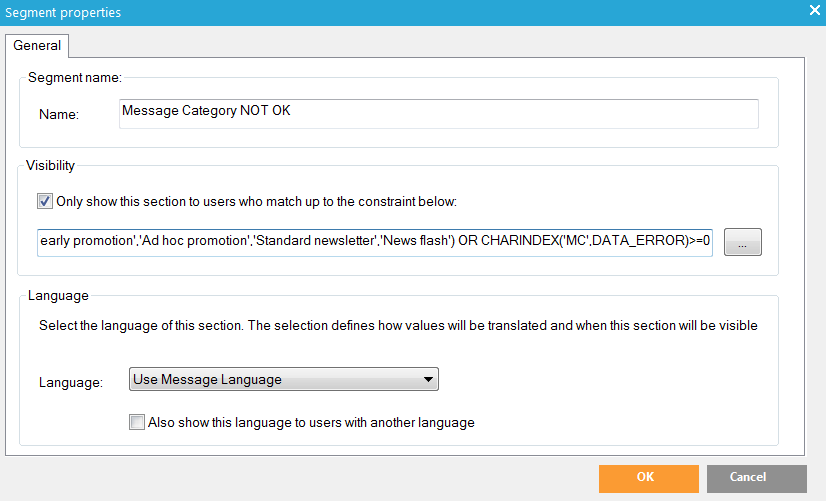
CHARINDEX('MC',DATA_ERROR) searches the string 'MC' in the System variable DATA_ERROR and returns the position of 'MC' in DATA_ERROR, starting with 0. If 'MC' is in DATA_ERROR the returned value should be bigger or equal to 0.
13. Save the "Optout" page.
14. In the editor, also add four Dynamic sections with constraints to the "Optout confirm" page, like you've done earlier with the "Optout" page, but check on the posted value @MC instead @MESSAGE_CATEGORY:
- @MC='Yearly promotion'
- @MC='Ad hoc promotion'
- @MC='Standard newsletter'
- @MC='News flash'
Tip: you can always test the received posted value with ~@MC~
Test the journey
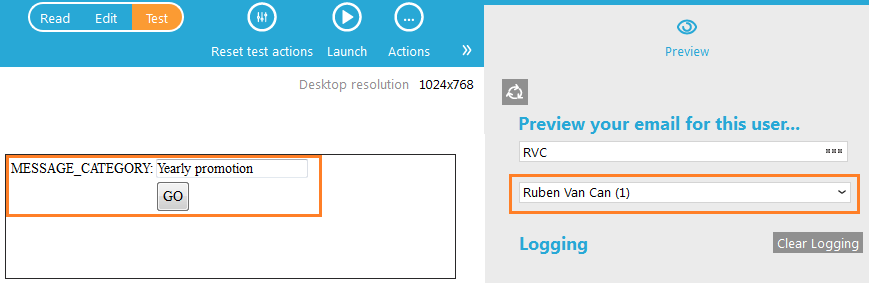
15. Like before, test the journey starting from the Input component and go through each step to see if everything works correctly. You can now pass a value for the Input parameter MESSAGE_CATEGORY. Enter "Yearly promotion" and click 'GO'.
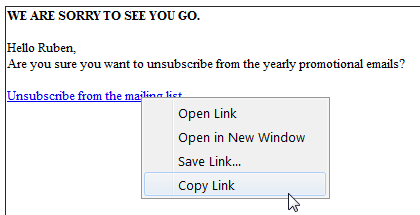
16. The content of the "Yearly promotion" Dynamic section
should be displayed.
You can Right-click the unsubscribe confirm link, and select "Copy
link". Paste the link in Notepad to check if the GET parameter 'MC'
is added correctly:
http://DOMAIN/optiext/optiextension.dll?ID=nLUnOP0tLditU2YgOcC5yjLF8DEi&MC=Yearly+promotion
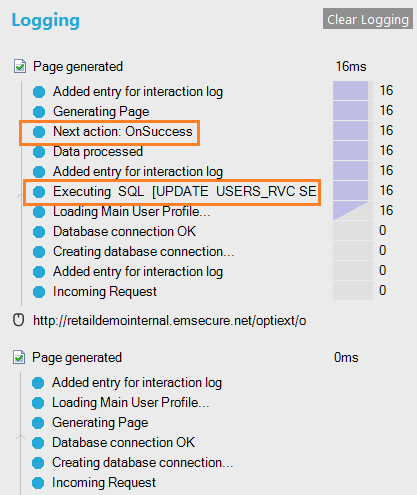
17. On the right side, under 'Logging' you can follow each step Campaign does, from click to page generation. To start with, it generates the first page, "Optout". When you click the unsubscribe confirmation sensor on the page, you should see the "Executing SQL: UPDATE [Audience list] SET OPTIN_PROMO_YEARLY=0, MODIFIED_DT=GETDATE() WHERE ID=[Current contact id]", Campaign stores zero (0) in the correct optin field. "Next action: OnSuccess", Campaign follows the 'Success' trigger and generates the "Optout confirm" page.
The most recent log items are displayed first.
Congratulations, the advanced optout journey is ready!
Adapt the unsubscribe sensor
The unsubscribe sensor of the "Spring sales" yearly promotional email has to pass the email's Message category to the optout journey Input component.
18. Make sure the Message category is selected in the Message Properties
panel on the right.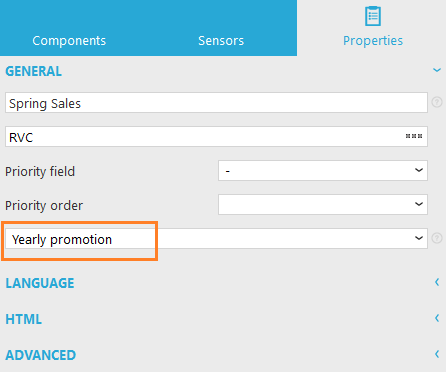
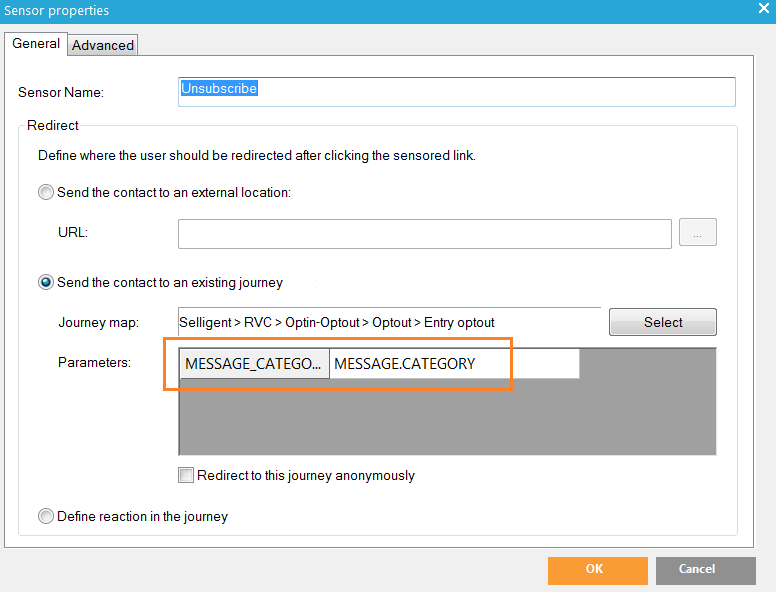
19. In the sensors over view panel on the right, find the unsubscribe
sensor, double-click it to open the properties. Earlier
we have selected the second radio button 'Send the contact to an existing
journey' and pointed it to the "Entry optout" Input component
of the "Optout" journey.
You should now see the Input parameter "MESSAGE_CATEGORY". As
a value enter MESSAGE.CATEGORY (use a dot, not an underscore). MESSAGE.CATEGORY
is a general System variable that will hold the Message category value.
If you do not have Message Categories defined, you can still pass textual values. Use 'Yearly promotion' as value. For textual values always use straight single quotes ('). You can also pass numeric values (no quotes) or contact values like ID or MAIL.
20. Click 'Ok' when done and save your email.
Clicking the sensor in the email will now redirect to the Optout journey with Message category as value for Input parameter MESSAGE_CATEGORY. You can test the sensor from the email journey.
The only requirement is that Message Category MUST be
filled in. If someone forgets to fill it in, no value is passed and the
optout process does not work and error messages are shown.
If we create a template for the yearly promotional emails, we can set the
unsubscribe sensor and Message Category fixed in the template. The template
would only allow adding content for the middle part in Express (in this
example the "Spring sales" content), the rest can be set fixed
(not editable) in the template. This way, no mistakes can be made when
creating new yearly promotional emails.
This setup requires some maintenance. If new Message Categories are added, this optout process needs to be adapted (constraints, validation and storing data).
