Personalization
We are going to keep it simple, change the first sentence "Spring is finally here!" to "Hello ~FIRSTNAME~, spring is finally here!":

~FIRSTNAME~ will retrieve the contact's value of the field FIRSTNAME in the audience list. Of course this field must exist and it must hold a value, otherwise nothing will be displayed. To see all the fields of the audience list, find your test audience list in the tree view on the right, under 'Audiences', click the list to see the linked lists and fields.
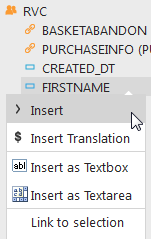
Instead of typing ~FIRSTNAME~ you can also right-click the field in the tree view and select 'Insert'. It will be inserted where you put the cursor.
The year system variable
The footer of the email reads "© 2015 Parana - Unsubscribe". If we want to duplicate this email later on for other yearly promotional emails, it would be better that the year automatically updated each year.
1. Select "2015" in the footer and from the top bar open the 'Insert variable' drop-down. Select SYSTEM.YEAR
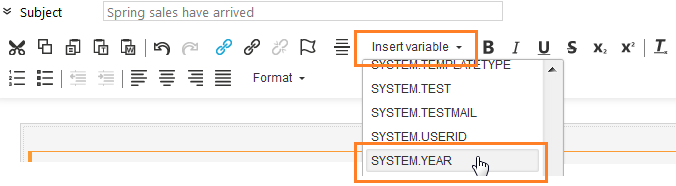
In the footer you should now see "© ~SYSTEM.YEAR~ Parana - Unsubscribe"
2. Save your email.
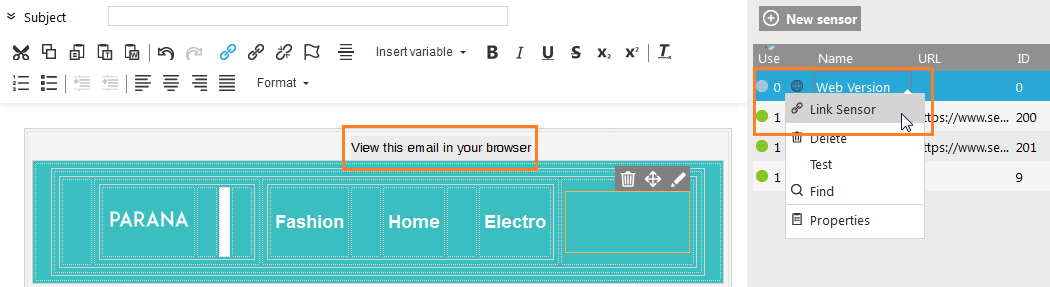
Web version sensor
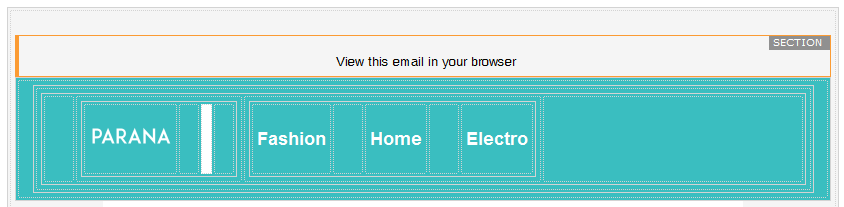
Open the sensor overview panel on the right side. You can see that the web version sensor is not yet used. We need to link the sensor to the text "View this email in your browser". This can be a bit tricky, like in our example, many times the original HTML file you have imported, already has a hyperlink created for this, with a hash (#) as hyperlink reference. Usually with styling added to the hyperlink. In the example code it looks like this:
<a href="#" style="color: #040400; font-size: 13px; line-height: 24px; font-family: Helvetica, Arial, sans-serif; text-decoration:none;" target="_blank">View this email in your browser</a>
If we want to link the web version sensor in the 'Design' tab, it would replace the entire hyperlink with a new one and the styling would be gone:
<a href="~PROBE(0)~">View this email in your browser</a>
1. To avoid this we will change the hyperlink reference in the source code. Click the 'Source' tab at the bottom. Press Ctrl+F to find the text "View this email in your browser". You should see the hyperlink (A-tag). Change href="#" to href="~PROBE(0)~". PROBE(0) is a function that creates a hyperlink in the eventual email for sensor 0, the web version sensor. The number between the brackets is always the sensor ID, PROBE(200) would create a hyperlink for sensor 200.

2. Save your email.
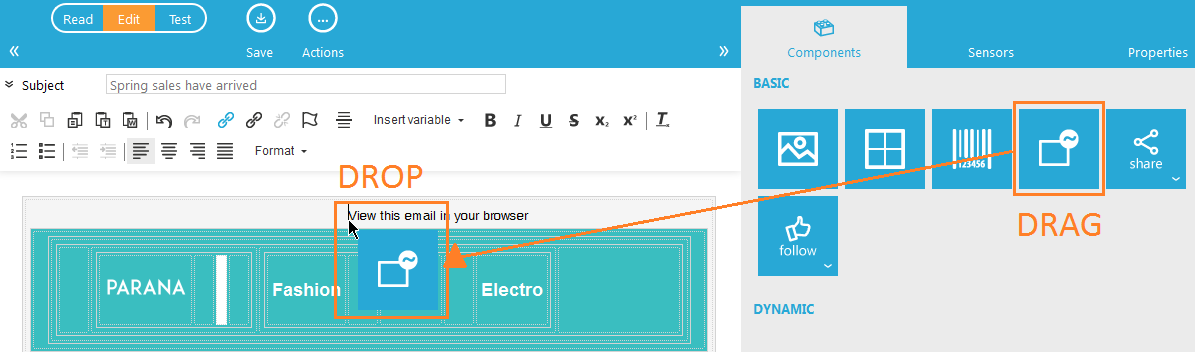
Create the web version dynamic section
We only want to show the web version sensor in the email client. After the contact clicked the sensor and views the email in the browser, we do not want to show the sensor anymore. To do this, add a dynamic sections with a constraint that shows the web version sensor only in an email client.
1. From the components panel on the right, drag a 'Dynamic Section' in front of the web version sensor
2. Cut and paste the web version sensor in the dynamic section. The header now looks like this:
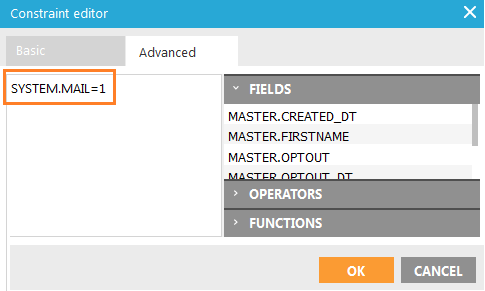
3. Hover over the dynamic section and click the constraint icon  . In the constraint editor, click the 'Advanced' tab and type SYSTEM.MAIL=1. Click 'OK' when done.
4. Save your email.
Unsubscribe sensor
Like the web version sensor, a hyperlink already has been created for the unsubscribe link at the bottom, with a hash (#) as hyperlink reference. So we will also change the hyperlink reference in the source code. But first the sensor has to be created.
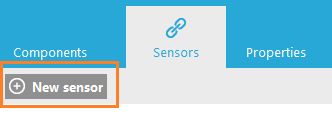
1. In the sensor overview panel, create a new sensor
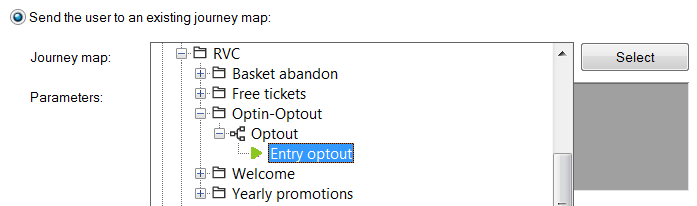
2. Give it an name "Unsubscribe" and select the second radio button 'Send the contact to an existing journey". Click 'Select' and find your test optout journey. Double-click the Input component in the test optout journey.
If you do not have a test optout journey, you have to create one first. The journey should use the same test audience list as the one you have selected in the email.
In the sensor overview we see the ID of the Unsubscribe sensor, here it is 202. We will need it in the next step.
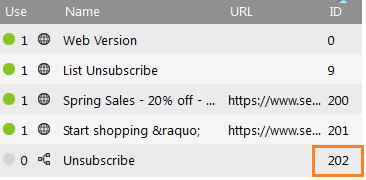
3. Click the 'Source' tab at the bottom. Press Ctrl+F to find the text "Unsubscribe". You should see the hyperlink (A-tag). Change href="#" to href="~PROBE(202)~". PROBE(202) is a function that creates a hyperlink in the eventual email for sensor 202, which is our unsubscribe sensor. If your unsubscribe sensor has a different ID, fill in that ID.

4. Save your email.
Check the sensor names
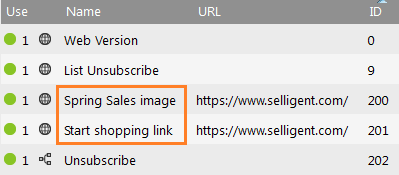
Our 2 imported sensors still have strange names: "Spring Sales - 20% off - Coupon code: Spring20" and "Start shopping »". For reporting it would be better to give them clearer, descriptive names.
1. Click each sensor and rename the sensor names to "Spring Sales image" and "Start shopping link".
2. Save your email.
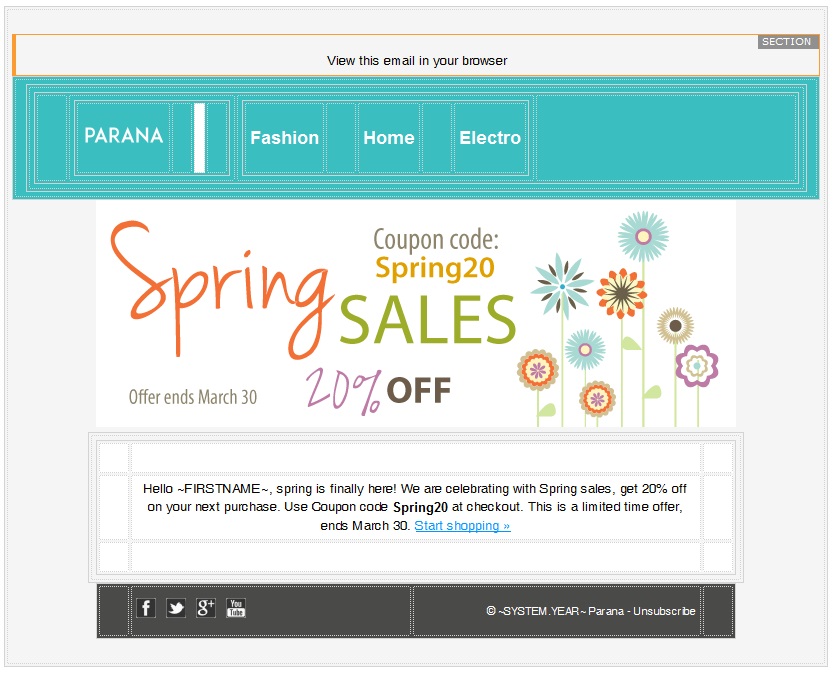
Your email now looks like this in the editor:
Back to 'Example: A basic email, step by step'
