Data Component
With the Data component you can validate data, usually submitted form data, but also validate audience list values or values from its profile extensions.
For example, if the contact submits a form, you can check if they filled in his firstname: @FIRSTNAME<>''.
The posted value (@) from input field with attribute FIRSTNAME is not equal to (<>) empty (represented by an empty string: '').
Selligent functions can also be used to validate data.
E.g. CHKMAIL(@MAIL) will check if @MAIL (the posted value (@) from the input field with the name attribute MAIL) has a correct syntax for an email address.
If the validation fails (input field FIRSTNAME was left blank in the form), you can provide an error message ("Please enter your firstname"). If validation fails, the 'Failed' event will trigger. Usually this trigger goes back to the form. On the form page you can use the system variable ~DATA_ERROR~ to display the error messages. See 'Designing a form' for more information on how to create a form in the Editor.
The Data component is also used to store data in the audience list. In the audience list and its profile extensions you can update, overwrite and insert a contact's record. In a 1-on-many linked list you usually only insert a new record for the contact.
You can validate and store data in the same Data component, but you can also separate them in different components. You can put several Data components behind each other to sequence storing data. There is no limit on the number of Data components you can use in a journey.
An example of a newsletter subscription. The first Data component validates the form data after submit. If validation does not fail, a Lookup component sees if the contact is already subscribed. If not, the form data is stored and an activation email is sent. When the contact clicks the "Activation" sensor in the email, the last Data component updates the contact's OPTIN_NEWSLETTER value with 1.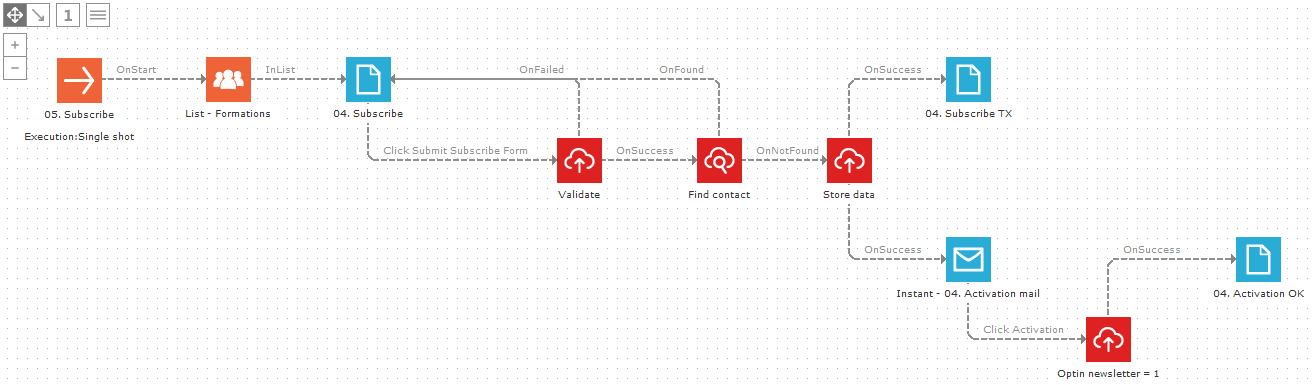
Events
The Data component generates two types of events:
- Success: the data contained no errors during validation and the changes have successfully been stored in the list.
- Failed: the data contained errors during validation and as a result, no changes were made in the list. If any error messages where defined in the validation tab, these will be displayed using the DATA_ERROR system variable. This variable can be used on the page after the 'Failed' event, usually the page that triggered the validation. The system variable is inserted in the Editor as ~DATA_ERROR~.
Properties
List selection
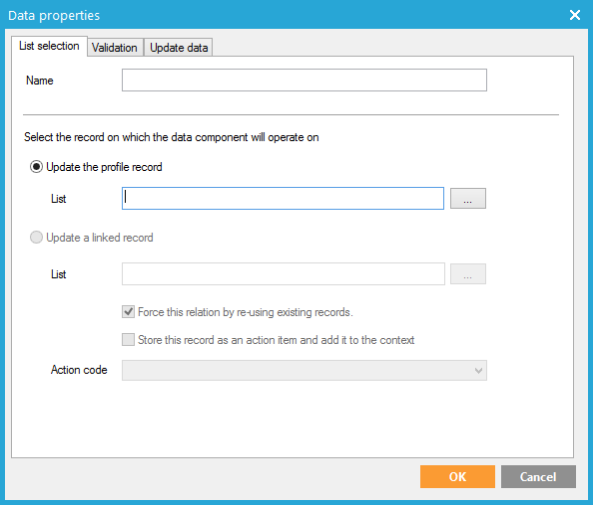
In the 'List selection' tab, give the Data component a descriptive name (this name will be displayed on the journey canvas) and select a list that will be used to store the data.
-
By default ‘update a profile record’ is checked: the Audience list fields are displayed on the 'Update data' tab. If an Audience component is in the journey and the Data component is in the link (set of arrows) with the Audience component , this field will be pre-filled with that Audience list.
To update or insert records in a profile extension (1-on-1 linked data list) of the audience list, first select the profile extension in the Audience component, on the 'Data' tab.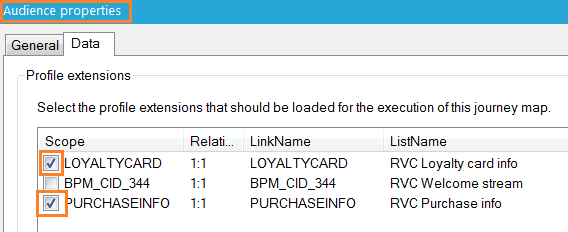
The extended profile fields will now be displayed on the 'Update data' tab of the Data component, together with the audience list fields, to update or insert the data. You do not need to enter a value for the field where the list relation is defined on. E.g. Audience list ID - on - Loyalty card data list USERID: the LOYALTYCARD.USERID field does not need to be filled in. List relations are defined under 'Lists'.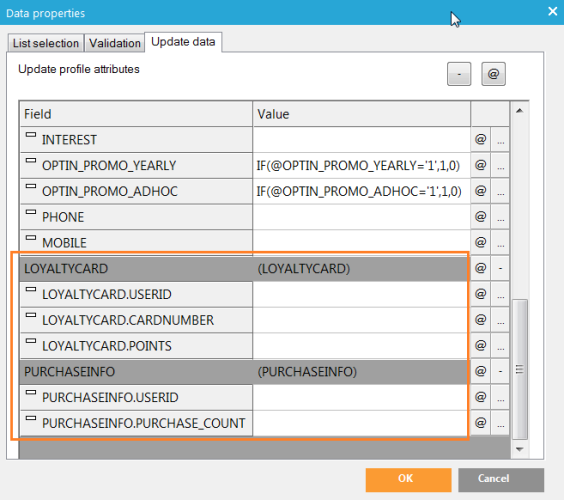
Selligent will create new profile records for anonymous contacts and add them to the targeted list. Known contacts' records will be updated.
-
Check ‘update a linked record’ if the information should be stored in a 1-on-manydata list. The data list fields are displayed on the 'Update data' tab.
Check ‘Force this relation by reusing existing records’ if each contact only has one record in the 1-on-many linked data list. If the record exists it will be updated or overwritten. If it does not exist it will be inserted.
If an action list was selected as data list to update, an additional option is available to store the record as an action item. An action code is then selected and assigned to these records. On the Data tab, fields in this action list are listed and can be updated. As a result, this implies that the data in this action list can be directly used in instant emails following the data component.
If 'Force this relation by reusing existing records' is unchecked, each time the data is stored, a new record is inserted for the contact. This is usually the intention for 1-on-many linked lists. If the contact only can have 1 record in the linked list, it usually is a profile extension and updated with 'Update the profile record' (see above).
Validation
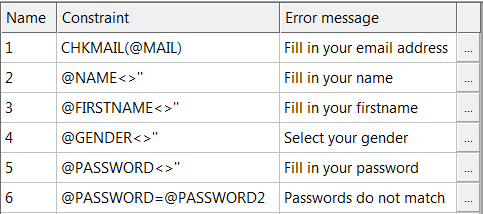
On the 'Validation' tab define constraints that will be validated before the data is stored. If one or more constraints are not met, the data will not be stored. E.g.
- @NAME<>'' : the input field with name attribute NAME is not filled in (no posted value @NAME is passed when the form was submitted)
- CHKMAIL(@MAIL) : checks if @MAIL (the posted value (@) from the input field with the name attribute MAIL) has a correct syntax for an email address.
- @OPTIN1<>'' OR @OPTIN2<>'' : the contact must select at least one optin value, from 2 optin input fields (checkboxes) with name attributes OPTIN1 and OPTIN2. Combine constraints with the AND or OR operators.
- DATEDIFF('dd',LASTPARTICIPATION_DT,GETDATE())>=1 : the contact must have participated at least 1 day ago. The difference between his value stored in the field LASTPARTICIPATION_DT and now (getdate function) must be at least 1 day.
- CONTEST1.ANSWER='' : the answer for contest 1 must be empty. The ANSWER field is in a profile extension with scope "CONTEST1". See list relations for more information on linking lists
To define a constraint:
1. Optionally, enter a name for the constraint that will be applied. This has no effect on anything in the journey or the constraint. Usually the constraints are simply numbered.
2. Enter a constraint, based on posted values (@OPTIN_NEWSLETTER), audience list values (OPTIN_NEWSLETTER) or profile extension values (OPTINS.OPTIN_NEWSLETTER).
- Every constraint should result in true or false. @OPTIN_NEWSLETTER is not a constraint. @OPTIN_NEWSLETTER<>'' is a constraint, resulting in true or false (The optin checkbox is checked on the form? Yes or no?). Use the following operators to define a valid constraint: = (equal), <> (not equal), < (smaller than), > (bigger than), <= (smaller or equal than), >= (bigger or equal than). To check on empty values you can use '' (two single quotes, empty string).
The only exception is CHKMAIL(@MAIL). This function returns true (1) or false (0), so the correct constraint is CHKMAIL(@MAIL)=1. But because it is a very commonly used constraint CHKMAIL(@MAIL) is also allowed. For instance, CHKPROP(FIELDNAME,@VALUE)=1 is the correct constraint to check if @VALUE is part of the multi value field (1,2,3) FIELDNAME. Including the "=1". CHKPROP(FIELDNAME,@VALUE) without "=1" is not a valid constraint.
- Combine constraints that should be validated as one constraint with the AND or OR operators.
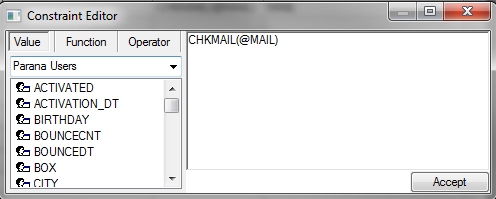
- Optionally, use the “…” button on the right to open the constraint editor popup. This popup will help build the constraint.
Technical note:
The ‘Function’ tab in the Constraint Editor dialog displays numerous functions that can be used in the validation process. These functions allow for instance to check text values (LEN(@PASSWORD)>4), numeric values (FADD(@NUMBER1,@NUMBER2)=5, validate email addresses (CHKMAIL(@MAIL), …
Check the "Functions" PDF on the Support portal for all available functions.
3. Enter the error message that must be displayed in the DATA_ERROR variable on the page following the 'Failed' trigger.
Update data
You can store any value in the audience list, its profile extensions or 1-on-many linked lists:
- posted values from a form. E.g. store @FIRSTNAME in the FIRSTNAME field of the audience list
- List values
- Constants. E.g. store '1' in an OPTIN field
-
- Functions. E.g. GETDATE() to store the current date in a OPTIN_DT datetime field
- Combined. E.g. IF(@VALUE=1,1,OPTIN) in an OPTIN field. If a posted value equals 1, store 1 in the OPTIN field, otherwise take the value of the OPTIN field and store this (this leave it to what it was).
Or EVENTIDS&','&@EVENTID to add a posted value @EVENTID to a multi value field EVENTIDS, comma separated.
Make sure you enter the correct data type (string, number, date) in a corresponding field type. Store a date in a date time field, strings in text fields and a number in a numeric field.
The list of fields displayed on this tab depend on the selected list on the‘List selection’tab. Audience list fields, profile extension fields or 1-on-many data list fields. See "List selection" above.
Technical note:
Before storing data, make sure you know how Selligent manages data. Contact related data can be displayed in different manners:
FIELDNAME: the value in the list of the field FIELDNAME
@FIELDNAME: The posted value in a form. When there is no posted value, the value from the list will be used, of the field FIELDNAME. When it is a known contact- not an anonymous one (does not have a value).
$FIELDNAME: translation of the value in the list of the field FIELDNAME (translations are defined in option lists in the Configuration section)
if the value should come from a profile extension, use the profile extension's scope name: SCOPE.FIELDNAME.E.g. CONTEST1.ANSWER
Not all information is or has to be dynamic. You can also store static values:
To store numeric values simply enter the numeric value (e.g. 1)
To store text values enter the text value between single quotes (‘a’)
1. Enter a value that should be stored in the specific field. Values are overwritten if a record already exists for the known contact. If the record does not yet exist, a record is inserted with the values.
2. Click the “-”-button at the top right to clear all the entered values.
3. Click the “@”-button at the top right to enter posted values in all fields, matching the field names.
4. Click the “@”-button behind the field to enter a posted value in that specific field, matching the field name.
In many cases the input field name on the form matches field name in the list. For instance, an input field for the 'first name' will have a name attribute of FIRSTNAME, because the input field is added from the audience list in the Editor: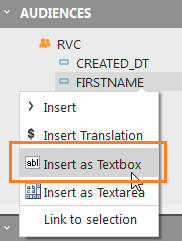
The source code for this form field is <input id="FIRSTNAME" name="FIRSTNAME" type="text" value="~@FIRSTNAME~" />. Thus, the posted value that should be used in the Data component is @FIRSTNAME, based on the input field's name attribute ( highlighted in bold), and not the value of the input field.
The value ~@FIRSTNAME~ tells Selligent Campaign to show the posted value of the input field with name FIRSTNAME. This happens when the form is submitted, validation fails in the Data component and the 'Failed' trigger points back to the form. If there is no posted value, but the page is viewed by a known contact, ~@FIRSTNAME~ will also display the value from the field FIRSTNAME of the audience list. This is handy for "update your profile" forms, everything is already pre-filled with the contact's data stored in the audience list. After posting, the value will always be the posted value, not the value from the audience list. For anonymous contacts and if the form is not posted yet, the input field value will be empty. There is no data in the audience list (anonymous) and no posted data yet.
