Groups in Access Management allow you to group users with similar roles together and assigning them permissions based on their role. It saves time and effort when changes need to be made to existing permissions for a specific role or when new users within that role need to be added. Think of a group for administrators, content creators, campaign executioners, etc. Or, create groups per department, physical office, country or region. Whatever makes sense for your organization.
Technical note: Engage groups and IDP groups:
The Engage Portal serves as an Identity Provider. For most customers this is sufficient, but some customers want to use their own IDP.
Engage allows the use of external IDP (Identity Providers).
Groups in that external IDP can be matched with groups in Engage and this way it is possible to define permissions for all users, internal or external.
When a IDP user logs on for the first time in Engage his identity is created in Engage. All his access rights are created based on the group mappings. If a group with the same name exists in Engage the IDP user will automatically be attributed to that group and enjoy the rights defined for that group. If no group is found with the same name, then the IDP user will have no rights attributed to him.
The next time he logs on the user is already known, so its identity doesn't need to be updated but its access rights are cleared and reset based on the group mappings.
The Groups overview shows all configured groups. Groups are common to all organizations.
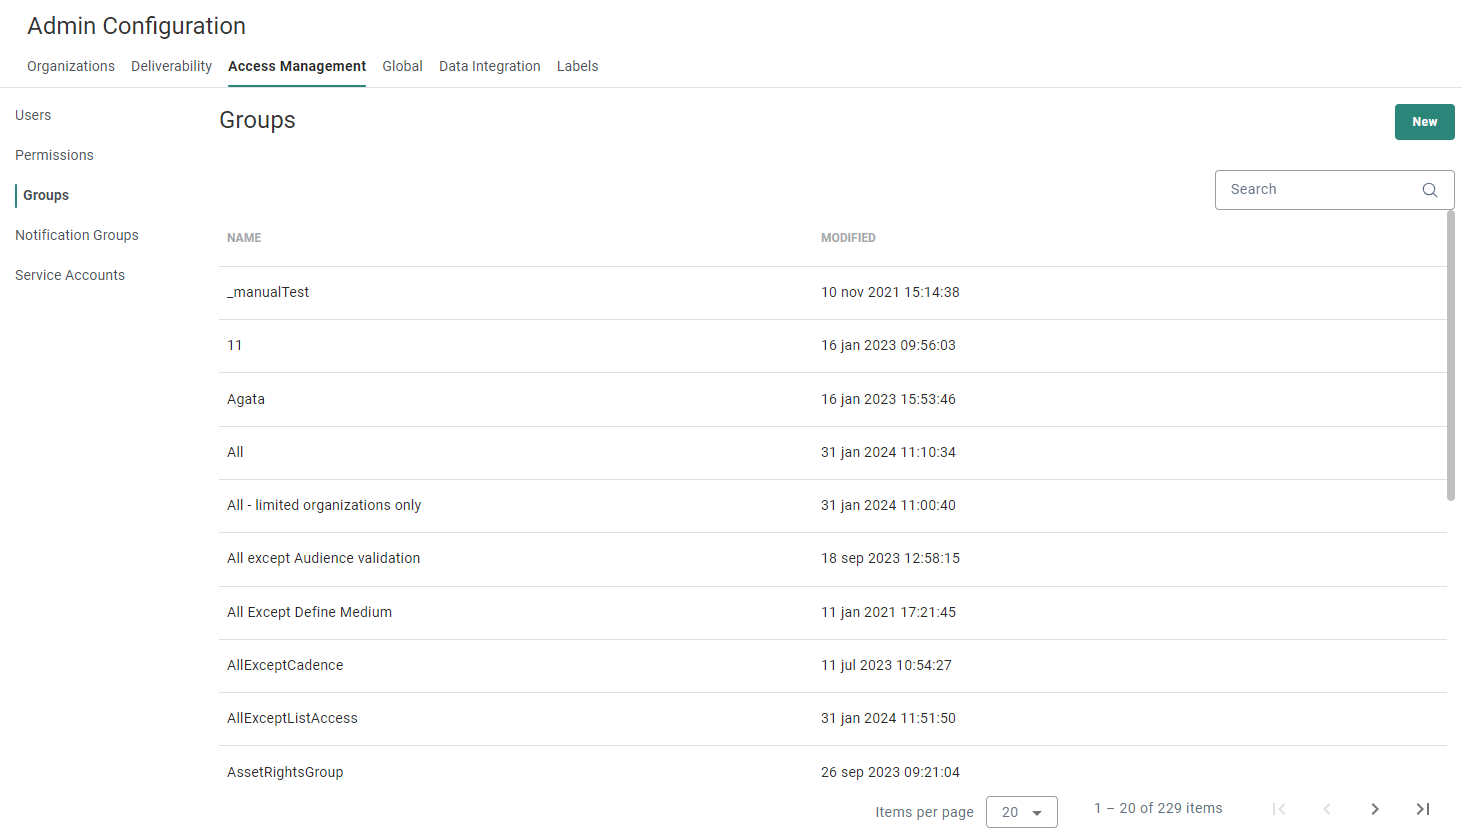
Paging is provided at the bottom of the overview.
From this overview you can
- Search for a group — By entering the first characters of the group name in the Search field.
- Create a new group — See below.
- Edit an existing group — By clicking on a group name. The properties are then displayed in a right sliding panel.
- Delete an existing group — By clicking on the bin icon.
Create a group
To create a new group, click on the New button
at the top-right.
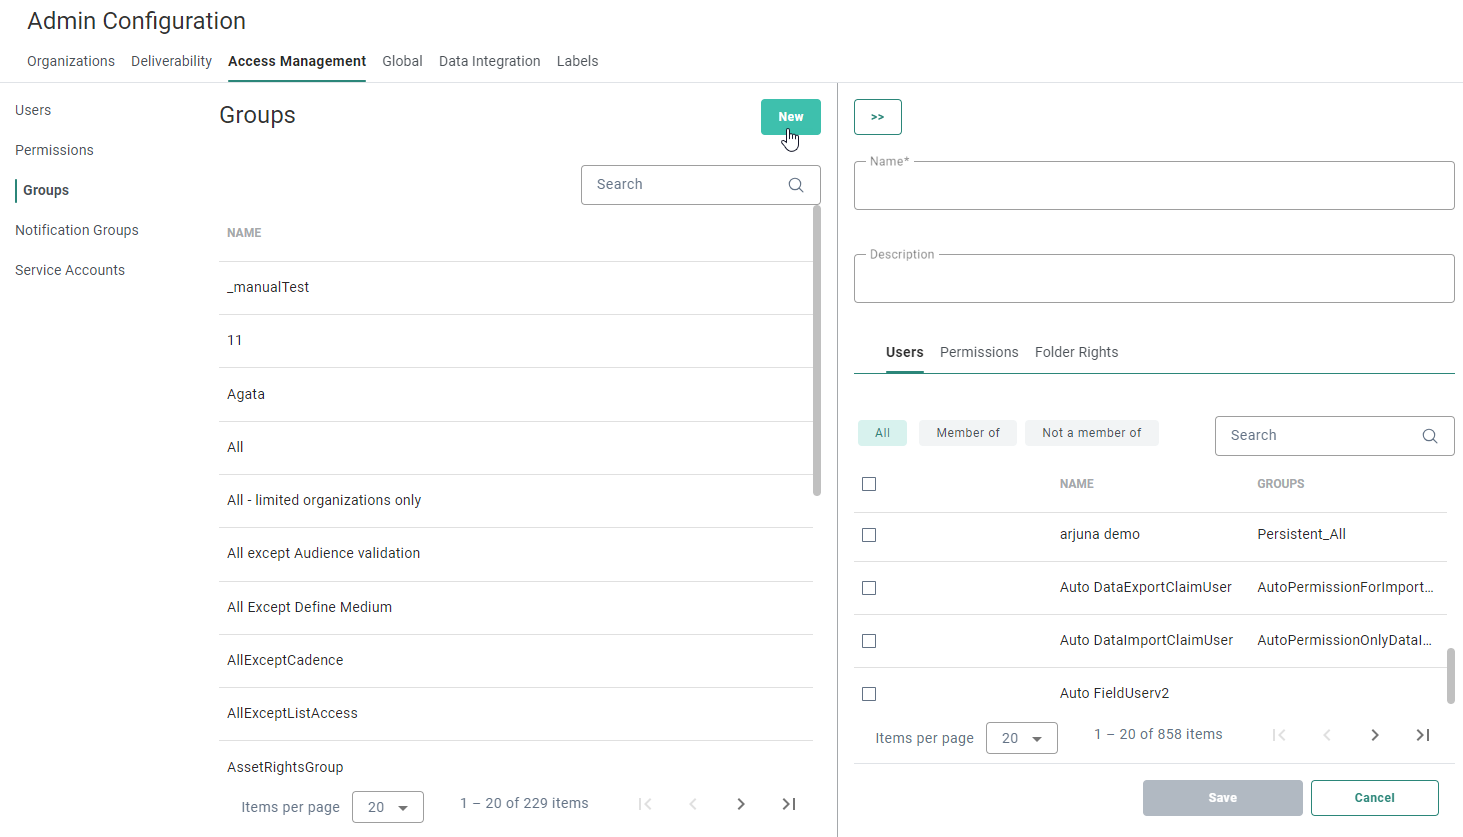
The following properties can be configured :
- Name* — Group name.
- Description — You can enter a description for the group here. Make it explicit to have a clear understanding of the purpose of this group.
Different tabs are shown underneath :
- Users — To select the users that you want to add to the group.
- Permissions — To set the permissions for the group.
- Folders — To set the folder access rights for the group.
When done, click Save.
Users
On the Users tab, make sure the filter 'All' is selected and select the users that you want to add to the group (through the checkbox in front of each user).
- For each user, both the user name and all the groups they belong to are shown.
- Users can be filtered to show 'All', 'Members' or 'Not members'.
- Members — Users that are part of the group.
- Not a member of — Users that are not part of the group.
- All — All users, which is a combination of both 'Members' and 'Not members'.
- You can search for user names through the search field at the top-right.
- You can remove a user from a group by deselecting the checkbox in front of the user. It will then disappear from the 'Members' list, and be part of the 'Not members' list.
- If users are deleted (from the Users tab in the Access Management section), they are also removed from the group(s).
Example of the 'Member of' tab with all users that are part of this group.
The groups the users are part of, are listed on the right.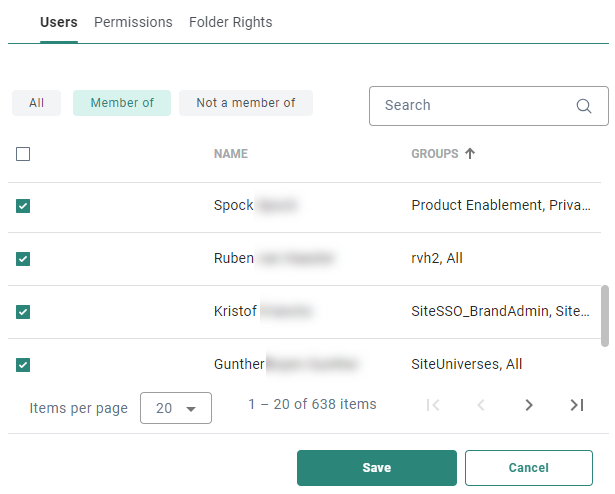
Reminder: Don't forget to click 'Save' after adding/removing users!
Note: Users can also be added to groups on the Users tab.
Permissions
On the Permissions tab, you can assign permission sets (that are defined here) to the group.
Depending on the type of permission, a slightly different configuration will be presented :
- For general permissions, no organization needs to be selected.
- For organization-specific permissions, you need to select one or multiple organizations.
The assigned permissions apply to all users who are member of the group.
Adding permissions
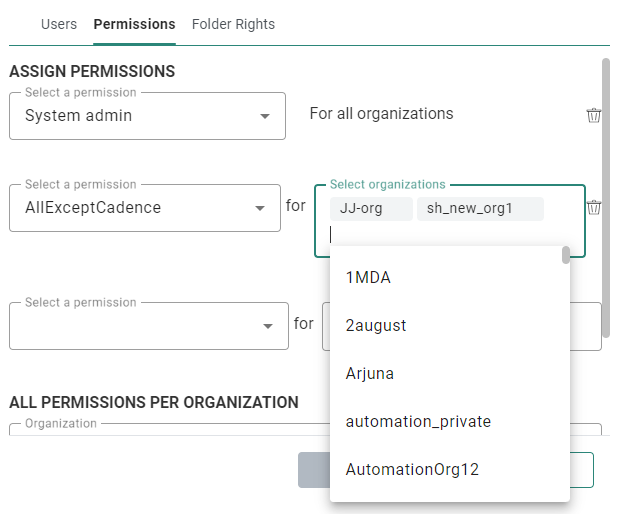
1. The following fields allow selecting the permission set and the organization(s) to which it should be applied.
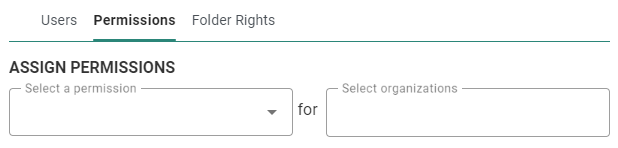
2. From the 'Select a permission' drop-down list, select a permission set. In case the permission set only contains rights for non-organization related functions, the permission is automatically assigned to all Organizations:

3. In case the permission set contains organization-specific rights, you need to select the organization(s) one by one by selecting them in the drop-down list.
4. An additional line is added each time you've selected a permission. That way, you can start defining the next permission and select one or more organizations.
5. When done, click Save.
You can remove an assigned permission from the group by clicking on the bin icon.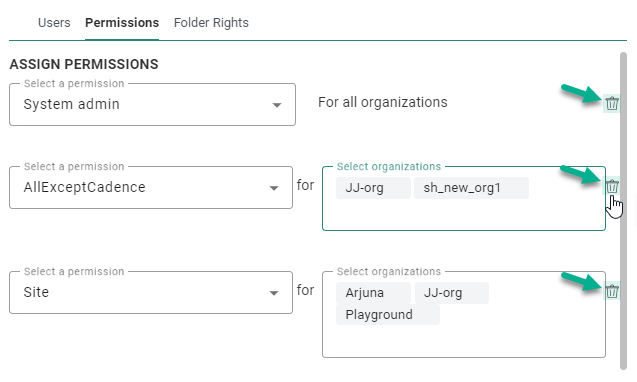
Viewing permissions
When permissions are set, you might want to get a complete view on the exact rights the group now has for a specific organization. This is displayed in the second part of the right sliding panel :
Under Overview all permissions
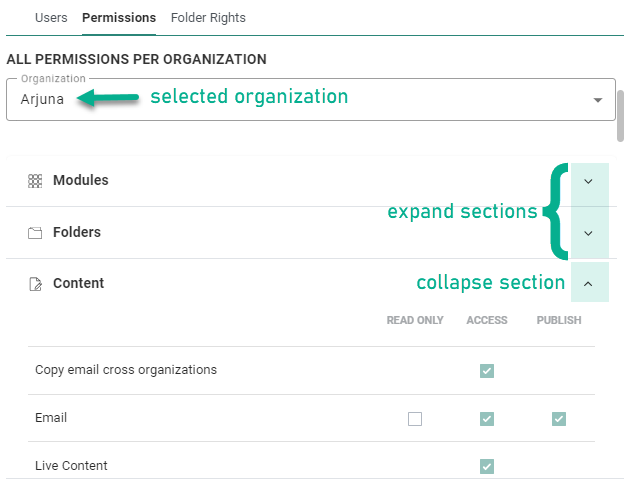
per organization, select an organization from the drop-down list.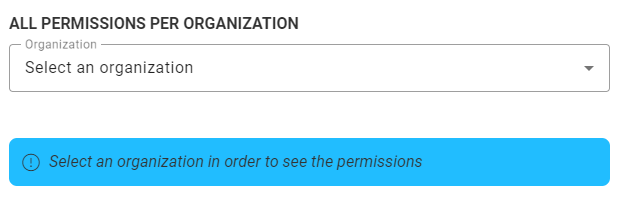
All attributed rights are displayed (read-only) below, split per section.
You can expand/collapse a section by clicking on the arrow on the right.
Note: Permissions can also be viewed as read-only fields for individual users on the Users tab.
Folder Rights
Assets, such as content, lists and journeys are stored in folders and subfolders. This allows marketers to organize their assets in a structured way and make them easily available for others to use.
Groups of users can now be attributed access rights to folders, restricting who can see what. These folder rights have an impact on multiple levels in the Engage application:
- Users cannot create or use assets in folders they don't have access to.
-
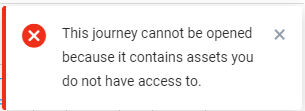
When trying to access journeys or content that are using assets in folders with no access, the user is informed and will not be able to open the journey or content. For example, accessing a journey using an audience list in a folder with no access.
- The assets displayed in the fly-out menu, on the overview pages (eg. Content start page) and in selectors (eg. task selector, journey selector, list selector) depend on the folder rights of the user. Only assets in folders with access will be visible.
- Recent assets in the fly-out menu for which the user does not have folder rights will not be accessible through the link.
-
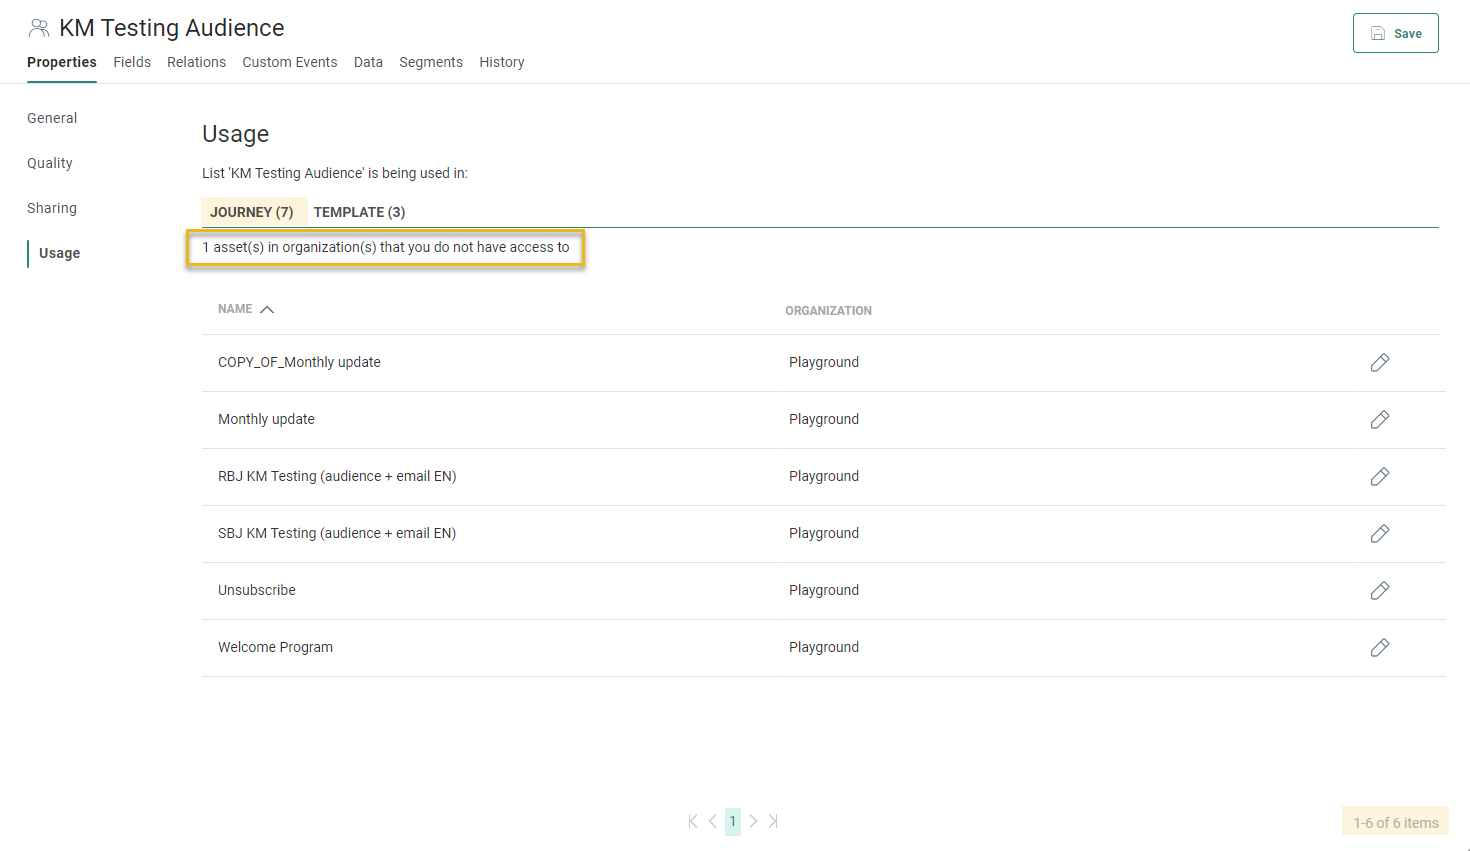
The List Usage section provides insight in which journeys and content the list is used. If the user has no access to the folders in which these journeys or content reside, they will not be listed in the overview. However, the total number of times the list is used in journeys/content DOES include the ones to which the user has no access.

The same applies to the Usage dialogs for Custom Components and Content Blocks. Only assets in folders the user has access to will be listed here. - Reports are only available for assets in folders the user has access to.
- When a new folder is created, the user and all the groups he is a member off automatically have access to the folder.

Note: A specific claim needs to be set in the permissions for a group to be able to apply folder rights to the users in that group. The following rules apply:
- When no folder rights claim is set for the group, this will result in users having access to all folders, regardless of the folder right configuration.
- When the Folder rights claim is set for the group, this will result in users seeing only the folders configured in the folder rights for the group.
Defining folder rights
Following rules apply when assigning folder rights:
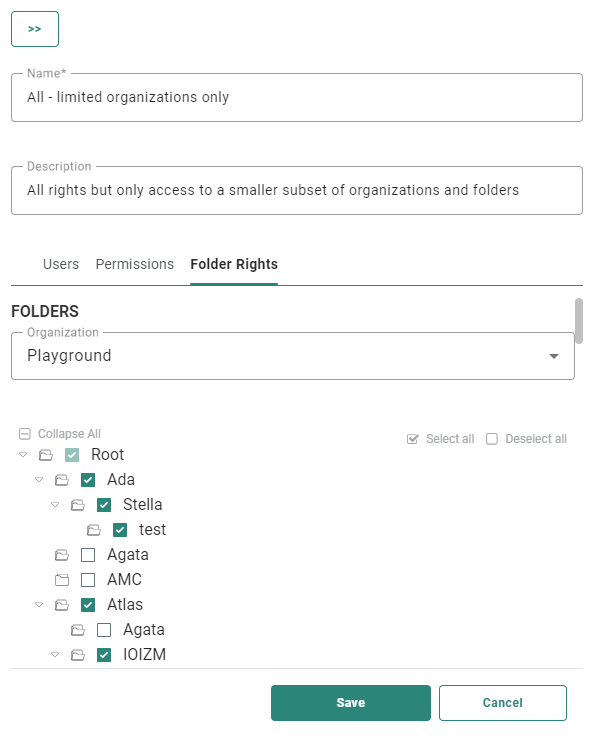
- When selecting a folder, all sub folders are automatically selected. You can then unselect subfolders one by one to give access to only some of the subfolders.
- When unselecting a folder, automatically all subfolders are unselected. You can't have access to a subfolder, if you don't have access to the parent folder.
- When selecting a subfolder, automatically the parent folder is selected as well as all folders below the selected subfolder.
1. To define folder rights for a group, select the organization.
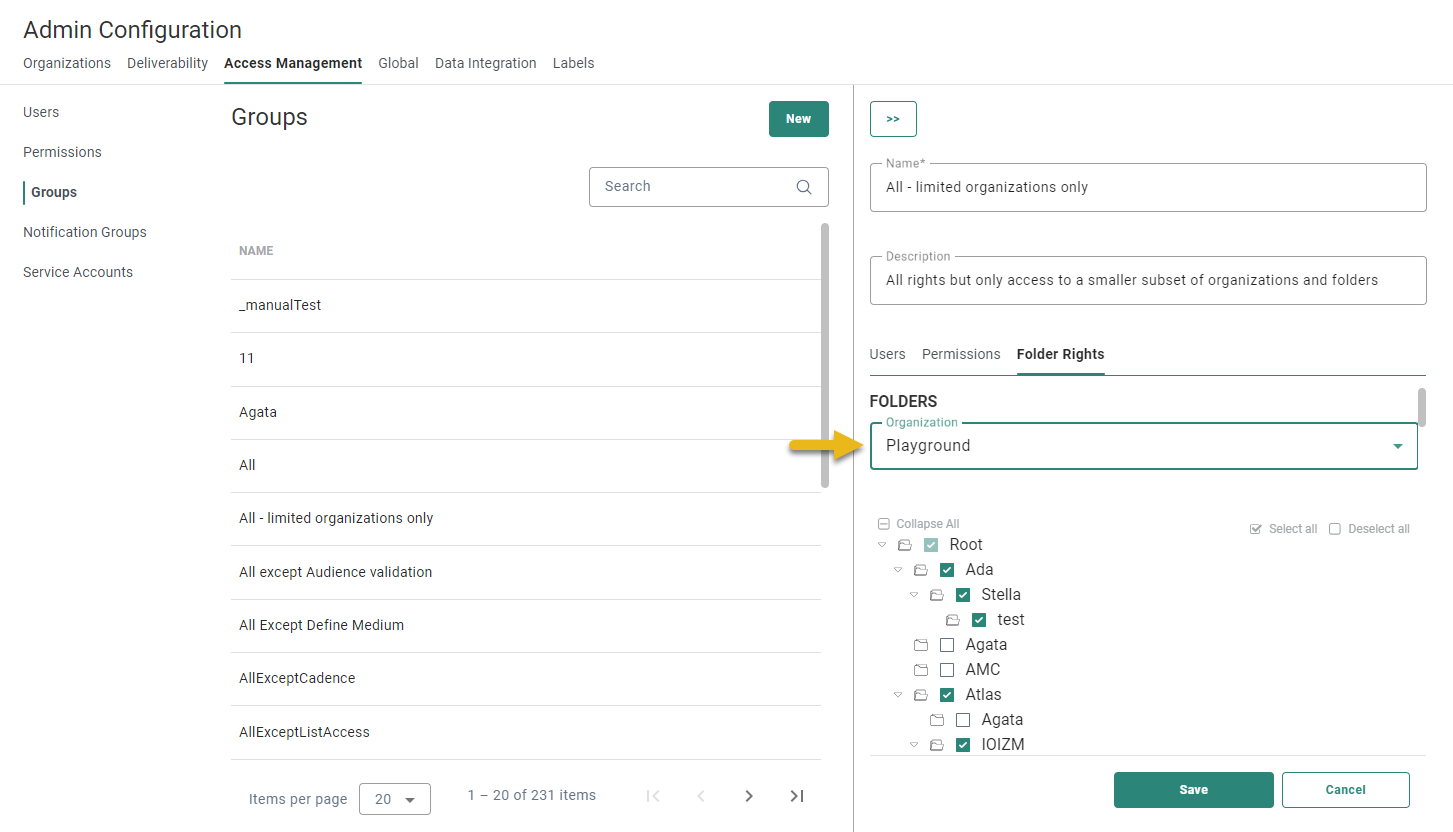
2. All folders and subfolders currently available for that organization are displayed.
Note:
1) If the Folder Rights permission is not enabled for the selected organization, and if there's no permission set defined for the selected organization at all (besides the default 'system admin' and 'organization admin' sets that are not taken into account), the user is informed about both of these.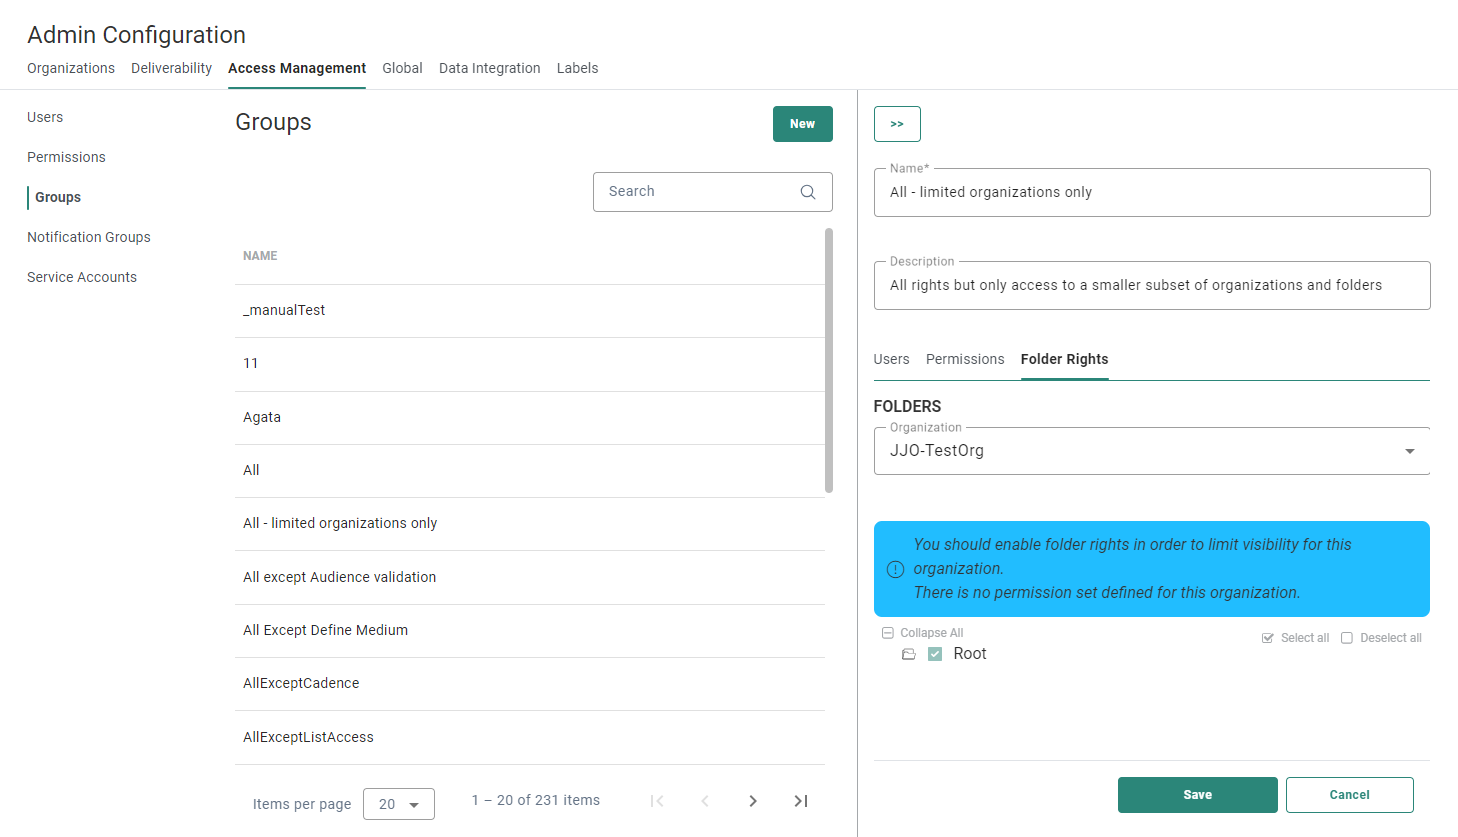
In that case, the user should first assign a permission set to the organization from the 'Permissions' tab.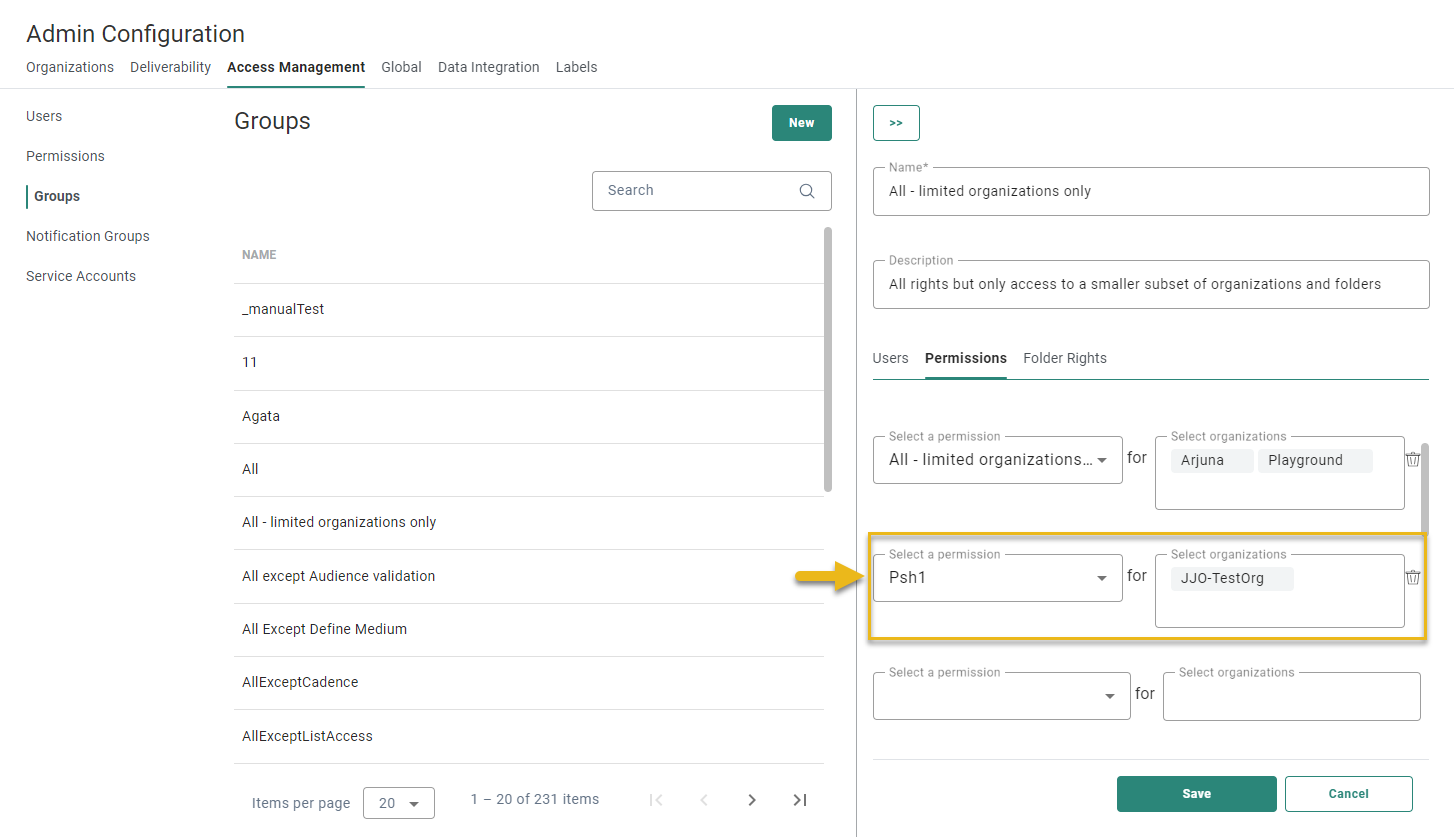
Only then it will be possible to enable folder rights.
2) If a permission set is assigned to the selected organization, and the Folder Rights permission is not enabled for the organization, the user is informed and can activate this permission directly from here.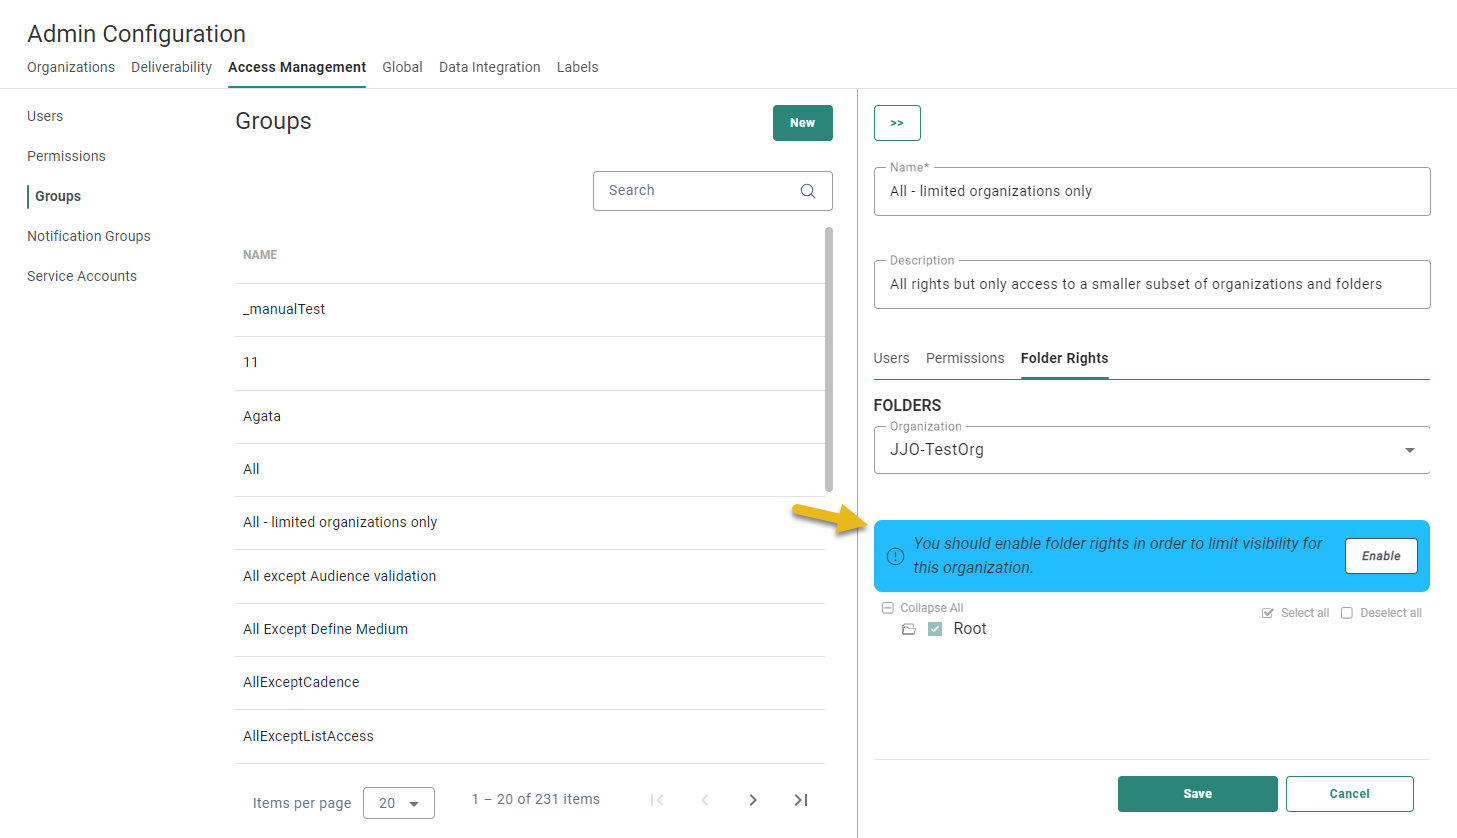
Clicking the Enable button displays a pop-up, informing about the impact this has and indicating which permission set will be updated.
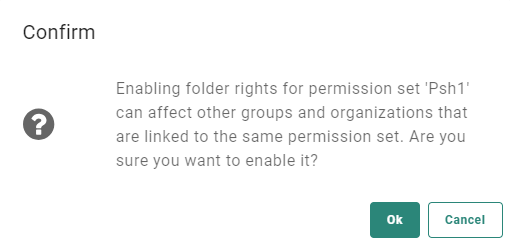
The permission set with the least impact and least used in other organizations will be updated. You can cancel the update if needed and set the Folder Rights permission manually in a different permission set for this group.
3. Check the boxes of the folders and subfolders to give access, keeping in mind the rules explained above.
Note: Folder rights can be viewed per user from the User profile.
