Marigold Engage provides multiple tracking systems to analyze known or unknown contact's behavior using various on-line environments, whether it is your own organizational web site, an on-line product catalog, or social media interfaces. Proper tracking can give you more accurate and reliable answers to many marketing questions and allows making important marketing decisions based on facts instead of guesswork or theories.
The Trackers overview shows all configured trackers, in alphabetical order (by name).
Each row contains the tracker name, last modified date/time and icons to edit and delete the tracker.
The overview can be sorted by clicking on a column header.
The Search field at the top-right
allows searching in the list of trackers based on name.
![]()
From this overview you can
- Create a new tracker — See below.
- Edit an existing tracker — By clicking on a tracker name. The properties are then displayed in a right sliding panel.
- Delete an existing tracker — By clicking on the bin icon.
Create a tracker
You can add trackers to trace customer behavior when defining a web tracking process.
To create a new tracker, click on the New button
at the top-right.
The properties are then shown in a right sliding panel.
![]()
The following fields can be configured (the ones with an asterisk are required fields) :
- Name* — Enter a unique name for the tracker.
- Domains — Enter all the domains
for
which this tracker should be applied. By setting (a) domain(s) here,
the tracker will only be used for those domains.
A domain name needs to be entered as follows: *parana.com. - Move the parameters generated by the tracker to the front — When this option is selected, parameters are placed at the beginning of the Query string. When using a tracker, Engage parameters are, by default, added at the end of the URL. But sometimes this results in very long URLs and not all CMS systems support them. With this option, you can ensure that the Engage parameters are always included in the URL.
- Activate
the required trackers by toggling them on/off:
- Engage webtracker — Sets up web sensors for web tracking.
- Google Analytics — Enables Google Analytics tracking system. All fields available in the table are updated with Google Analytics parameters.
- Lotame — Tags sensors pointing to the domain specified in the tracker with a Lotame parameter.
- Custom —
Defines
a custom web tracking process. Anything
you define in here can be added to the URL. A custom tracker
allows using functions or profile fields .
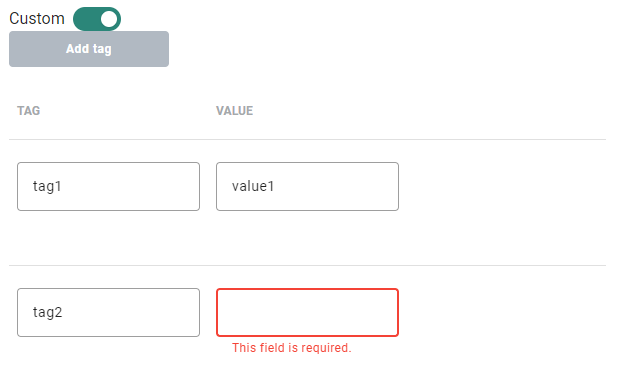
- When enabling the 'Custom' toggle, at least one tag and value are required.
- An additional line automatically appears each time you've added a tag and value. That way, you can add additional custom tracker tags with values.
- A bin icon is available to delete them. Keep in mind that a minimum of one tag with a value is required (validation errors appear if this is not the case).
- Custom trackers need to have a unique tag name.
If additional parameters are required for a tracker, they are shown when a user enables the toggle (eg. Google Analytics).
![]()
The user then needs to set all required fields.
When done, click Save to create the tracker. The Tracker is not active instantly but only after a few minutes.
Note :
When saving a tracker, your configuration is validated. Inconsistencies result in errors to be shown. In that case, rectify your setup and save again.
Note: Trackers must be assigned to one or more organizations, in order to track messages sent (within the organization(s)) !
