![]() The Single Batch Component is used in Custom Journeys to perform a single batch execution for the selected audience. Messages are sent out in bulk to the message audience. The journey is executed either immediately or at a given time.
The Single Batch Component is used in Custom Journeys to perform a single batch execution for the selected audience. Messages are sent out in bulk to the message audience. The journey is executed either immediately or at a given time.
Sending out bulk messages is already possible with the Single Batch Journey created through the wizard, but the goal of this Single Batch Component in a Custom Journey is to allow more complex scenarios, such as adding audience filters, data components or waves.
When using a Single Batch Component in a journey keep in mind the following rules
- A journey can only have one Single Batch Component
- A Single Batch Component cannot be combined with a Recurring Component
- A Single Batch Component can have an optional start date
- Only one link can be made from this component to the next
Properties
Configuration tab
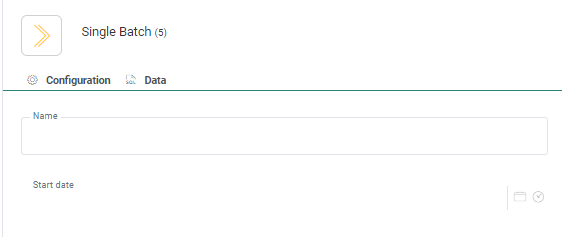
Name — Set a name for the component. The name will be visible from the Design canvas.
Start date — You can set a start date for the journey on which the journey should be executed once it is activated. If no start date is set and the journey is published and activated, the journey will be executed immediately.
Note: When a user defines a scheduled launch time on a journey, the time is expressed in their time zone. The journey will be launched in the time zone of this user at that time.
When a user with a different time zone views the journey, the scheduled time will be translated to their time zone, to reflect the local time.
Internally, the system uses a universal time zone, to make it possible to translate times to localized versions for every user. This means that updates by one user will be correctly represented in the local time zones of all other users.
Example:
User A has a time zone that is set to UTC -5 (Eastern Standard Time).
The user schedules a journey to be launched at 6:00 local time (UTC -5).
User B has a user time zone that is set to UTC +1 (Romance Standard Time).
The user sees a scheduled launch time of 12:00 for that same journey, as their local time has a 6 hour difference compared to user A.
Data tab
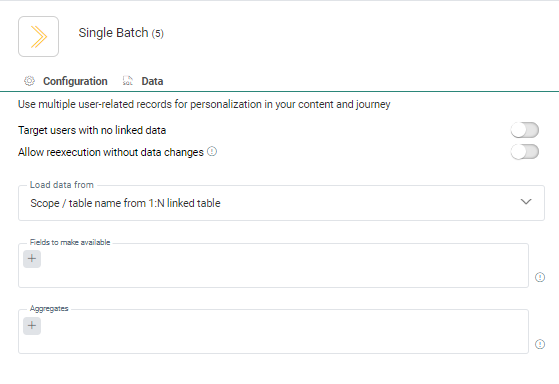
This section allows you to indicate if and what data from a 1:N linked list and 1:N:1 linked lists should be made available for personalization in this journey. Once the below configuration is finished, the Linked list fields will be available in the Personalization Dialog and the Visibility Constraint in any message created in this journey.

Note: Fields from the 1:N:1 linked lists are available in the Personalization Dialog to personalize message content but can also be added to the message using the following function:
JsonValue(eventValue('BULK_DATA_SCHEMA'), 'contracts[0].contract_details.id')
where:
- contracts is the 1:N linked list
- [0] refers to the first record in the 1:N linked list, [1] is the second record and so on
- contracts_details is the 1:N:1 linked list
- id is the field of that 1:N:1 linked list
1. First, select the 1:N linked list from the drop-down. Only lists linked to the selected Audience List are shown.
2. Next, select the fields in that list which should be available to personalize a message or journey. A drop-down is available listing all the available fields from the selected 1:N list, as well as fields from lists linked 1:1 to this selected list.
Note: A maximum of 50 fields can be selected.
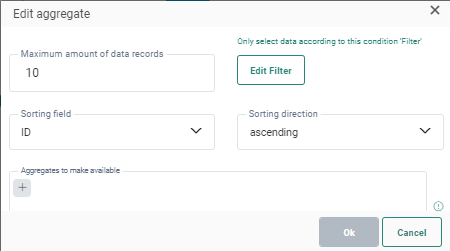
3. Records from the selected linked list can be sorted, filtered and limited to a maximum number.
- Maximum amount of data records - Limit the number of records returned by the selection. By default, a maximum of 100 records can be loaded.
- Edit filter - Define the filter that limits the records returned to only those complying with the filter. Any of the fields in the selected 1:N linked list can be used to filter on
- Sorting field and sorting direction - Sort the fields based on a value in one of the 1:N list fields. This will determine which records will be retained
Example: Return only records of this year, sort the records by order date, with the most recent ones at the top and limit the number of records to only 10. This will result in the 10 most recent orders of this year.
Note: This option is used in combination with data settings in the properties of the message. More details can also be found in this topic: Personalization Dialog
In addition to the standard fields, aggregate fields can be created and used in the personalization of the content. An aggregate is a field that is calculated based on the values of a field in the 1:N list (eg. Sum of all order amounts).
Moreover, you can filter, limit and sort the data used for the aggregate. (E.g. sum of the last 10 most expensive purchases).
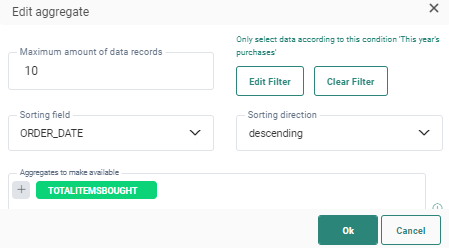
1. To create a new aggregate field, click the + icon in the Aggregates field. A dialog is displayed where a filter, sorting and limitation can be defined. (This is done in the same way as for the normal fields. See explanation above.)
Note: The filters defined in this dialog will apply to all aggregates added in this dialog. If you want to create aggregates with different filter options you will have to repeat this procedure for those aggregates and redefine a new filter and link the aggregates.
Example: 10 most recent purchases of this year. 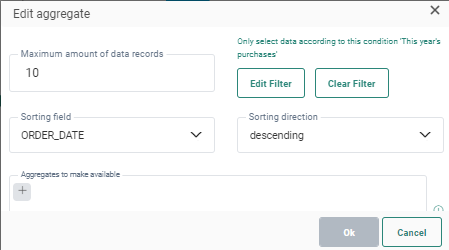
This means that all aggregates defined in here will only take into account the 10 most recent purchases of this year.
2. To create a new aggregate within this filter, click the + and define a name, an operator and a field.
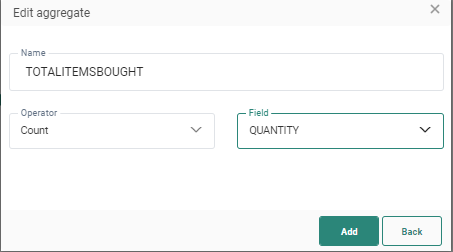
Example: The number of items bought. The result is based on the 10 most recent purchases of this year.
3. Click Add to save the aggregate in the filter.
Note: If you want to define another aggregate within this filter, repeat the process by clicking the + icon again.
4. When done, click OK to save the configuration. The aggregates are added to the properties panel of the component.

Events
It generates the following event:
- OnStart— Whenever the journey is launched, the following steps in the flow are executed.
