Content can be personalized in several ways:
- With the contact's data stored in an Audience List and 1:1 linked lists. This also includes fields from Email Engagement and Email Interest profile extensions when the features are activated on the environment.
- With fields from data selections configured for the template/message
- With variables (VARIABLE.[Name of the variable])
- With system values (Example: data error returned by a Validation Component in a Custom Journey)
- With labels from a selected dictionary to automatically include the translated values of a label
- With fields stored in Custom Events linked to the Audience List
- With fields from the Device List linked to the Audience List. This is only for mobile messages
- With fields from 1:N and 1:N:1 linked lists
Note: Several of the above personalization options are not available by default and require specific setups. Look for more details on this further down this topic.
To add a personalization value,
click the icon  in the pop-up toolbar of a field such as a Text Component, email header
field (e.g. subject line), image URL, button, etc.
in the pop-up toolbar of a field such as a Text Component, email header
field (e.g. subject line), image URL, button, etc.
The Personalization Dialog pops up listing all possible personalization options for the message. This can be fields from an Audience List, 1:1 linked list, a Data Selection List, variables, dictionary, etc.
Example:
The below Personalization Dialog show entries for the parent
Audience List and linked lists, data
selections, variables and system values and dictionaries.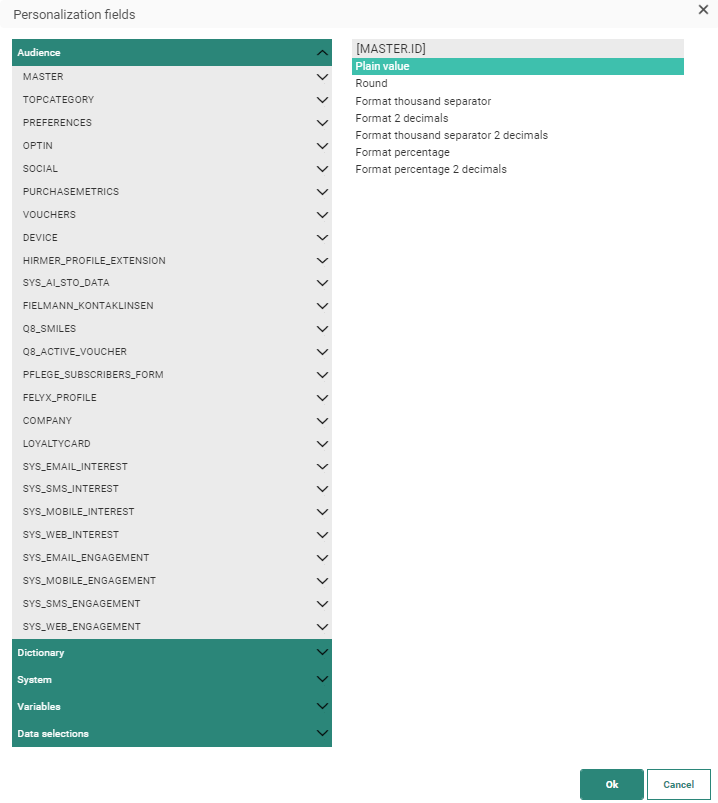
When you select a field, you can choose from different functions to define the format of the field value in the message.
Note: You can use a function to encode the data used in your message. Use this function (base64) when PII (Personally identifiable information) data is used.
- Text fields can be displayed as Plain value, Upper case, Lower case, Proper case or Trim.
- Numeric fields can be displayed as a plain value, rounded, formatted to two decimals, formatted as a percentage, etc.
- Date fields can be formatted in multiple ways to comply with your country's rules and customs.
When done, click OK. The personalization value is shown in the field.
Personalization fields can also be entered or edited directly in the text and must follow a specific format:
- System values: [%VALUENAME%] (Example: [%sysdate()%]
- Variable: [%[VARIABLE. NAME]%]
- Fields from a data selection: [%itemValue()%]
- Fields from an abandoned Site cart: [%cartValue( )%]
- Fields from a dictionary: [%label( 'DICTIONARY_NAME','LABEL' )%]
- Fields from a Custom Events List: [%eventValue('FIELD_NAME')%]
- Fields from a Device List : [%mobileValue('FIELD_NAME')%]
Technical note: If you want to add text with [] and percentages in it, the first [ must be doubled. Example: [[%this is my text%]
Note: Personalization fields can be used in multiple locations, e.g., when setting the URL of an image, in the URL of a link, in the label of a button, in the fields of the email header, in a Barcode, etc.
Below, we'll go a little more into detail on how to enable the use of specific personalization fields.
- Use data selections for personalization
- Use Site cart data for personalization
- Use Custom Events data
- Use Device List data for personalization in mobile messages
- Use 1:N and 1:N:1 data for personalization
Use data selections for personalization
A Data Selection List is your typical catalog, whether it is a list of articles, shop branches, financial products or other. Data from a Data Selection List can be shown in a message subject, Text Component or even Repeater. To be able to do that, the data selection needs to be defined in the properties of your message.
More information, details and examples on how to configure this can be found here:
Use Site cart data for personalization
When you want to use cart data to personalize your message, you also have to work with a Data Selection List. However, additional steps are required:
- An Abandoned Cart Journey must exist in which a scope (mandatory) is defined. The Abandoned Cart returns a list of products from Site with their price and quantity and this data will be used to personalize the message.
- Then, you need to create a data selection in the properties of your message and configure it as a lookup. Perform a lookup by matching the products in the catalog to your products in the cart. This is where the cart scope will be used.
- When this data selection is used for personalization, a function cartValue() is available that allows using the value returned by Site for the selected field. If no Site value is available, the value from the Data Selection List is taken.
Note: At this moment, only price and quantity can be used to personalize the message.
Example:
We have an Abandoned Cart Journey with scope 'ABANDONED'. Site returns 2 parameters for the cart: Cart and Products
The Products parameter contains the list of abandoned items with their price and quantity.
Example of the Site payload:
We then create a message that contains a repeater using the following data selection configuration: Items are filtered using a data selection lookup which only returns items from the Data Selection List that have an ID that corresponds to the IDs returned by Site. Setting the data selection to be used as a lookup is a mandatory step when Site cart data is to be used.
'ABANDONED' is the scope name set in the Abandoned Cart Journey. 'PRODUCTS' is the parameter that contains the list of items.
When this data selection is used in a repeater for personalization, a function cartValue() is available that allows using the values returned by Site. If no value is available, the value from the Data Selection List is taken:
Note: When using the cartValue expression in a message, the preview of the message cannot display the cart data but will instead show the data from the data selection.
Summary:
To use Site data in personalization the following conditions must be fulfilled:
* A scope must be defined in the Abandon Cart Component
* The data selection used in the message is configured to be used as a lookup.
Also, the Data Selection List should contain the same products and IDs as used in Site.
Related topics:
- Data Selections
- Data Selection filters
- Data selection as Personalization
- Abandoned Cart Component in Custom Journeys
Use Custom Events data
Custom Events data can be used in two ways to personalize a message. One way is to use the data from the Custom Events List directly in your message and the other way is to use the Custom Events data to retrieve matching records from a Data Selection List.
Custom Events data in personalization
When an Audience List has a Custom Events List linked to it and you want to use data in this Custom Events List to personalize your message, you need to explicitly indicate this in the properties of your message. 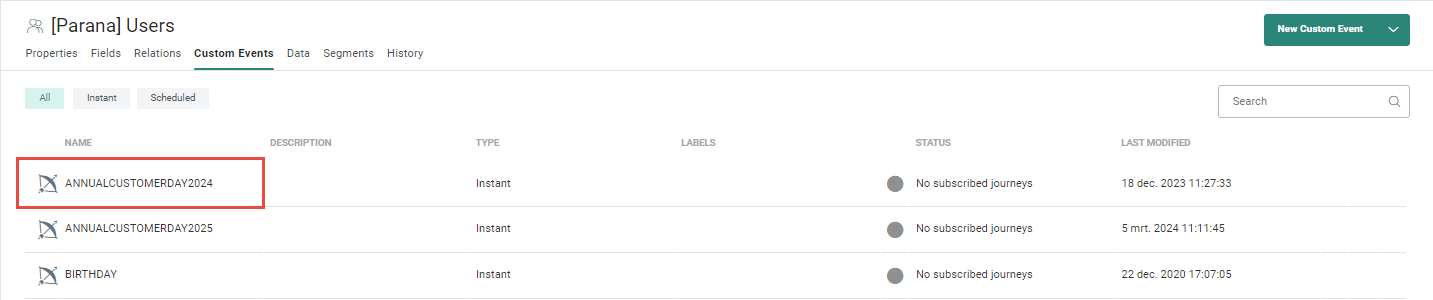
In your message, go to Properties > Audiences, Languages and Data > Data section > Event data type field and select Custom event data from the drop-down. 
Once this is done, the Custom Events List will be available in the Personalization Dialog: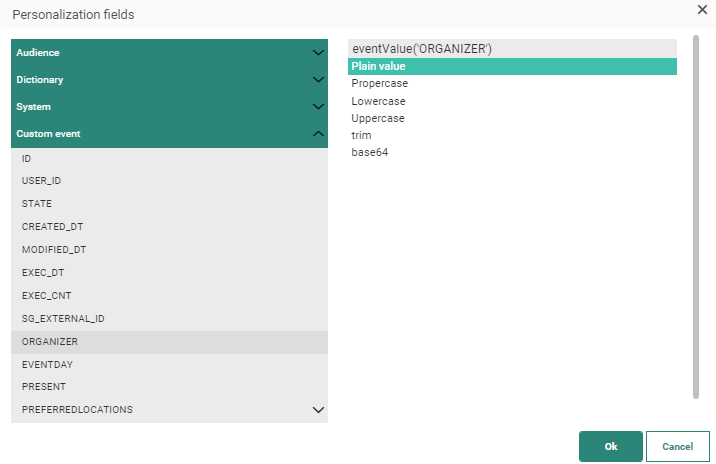
Custom Events data to look up items from a Data Selection List
In this case, we are not directly using the data in the Custom Events List to personalize the message, but we will look up data from a Data Selection List that matches the data in our Custom Events List.
For example, a Data Selection List contains the catalog of car models and their technical details. At an exposition, customers can indicate their preferences. After the exposition, emails are sent to these customers with all the details of their preferred car models. The details come from the Data Selection List but only for the products that match with the preferences in the Custom Events List.
Check out this topic for a detailed explanation and example on Custom Events for personalization.
Related topics:
Array fields in Custom Events as a data source for a data selection
When a Custom Events field of type JSON has an array defined in it, this array can be used as a possible data source in a data selection. This allows the marketer to use the data in the array to personalize the message.
Example: A Customer day is being planned at multiple locations and customers can indicate their preferred location(s). This information is stored in a Custom Events List and an array is used to store the address details of each location. When sending out a communication, the address information of all selected locations is listed in the message.
(For more details on how to do this and a detailed example, please check out the following topic.)
Use Device List data for personalization in mobile messages
Data from a Device List (also referred to as mobile app) can only be used to personalize mobile messages.
1. To do this, you need to select the mobile app when creating the mobile message. All mobile apps linked to the current message Audience List are listed.

Note: If no mobile app is available to select, check
- if a Device List is linked to the Audience List.
- if the Device List has a mobile endpoint defined. If it hasn't, select one. If no endpoints are listed, ensure that a mobile endpoint is linked to your organization and is not yet used by another Device List
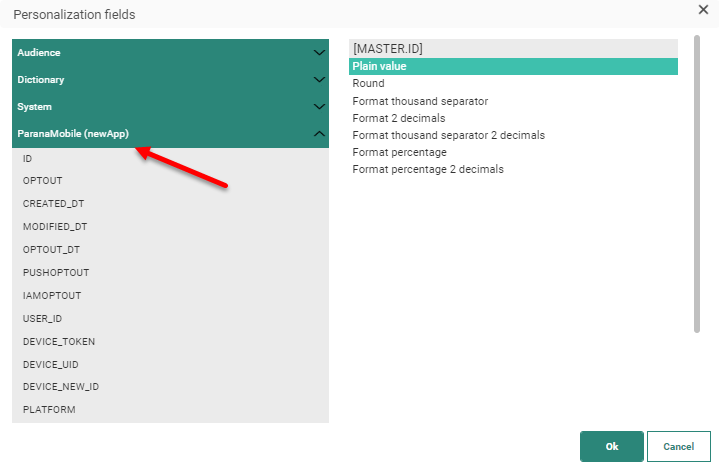
2. Once the mobile app is selected, it will be available in the Personalization Dialog.
Use 1:N and 1:N:1 data for personalization
Data in 1:N and 1:N:1 linked lists can be used for personalization in a message but several steps need to be taken to accomplish this. Currently, this is only available for Custom Journeys.
Note: This is only available in email messages used in Custom journeys. It cannot be applied to templates.
1. In a Single Batch or Recurring Batch Component, go to the Properties panel of the component. On the Data tab, select the 1:N linked list.
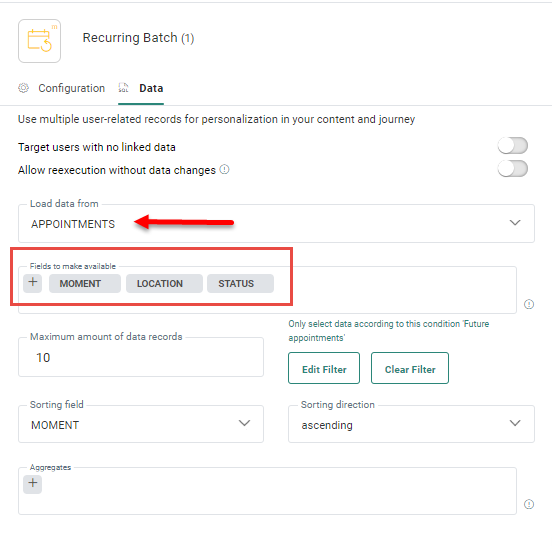
2. Next, select the fields in this list. Only selected fields will be available for personalization. A maximum of 50 fields can be selected.
3. If needed, a filter, a maximum number of records and sorting can be defined. This will limit the records returned from the 1:N list to those answering the criteria.
4. In addition, aggregates can be defined as well.
5. Once this configuration is finished, create a message, either directly from the Journey chapter or from the Content chapter. Specify if journey data needs to be used and which journey. Only journeys that have been set up to make 1:N data available are listed.
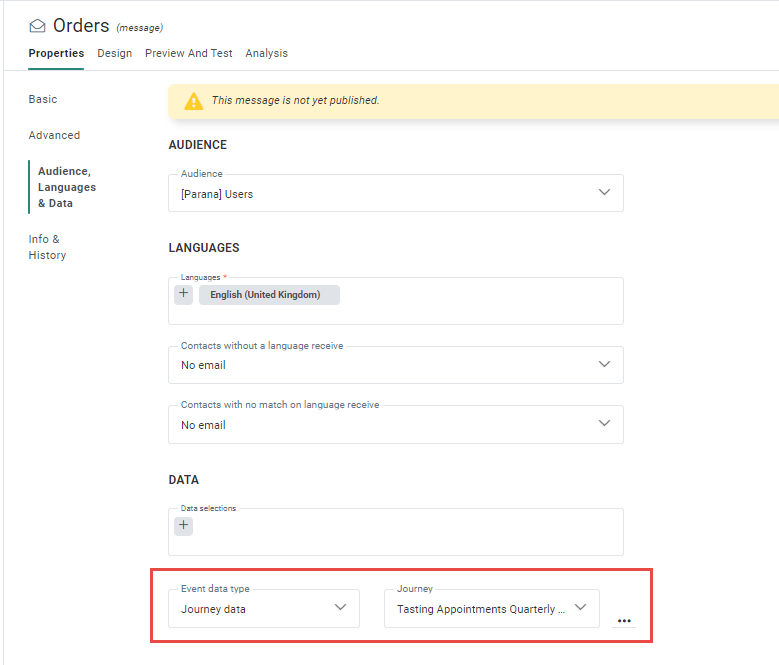
Note: When creating the message directly from the Journey chapter, this information is already pre-filled.
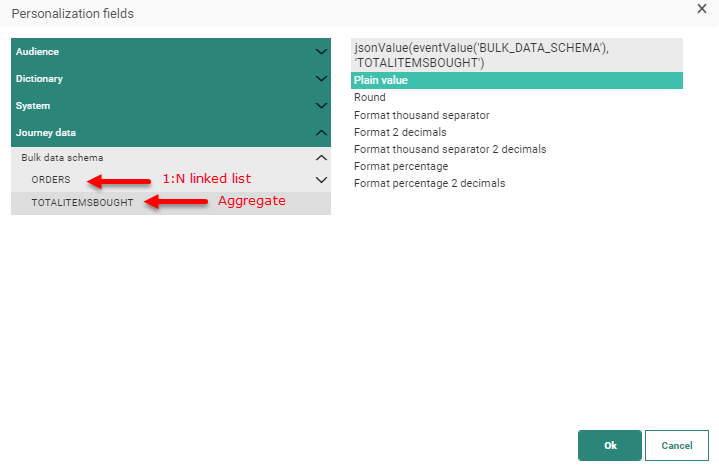
6. The Personalization Dialog lists these fields now.
Note: Fields from the 1:N:1 linked lists are available in the Personalization Dialog to personalize message content but can also be added to the message using the following function:
JsonValue(eventValue('BULK_DATA_SCHEMA'), 'ORDERS[0].HIGHESTORDERSCOPEAMOUNT')
where:
- ORDERS is the 1:N linked list
- [0] refers to the first record in the 1:N linked list, [1] is the second record and so on
- HIGHESTORDERSCOPEs is the 1:N:1 linked list
- AMOUNT is the field of that 1:N:1 linked list
In the Personalization Dialog, fields from the 1:N:1 Linked List are displayed as following:
The Aggregates defined for the Linked List will be displayed as follows:
If you want to use the Journey Data for personalization in a repeater, you need to create a data selection using this journey data as a data source.
Note that aggregates will not be available when journey data is used in a repeater.
Example :
In a Custom Journey we want to list all the orders a consumer has ever made. These orders are stored in a 1:N list.
In the properties of any message used in this journey, this journey data can be selected as a data source and used to personalize the message with the product details.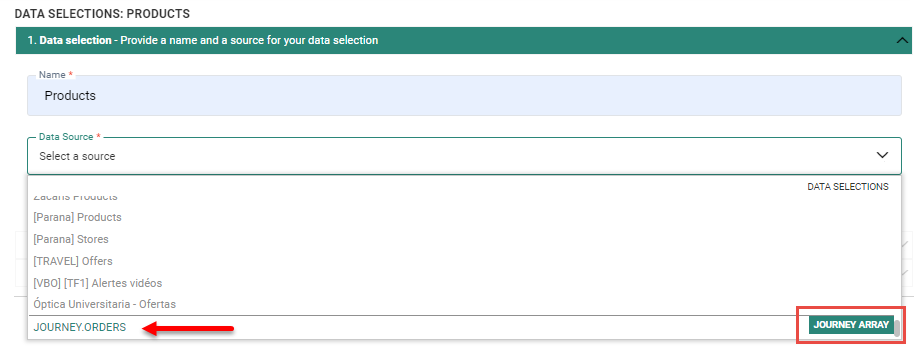
Check out these topics for more details on how to personalize using 1:N data:
- Single Batch Component
- Recurring Batch component
- Message Properties - Details on how to select the journey data for use in the message
- Message Preview - Preview your message containing journey data
- Send test message - Send a test message containing journey data
