1. To create a push notification, go to the Content entry.
2. Select New from the toolbar and then select

3. When Mobile Message is selected, you need to select the type:
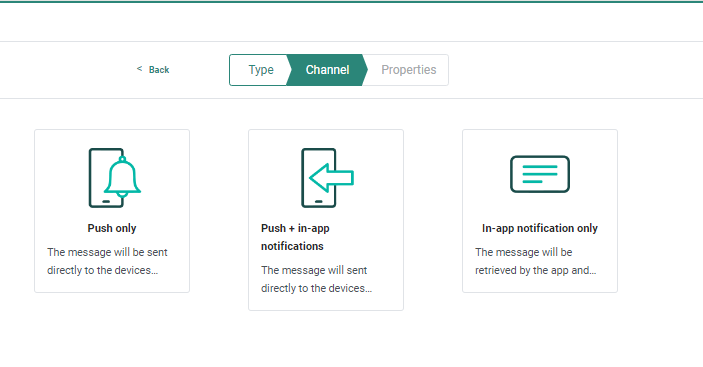
4. Click Push only. The following properties page is displayed:

The properties are grouped by type of information. By default only the Basic fields are displayed. Switch to the Advanced fields tab to display all other fields. On the left hand side of the properties, on-screen help is provided. This helps the user filling out the form with accurate and comprehensive information.
Basic fields tab:
Basics
- Folder path — Set the Folder Path. This is the folder in which the asset is created. By default it takes the folder that is currently selected on the Start page when the asset is created. You can modify the path if required
- Name — Set a Name for this notification.
Target
- Audience — Select an Audience list. Fields in the selected list will be available to personalize the notification. (This audience list must be linked to a Device List (only one). This also implies that app users who did not register the device and, therefore, do not exist in the audience list, will not receive this push notification.)
- Languages — Select the Languages in which the notification should be available. Only languages defined for the Organization are available. The Language field is pre-filled with the default languages defined at Organization level. The language for the notification is matched to the user's language and defines the language in which the notification is sent. If the notification does not exist in the device language nothing is sent.
Advanced fields tab:
Basics
- API name — Set the API-Name. By default the API name is filled out automatically based on the name of the message. Change it if needed. The API name is used to call the page via the API Explorer.
- Labels — Asset labels are optional. Select one or more labels from the drop-down. (These labels are configured in the Admin configuration.) Users with the proper Access permissions can also create new labels here by typing the new label value in the field.
- Description — Set a clear description of what this content is used for.
Data selection
Select the type of data to use in this message. From this drop-down list you can choose from following options:
- No event data — In this case the message behaves as a normal message.
- transactional data — Select this option to make the message available to create Transactional Journeys from. By selecting the option, the message is marked as a transactional message, transactional data can be defined and used and the message will only be available for use in a Transactional Journey.
- Custom event — When Custom Events have been defined for the selected audience, the marketer can use the data in the Custom Event to personalize the message that will be used afterward in a Custom Journey triggered by the Custom Events. Messages using Custom Event data can only be used in event-driven journeys. Note that Custom Events data used to personalize the message are not visible in the preview of the message.
App selection
- Mobile app — Select the Mobile app to use in the message. All mobile apps linked to the selected Audience list are listed. Select the mobile app for which the message is being created. Data from this mobile app can be used for personalization.
5. Click Create message.
Note: Push content can be used directly from the Content window to create a single batch journey or transactional journey. Moreover, Push content is also available from the Mobile Push component in a custom journey.
Define the content for the push notification
Once the message has been created, define the content of the push notification. A push notification can have a banner title and content. Up to three buttons can be added to the notification.
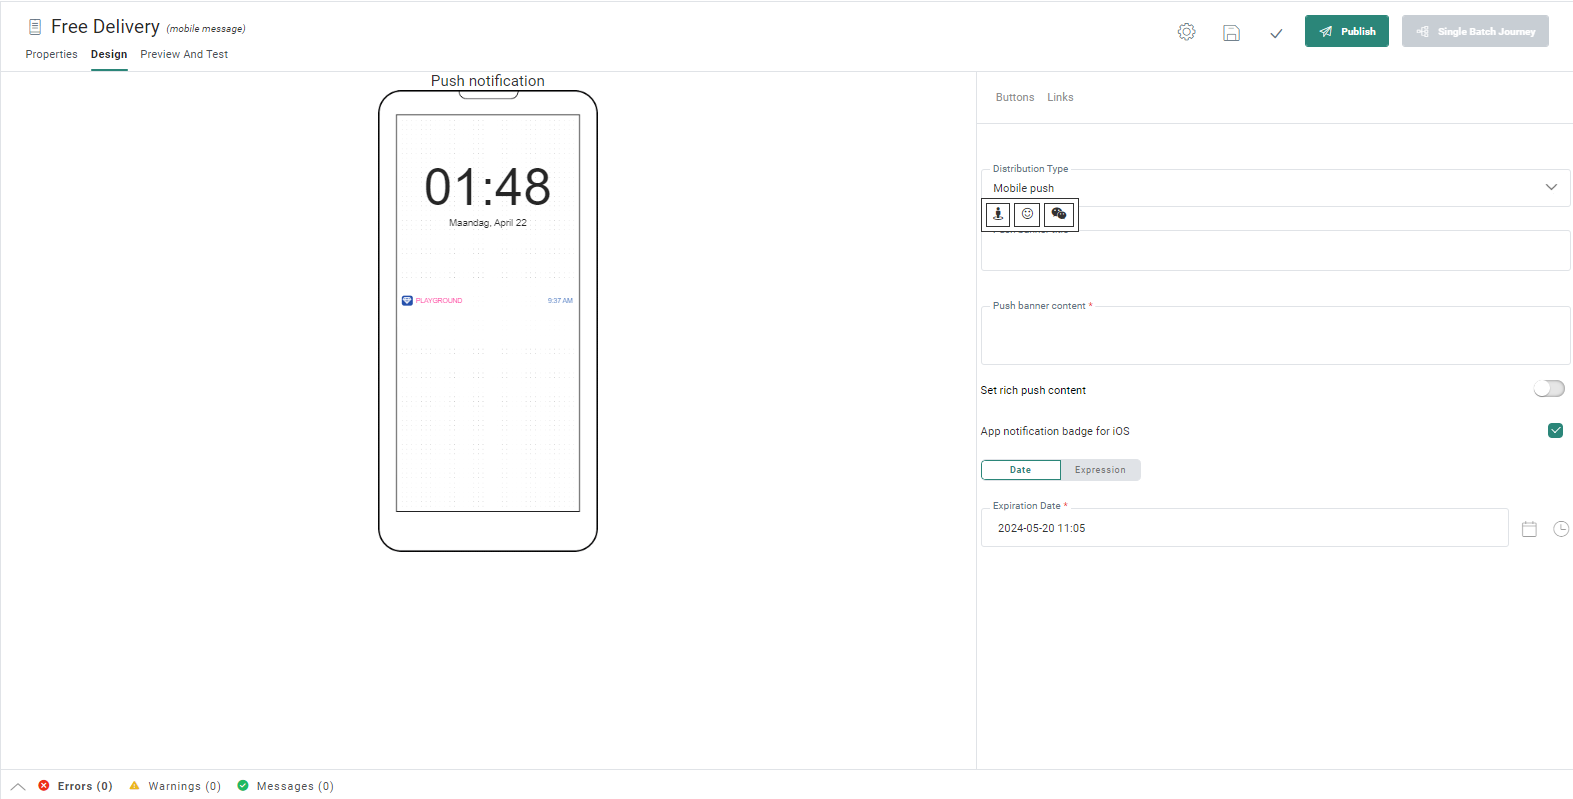
The Distribution type field is, by default, set to the type selected when the notification was created. It can still be modified here. The following options are available:
- Mobile push — Only a push notification is sent.
- Push + in-app notifications — A push and in-app notification are sent. The content can be the same or a custom in-app notification can be created.
- In-app notification only — Only in-app notifications are sent to the device. An in-app notification is sent to the inbox.
- In-app when no push notification is available — A push notification is sent to all devices. If a contact has disabled push notifications, an in-app message will be sent instead. If a contact has enabled push notifications, a push notification is sent and no in-app notification.
The following properties need to be defined for the Push notification:
- Push Banner title — This banner pops up on the mobile lock screen or in the notification center. The user does not need to be connected to the app to see this banner. When the user taps the notification, the app is opened and the actual message is displayed.
- Push Banner content — This is the actual content of the notification available from the notification center.
Note: The Banner title and content can be filled with AI generated content. Click the icon Generate message using Marigold AI in the toolbar of the field to open the AI conversation dialog. You can enter your question or keyword and use the generated content in your message: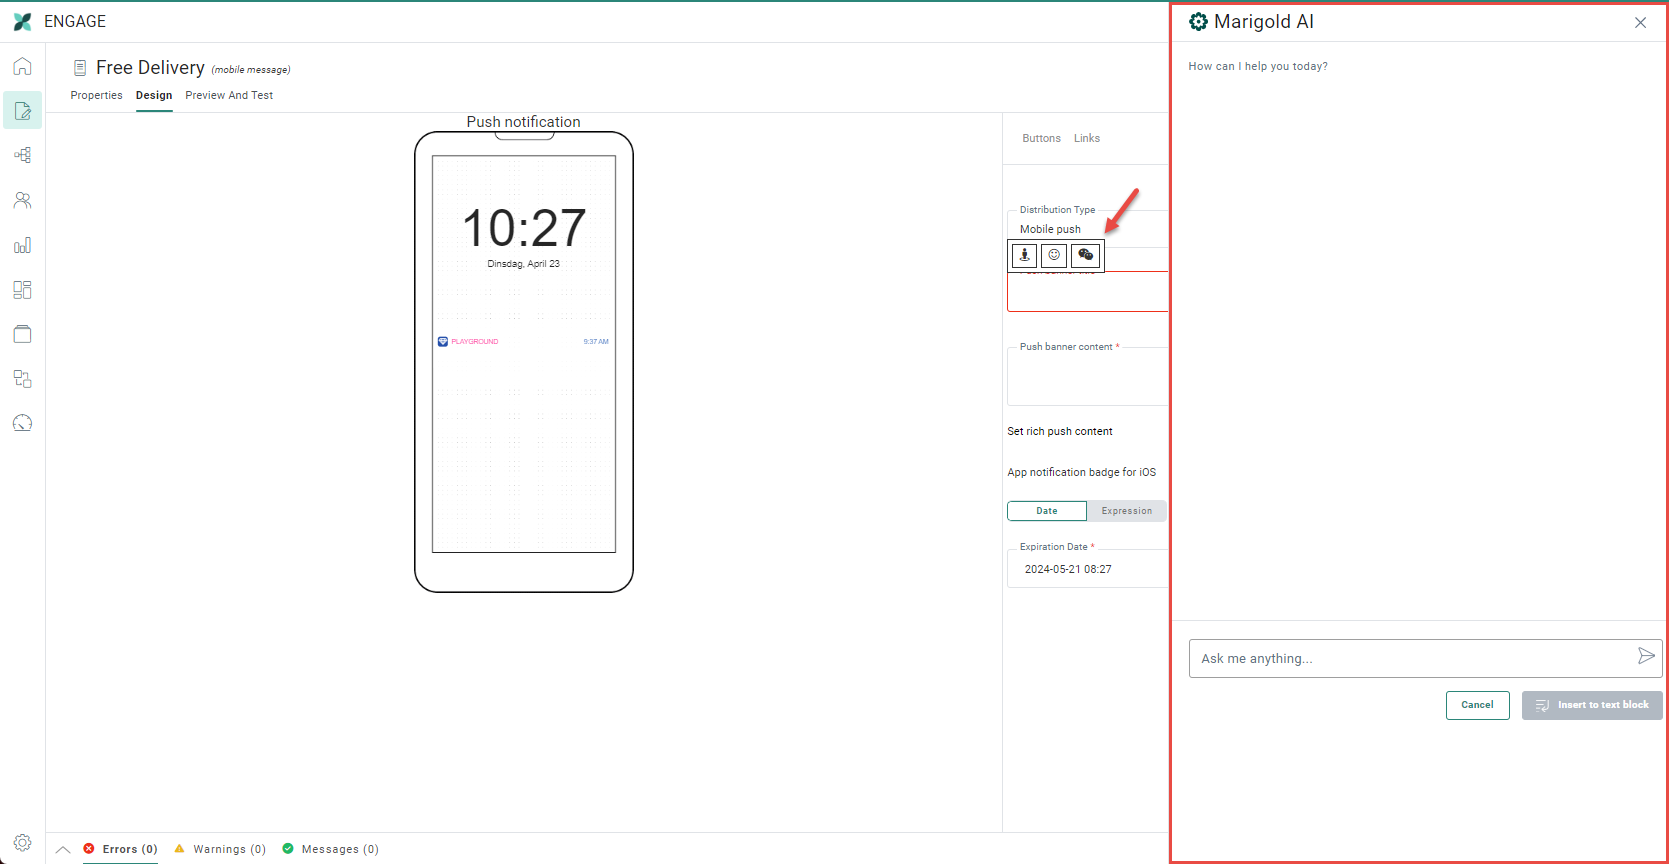
Note: If you select the existing text in your message first and then click the AI icon, the selected text is used as the question in your dialog and the AI generated text will overwrite the selected text in your message if you agree to use it.
Additional options are available to make the selected text shorter, check the spelling, change the tone or completely rewrite the text.
- Set rich push content — Select the option to add rich content to the push message. When the option is activated, additional fields are displayed to add the rich content. This can be an image or Smart Content.
Image

Press Choose image to access the Library, navigate the folders and select an Image. The URL is automatically added to the Source field.Note: Check out the section on Library for more details on how to manage Images. Personalization fields can be used to complete the path to an Image in the library.
When Live Content is used in the template, click the Choose Live Content button to select an existing Image or create a new one. The Source field is automatically filled out with the selected Image. For more details on all the options available for Live Content, click this topic.Example:
[%livecontent('530506b4-99fe-4957-af16-3424a668805a')%])Note: To make sure that images appear correctly when expanding a push notification, it's advised to use images with a 2:1 aspect ratio, and a maximum width of 2000 pixels.
Commonly used sizes are 512*256px and 1440*720px.Smart Content
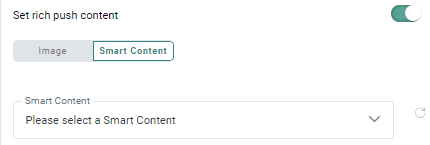
When selecting this option you can choose from a drop-down list of predefined Smart Content. Smart Content is used to add dynamic and intelligent recommended items to a message. The content of the Smart Content is based on algorithms that analyze the behavior of other visitors on the website. For example, present your contacts with trending items that are currently a lot looked at. Or when buying a product and sending a confirmation email, present your contact with products that are often bought together. For more details on Smart Content, please check this section.
- App notification badge for iOS — This option can be enabled to add an app notification badge for iOS devices.
That way, marketers can ensure that users who may have disabled push notifications on their iOS device or missed an initial push notification, still get notified and are thus encouraged to open their mobile app (which might also boost the app’s open rate).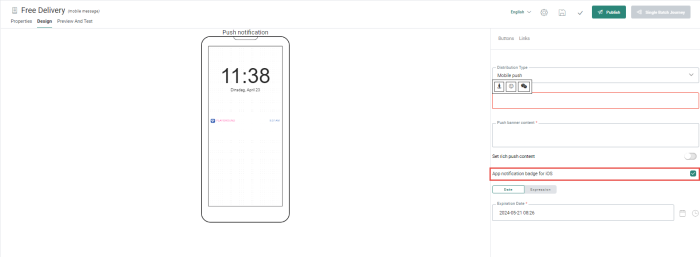

Note: This option is available for distribution types Mobile push, Push + in-app notification and In-app when no push notification is available. It's not available for In-app notification only.
If a mobile push message is sent with the 'app notification badge for iOS' setting enabled, the following occurs for the iOS contact receiving the message:
1) The contact receives the push notification on their device.
2) If the contact ignores the push notification, an app notification badge will be visible as a red dot containing the number 1.
(On Android devices, app notification badges already appear automatically, as red dots without numbers.)
3) If the contact opens the app through the push notification on their iOS home screen, the notification badge on the app disappears.
(If the contact opens the app through the push notification on their iOS lock screen, no notification badge is displayed at all.)Important:
If the contact ignores the push notification, and opens the app, the notification badge remains visible.
In this case it's not up to Marigold Engage, but to the app builder to manage the behavior of notification badges of the app.
Before starting to use the 'app notification badge for iOS' setting, it's always best to check and test the app you're using to see if it behaves properly.Note: When a new push notification is sent from Engage and the app already has a notification badge (regardless the number in it), it gets overwritten with a new notification badge with the number 1. .
- Expiration date — Defines how long the mobile notification will remain available.


Note: Depending on the operating system used, the following behavior occurs. In iOS, the expiration date is not limited, while in Android, the maximum allowed expiration time is 4 weeks. The expiration date is unique for a message, which means that any expiration date set above 4 weeks will automatically be limited for android to 4 weeks.
The expiration date is by default set to 'today+1 month'.
If you are sending a promotional push notification, it must be available only for a specific duration. When devices are offline and cannot receive notifications at the time they are sent, the notification will remain on the server until the expiration date. After that date, if devices become available again, it will no longer be sent.
All fields can contain personalization fields. These personalization fields depend on the selected audience list.
Example 1 :
The push banner title contains: A special offer for you, [%proper([MASTER.NAME])%]!
Example 2 :
The following expiration date is set: [%addweeks(sysdate(), 4)%]
Define the message action and buttons
Next, you can define the buttons that should be displayed on the push notification. Up to three buttons can be defined, with a specific action linked to each one. In addition, a message action can be defined.
Use the toolbar to define the buttons.
Click the first icon to display the Call to actions buttons panel:
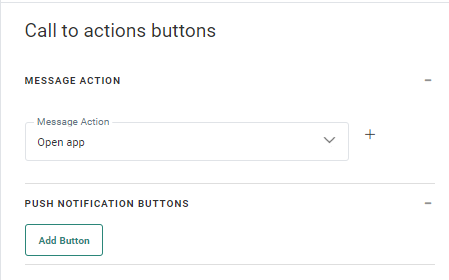

Message action — The message action defines what happens when the recipient of the push notification clicks the notification. This can be any of the following actions. For each action a link is created:
- Define reaction in the journey — What happens when this button is clicked is defined in the journey itself, such as redirect to another journey, send an email, etc. Clicking the link in the notification will close the notification.
Note: When using this link, the mobile push component is followed by a Page component.
-
Existing journey — Redirects the contact to a page in an existing journey.
-
Telephone — Makes a phone call to the defined phone number.
-
Send an SMS — Opens the default SMS application to send an SMS text to the indicated mobile phone number.
-
Open Email client — Opens the default email application to send an email to the indicated email address.
-
External URL — Opens the default browser on a defined URL (for example, http://www.selligent.com)
-
Open App — Opens a defined application, such as Facebook, 'X' (formerly Twitter), etc. Example: fb:// on iOS; com.twitter.android on Android)
Note: The syntax of the target differs depending on the platform. At the moment no automatic conversion is made to the correct syntax for iOS or Android. It is recommended to create 2 separate push components dedicated to a platform.
-
Open a method in your app — Opens the specified method in the app. The same method name should be used on Android and iOS apps.
-
Open Passbook— Opens the passbook file at the given URL (e.g., airline boarding pass, movie tickets, etc.). The passbook file must already exist. Engage only provides the possibility to open it. When the button is clicked, the notification is closed and the passbook is opened.
-
Deeplink — This links to a specific location in an app, rather than simply opening the app.
-
Rate the app — Allows the contact to rate the app.
-
Close — Closes the notification. Depending on the configuration of the app, it open the application for the contact. The click on the Close button is sent back to Engage and can be used to trigger actions at Journey level. For example, a mobile message where the Close button is used as a ‘Remind me later’. The click on the Close button will trigger an action in the journey where a reminder notification is sent later in the day.
Mobile push notification buttons — In this section, you can define up to three buttons. Click 'Add button' to create a button:

Define a label and select a link from the drop-down list. If no links exist, you can create a new one using the + button.
Note: The list of possible links that can be created for a button is the same as for the main action. See above overview.
Note: If no main action is defined for the Push notification, the default action to open the app is used.
Note: A click on one of these buttons can be used as an event in the journey.
