Liveclicker allows you to customize message content based on when, where, and how a message is opened. For example, the message might display a promotion on summer dresses when the weather is sunny at the email recipient's location.
For location-based content, the solution uses an externalCityIp2City database from MaxMind that maps the message recipient's IP address to their location: https://www.maxmind.com/en/home
The accuracy of the location differs by country. You can view the location accuracy for a specific country through the following link: https://www.maxmind.com/en/geoip2-city-database-accuracy
The country may also be detected based on where the mobile network is located. However, when emails are opened through a mobile app using 3G or 4G network at the city level, location-based content will not work as expected.
For location-based weather services, the solution uses the OpenWeatherMap application.
Note: The GeoIP Databases and GeoIP Data are furnished on an “as is”, as-available basis. No warranty, express or implied, is made with respect to the capability of the GeoIP Databases and GeoIP Data or the accuracy or the completeness of the GeoIP Data. All warranties of any type, express or implied, including the warranties of merchantability and fitness for a particular purpose are expressly disclaimed. Marigold and its suppliers do not warrant that the GeoIP Databases and GeoIP Data will meet any particular criteria of performance or quality
Each Live Content element added must have a default selection that will be displayed if no data is available for the content. In addition, rules can be configured to display different content depending on a constraint being met or not. When several constraints are defined, they are tested from top to bottom. When none of the constraints are met, the default content is displayed.
Note: For performance reasons, image size is limited to 100KB. This is configurable and can be changed upon request.
Technical note: Images are set to expire which means they are reloaded each time the message is viewed. As a result the right image is always shown in email providers, such as Gmail, who usually pre-load the images.
Engage supports following types of Live Content:
- Countdown — Inserts an animated countdown timer that counts down to the specified time in days, hours, minutes and seconds.
- Web scrape — Inserts an image taken from a web URL. Examples of use include products in stock or the last booking, etc.
- Dynamic images — Inserts an image with a personalized text overlay. Audience fields, fields from linked lists, and system fields can be used to personalize the image.
- Weather — Inserts a weather widget that can be based on the contact’s location as stored in their profile, or based on the user's location when the message is opened, or on a fixed location. Engage provides several weather display templates for the user to choose from.
- Weather forecast — Inserts a weather forecast widget that displays the weather for the upcoming three days based on the contact’s location as stored in their profile, or based on the user's location when the message is opened, or on a fixed location.
- 'X' (formerly Twitter) — Inserts a widget that displays tweets from a specific 'X' (formerly Twitter) timeline or with a specific hashtag. The user can choose to display the most popular tweets or the latest.
- Content Automation — Inserts an automated widget that displays content provided from any API in predefined templates, such as stock market information.
- Nearest store — Inserts information on the store nearest to a given location.
- Rule based — Displays different content, based on rules you define inside the widget's configuration. Rule based content can be created from scratch or default content can be converted to rule based content.
Adding Live Content to a Message
To add Live Content to the email:
1. Drag and drop the Image Component onto the message and click it to access the Properties panel.
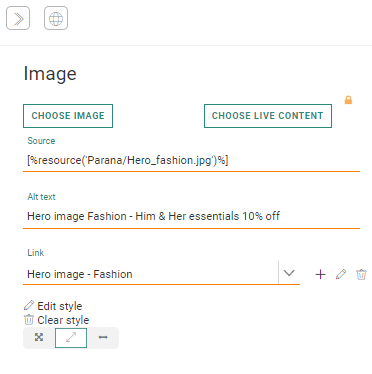
2. Click the Choose Live Content button. A dialog pops up listing all of the Live Content that has been created already.
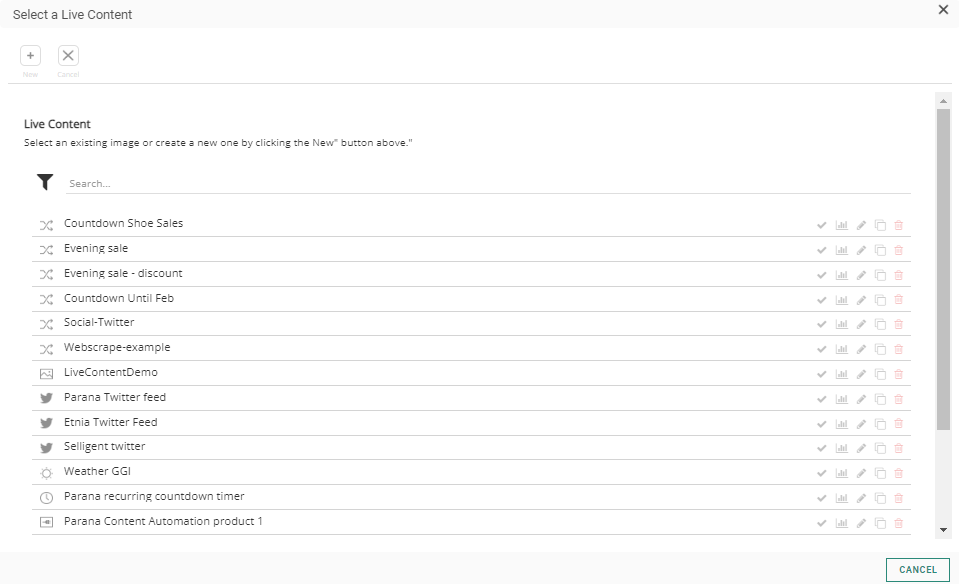
You can search for an existing image using all or part of the image name. All Live Content images created in the application are available for selection. Use the 'Search' field to limit the list entries.
The buttons in the result list can be used to select, edit, or duplicate the image.
Creating New Live Content
You can click the New button in the toolbar to define new Live Content. A drop-down of possible types appears:
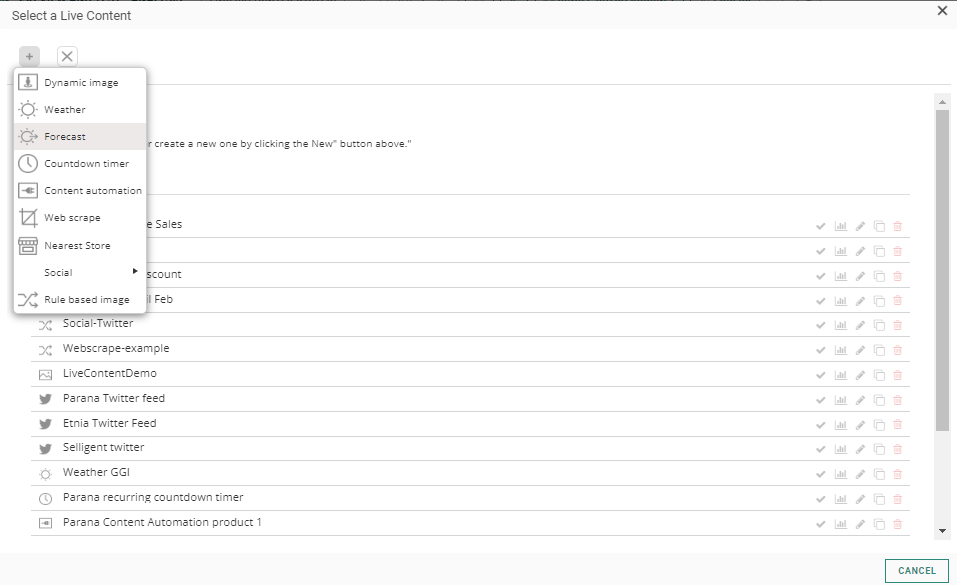
Select the type of Live Content from the list. A configuration panel is displayed. The upper part is common to all types, the lower panel depends on the selected type
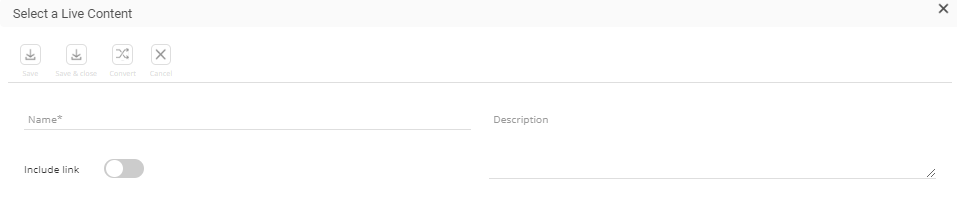
1. Set a Name and >Description for the content.
2. The 'Include link' option adds the possibility to define a link for the Live Content. If the option is checked, links must be defined for all rules and for the default content. The recipient can then click the image and go straight to the linked URL.
Note: Links can be personalized with Audience fields and fields from the widget's data source.
If the option is deactivated after the Live Content was used in an email, the links will be removed from the email. If this Live Content was used in other emails, the links will no longer work in the other emails.
Technical note: When links are activated for Live Content, one link will be added to the list of all links for the email (under the Links tab). This Live Content link can then be used elsewhere in the email. The link is filled out automatically at open time based on the rule that applies .
Example: You want display a different image in the email based on the device used and add a different link to the app store/play store. Depending on the device on which the email is opened, the link will be automatically filled out with the right URL.
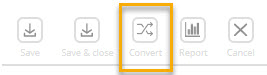
The buttons in the toolbar allow the following actions:
- Save — Saves the Live Content definition while keeping the configuration panel open.
- Save & Close — Saves the Live Content definition and closes the configuration panel.
- Convert — Converts the default Live Content for which no rules are defined to a Live Content where rules are defined and different content is displayed according to those rules.
- Cancel — Closes the current configuration panel and removes the Live Content from the image.
Define the Default Content (Mandatory)
The Configuration panel is used to define the default content. This panel is different depending on the selected type.
Engage provides a number of default templates for each one of the widgets. Some of these templates are dynamic and can be modified by the user.
- Countdown
- Web scrape
- Dynamic images
- Weather
- Weather forecast
- 'X' (formerly Twitter)
- Content Automation
- Nearest store
- Rule based
Note: For each one of these widgets a preview is provided. If the widget configuration contains personalization fields, the user will be able to enter test values for these fields and get a real impression of what the result looks like. These test values are saved when the widget is saved and the next time the preview is launched these test values are used.
Configuring Rules to Determine the Content to Show
In addition to the default Live Content, it is possible to display different content based on rules.
- Rules determine what content should be displayed when a specific rule applies.
- Rules are executed from top to bottom. The order of the rules can be changed by drag and drop.
- A rule consists of one or more constraints or groups of constraints.
- When none of the rules apply, the default content is displayed.
To create these rules, you first need to convert the default content to rule based content (unless you create Rule Based content from scratch). Use the button in the toolbar to do so.
Note: You can only convert Live Content when default content has been defined first.
A configuration panel to configure these rules is displayed. The default content already defined earlier is equally displayed. The default content will be displayed when none of the rules apply or when no rules are configured. Click it to make modifications when required.

Adding a New Rule
To add a new rule:
1. Click the + button. Immediately the constraint Editor is displayed to define the first constraint.
2. Following information can be used to define the constraint:
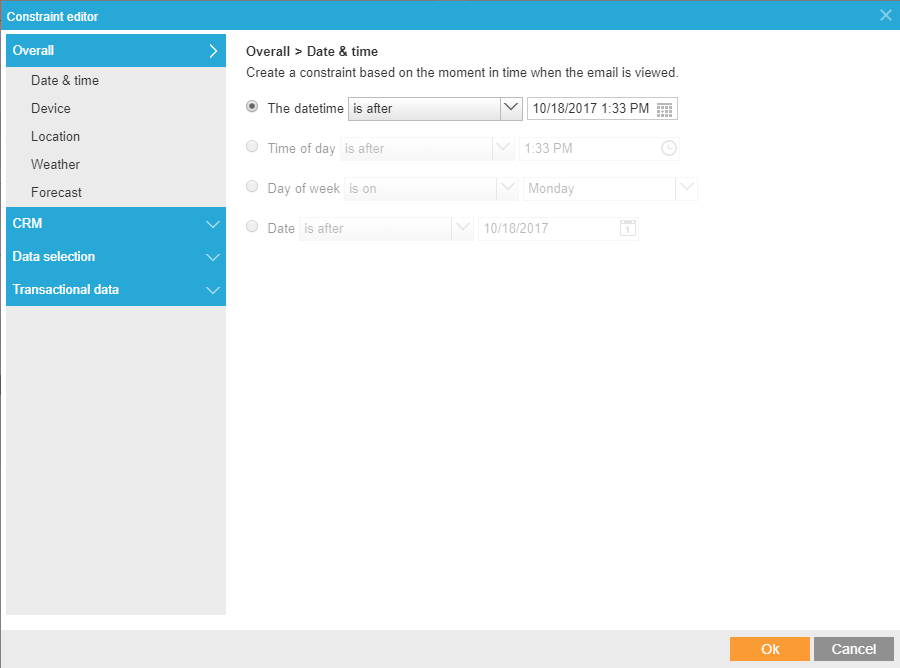
- Date & time — Choose from a specific date and time, time of day, a day of the week or a specific date. Different operators are available to define when the content should be displayed (e.g. time of day is after 22:00h, day of week is not on Sunday, etc)
- Device — Content displayed will depend on the device used or the email client (for example, if the device is not a tablet, Email client is Outlook, etc.)
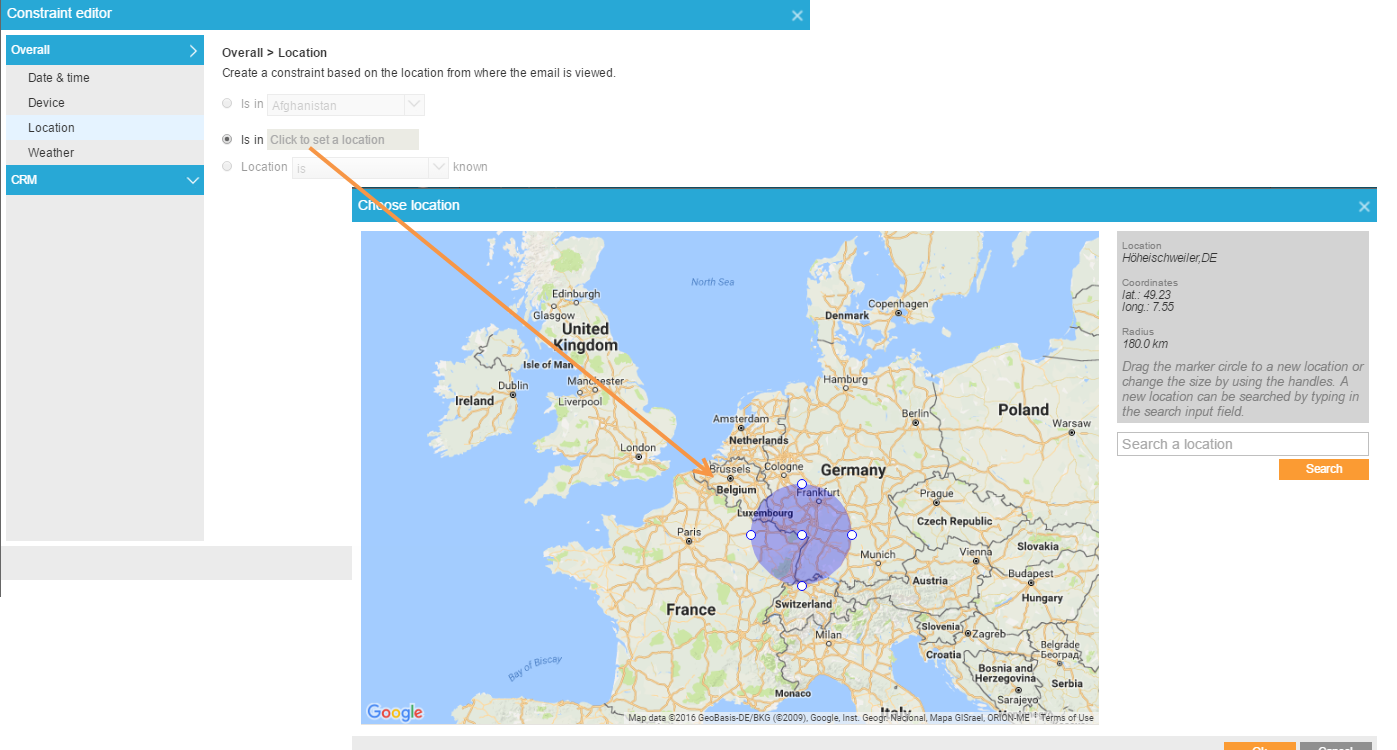
- Location — Content will depend on the country of the contact (selected from a drop-down list). Choose whether to detect if the location is known or not or determine if a contact is within a radius of x number of KM of a specific location (by using a map). (For example, if the user is in the neighborhood of Brussels, send info about an event currently happening there. To select the location and radius on the map, move the circle around to set the location and drag the borders to increase or decrease the radius:
Note: Location-based content will not work
at the city level when emails are opened through an app on a mobile device
using 3G or 4G networks. The country can still be detected, however, based
on where the mobile network is situated.
Also,
for some web clients such as Google, it is not possible to detect the
location for emails opened with these web clients
because they use a proxy and make it impossible to know the user's IP
address to detect their location.Also, issues to detect the device can occur with Google email clients.
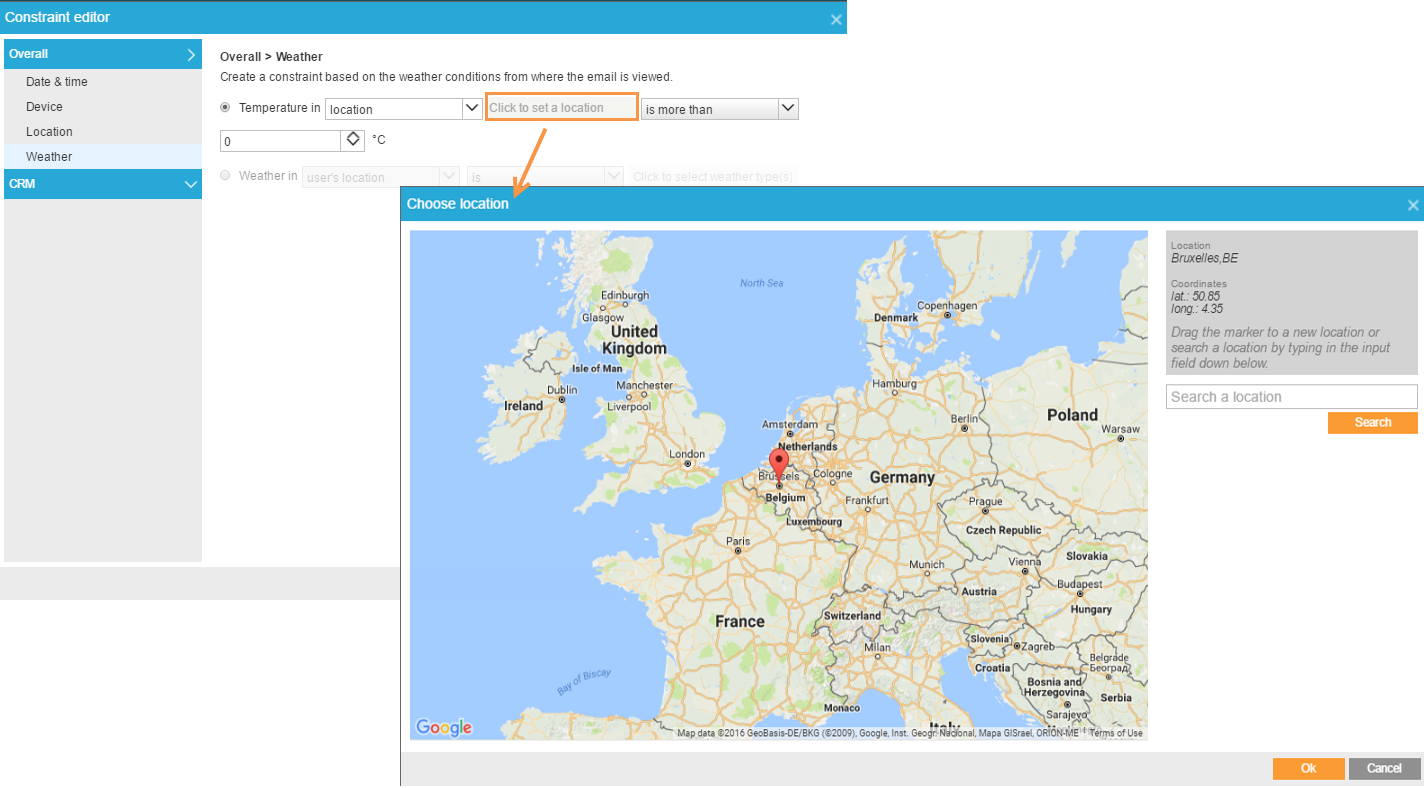
- Weather — Choose weather to display the weather forecast at a specific location or the contact's location to determine the content. (E.g. if it is sunny, display summer dresses, if it rains, display umbrellas). The location can be a fixed location or the contact's location. You can use temperature and weather descriptions (cloudy, light rain, etc).
Note: The contact's location is currently determined through the IP address and the weather forecast comes from OpenWeatherMap. To select a specific location, use the map. Move the pointer on the map to select a location or search for a location with the search field on the right.
Note: When using the user's location in the constraint, the same limitation applies as for the location-based constraints.
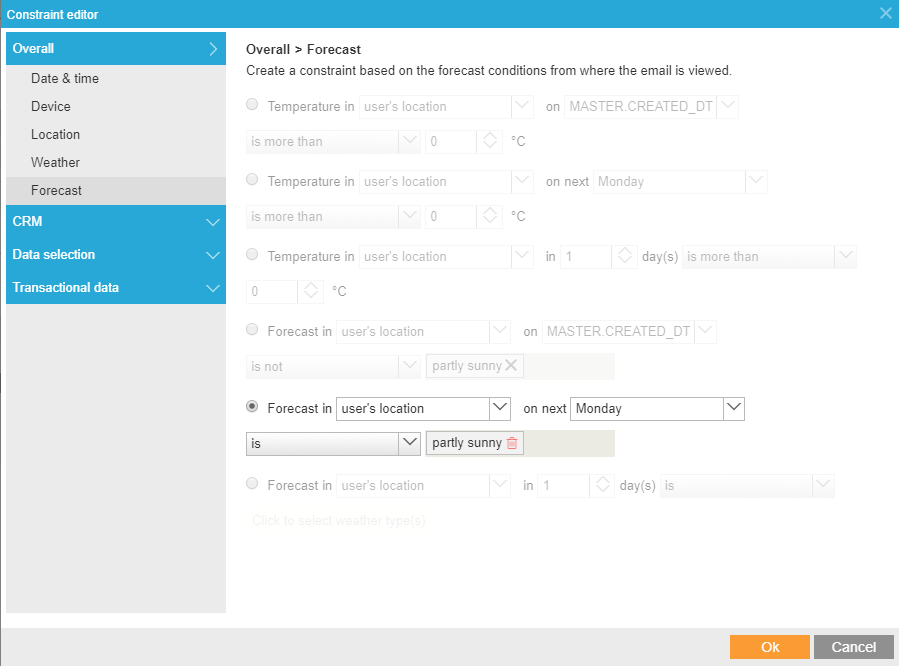
- Forecast — Display content based on the forecast conditions for the selected
location. This location can be a fixed location, the location at open
time of the email, or the location as stored for the contact in the
database.
A mix of different elements can be used to build the constraint. The exact date of weekday for the forecast as well as the type of weather predicted. For example, only display content if the temperature at the user's location is above 20° on next Saturday. Or, only display content if the rain is predicted in 3 days at the user's location.
- CRM — Choose whether to use fields from the audience list or any extended list to set the constraint. Social data, behavioral information, survey results, etc. can all be used.
Important Note: When CRM parameters are used in a constraint, they are added to the final image URL when the image is used in a message and are filled out with data when the message is sent. If\ you need to change these CRM parameters when the image was already used in an non-sent email, the image will have to be removed from the message and added again to ensure a new URL with the new parameters is generated. This means also that, when CRM parameters are modified AFTER an email is sent out with that image, these parameters are not correctly filled out as the image URL cannot be regenerated.
When the first constraint is defined, a Rule block is added.

A rule can be built from a single constraint, multiple constraints, or groups of constraints. The selected group operator AND or OR applies to all constraints within the group. Each group can have its proper operator.
Use the buttons Add group and Add constraint to add respectively additional groups and/or constraints to this rule.
The buttons in the upper right corner of the constraint block are used to edit the constraint, copy it or remove it.
3. On the right, select the content type (countdown, web scrape, dynamic, 'X' (formerly Twitter), weather, forecast) to display when the rule applies.
4. Click the corresponding icon to edit or define the content for the selected type and configure the content.
5. When done, click OK. On the left, the constraint is displayed and on the right, a preview of the image is shown that will be displayed when this rule applies:

Note: When multiple rules are created, the order can be changed by dragging and dropping them to the new position. The order of the rules is important as it determines which rule is tested first and therefore sets the image to display.
Following is an example of Live Content with three rules: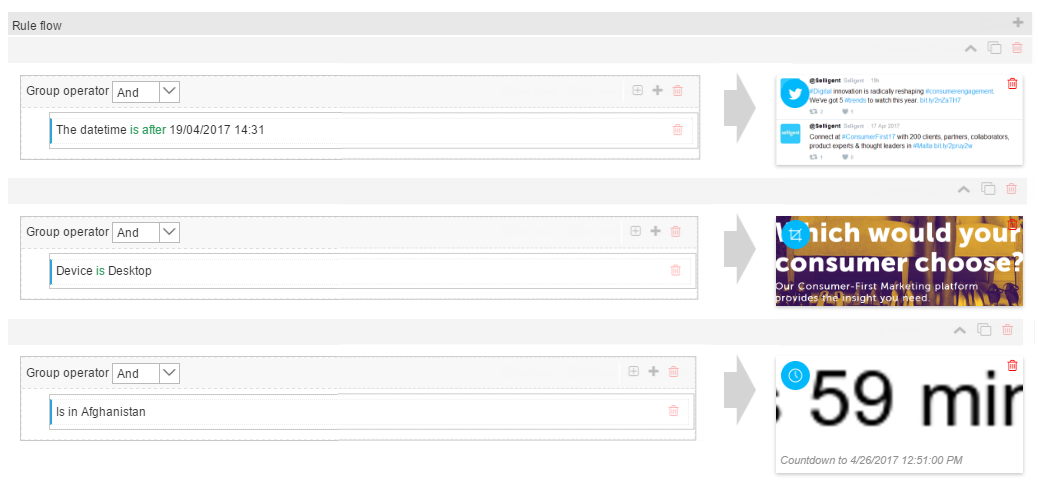
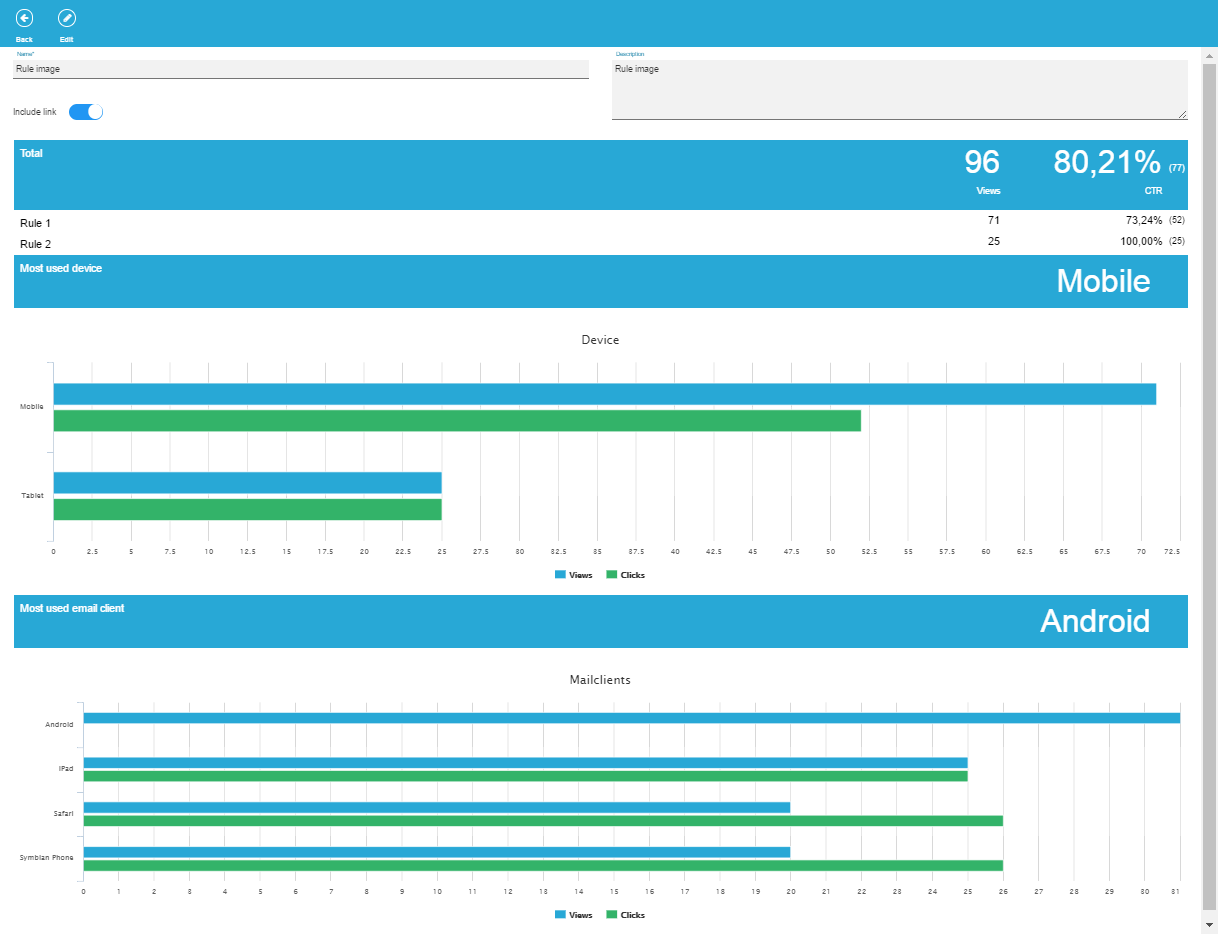
Live Content Reporting
Live Content has dedicated reporting available directly from the Live Content overview. A report icon in the grid takes you straight to the reports linked to the selected Live Content. The same report can be called also when editing a Live Content. An icon is added to the toolbar.
The reports provide details on views and clicks of Live Content and if rules are defined, there is a split over the different rules. You can also find details on the most-used device and email client most used to view the content.
 Watch Live Content Learning videos
