Note: Before creating a template, make sure you are logged on to the correct Organization. The selected organization defines to which Audience Lists and Languages you have access. The currently selected Organization is displayed at the top of the module. If necessary, you can select a different one from the drop-down menu:

1. To create a template, use one of the following methods:
- From the Content Start page, click the New button in the toolbar and then Template from the wizard
- From the Home page, use the Create Content button in the toolbar. and then select Template from the wizard
- From the Content fly-out menu in the navigation bar on the left, click New and then select template from the wizard.
The template creation wizard is displayed.
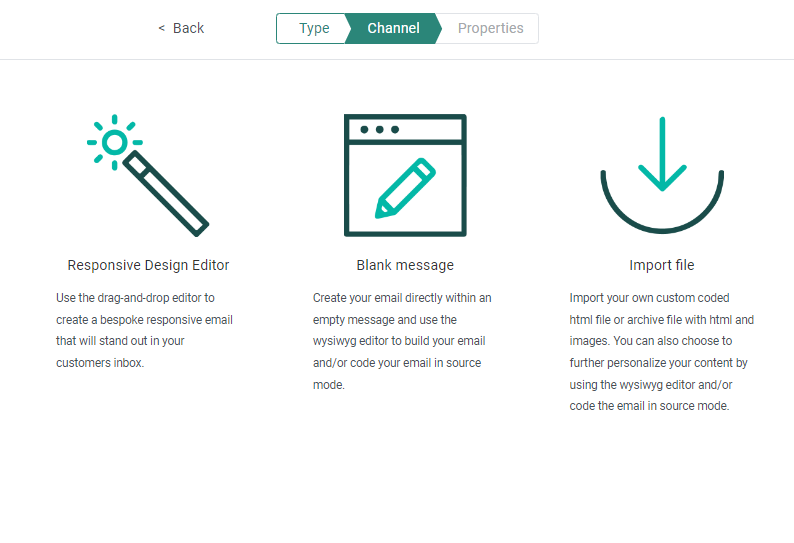
2. Select Responsive Design Editor on the left or one of the two options for Source mode on the right.
- Responsive Design Editor — Displays a pre-defined, standard content layout and lets the user drag and drop components onto a design canvas. All changes made to the design are immediately visible for the user. All content is created and defined in a visual way.
- Blank Message — Displays the content HTML code that can be modified by typing HTML code directly in the source or using the same drag-and-drop components used in Design Editor.
- Import file — Import your own custom coded HTML file and make use of the standard content components and WYSIWYG editor to make the necessary modification.
3. When a type has been selected, the Properties screen appears where you can configure the following template properties:
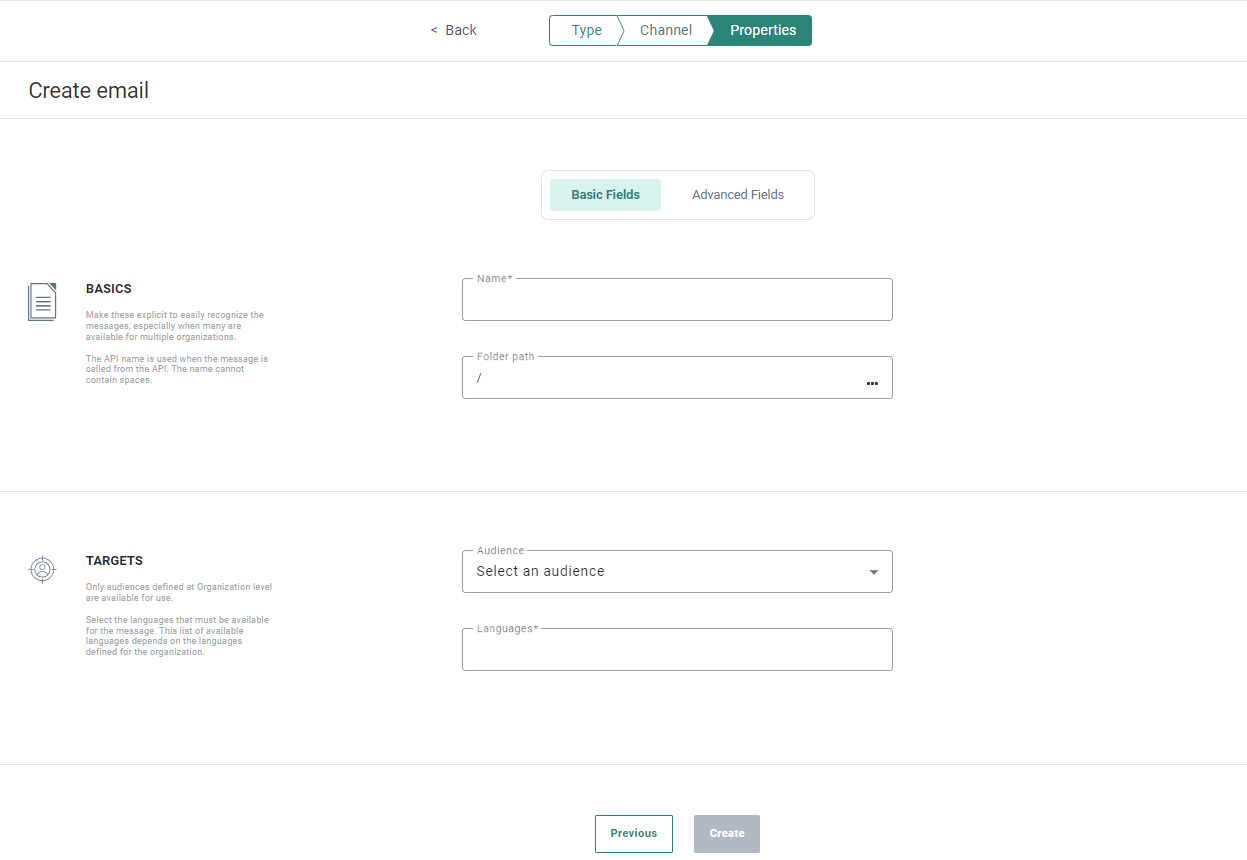
The properties are grouped by type of information. By default only the Basic fields are displayed. Switch to the Advanced fields tab to display all other fields. On the left hand side of the properties, on-screen help is provided. This helps the user filling out the form with accurate and comprehensive information.Set the properties.
Basic fields tab:
Basics:
- Folder Path — This is the folder in which the asset is created. By default it takes the folder that is currently selected on the Start page when the asset is created. You can modify the path if required. A dialog is available with a tree view of all folders and subfolders.
- Name — Make these explicit to easily recognize the templates, especially when many templates may be available.
Targets
- Audience — Select the
audience to be used in the template.
- You can use data fields from the selected audience and extensions to personalize the template.
- The selected audience determines the tables and fields that will be available for the Visibility constraints.
Note: The list of available audiences is based on the audiences defined for the organization.
- Languages — Select one or more language versions for the template that you want to create. All languages defined for the Organization are listed. Note that the template creator must enter language-specific content into each different version of the template.
Note: When default languages have been selected on organization level, these languages will already be selected for the template. You can still add other languages or remove one or more default languages.
Advanced fields tab:
Basics
- API name — This represents the name of the Template when used in the API Explorer. By default It gets prefilled while filling out the Name in the input field above.
- Asset label — The label(s) assigned to this asset. Select one or more labels from the drop-down. (These labels are configured in the Admin configuration.) Users with the proper Access permissions can also create new labels here by typing the new label value in the field.
- Description — Set a clear description of what this content is used for.
4. Press Create Template when done.
You can now start designing the template.
