When content items need to be re-used in other parts of the same message, it is recommended that you create and use Data Selections based on a data source. Data selections are sub-selections derived from a selected data source, which is typically a Data Selection List. (For more details on possible data sources, check out this topic.)
Note: Data sources include a Language column with a language code. If the language is stored in the data source, the system can select items retrieved from the data source in the language of the contact .
Data selections retrieve items from a data source and display these items in the content of the message, typically in a Repeater component. For example, a Repeater might display news items retrieved from a data source or products in a catalog.
Nevertheless, items from data selections can be displayed anywhere where personalization is allowed. For instance, the subject of the email can contain a specific item.
Data selections are a subset of the data source, derived by applying filters and limiting the number of items returned (cropping). Data selections allow you to narrow down the number of items in the content. And these items can even be different for each contact, when matching is used, where only items are returned that match a contact's profile.
The data sources that are available to create data selections from depend on the selected organization for the content. Only data sources linked to the selected organizations are available for use.
Note: There can be more than one data selection used in content, either based on the same data source or a different data source. It is possible to use items from different data selections on the same data source in different areas of the message. For instance, you could create a data selection with the top three most-clicked news items and then a data selection with the news items that match the contact's interests.
Define the data selection
Data selections are defined in the Properties of the Content (templates, messages, pages). To access data selections, open the Properties/Audiences, Languages and Data tab.
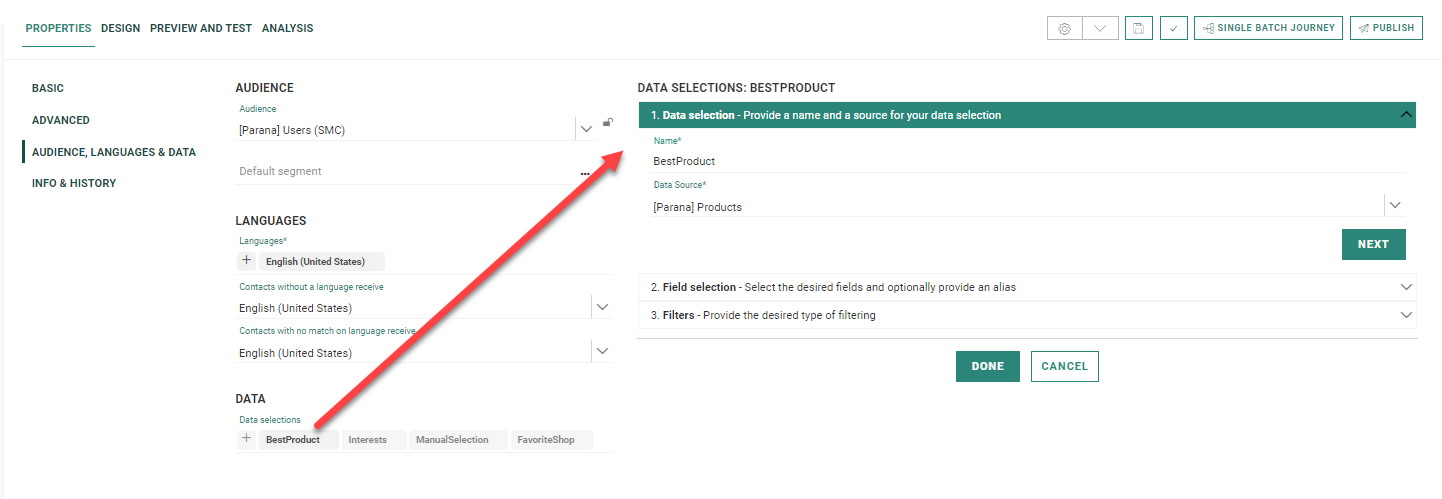
1. To add a new data selection, click the + button in the 'Data selections' field. Automatically a 'New data selection' is added. The properties panel appears on the right to select the data source and configure it.
2. Enter a Name for the data selection. The data selection can have a different (more user-friendly) name in Email than the one that is used in the database.
3. Select from the 'Data source'
field the data source that should be used for this data selection.
Following sources can be used:
- Data Selection Lists - Only Data Selection Lists defined in the organization are listed here.
- Array fields in a Custom Events list - Only Custom Events Lists linked to the Audience List can be selected. This is only for messages, not for templates.
- Journey Data - Only Journey Data made available in the Journey for which the Content is created is available. This is only for messages, not for templates.
Depending on the type of data that is used as a source, different steps are required to make that specific data type available here. Please check out this dedicated topic, explaining the use of each of these data types with an example.
You have now selected the source.
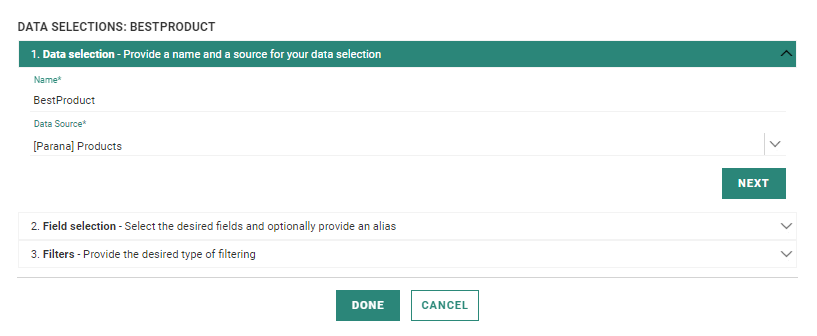
4. Press Next and select the fields.
Define the fields
The next step is the selection of fields to use from the data source. Not all fields need to be retrieved.
Note: Select all the fields required for content but also for filtering, sorting and matching. Only selected fields will be available to perform those operations on.
1. For every field you want to use, tick the box and enter an alias and the usage of the field (text, URL, image, Rich Text). The usage defines how the field is displayed when manually editing/adding items to the Repeater and what type of values can be entered.
Note: In case usage is set to type 'Rich Text' in the template, styling options are at hand in the message to define the look of the content, including ordered/unordered lists, fonts, sizes, text and fill colors, etc.
Example:
In the Data Selection 'Interests', the Description field has been configured as 'Rich Text'.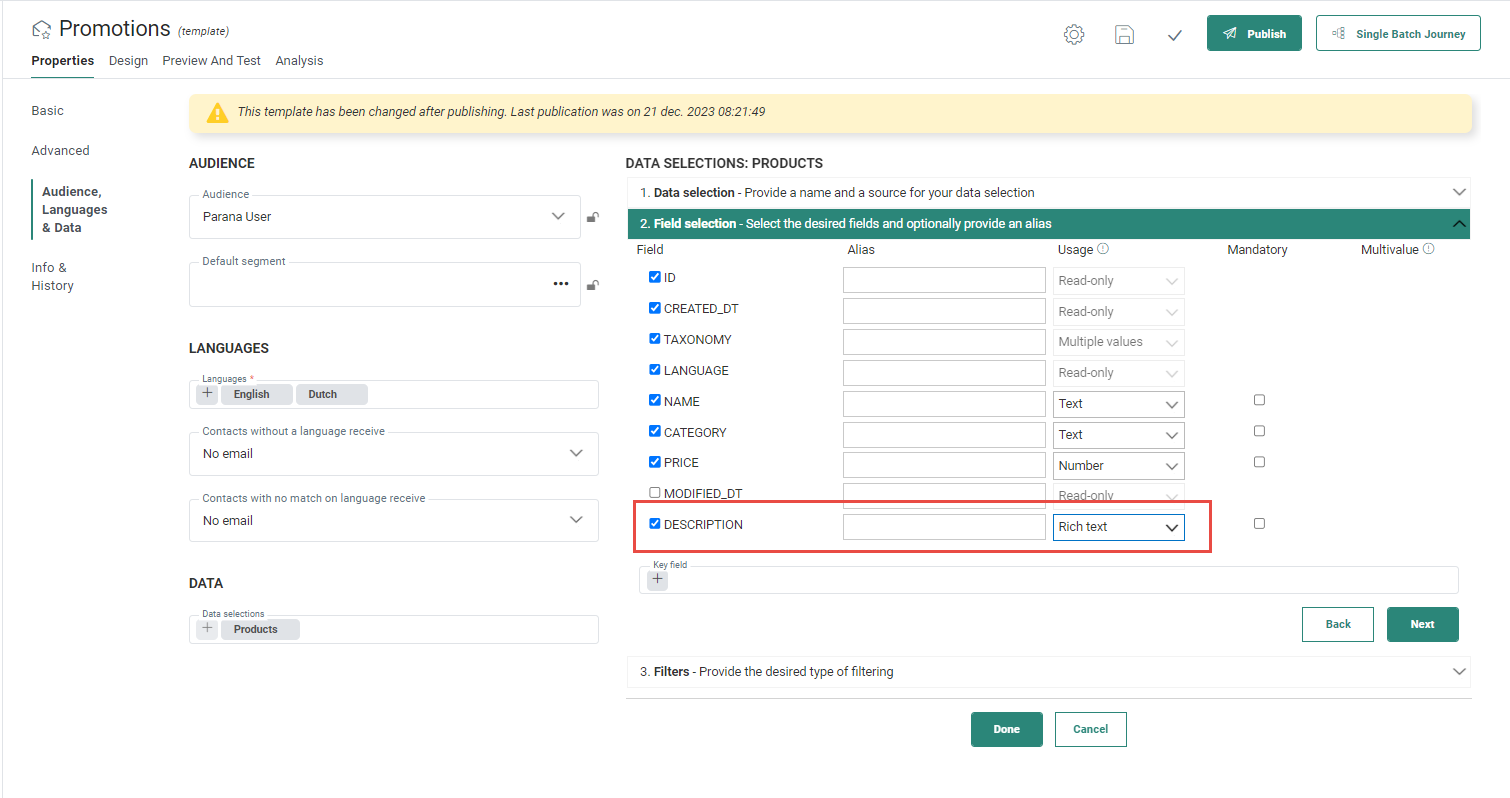
When this description field is used in the template and displayed in the message created from the template, styling options are available: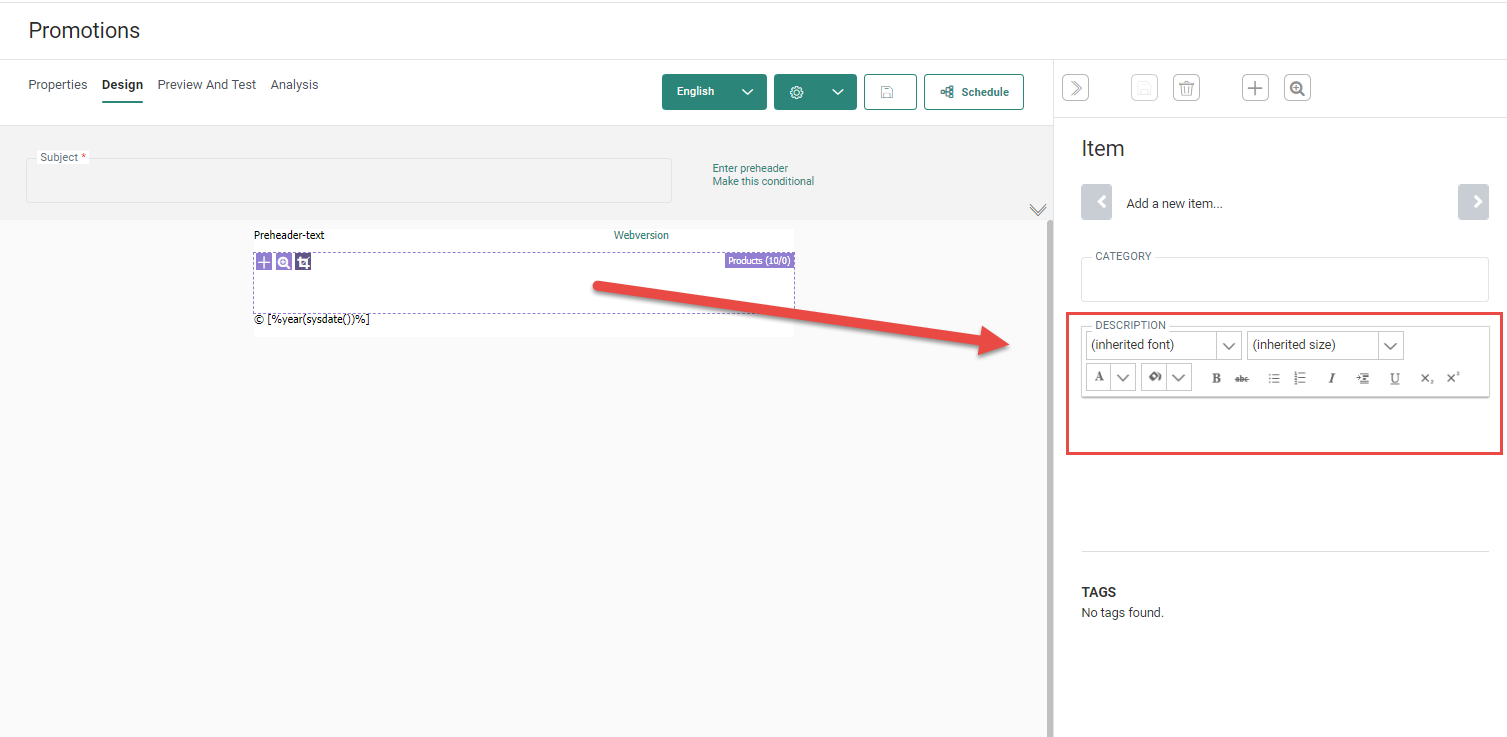
Important note: When HTML tags are used in a Data Selection List item and the itemValue function is used in the source code of the Repeater, these tags will not be rendered correctly because of security reasons. To ensure a proper presentation of these HTML tags, you need to add these to an Engage Text Component, such as sg:Content. This way the HTML can be validated and previewed correctly.
2. If the field is mandatory, tick the corresponding box as well. Without all mandatory fields filled out, it is not possible to save the item.
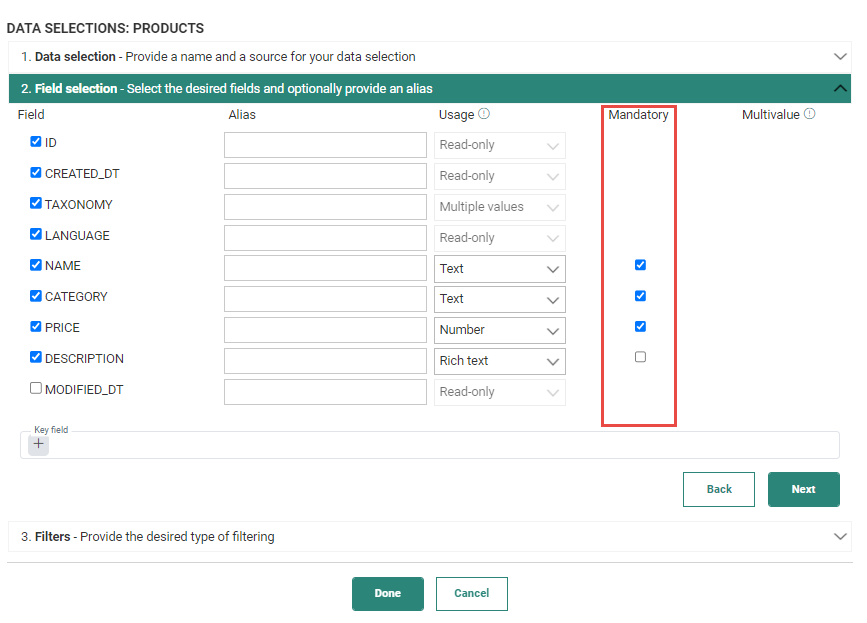
Note: For some fields, it is not possible to define the Usage. This is the case for system fields which cannot be edited by the user.
3. The checkbox 'Multivalue' must be used to indicate if the field is just a text field or if it contains multiple values separated by a , (comma) . This option is crucial for the correct application of the operators used in the 'Matching' section.
4. The field selected as key field is the one that will be used in the message to represent the items when manually adding/editing items. It is recommended that you select a field with unique values and is descriptive (such as Name). When no value is selected for the key field, the ID of the item is used.
5. When done, press Next.
When required, Filters can be set. We recommend to do so. Check out the following topic: Filtering the articles in a data selection
Example:
As an example, we create another data selection 'BestDeals' on the
same data source 'Parana Retail Products' that returns items matching the preference of the contact:
Using data selections for personalization
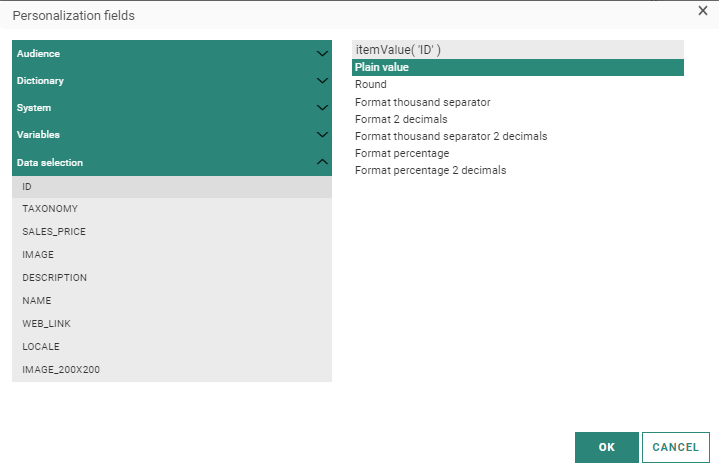
Once the data selection is configured in the message, the data can be used for personalization in different locations in a message. There are 2 main differences:
In a Repeater
When used in a Repeater, the Personalization dialog only contains the data selection fields defined in the Repeater properties. These fields are dropped onto the Repeater and define the layout and structure of the items. What items will actually be displayed is defined by the data selection filter properties.
For example, if manual selection is allowed, the marketer will select the items himself and add them to the Repeater when sending out the message. If the data selection does not allow manual selection, items will be filled out automatically, taking into account the sorting, the maximum items to display, the matching and lookup configurations, etc.
Outside the Repeater (Subject line, Text component, Buttons, etc)
The Personalization dialog looks slightly different when using data selections outside the Repeater.
When more than one data selection is configured in the message, there will be an entry for each one of them.
Also, the data selection returns a series of items, based on the cropping defined for the data selection and the filters set. As a result, these individual items are represented by an index and the field name.

This means that the marketer selects a specific item returned by the data selection and uses it in the message.
Example: The data selection is configured to display a maximum of 3 items. The Personalization dialog will contain an entry for the first 3 items returned. Each item has an index, starting from 0. The marketer can then select which one of the 3 items is to be used to personalize the message. In the below example, the first item from the Location data selection has been selected.
Data Selections and Lookups : Terminology
Example : Lookup Data Selections
Example : Using Data Selections with Repeaters
