The interface is built from the following elements:
Top bar — Provides access to the active tasks, different modules, organizations, account details and the online help.
-
 — Active tasks: allows you to see tasks that are scheduled to be executed within Marigold Engage.
 -
 — Modules
: allows you to launch other modules directly from here.
— Modules
: allows you to launch other modules directly from here. -
 —
Access to the different
organizations, depending on the user's (group) permissions (only visible when there is more than one organization).
The selected organization defines the languages and maildomains, audiences, data
sources, endpoints and data integration details. So make sure to select the right organization here, before starting designing content or performing other actions. Organizations are ordered alphabetically.
—
Access to the different
organizations, depending on the user's (group) permissions (only visible when there is more than one organization).
The selected organization defines the languages and maildomains, audiences, data
sources, endpoints and data integration details. So make sure to select the right organization here, before starting designing content or performing other actions. Organizations are ordered alphabetically. -
 — The drop-down list provides access to account
details
and lets you log off. It also shows a link to the About screen.
— The drop-down list provides access to account
details
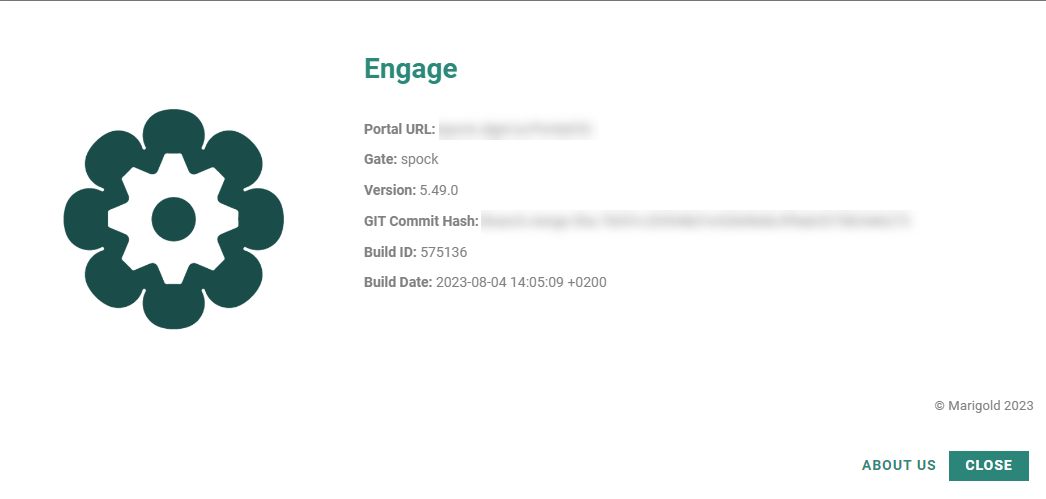
and lets you log off. It also shows a link to the About screen.- About : Provides information on the current Engage version installed, build date, portal URL, and the Gate on which the install resides.

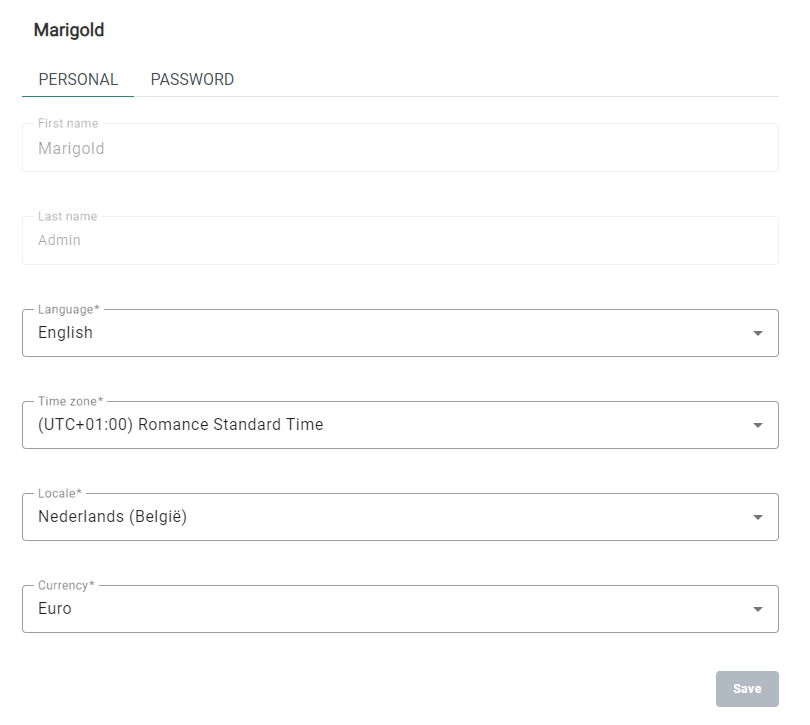
The link About us takes the user to the Marigold website. - Account Details : The account details are split over two tabs : Personal and Password.
- Personal — This tab contains all personal data belonging to the user : first name, name, the user's language, time zone, locale and preferred currency.
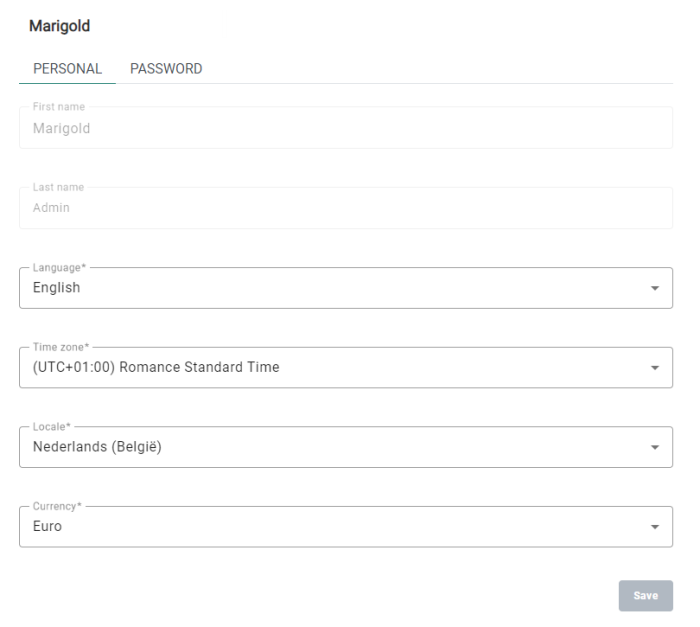
Note that it's only possible to edit the 'Language and locale' field values. Users can not change their first and last name; only admins with the proper permissions can fully edit user accounts in the Admin Configuration section of Marigold Engage.
Do not forget to click on 'Save' after making changes! - Password — This tab allows users to change their password.
- Password — Here the user needs to enter their current password.
- New password — Enter a new password.
- Repeat new password — Confirm the new password. This needs to match the value in the 'new password' field.
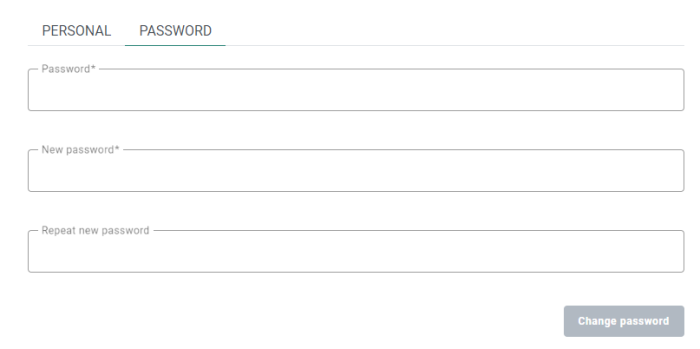
Do not forget to click on 'Change password' after making changes!
When two-factor authentication is active (see this section for more info about 2-FA), an additional section is shown :
The user needs to enter their authentication code that was sent by SMS and click on the 'Validate' button. When this is successful, the password will be changed and the user is notified about the change.The user can retry to validate a code for a maximum of 3 times.
It's also possible to click 'Resend SMS' to receive a new code by SMS.
This is also allowed to be used for a maximum of 3 times.
- Personal — This tab contains all personal data belonging to the user : first name, name, the user's language, time zone, locale and preferred currency.
- About : Provides information on the current Engage version installed, build date, portal URL, and the Gate on which the install resides.
-
 — Access to the online help.


Left navigation bar — Provides entry points to the different functionality of Marigold Engage. Hover the navigation bar to expand it:
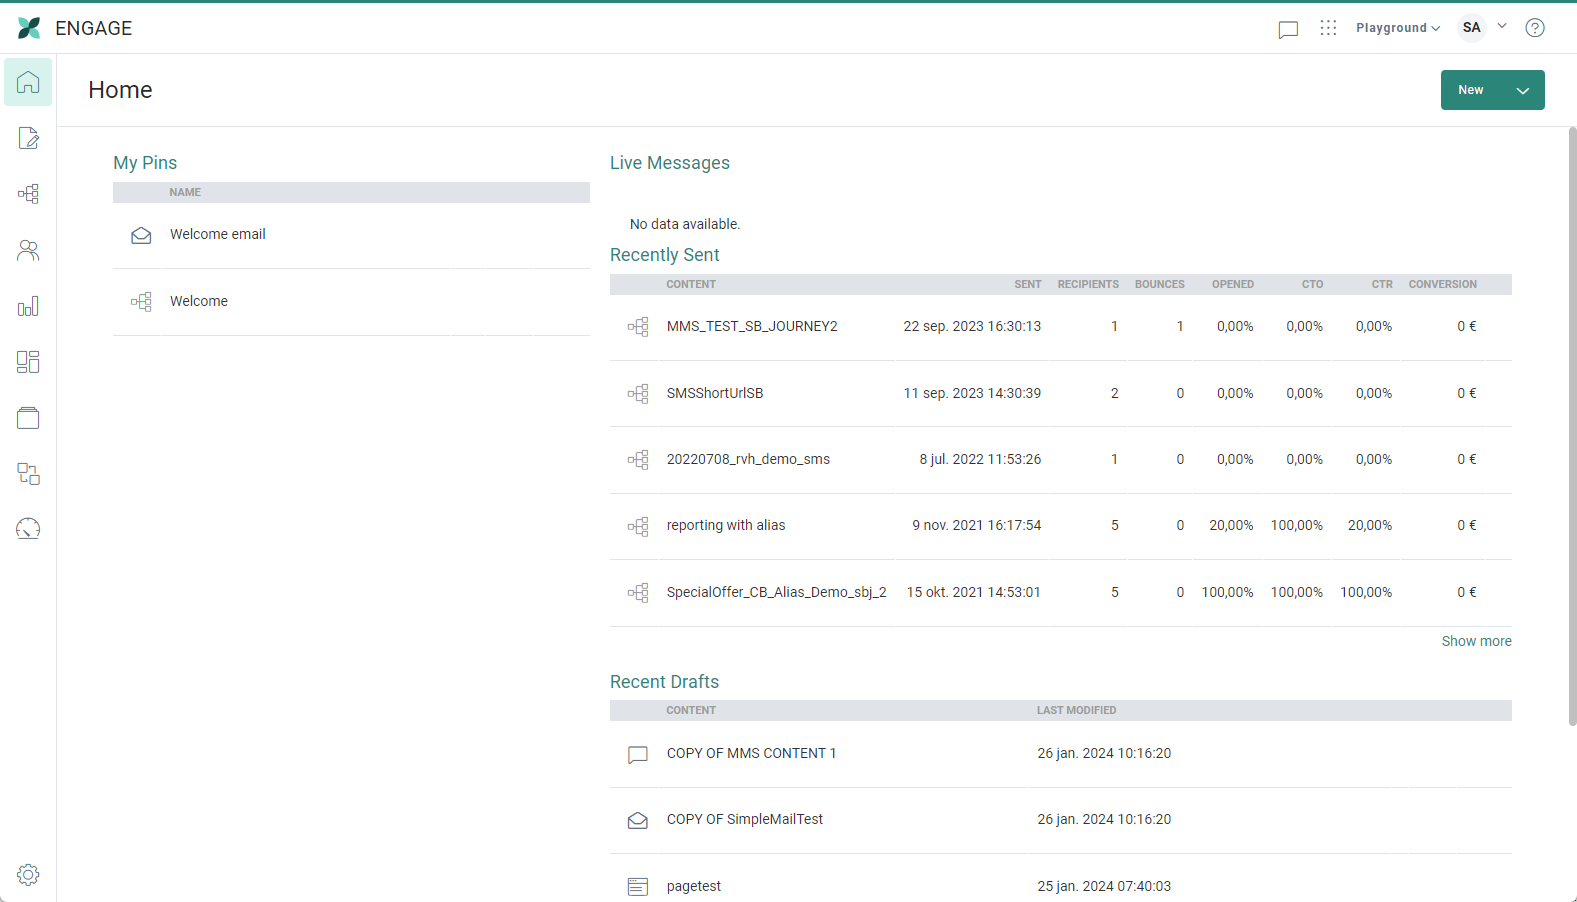
![]() Home — Shows an overview
of pinned, most recently modified content, and published content.
Home — Shows an overview
of pinned, most recently modified content, and published content.
![]() Content — Accesses a Content Overview
and lets you create or edit templates, messages, pages,
and push notifications.
Content — Accesses a Content Overview
and lets you create or edit templates, messages, pages,
and push notifications.
![]() Journeys — Accesses a list of all journeys
and lets you create and modify journeys using the Engage Journey Builder.
Journeys — Accesses a list of all journeys
and lets you create and modify journeys using the Engage Journey Builder.
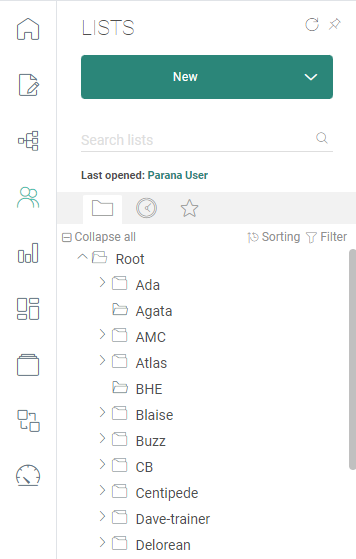
![]() Lists — Accesses the Lists entry from where different list types can be created and managed
Lists — Accesses the Lists entry from where different list types can be created and managed
![]() Reports — Accesses detailed reports on
emails sent and overview of emails currently being sent.
Reports — Accesses detailed reports on
emails sent and overview of emails currently being sent.
 Dashboards — Accesses activity dashboards with dynamic reporting widgets on email performance.
![]() Library — Accesses a library of
images that are available in the application. Any Organization-specific
images can be uploaded to the "My Organization" folder
to restrict access to them to just those users in that Organization
Library — Accesses a library of
images that are available in the application. Any Organization-specific
images can be uploaded to the "My Organization" folder
to restrict access to them to just those users in that Organization
![]() Data Exchange — Accesses the Tasks entry and lets you search for or create a new task.
Data Exchange — Accesses the Tasks entry and lets you search for or create a new task.
 Cadence Management — Accesses the Cadence Management functionality that lets you manage the load of messages sent to your audience over a given time.
When you hover the navigation bar it flies out to the right and provides access to pinned/most recent items or the folder structure. You can toggle between both views. You can perform a search here or start immediately from here the creation of a new item. *
Use the pin icon in the top right border to pin the fly-out menu and keep it displayed at all times. Pinning the fly out menu will be remembered through out the following sessions.
Central window — Depends on the selected entry. Displays either the Start page content or the configuration section of the different entries.
