To be able to start using the Loyalty program within Engage, an integration needs to be set up in Loyalty.
Note: In-depth documentation on the Loyalty module and all of its capabilities can be found here.
Prerequisites
Before accessing Loyalty, please make sure the following prerequisites are done in Engage:
- A 'Loyalty' permission is used that is set up in the Admin Configuration section of Marigold Engage, to allow users to access the Loyalty module.
-
Also, an API Service Account needs to exist that is able to trigger the correct API call.
The Engage setup is explained here.
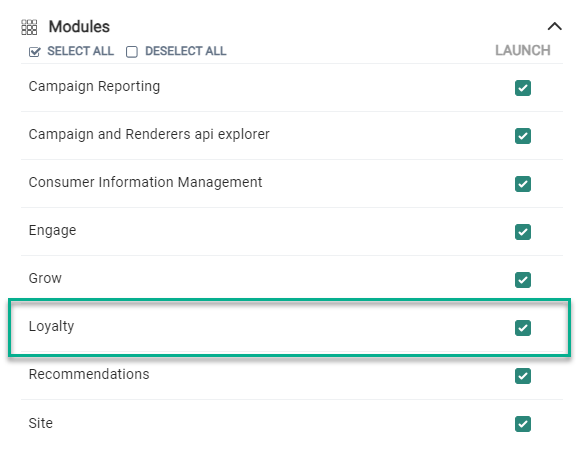
Launch Loyalty
Launch the Loyalty module.
You'll need to log in with your Loyalty credentials.
Note: If you don't have Loyalty credentials yet, please get in touch with your Marigold contact.
Add a Loyalty connector
Once logged in, add a connector in Loyalty for integration with Engage.
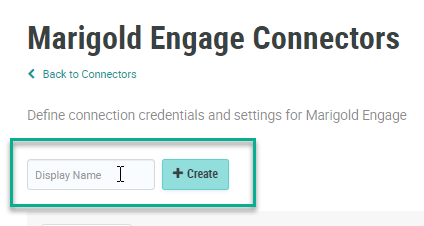
Navigate to 'Admin > Integrations > Connectors ', and click on the Marigold Engage tile.
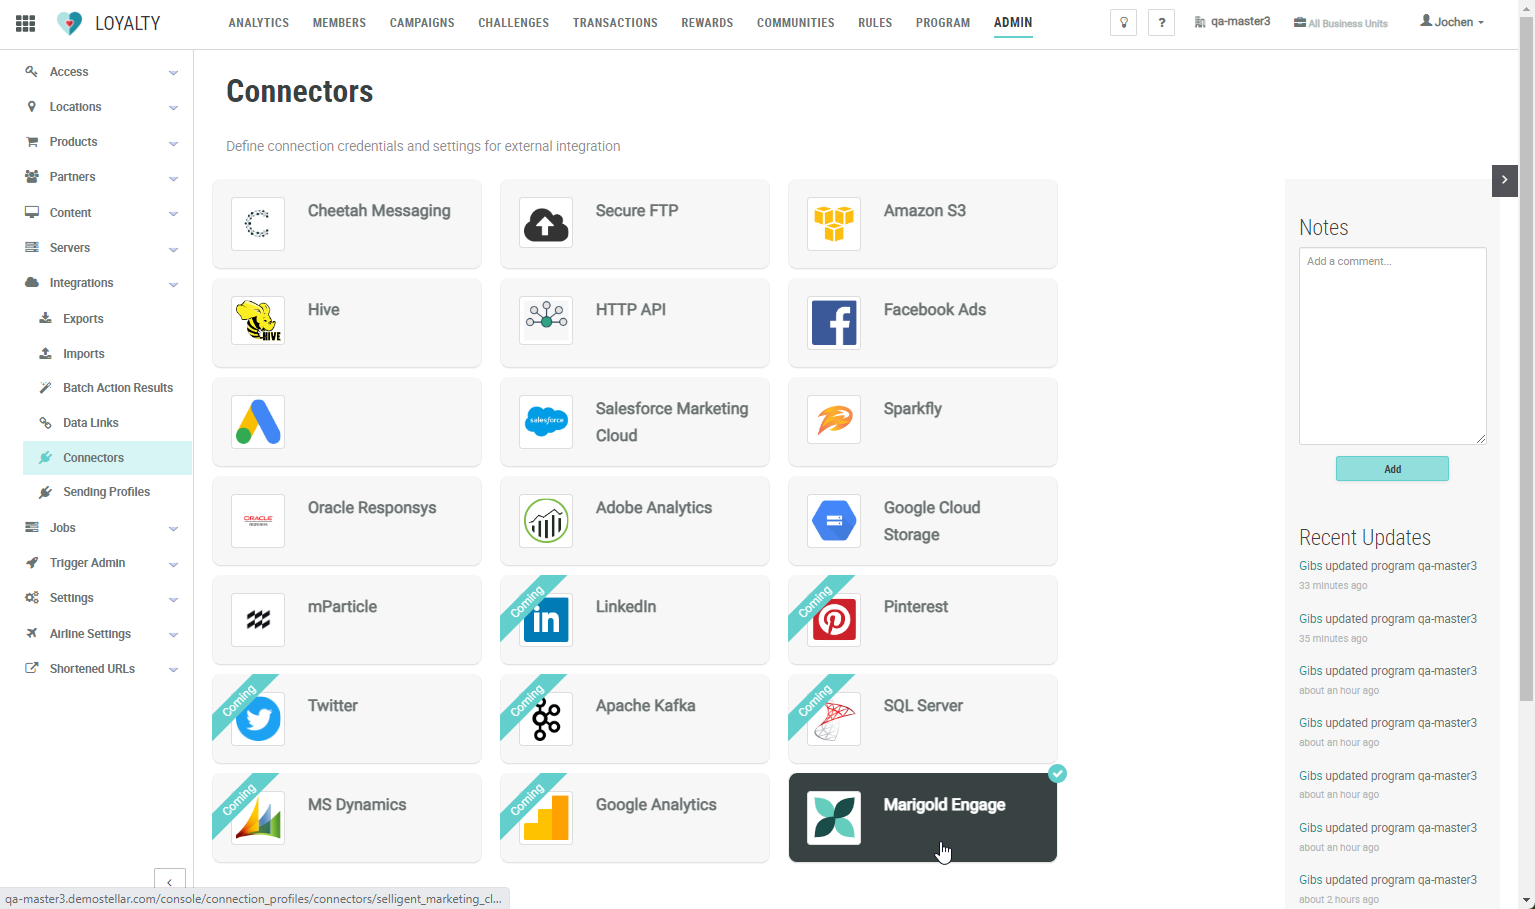
This leads to the Marigold Engage Connectors screen.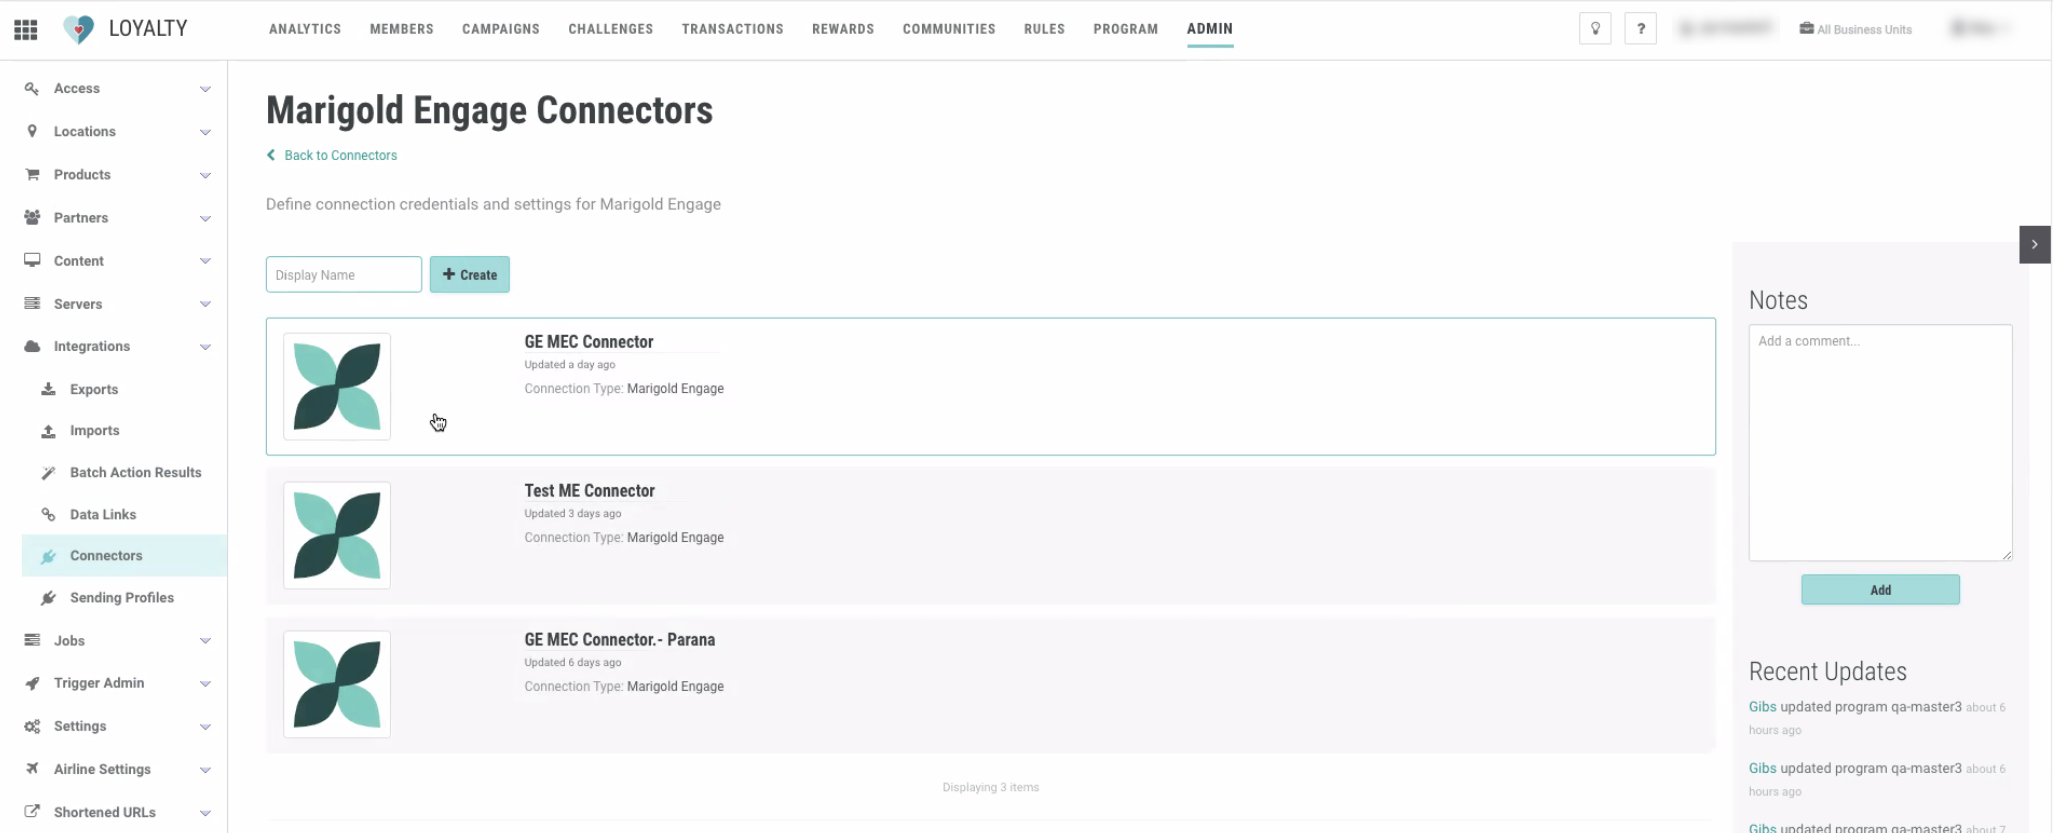
To create a new Marigold Engage integration connector, enter a display name and click on + Create.
A pop-up will be shown in which the connection profile can be defined.
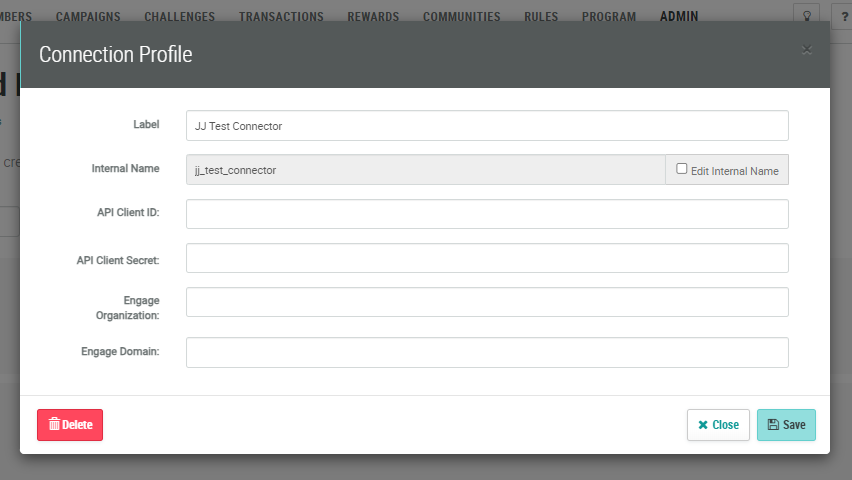
Enter/set the following values :
- Label — The display name. Use a clear name, as this is the connector label name that will be used in triggered actions/scheduled jobs afterwards.
- Internal Name — The 'Internal Name' is used in API calls and automatically populated based on the 'Label' value. This field is not editable by default. To edit the Internal Name, check the 'Edit Internal Name' box.
- API Client ID — This is the API key coming from Marigold Engage. Copy the value from the Service Accounts section in Engage's Admin Configuration, and paste it into this field.
- API Client Secret — This is the API key secret coming from Marigold Engage. Copy the value from the Service Accounts section in Engage's Admin Configuration, and paste it into this field.
- Engage Organization — The Engage organization name in which the Transactional Journeys and messages are located.
- Engage Domain — The domain for the API call to be triggered (eg. https://subdomain.domainname.com).
Note: This connector only needs to be configured once per 'profile', and can be used for all action triggers and scheduled jobs. For different Engage organizations, different connector setups are required (one connection profile contains a link to only one single organization).
Create a Loyalty action trigger
Once a connector exists for the integration between Loyalty and Engage, an action trigger can be created to map Loyalty with Engage fields, and to be able to trigger the transactional Engage API.
-
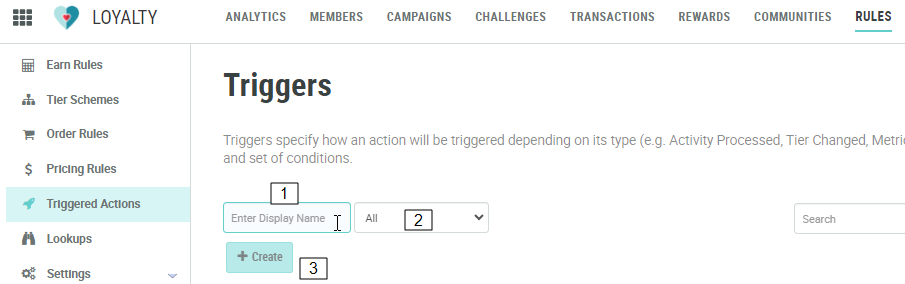
Select 'Rules' from the top-navigation and then select 'Triggered Actions' from the left-navigation.
Note: More info on Triggered Actions can be found here.
-
Enter a display name1, select a 'trigger group2, and click 'Create'3.
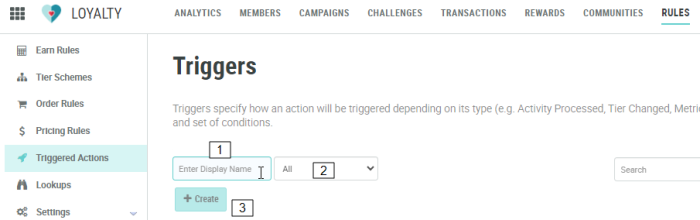
2Note: Triggers are typically organized into Trigger Groups, which are used to control which Triggers are executed. The platform supports two different types, or "strategies," of Trigger Groups:
- Execute only first application rule: Once a Trigger in this Trigger Group is executed, all other Triggers are skipped. For example, if you're using Triggers to send messages, you could put them in the same Trigger Group to avoid sending multiple messages to the same Member.
- Execute all applicable rules: All Triggers in this Trigger Group can be executed.
More info on Trigger Groups can be found here. -
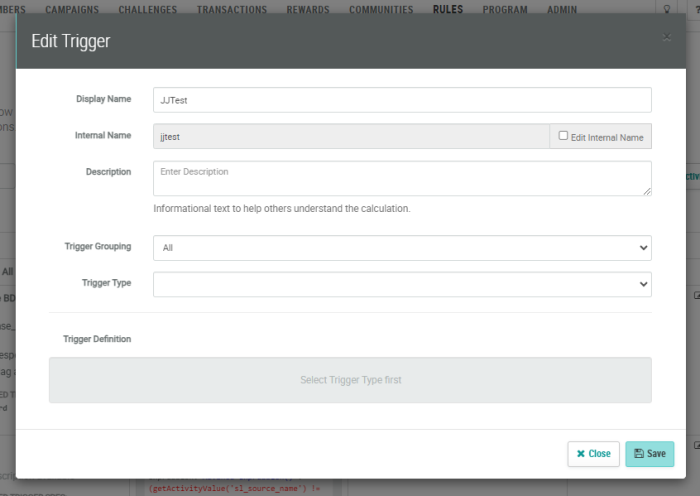
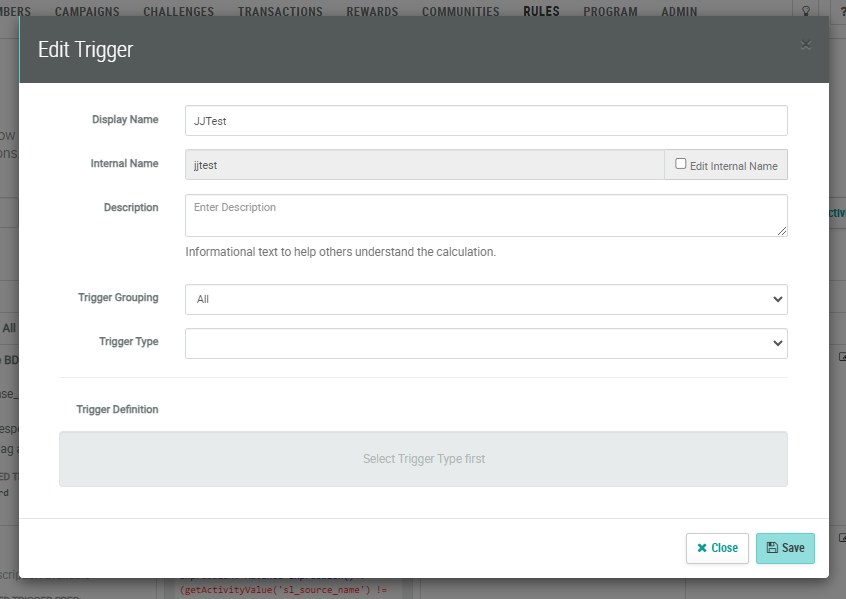
A pop-up appears.
-
In here, the following fields and values are visible :
- Display Name — The name you entered in the previous step. Use a clear name to describe this trigger.
- Internal Name — The 'Internal Name' is used in API calls and automatically populated based on the 'Label' value. This field is not editable by default. To edit the Internal Name, check the 'Edit Internal Name' box.
- Description — Informational text to help others understand what the trigger's about.
- Trigger Grouping — 'All' or a specific trigger group can be selected. (See note2 above)
- Trigger Type — ‘Activity processed’, ‘Tier changed’ or ‘Metric changed’. The Trigger Definition underneath shows different fields depending on your Trigger Type selection.
- Trigger Definition — Depending on the Trigger Type selected above, different values can be set :
- For Trigger Type 'Activity processed' : Activity Type (eg. Reward, Sign-up, etc) and Metric Changes (eg. points, distance, duration, etc) become configurable.
- For Trigger Type 'Tier changed' : A Tier Scheme, the New Tier and the Old Tier can be selected.
- For Trigger Type 'Metric changed' : A Metric can be selected (eg. points, distance, duration, etc).
Note: More detailed info on triggers can be found here.
Make sure all values are entered/selected and click 'Save'.
-
In the 'Action' column of the created trigger, click on the pencil icon.

-
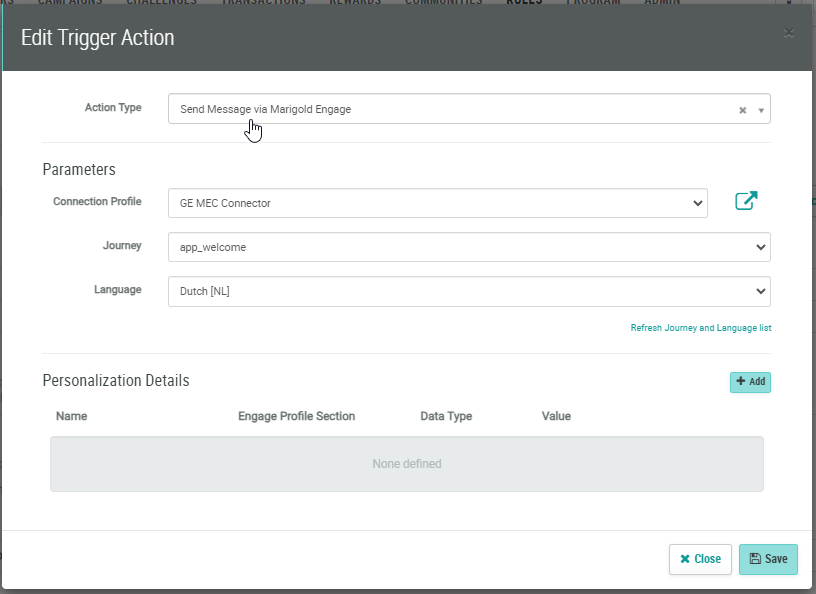
The 'Edit Trigger Action' pop-up is shown.
In here, select the Action Type : "Send Message via Marigold Engage".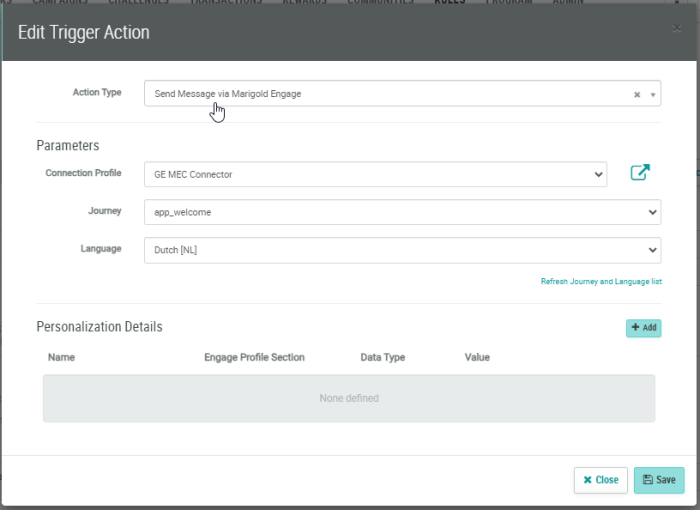
-
Once the Action Type is selected, the following Parameters will become available to be configured :
-
Connection Profile — Select the connector that was set up earlier, which contains the Engage organization name, the domain for the API call (eg. https://subdomain.domainname.com) and the API secret and key.
-
Journey — Select the applicable Engage Transactional Journey (Journey API name) to trigger.
This will be the journey sending out the transactional messages (eg. welcome, reward, birthday messages). -
Language — Select the language for which the transactional API call will be triggered.
Note: Only one language can be selected. If you want to send out transactional messages for multiple languages defined, a separate trigger needs to be created per language.
-
-
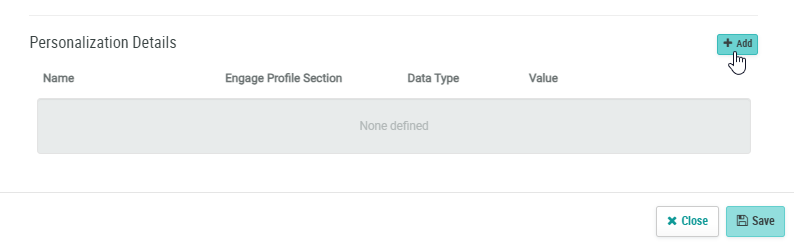
After defining the Parameters, the following Personalization Details need to be set, to map Loyalty with Engage fields.
Click on '+ Add'.
A new empty row is added to the Personalization details.
In here, the following can be defined :-
Name — Enter a field name of the Engage main audience (eg. Name) or extended Loyalty profile (eg. Loyaltypoints, Tier).
-
Engage Profile Section — Select the Engage main audience* (scope MASTER) or the extended profile (scope ENGAGE_LOYALTY).
*Note: The Engage main audience is determined by the message used in the Transactional Journey.
-
Data Type — The type of values from Loyalty that can be selected and passed in the request to Engage :
-
Attribute — refers to member* attributes available in Loyalty.
When "attribute" is selected, "value" shows a list of available member attributes from Loyalty.
The value of the selected member attribute will be passed in the API call to Engage.* Note: Contacts/consumers who are part of the Loyalty program are considered members.
More info on Loyalty members can be found here. -
Metric — refers to member metrics available in Loyalty.
When "metric" is selected, "value" shows a list of available member metrics from Loyalty.
The value of the selected member metric balance will be passed in the API request to Engage.
-
-
Value — A drop-down showing the list of values for the selected "Data Type".
This is a list of member attributes or a list of member metrics.
The value selected will be retrieved when the trigger executes to populate profile details passed from Loyalty to Engage.Examples of possible values in the drop-down : Birthdate, Email, First Name, Mailing City, Member Id, etc.
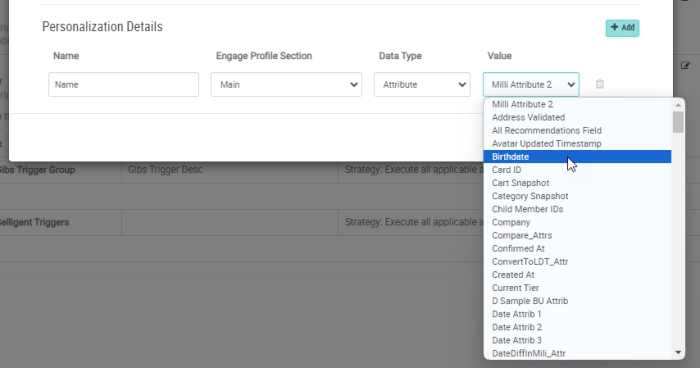
Note: Multiple rows can be added to the Personalization Details, for multiple mappings on fields of the main list and/or extended loyalty profile.
-
-
Once you're done, click "Save" to save the action trigger.
The 'Action' field now contains the action values set.


Note: The usage of the action that triggers the Engage transactional API call is explained here.
Using the Loyalty triggered action (event-based)
To start using the Loyalty triggered action :
- Publish the Triggered action : Update the status from 'Draft' to 'Published'.
- The effectivity is by default set to 'Always'.
- Click 'Save'.
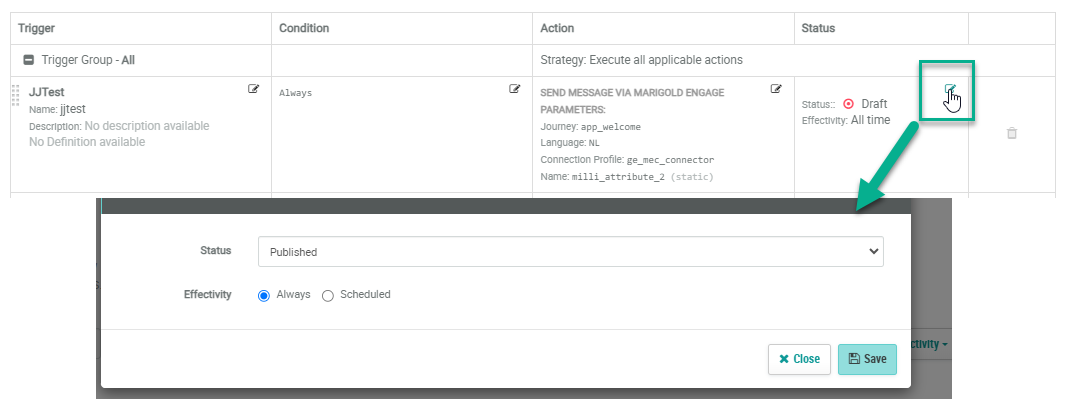
Note: More info on status and effectivity can be found here.
Examples of triggered actions (event-based triggers) are sending messages when new members join, when they earn rewards, etc.
Loyalty scheduled job (date-based)
Scheduled jobs are a great way for marketers to pre-schedule and execute actions that don't trigger a change in the system, such as sending birthday messages, notifications of expiring offers, etc.
Note: The difference between Triggered Actions and Scheduled Jobs is one (triggered actions) reacts when a specified activity takes place in the program and then happens immediately (event-based), and the other (scheduled jobs) only is processed at a designated pre-scheduled time (date-based).
In Loyalty, go to 'Admin > Jobs > Scheduled Jobs'.
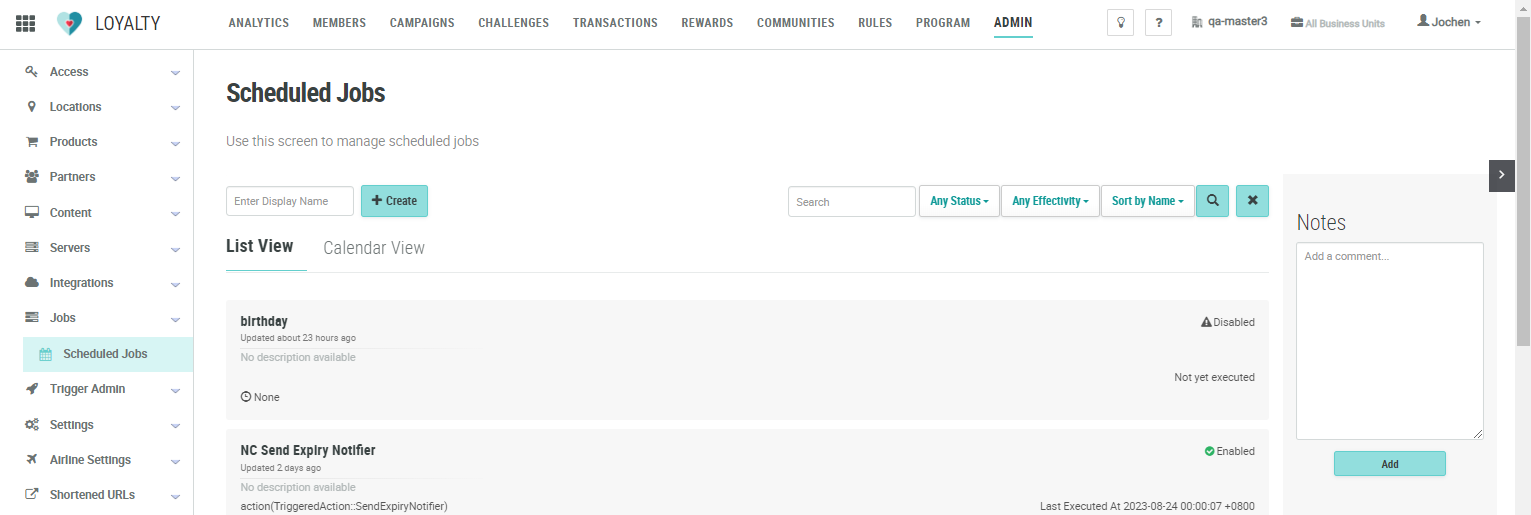
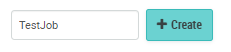
To create a new scheduled job, enter a display name and click on '+ Create'.
The following screen is shown :
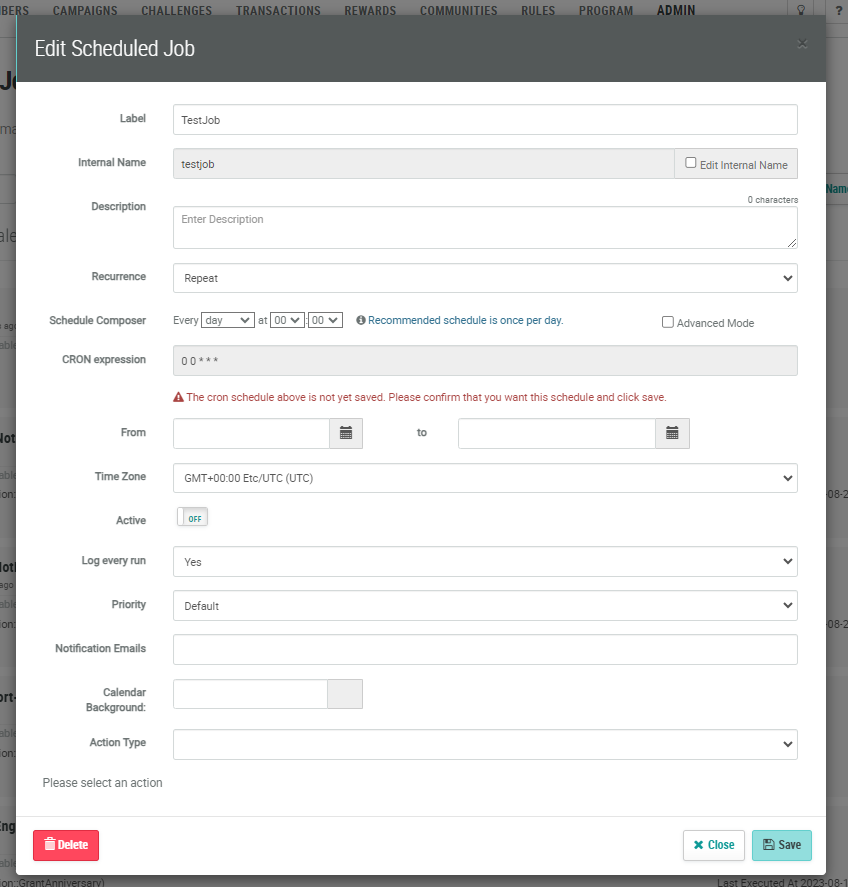
Like with Triggers (see above), an internal name and description can be entered (and the internal name can be changed).
Additionally, scheduled jobs offer the ability to set scheduling options such as recurrence, schedule dates and timings, and the time zone.
A scheduled job can run one time, or on a recurring schedule (e.g. every Monday at 11:00pm EDT, or on the 30th minute of every even hour).
The schedule job can be activated through the on/off toggle.
Note: Other scheduled job settings can be defined. For the full explanation, please consult this page.
You'll need to select an 'action type' :
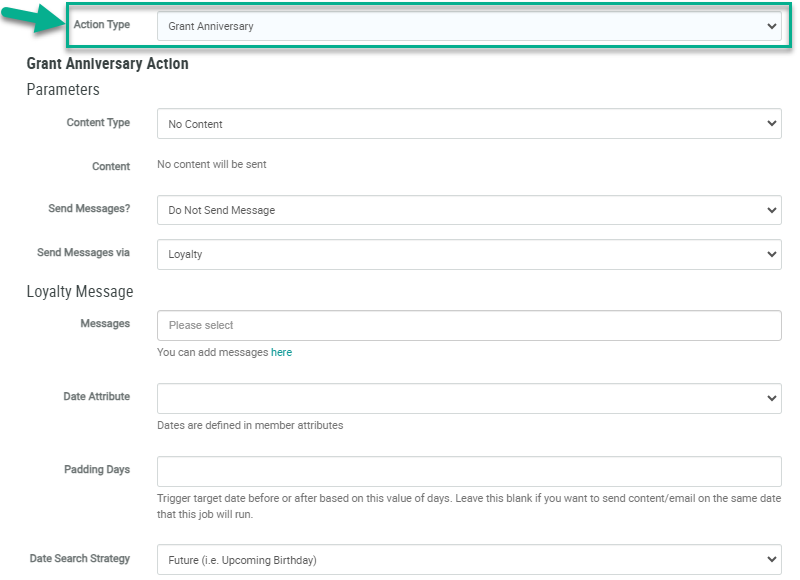
Note: Currently, only the action types 'Grant Anniversary' and 'Send Expiry Notifier' allow Marigold Engage to send messages. If another action type is selected, 'send messages via Marigold Engage' won't be selectable below.
Action types are explained here.
Once you've selected an action type, additional sections become visible :
- Parameters
- Content Type — For example an offer or reward.
- Content — The actual content, linked to the content type.
Note: Content and Content Type are Loyalty-specific settings based on the requirements for the job being configured. They're not specifically related to the integration between Loyalty and Engage.
- Send Messages? — To define if messages need to be sent or not. Select 'Send Message'.
- Send Messages via — Select 'Marigold Engage' here.
When 'Marigold Engage' is selected, additional fields are available (these are the same fields as when setting up a Trigger Action, mentioned above):- Connection Profile — Select the connector that was set up earlier, which contains the Engage organization name, the domain for the API call (eg. https://subdomain.domainname.com) and the API secret and key.
- Journey — Select the applicable Engage Transactional Journey (Journey API name) to trigger.
This will be the journey sending out the transactional messages (eg. welcome, reward, birthday messages). - Language — Select the language for which the transactional API call will be triggered.
Note: Only one language can be selected. If you want to send out transactional messages for multiple languages defined, a separate scheduled job needs to be created per language.
Personalization Details — These are the same details that can be set, as already explained earlier on.
Additionally, Date Attribute, Padding Days, Date Search Strategy and Refresh Segments can be set.Note: For the full explanation on these settings, please consult this page.
When done, click 'Save' to save your scheduled job.
Examples of setting up Scheduled Jobs in Loyalty: 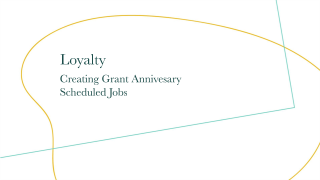
Creating Grant Anniversary Scheduled Jobs
Creating Send Expiry Notifier Scheduled Jobs
Ready for action
After setting up the Loyalty triggered action(s) and/or scheduled job(s), you can start using the Loyalty program in Marigold Engage.
