Message Sensors
The 'Sensor' tab provides an overview of the available sensors within a selected message. The sensor ID is displayed in the overview.

Sensors are used to
- measure a user response. This is visualized in the reporting.
- redirect to an url, an other journey or you define the click in the journey where the message is used.
There are two specific sensors:
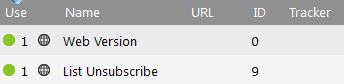
The 'Web version' sensor (ID = 0) is added to email messages to allow contacts to read the mail message in a web browser in case they are unable to view the mail correctly in their email client. When you create a new email, the web version sensor is by default added and available from the Sensor window, even if no sensors have been defined yet. A default section for the web version link is automatically added to the email, "View this email in your browser", with a constraint SYSTEM.MAIL=1 to show it only in the email client and not in the browser. As best practice, it is no use showing the web version sensor when you are already viewing the email in a web browser. You can change this section if needed. See Dynamic section for more information.
The 'Unsubscribe' sensor (ID = 9) is added automatically to the list of available sensors when the option 'List Unsubscribe' is selected in the properties of the message. The sensor is used by certain web-based email clients to provide the user with an additional option to unsubscribe. A "list-unsubscribe" link is added to the head of the email. If the receiving mail client detects this link, they usually add a line of text with a link above the email "You are subscribed to this mailing list. Unsubscribe". If the contact clicks this link, he is unsubscribed from the entire audience list (OPTOUT field is set to 9). This is only used when the email client supports the ‘list-unsubscribe’ standard. More information can be found on www.list-unsubscribe.com.
The sensor does not need to be linked to a journey to handle the unsubscription. By using this sensor the unsubscription is handled automatically by the system and the opt-out value for the contact is set to 9.
NOTE: It is advised to not use the probe(9) for a custom unsubscribe journey unless that unsubscribe journey doesn't require confirmation. The reason for this is that when he unsubscribe link is clicked, it triggers a POST request from the ISP to unsubscribe the contact. If a confirmation is added, the ISP will receive that confirmation but the contact will never be unsubscribed.
It is recommended best practice to leave the option checked, even if a custom opt-out button is provided. It will reduce complaints, improve deliverability and improve the experience for your subscribers. Frustrated contacts are more likely to hit the "Report Spam" button, hurting your sender reputation. Downside is that this will unsubscribe the contact for all mailings (OPTOUT=9). A custom, and mandatory, opt-out sensor will allow taking the contact to your own opt-out journey, where you can unsubscribe him any way you like. E.g. setting a field..OPTIN_NEWSLETTER=0.
NOTE: this List unsubscribe option does not replace the mandatory opt-out link in your emails!
A right click anywhere within the sensor window displays a menu with the following options:
- New sensor: creates a new sensor within the selected message. The Properties window is launched.
- Hyperlink to sensors: converts all hyperlinks to sensors.
- Remove unused sensors: removes all unused sensors from this message.
- Validate Sensors: opens the sensor validation panel.
- Overview: gives an overview of all sensors with their type, id, name and url.
A right click on a sensor gives the following menu options:
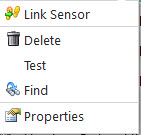
- Link sensor: link the selected sensor to a selection in the current message.
- Delete: delete the selected sensor.
- Test: test the URL attached to the selected sensor.
- Find: find the selected sensor in the current message.
- Properties: open the properties window of the selected sensor.
