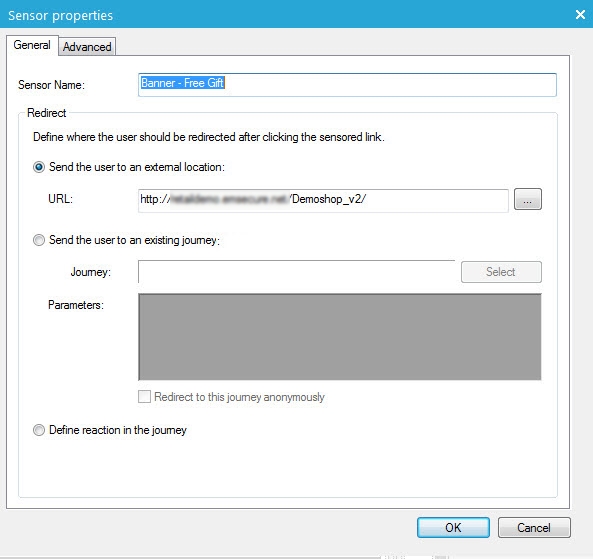
On the General tab, three sensor types can be used:
-
Send the user to anexternal location — Redirects the contact who clicked the sensor to a selected web page. Enter the absolute URL (starting with http://). You can also insert references to the Audience list or external properties (e.g. ~LINK~). Use the browse button next to the URL field to select the desired contact property field.
NOTE: When entering a web site URL, add a ‘/’ to the end. This ensures that the system verifies the redirect immediately as a URL. If this is not added, it will search for files and folder names with that value, and then for web pages. By adding the ‘/’, the search is slightly quicker.
-
Send the user to an existing journey — This redirects the contact to another journey and into an Input component in that journey. Click the Select button to select an Input component in an already existing journey to send the contact to when they click the sensor. The Parameters section allows you to define parameter values for the Input component that can be used to move the contact along the journey. Values can be numeric or textual values. Text values must be between single quotes, such as 'a value'. System variables and contact values do not use tildes here.
-
Define the reactionin the journey — You define the click in the journey where the message is used. The sensor will be displayed in the Sensor Overview as a 'blank sensor'. Choose this option when you do not wish to link the sensor in the message. The sensor will need to be defined later in the journey. This may come in handy when the same message is used in multiple journeys but the behavior of this sensor is different depending on the journey.
After choosing the correct sensor, click on the Finish button to apply the changes.
NOTE: The name of the sensor is also used in reporting. So give it a short, unique and descriptive name. Having 10 sensors with the name 'Click here' will make it impossible to identify the sensor in the reporting.
On the Advanced tab, you can set the following properties:
-
Page tag — This is used to add a tag to the sensor. The tag can be used internally, but also by external systems. Examples of external systems are Google Analytics, Xiti, Nedstat, etc. The tag can automatically be added to the redirect URL as a parameter value, so the analytics script on the resulting web page can use the parameter value. This allows indicating for instance that a sensor redirecting to a sports page is tagged as ‘Sport’. See tracking for more information. This tag can be requested with the system variable PROBE.TAG
- Categorization — This panel allows assigning a category to the sensor. The available categories are defined in the Selligent 'Settings' section.
NOTE: This Category field is mainly used for the OPTOUT- category, linked to the 'unsubscribe' sensor, which is used in combination with the AB-component. When measuring the best click through rate with an AB-component, clicks on sensors with the OPTOUT category are not taken into account.
- Taxonomy — The taxonomy panel provides a list of taxonomy tags used to characterize the sensor. For example, a sensor which sends the contact to a financial website can be tagged with the appropriate tag ‘Financial’. Whenever the contact clicks such a sensor his profile data is extended with this information. However, before using taxonomy on sensors, it’s mandatory to specify first an Audience list with a taxonomy defined on it. This means linking a taxonomy list to the Audience list. It can be easily done in the “Message properties” panel. Reporting on taxonomy is available from the portal. See taxonomy for more information.

