The properties of emails, templates and pages are more or less the same. They are both explained in this topic, with an indication of which properties apply to which type of message.
To access the properties of a message, open the 'Properties' tab at the right hand side of the main window.
General
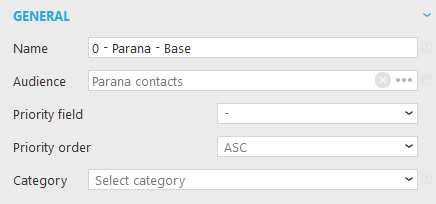
- Name: the name given to the message, by which it will be available for selection in a journey.
- Audience(emails
only): this part allows selecting the audience list linked
to the message. It is a good idea to always
select the audience list because:
- it limits this way the available personalization fields to those defined for the selected audience list.
- it is needed in the constraint editor, when creating sections in the message
- In addition, if Taxonomy is defined for that audience list, the Taxonomy values can be used on sensors in the message. Once it has been defined, the Sensor Advanced Tab in the Sensor properties is updated with the tags defined in the taxonomy list.
- It is also used when using a 'match' filter in an article container, or selecting the linked action list in an action container.
Selecting an audience list in the message properties makes it easier to edit the message. It does not enforce its use in the journey. You can still select a different audience list in the journey. Of course if the fields, content or linked lists are different than the audience list selected in the message, all the personalization, sections, etc. will not work.
- Priority field (emails only): this option allows defining which emails should be picked up and sent first. The selection is based on a numeric or date field in the selected audience list. If no field is selected, the order in which emails are generated for contacts, is based on the ID field, top to bottom. This means that earlier created contacts (older) are picked up first. Usually this is not a problem but sometimes you want the more recent contacts to get the email first. In this case, you can change the order, for instance MODIFIED_DT descending, to send to the recent modified contacts first.
- Priority order (emails only): the values for the selected priority field are sorted either ascending or descending and the order in which email are generated for the contacts is automatically adapted based on the selected pickup priority.
- Category: It’s possible to define a specific category for the selected message. The message category is used in reporting. Message categories are created under 'Settings'
HTML
With the 'Source' or 'Design' tab at the bottom, you design the body of an email or page. I.e. what is between the <body> tags. Here in the properties, the designer of the message can use HTML that appears in the <HEAD> and define the attributes of the <Body> tag.
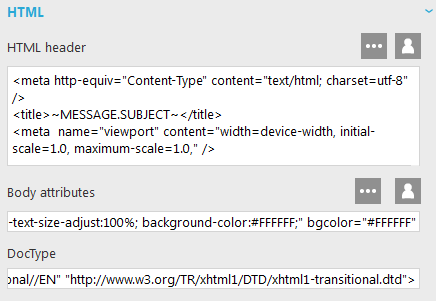
The HTML Header section can - amongst others- be used to:
- Define css (works only for emails when put in a separate section)
- enter meta tags
- use scripting (for pages)
- set the title of the page. Can be used for emails when the web version of the email is displayed.
Enter the Header attributes in the same manner as you would in a HTML editor.
Tip: For emails, place the subject between <TITLE>-tags in the HTML-tab. That way, the subject of the email is shown in the browser-title-bar when a contact looks at the html-version of the mail in the browser!
The Body Attributes section enables you to define custom body attributes for the message. For instance, you can set the bgcolor=gray (background color).
Doc-type (Advanced use): this last field defines the rules that a browser should respect when converting the html code of a message to the actual message on the screen. (For more information check out: http://www.w3schools.com/tags/tag_doctype.asp)
AMP
AMP email is a technology that allows email marketers to embed interactive elements like carousels, accordions, purchase buttons etc. into their emails. HTML header section is used to add or edit the AMP scripts and styling that are required to use AMP widgets in the messages.
Note that the body attributes section allows setting the attributes such as background color, margins, padding, font-family etc.
By default, when creating an AMP email, the following code is available in the Head-section and is required to be able to use the AMP library:
<script async src="https://cdn.ampproject.org/v0.js"></script>
<style amp4email-boilerplate>body{visibility:hidden}</style>
When specific widgets are used, an additional SCRIPT tag is added to the header for each of the widgets required.
Example: adding a carousel to the email
<script async src="https://cdn.ampproject.org/v0.js"></script>
<style amp4email-boilerplate>body{visibility:hidden}</style>
<script async custom-element="amp-carousel" src="https://cdn.ampproject.org/v0/amp-carousel-0.1.js"></script>
For more information on the available AMP components, please check out: https://amp.dev/documentation/components/?format=email
Tip! In Campaign, personalization fields are referred to with tildes. (Example: ~@FirstName~). Now, when using this sibling selector in CSS (often used for dynamic content), it is required to double the tilde in order for it to be previewed correctly in the output.
Language
The language section is used to set the language to be used for the translations in the message.
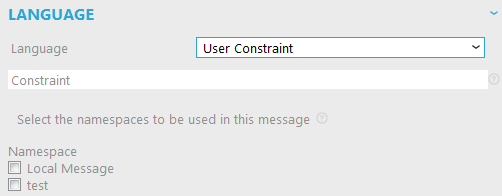
You can choose one of the default languages. The list of available languages is defined in the Selligent configuration. For instance, if the language of the message is set to French, all translatable values (drop down lists, database values,. ) are translated into French.
However, instead of selecting a fixed language, you can also set your own constraint for the language property. Select the option 'User Constraint' from the drop-down box. The constraint text box will be displayed. Enter your constraint in this box.

Example: IF (LANGUAGE='ES','EN',LANGUAGE) IF(LANG IN ('EN','FR','DE','NL'),LANG,'EN')
The above is typically used when there are no translations available for a specific language. In that case one might say for this example, that if the language of the contact is not English, French, German or Dutch, or if the language is empty, the English version of the message should be displayed.
Namespace: Namespaces are used for the translation of labels. It is possible that the same label is to be translated differently depending on the context. In that case a namespace can be used. A namespace is a collection of labels. Labels can for instance be used for the labels of input fields in forms. Select the Namespace indicated with the set of labels (namespace) you want to be used in the message by ticking the corresponding check box.
Advanced
The Advanced section is only available for email messages.
Archive Message:option is available when archiving is activated and when the user has the necessary access rights. When the option is checked a copy of the message is sent to a BCC email address defined in the maildomain.
Embed images: when this option is flagged the images are stored within the message. In general it is not recommended to embed the images. It could be used for instance in secure environments where the end-contact does not have access to the internet and cannot download the images as a consequence. Embedding all images in the email will make the email a lot larger for the contact to load in the email client and the bandwidth used to send the email will increase exponentially.
Include List-Unsubscribe: when this option is flagged, automatically a sensor is created allowing the contact to unsubscribe from the mailing list. A "list-unsubscribe" link is added to the head of the email. If the receiving mail client detects this link, they usually add a line of text with a link above the email "You are subscribed to this mailing list. Unsubscribe". If the contact clicks this link, he is unsubscribed from the entire audience list (OPTOUT field is set to 9). This is only used when the email client supports the ‘list-unsubscribe’ standard. More information can be found on www.list-unsubscribe.com. The corresponding sensor ID is 9.
Include Spam complaint: When this option is flagged, automatically a link is created that allows reporting a spam complaint. When the user clicks this link in the message, you can define a reaction for this sensor and for instance redirect the user to a custom journey that handles spam complaints.
Max line width; the maximum length allowed for the text versions of the message
It is best practice to leave the option checked, even if a custom opt-out button is provided. It will reduce complaints, improve deliverability and improve the experience for your subscribers. Frustrated contact are more likely to hit the "Report Spam" button, hurting your sender reputation. Downside is that this will unsubscribe the contact for all mailings (OPTOUT=9). A custom and mandatory opt-out will allow taking the contact to your own opt-out journey, where you can unsubscribe him any way you like. E.g. setting a field.OPTIN_NEWSLETTER=0.
The Attachments give a review of all the attachments that should accompany the message.
To add one, click on the  button.
Three options are provided:
button.
Three options are provided:
- File
- Contact
- Appointment
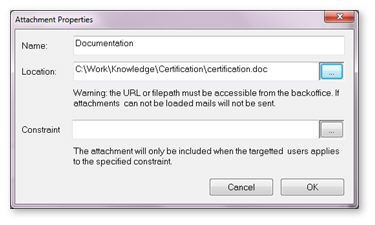
1. Enter a name for the attachment (the name recipients will see),
2. Enter the location of the attachment or browse to it by using the button on the right. Make sure the file path is accessible for the SELLIGENT back office.
Technical note:
These attachments are usually located on the web server while the
application is running on the application server. Make sure that
the user under which the Mailagent is running has the necessary
(read) rights on the file path and files on the web server. Typically, the network path is used in the Location box.
3. Add constraints if necessary. The constraints are based on user properties, which can be accessed with the browse button. The Use of the constraint commands (=, <>, AND, OR …) is allowed. For instance, send the attachment only to women older than age 30.
4. Click OK to close the window.
The following dialog pops up in which following contact fields need to be filled out:

A constraint can be defined to make this contact attachment visible under certain conditions.
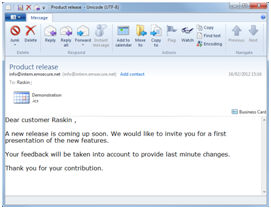
The recipient will receive an email that with a button to create a contact record:
The email might look slightly different depending on the email client used.
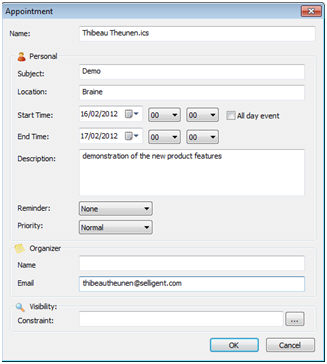
In case of an appointment, the following dialog pops up to define the details of the appointment.
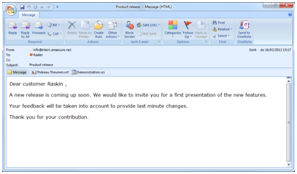
The email received by the target will look as follows:
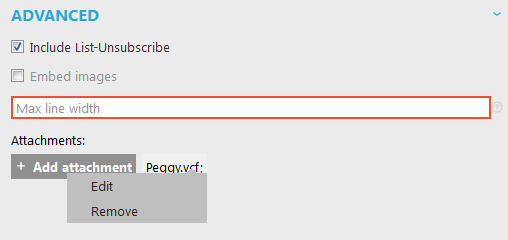
To modify: select the attachment and then click the 'Edit' button.
To delete: select the attachment and then click on the Remove button.
NOTE: including attachments in emails is not recommended, as it increases the probability that the email will be considered as spam and increases bandwidth. Including a link in the email message which opens the pdf or other item on a webpage is recommended. In this case, you will also have reporting on how many contacts clicked to download the item.
Best version
The tab ‘Best version’ is only displayed when the message contains a Multivariate test component. This MVT component allows adding text, image or article containers to a message and tests each possible combination. The ‘Best version’ allows defining when and how a best version is selected.
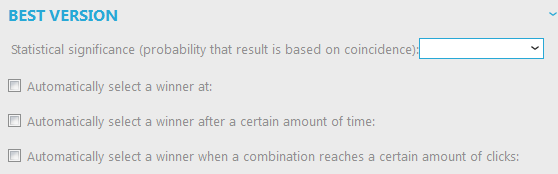
A MVT journey will send the different variants until one of these criteria is met:
- Statistical significance: if the difference between the results has a statistical significance of 1, 5 or 10% (based on the F-Test or one-way ANOVA)
- Automatically select a winner at a specific date and time.
- Automatically select a winner after a certain time has elapsed since the start of the test.
- The winner is selected when a specific amount of clicks is reached.
It is possible to select multiple options but the one that is completed first is used to determine the winner.
The ‘statistical significant difference’ is a statistical calculation that calculates if the result (number of clicks) is based on coincidence or not. If you only have 2 clicks on an item, the chance that the clicks are coincidental is high. The more clicks you have on an item, the chance becomes lower. For more info see Wikipedia: “Multivariate testing in marketing” or “F-test”.
Output type for pages
When creating a page, you can set the required output type for the page. You can choose between HTML, XML, JSON, plain text or CSS.

The non-HTML types are meant to be used when you want to provide API-responses to external services with data stored in Selligent.
This is a unique selling point of Selligent as this allows you not only to generate personalized HTML pages but also XML, JSON, CSS and plain text pages that can be used through the API for Content Automation.
Example: You want an existing form on the website to submit data to a Selligent MC Journey, so all advanced Journey capabilities can be used. This submit expects a result saying “success” or a list of error messages for example. By allowing different types of output pages, we can now very easily set this up.
