Creating data in a list
The 'Data' tab in the Lists main window is used to consult and generate data.
Data can be
- entered manually using the 'New record' option in the toolbar of the 'Data' tab
- imported using the 'Import' button in the toolbar of the 'General' tab
- consulted.
To add a new record to the list, press the 'New record' button. A dialog is launched in which the values of the different fields can be entered.
If values need to be entered in linked lists, this list can be selected from the drop down field at the top of the dialog. This is only possible for 1:1 related lists.

NOTE: when creating a new record, the ID is automatically generated.
If a field has an option list attached, click the 3-dots icon at the end of the input field to select a value defined in the option list.
Now at import, following choice can be made:
- import into a new list: in this case the list and table do not yet exist and are created at the moment of import.
- Add to existing list: records are created in an existing list. They are appended to the already existing records without updating existing records. No checks are made on duplicate records.
- update an existing list: records in a list are updated with the imported data. A key field is required to match records in the source with records in the Selligent list. If no corresponding record is found in the Selligent list, the record from the source is not created.
- Merge with existing list: new records are added, existing ones are updated. A key field is required to match records from the source with records in the Selligent list.
1. First the source file must be selected. Use the 'Browse' button to locate the source file and press 'Load' to load the data from that file. A file delimiter can be selected.
A preview of the data in the source is returned.
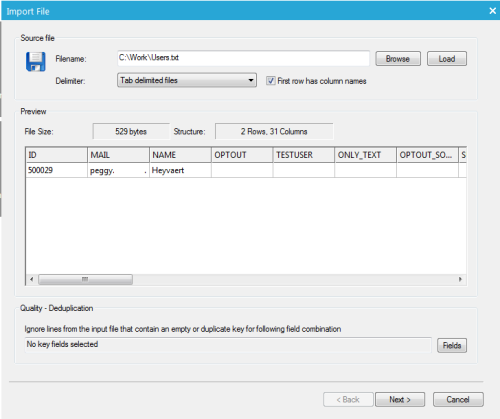
To guarantee clean data, it is possible to remove duplicate records from the source based on one or more fields. Use the 'Fields' button in the 'Quality - Deduplication' section.
2. Next, select the type of import to perform and set the destination details:
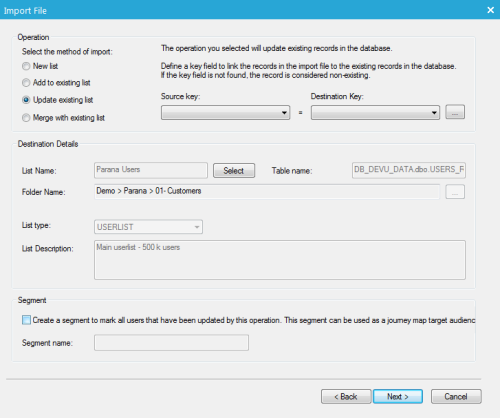
Depending on the type of operation (update and merge), a source key must be mapped to a destination key in order to be able to update records in the destination list.
NOTE: it is possible to select multiple key mappings. If this is the case, these can be consulted by clicking the ... button.
If there are duplicate values in the list, based on the mapped field, only one record is updated. Preferably there are no duplicates in a list. See deduplication to remove duplicate records.
Next define the destination list. In case of the option 'New list', enter the name of the list. The table name is generated automatically but can be modified if required. The folder in which the list must be created can be selected from the 'Folder' field. A type of list must be selected as well. This defines the default fields that will be created in the new table.
For all other options, select the list by clicking the 'Select' button. A tree view of folders and sub-folders is provided from where the list can be selected.
NOTE: the folder name field is updated automatically after selecting a list.
Last, a segment can be created based on the contacts that have been updated by this operation. Segments can be used in journeys.
3. In the following step a mapping is defined between the source fields and the fields in the destination table.
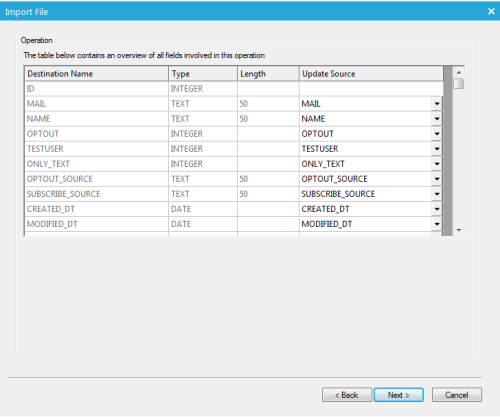
If the column names in the import file matches the fields from the list, an automatic mapping between fields is provided,but changes can be made.
4. The last step gives a summary of the different steps executed during the import procedure.
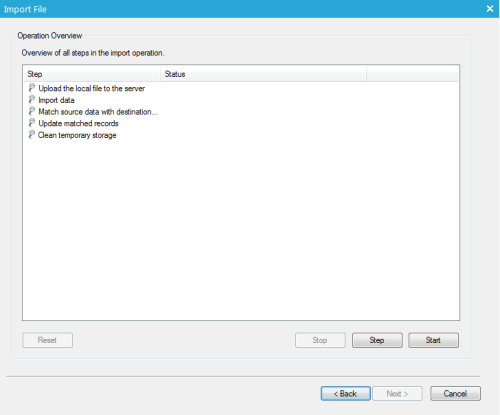
These steps can be executed one by one (using the 'Step' button) or can be executed all at once (using the 'Start' button). When executing steps one by one, they can be reset. The status column will show if the step was successfully executed or if there was a problem. Usually it is a type mismatch, where the value to import does not match the field type of the list.
When done, a summary of the import is returned.
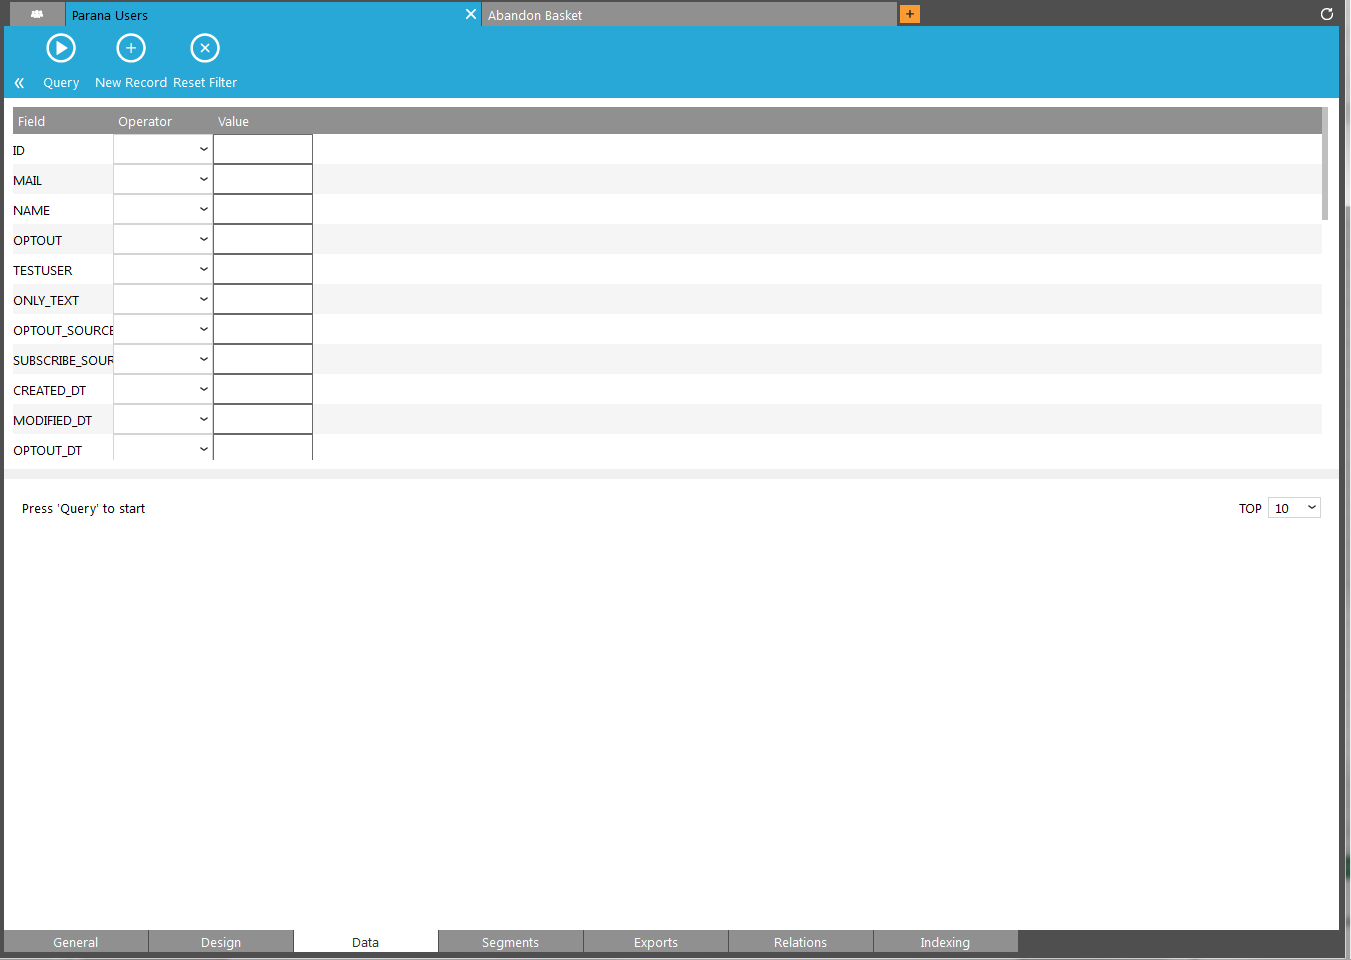
Once records are stored in the list, they can easily be retrieved from the 'Data' tab.
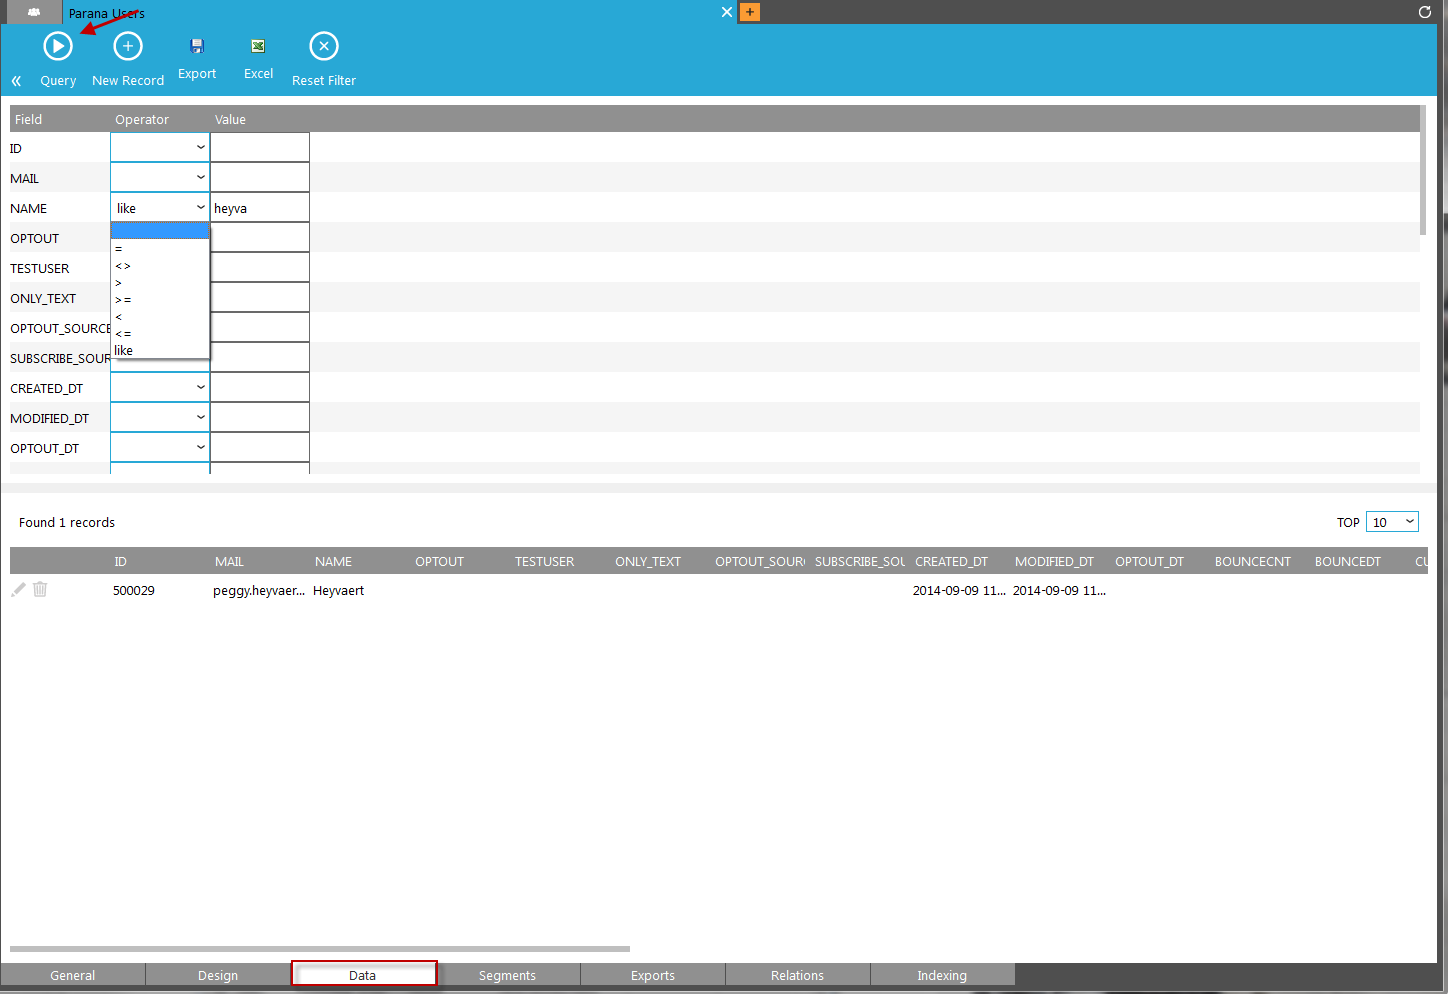
Press the 'Query' button to return the top 10, 100, 1000 or 10000 records in the list. Select number of records from the "TOP" pick list on the right.
To limit the result, use the search fields in the upper section to define criteria on one or more fields. Adding multiple search criteria will result in an AND operation. E.g. Gender='M' AND Lang='EN'
NOTE: the operators available are related to the type of field.
The result of the query is displayed in the lower part of the 'Data' tab. Records can be edited directly in the result table or deleted.
NOTE: by default the top 10 records are displayed. It is possible to change this value to 100, 1000 or all records.
