Setting up the Meta Audience Integration
Introduction
The Meta Custom Audience integration allows customers to exchange Engage Audience Lists for ads targeting in Facebook or Instagram. An interface plugin has been developed which allows you to transfer data from Engage to the related Meta app.
Configure the Plugin
Create the Social Channel Endpoint in Engage
When adding a new instance of the Meta Audience plugin in the Admin Configuration, you need to configure a new endpoint of type 'social'.
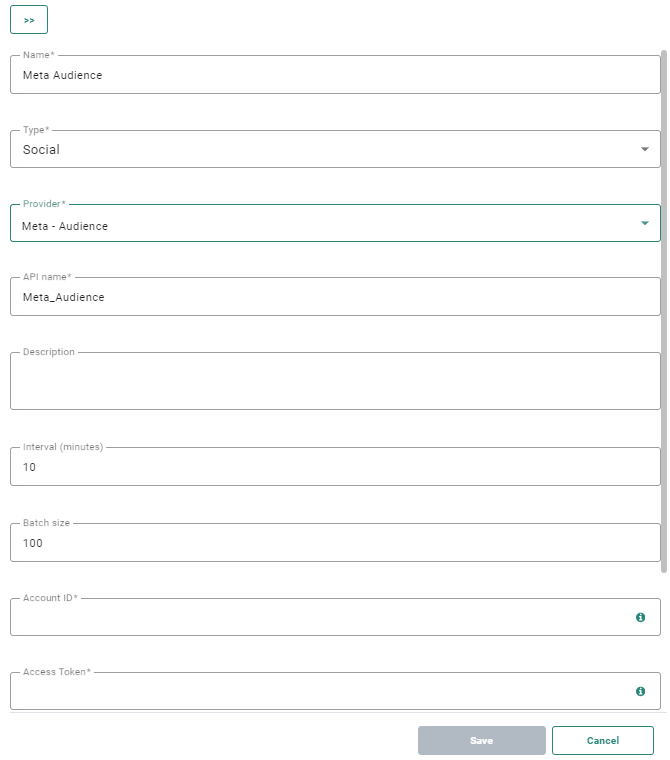
The following fields can be configured (the ones with an asterisk are required fields) :
- Name* — Enter a channel endpoint name. Make sure to choose an easy recognizable name.
- Type* — Select Social as type.
- Provider* — Select Meta Audiences.
Note: The type and provider fields can only be selected during creation of a new channel endpoint. When editing an existing channel endpoint, they are read-only and can thus no longer be changed.
- API-Name* - The API-name attributed to the end point and used by the API .
- Description — You can enter a description for this endpoint.
- Interval (minutes) — Throughput interval, expressed in minutes. This is a configurable value, which is 10 minutes by default.
- Batch size — Throughput batch size. This is a configurable value, which is 100 by default. A maximum of 10000 records per interval is possible. Note however, the more fields are being synchronized per record, the smaller the batch size should be set.
- Account ID* — Your Meta account ID. This is the ID of the user used to create the app in Facebook or Instagram.
Note: Interval and Batch size are settings applied to records sent from Engage to the plugin. However, the processing speed depends on the settings defined in the plugin and can be different for each plugin. The rate limits of the plugin are defined through 3 distinct parameters: Concurrency, MessagesPerrequest and RequestsPerSecond/Minute.
How to retrieve the Account ID:
Navigate to https://developers.facebook.com/apps and select your app.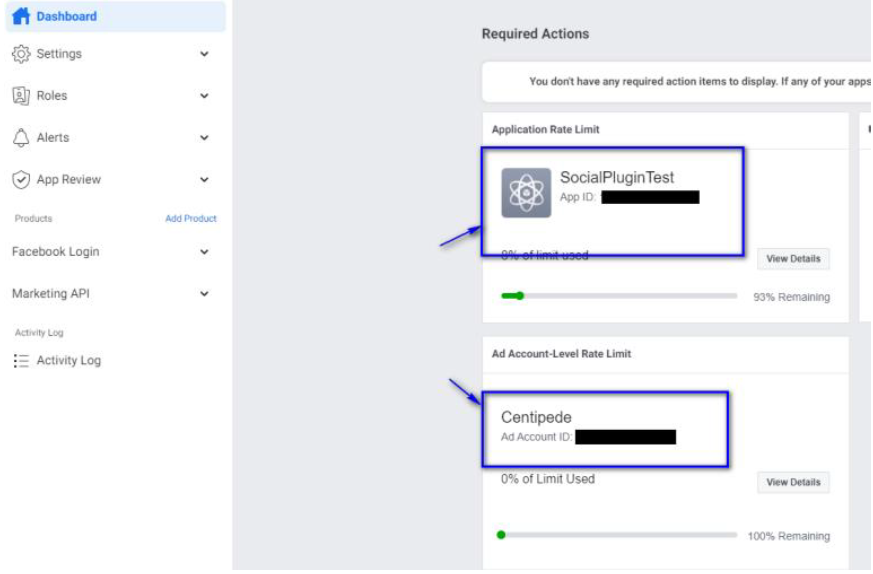
- Access token* — This token is to be obtained from the Meta's Graph API explorer.
Note: For more information on how to obtain this Meta Access token, please check out the following topic.
- Page ID — The related page ID you want to use..
How to retrieve the Page ID:
1. Go to https://business.facebook.com/
2. In the menu on the left, go to Settings
3. Go to Business Assets
4. Click on your page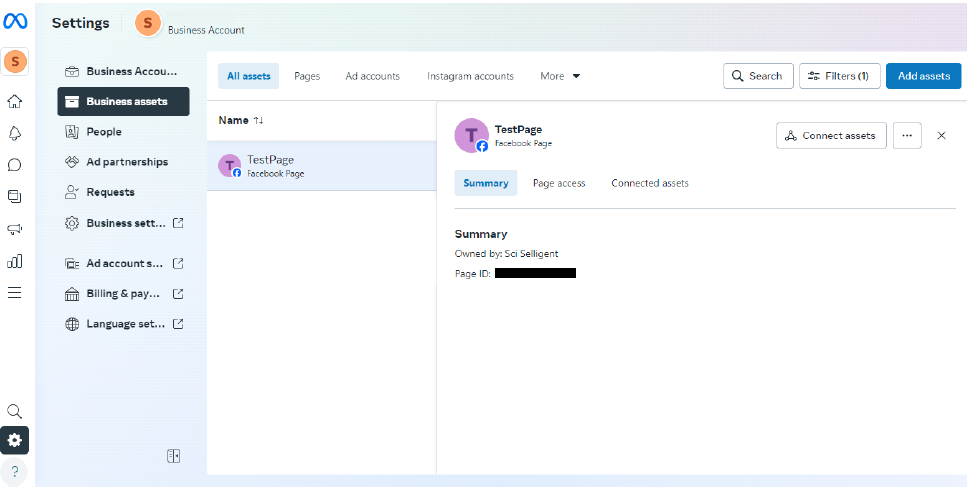
- App ID — Your app ID within Meta.
How to retrieve the App ID:
Navigate to https://developers.facebook.com/apps and select your app.
After setting up the Meta Custom Audience plugin successfully, it can be used in Marigold Engage through the Meta Custom Audience component in Custom Journeys.
Connect your Meta Instance to Your Organization
As you can create multiple instances of the Meta Audience plugin, you’ll need to define within the Admin Configuration which Meta instance you want to use within your organization.
1. In the Admin Configuration , click on Organizations tab and edit the one you want to configure.

2. Select the tab Endpoints and choose the preferred Meta Instance you like to use and click on Save.

Use the Meta Audience Component in Journeys

-
Name — The name of the Meta Custom Audience Component. This is used to reference the component on the Design canvas. Make sure to use a clear name.
Note: The name should be limited to a maximum of 50 characters.
-
Meta Audience Name — This is the name of the Meta Custom Audience and can be retrieved from Meta .(Check out the section on Meta Audiences for more info)
Note: Meta does not permit to delete users from audiences with less than 1000 contacts.
-
Enable deduplication — If there are duplicate contacts in the journey's audience, you can use Deduplication to select a unique contact based on a field or a combination of fields. This avoids sending the contact to Meta more than once.
You can define the following settings:
- Unique key — You can define the field in the audience that should be used to perform deduplication. This can be a combination of fields as well, for example the Name and Email for a contact can be used to detect duplicates.
-
Prioritization — Here you define what field in the audience should be used to define the record that has priority over the others in case duplicate records are found. For example, you can use the last update date as a prioritization rule.
-
Sorting — Choose from ascending or descending to define the record that should be kept.
The following fields are available to target the Meta contact. One field or a combination of fields can be used to do the matching.
-
Mail — Email address associated with the target Meta user. Trim leading and trailing white space, and convert all characters to lowercase.
-
Phone — Phone number associated with the target Meta user. Remove symbols, letters, and any leading zeroes. You should prefix the country code if the COUNTRY field is not specified.
-
FirstName — First name associated with the target Meta user.
-
LastName — Last name associated with the target Meta user.
-
City — City associated with the target Meta user.
-
State — State associated with the target Meta user. Use the 2-character ANSI abbreviation code, lowercase. Normalize states outside the US in lowercase, with no punctuation, no special characters, and no white space. h
-
ZipCode — Zip code associated with the target Meta user.
-
Country — Country associated with the target Meta user.
-
DateOfBirthDay — Numerical value of the day of birth associated with the target Meta user.
-
DateOfBirthMonth — Numerical value of the month of birth associated with the target Meta user.
-
DateOfBirthYear — Numerical value of the year of birth associated with the target Meta user.
-
Gender — Gender associated with the target Meta user.
-
PageUiD — Page user ID associated with the target Meta user. (*)
-
AppUiD — Application user ID associated with the target Meta user. (*)
(*) Both the Page ID and App ID need to be configured in the Channel Endpoint configuration in Admin Configuration before using them in the Meta Custom Audience Component in your journeys.
Note: Field values can be entered manually, but also by inserting personalization fields. To use a personalization field value, navigate to a field with the mouse cursor (or via keyboard 'tab'); the personalization icon then becomes visible and can be clicked to show the Personalization Dialog .
Set up in Meta
This section explains what steps are required to create/map an add user account. A business account is required when you want to sync data to a custom audience list. Information about authorization can be found here: https://developers.facebook.com/docs/marketing-api/overview/authorization/
It is advised to read this through before setting up the marketing Api account.
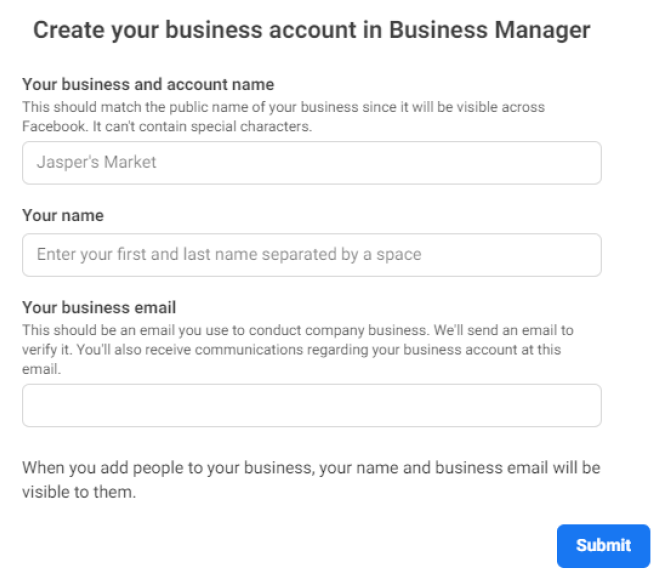
Create a Business Manager Account
A business manager account is required to synchronize data from Engage to a Meta Custom audience list. https://www.facebook.com/business/help/1710077379203657
1.Go to https://business.facebook.com/overview. Log in to your Facebook/Instagram account.

2. Click on create account
3. Fill in the required information:
Create a Meta App
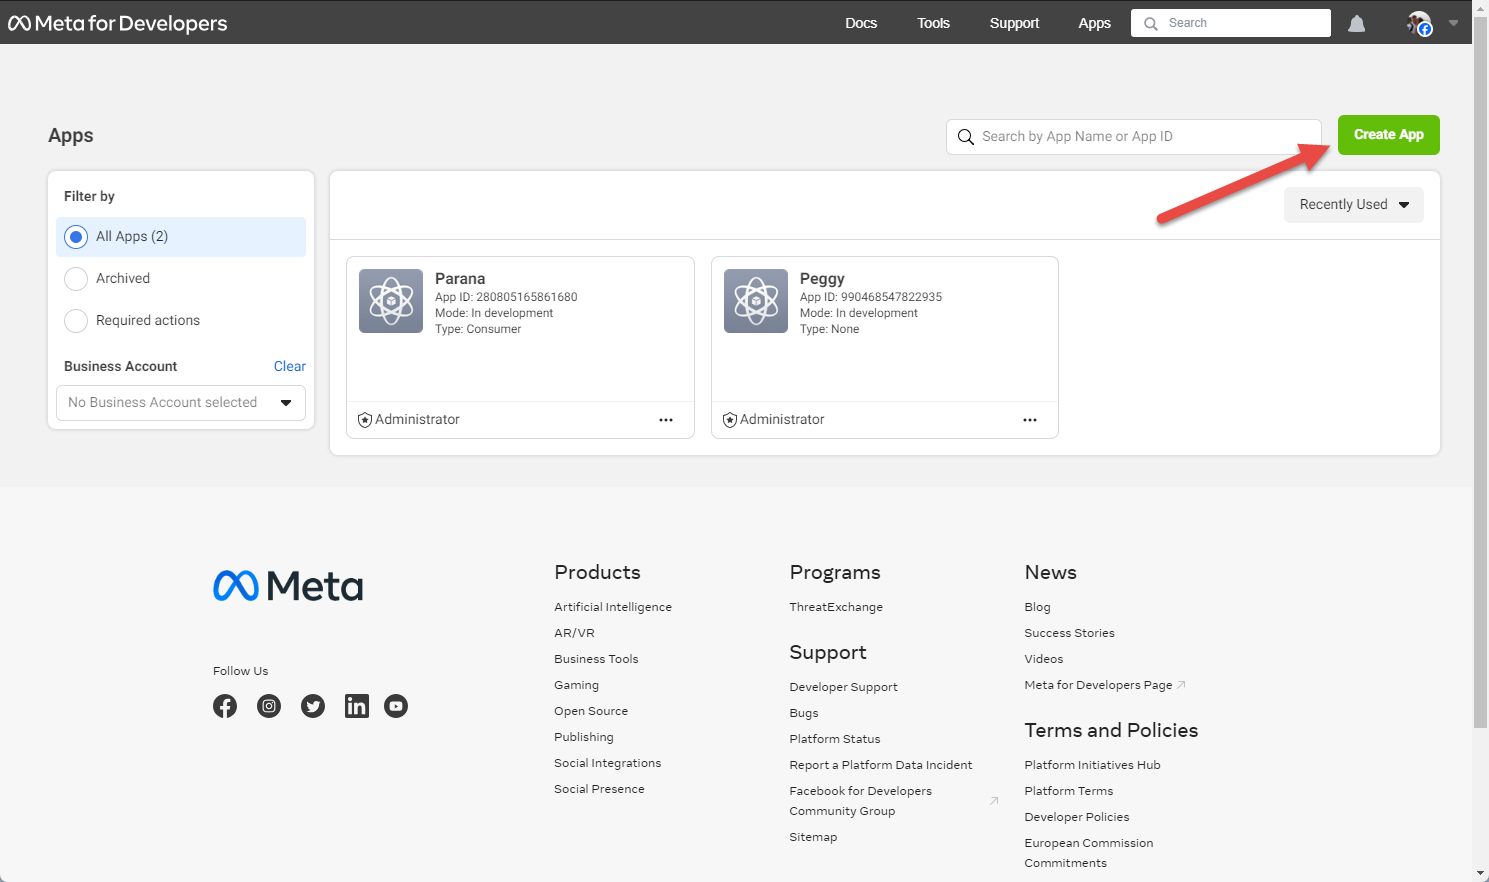
A Meta app is required when using the marketing Api. If you have already created an app, make sure to connect your Business account to it. If you didn’t create an App yet, please navigate to this URL to create one : https://developers.facebook.com/apps/
1. Click on Create App.
2. Select the option Other and click Next.

3. Then select Business and click on Next.

4. Fill in the necessary information and click Create App.
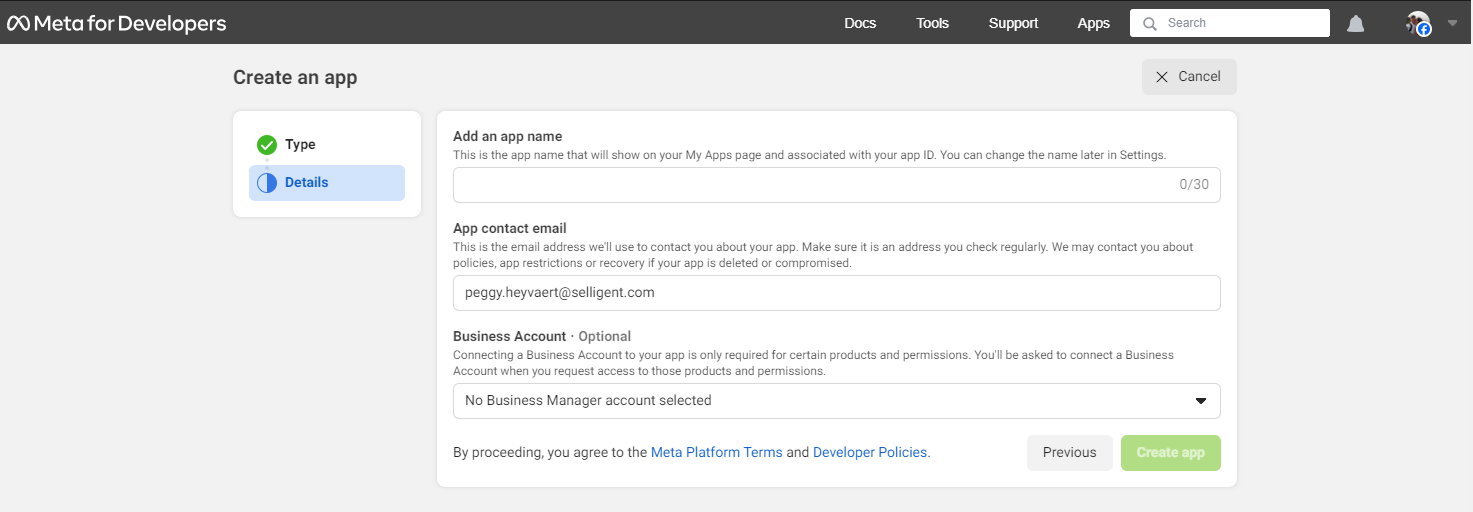
* Select your business account that was been created within the previous section
5. You can find your App ID on the top left corner.
Add an Ads Account
A Meta Ads account is different from a user account. An ads account is required when using the Marketing Api. This can be created within the business management portal page.
1. Navigate to https://business.facebook.com/settings/
2. Select in the left menu within the section Accounts → ‘Ad accounts’
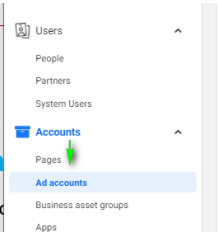
3. Create or Add a new ‘Ad Account’.
There are 3 options that you can select:
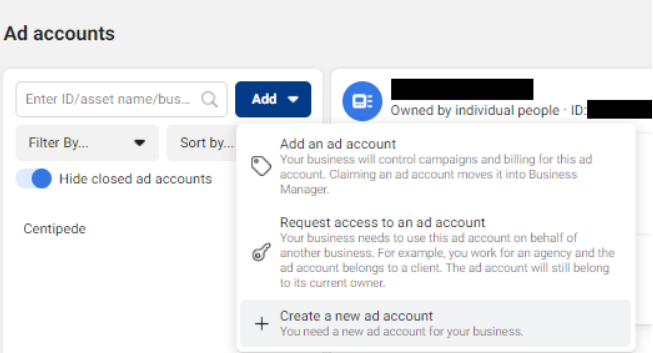
If you don’t have one yet, click on ‘Create a new ad account’.
4. Fill in the required information and click next.
5. Select ‘My business (xxxxx)’ and click on create.

Access Tokens
An access token is required to sync data from Engage to Meta. This part contains three different sections. First, we have to create a short-lived access token. This token will be used to generate a long-lived access token. With this long-lived token, we can create a never expiring access token.
Create a Short-Lived Access Token
Currently you have the get the Meta User Access Token from Meta’s Graph API explorer at https://developers.facebook.com/tools/explorer.
1. In the My Apps you must select a Meta application to associate the access token with.
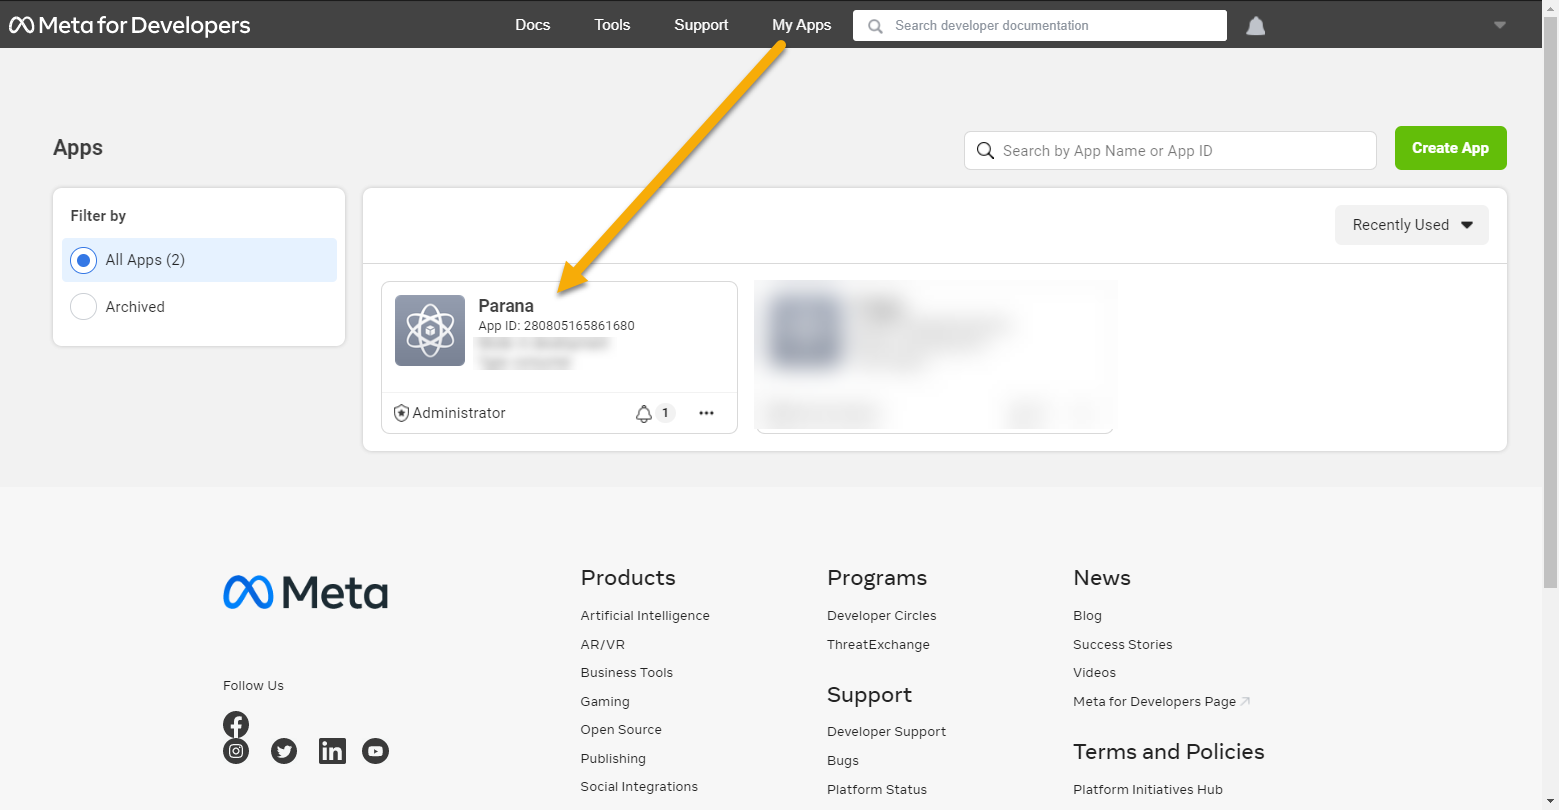
Note: If you don’t own any application you should create one by clicking the ‘My Apps’ drop-down and then selecting Create App
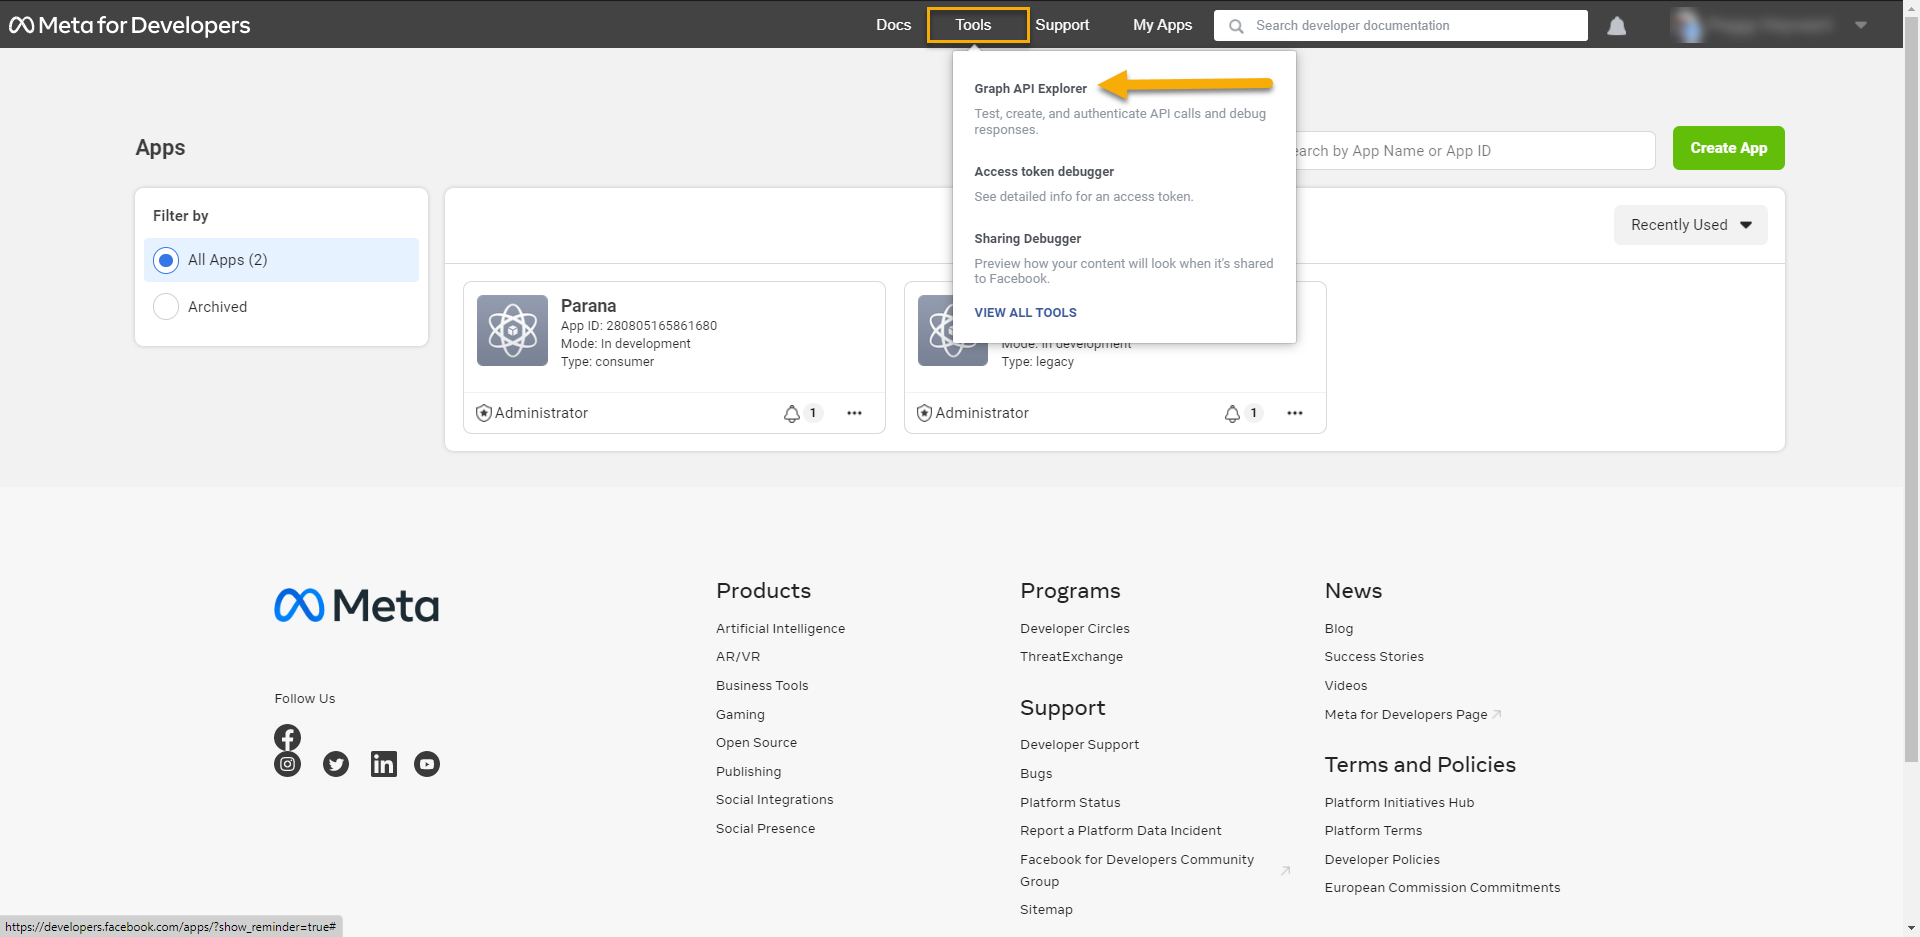
2. Next, go to Tools and select Graph API Explorer :
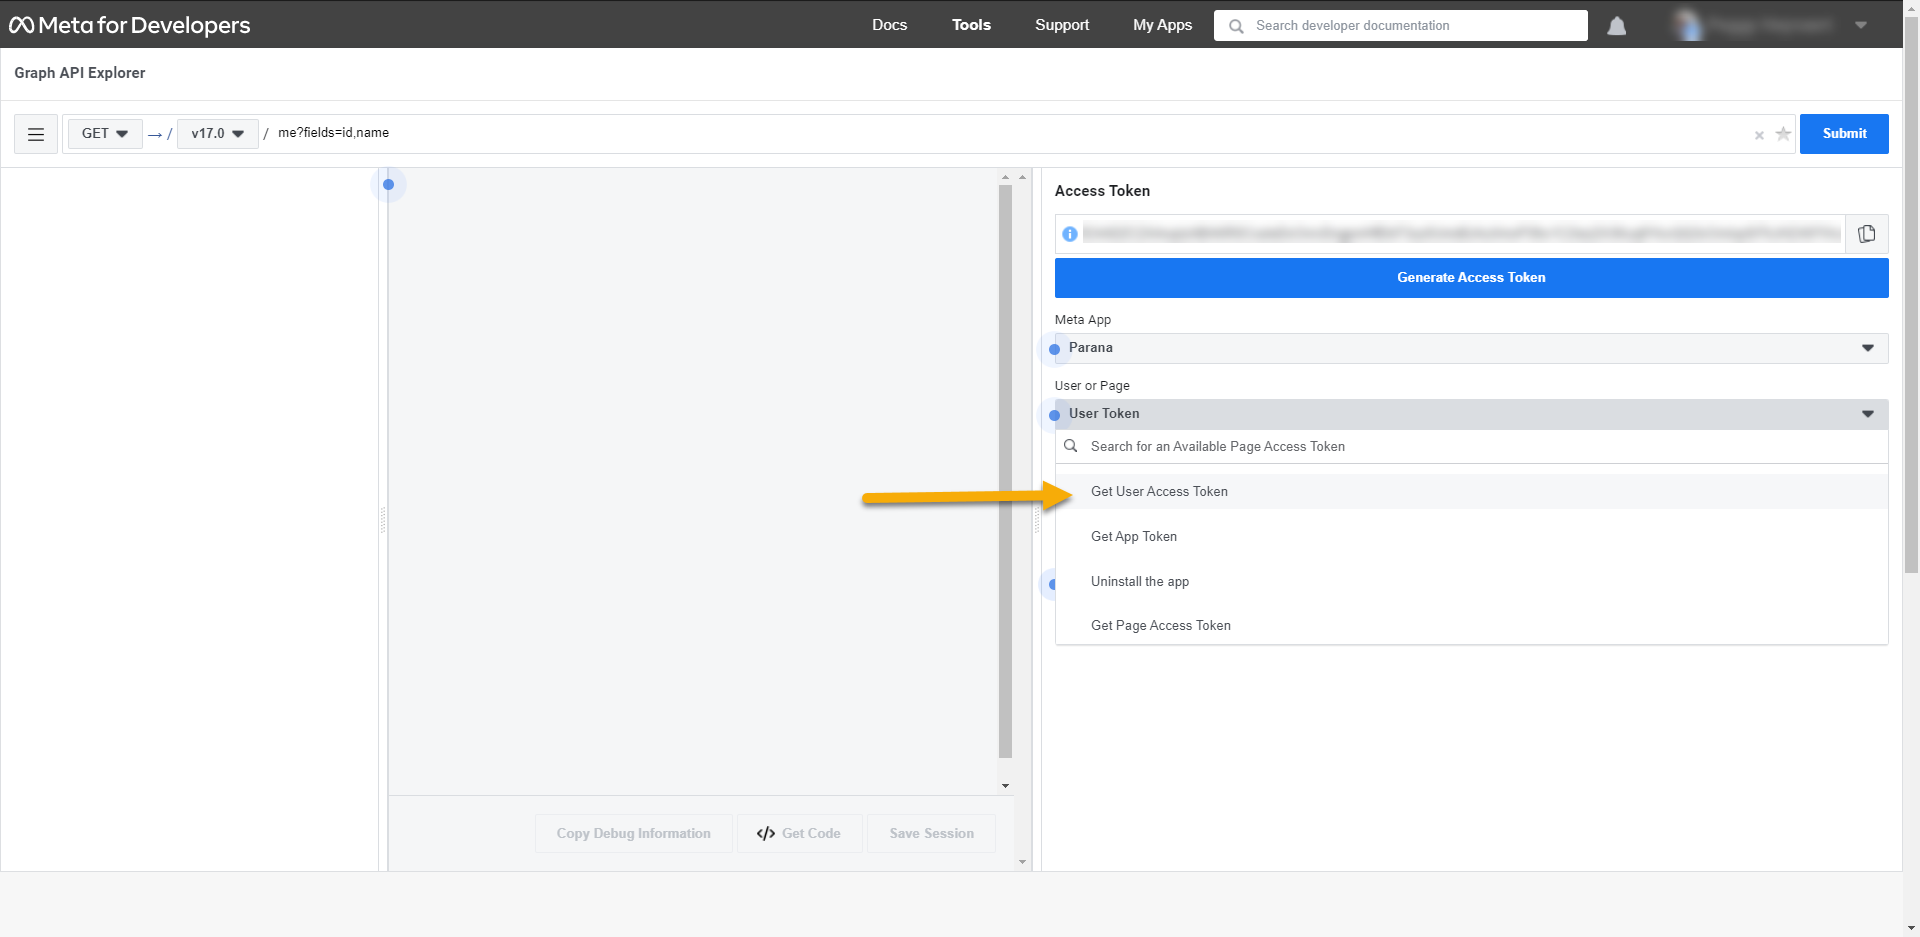
3. Next, click the User or Page drop-down and select Get User Access Token.
4. Make sure to select ads_management, ads_read, business_management and pages_show_list in the permissions below .
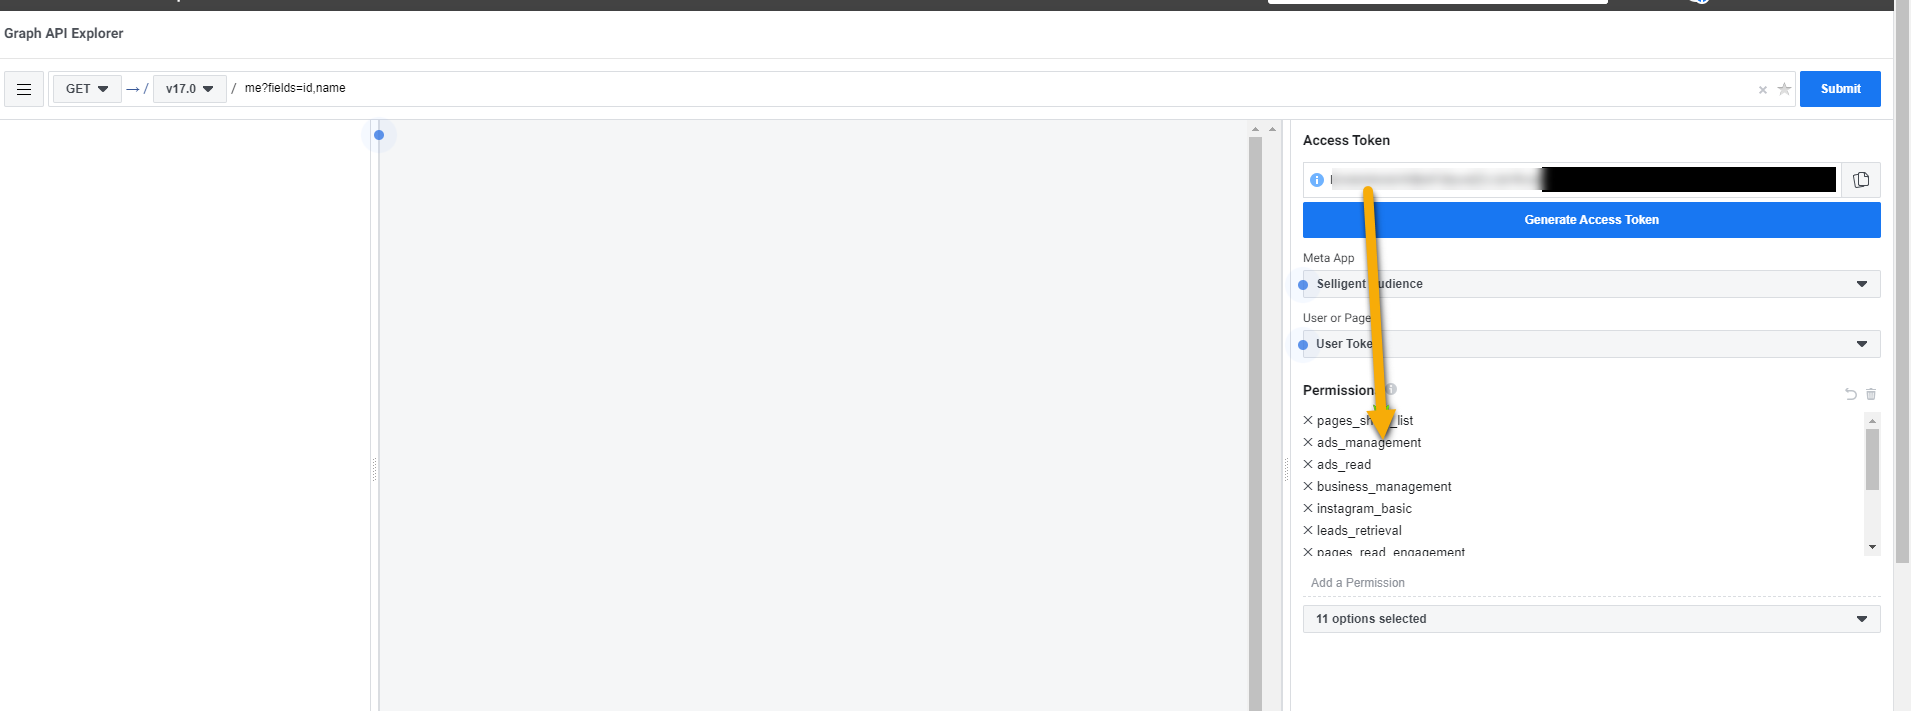
Note : You will have to confirm that you are giving your app permission to make changes to your account. Then the access token will be generated automatically in the first input field. Do not click 'generate access Token' as this will create a new blank token.
Note : This token will only last for 2 hours. However, there is a way to extend it to last for 2 months; see the steps below.
Create a Long-Lived Access Token
1. Go to https://developers.facebook.com/tools/debug/accesstoken/ and copy the access token in the text field and click debug.
2. If this is a short-lived access token (with the necessary permissions) then at the bottom of the debug page you will find the button “Extend Access Token”. Press it to extend the expiry time of the access token with 60 days.
3. Copy that Access Token and proceed to create a never expiring page access token.
Note: Not the entire access_token is shown, click debug to open a new debugger to copy the token.

Create a Never-Expiring Access Token
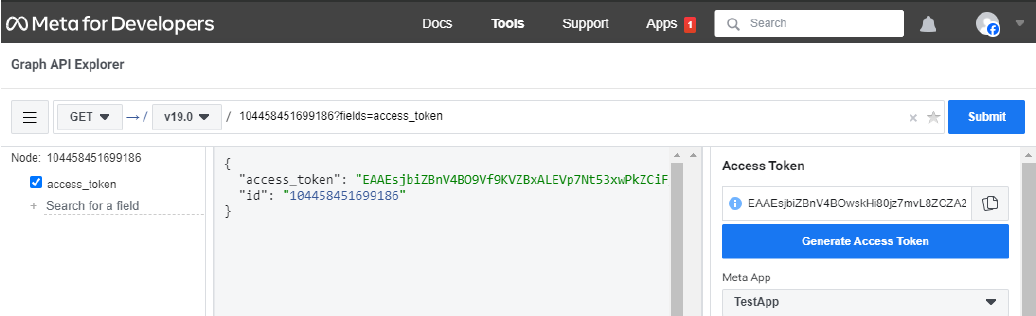
1. Go tohttps://developers.facebook.com/tools/explorer/.
2. Paste the long-lived access token generated in previous step inside the field “Access token”.
Note: Do not change any settings and do not click 'generate access token'.
3. Get the Access token.
At the top input bar: fill in [YourPageID]?fields=access_token (ex: 123456789?fields= access_token).
Copy the access token in the middle pane and verify this in the access token tool.
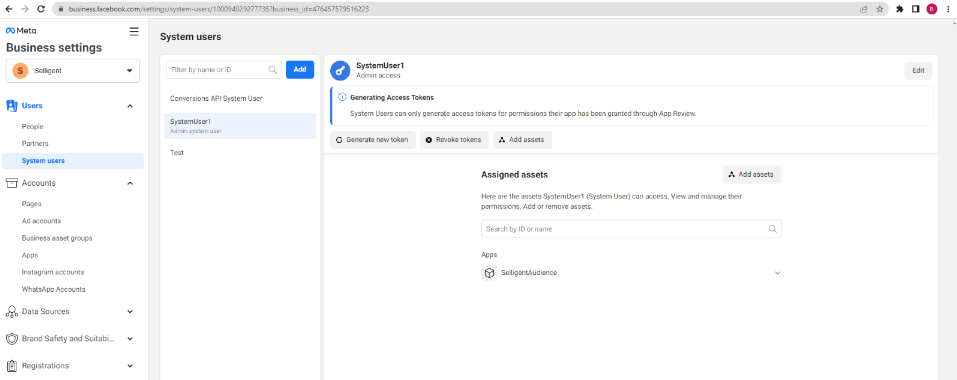
System User Access Token
You can also use a system user (not linked to a Meta user) in your Meta business manager settings.
1. Go to https://business.facebook.com/settings (select your account - it needs to be the business manager account where your app was created.)
2. Add a System User (name, select employee or admin).
3. Add Assets (This is the app you created and add full control).
4. Click 'Generate token'.
5. Select the app, set 'token expiration' to never, and select the necessary permissions.
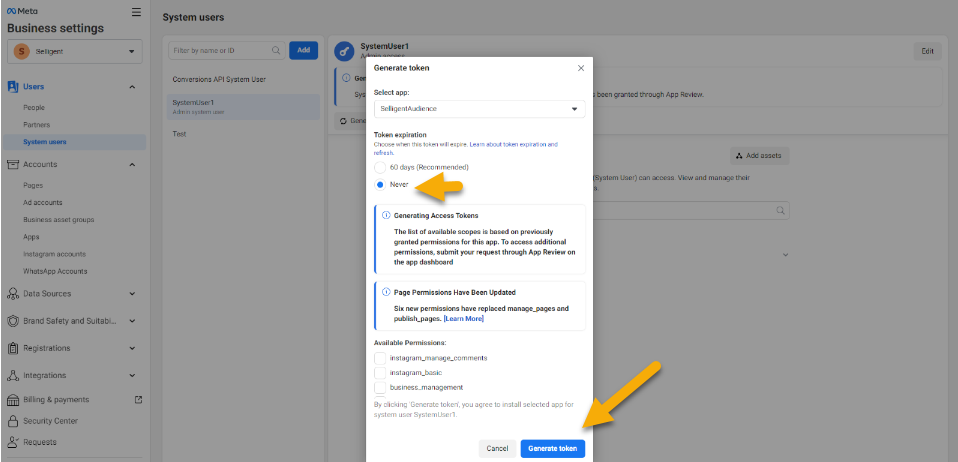
6. Below click 'Generate token'. Copy this token and provide it to Marigold.
Create a Meta Audience
When using the Meta Component in a journey, the Audience name of the Meta Audience List is required. Read the following to find out how to obtain this.
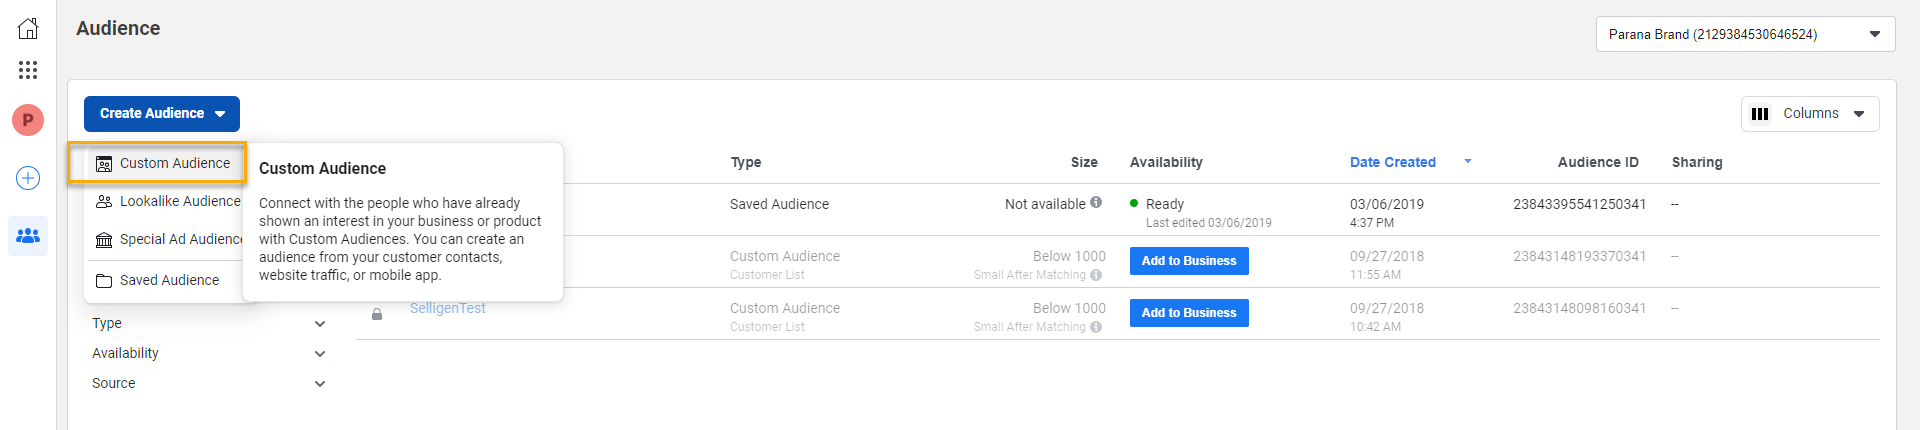
Go to Facebook Custom Audience with your developer account..
Create Create Audience.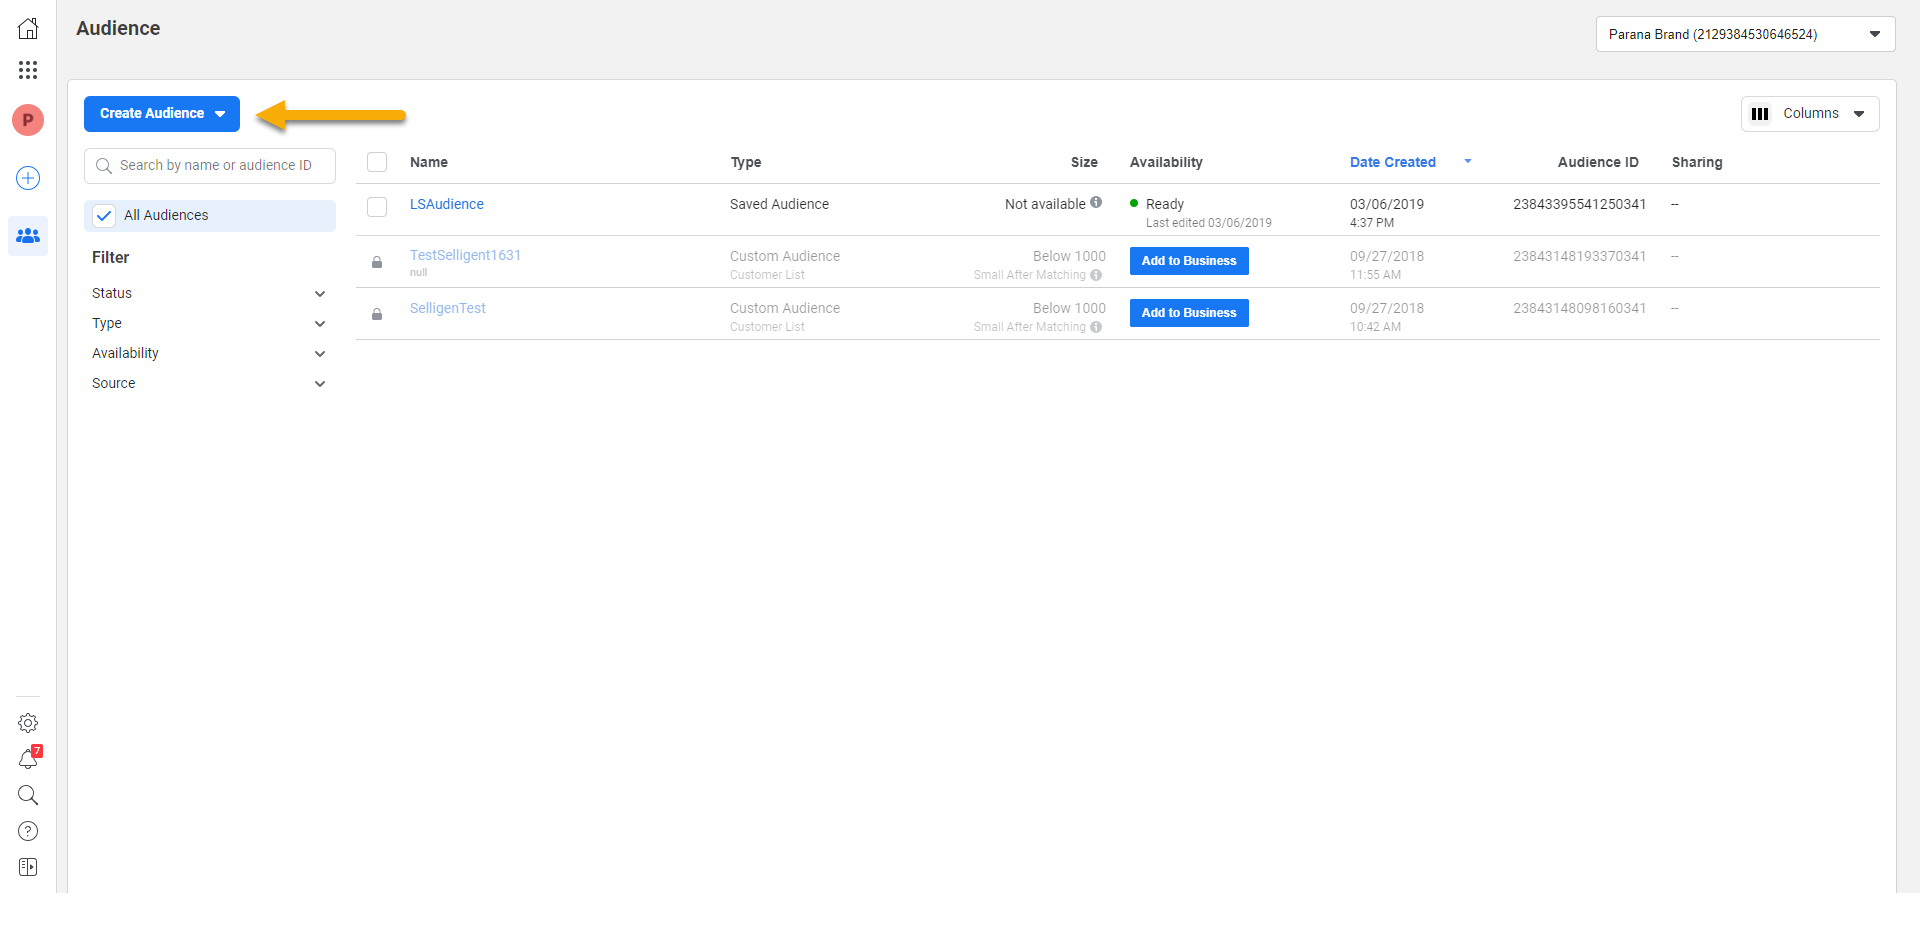
From the drop down menu select Custom Audience.
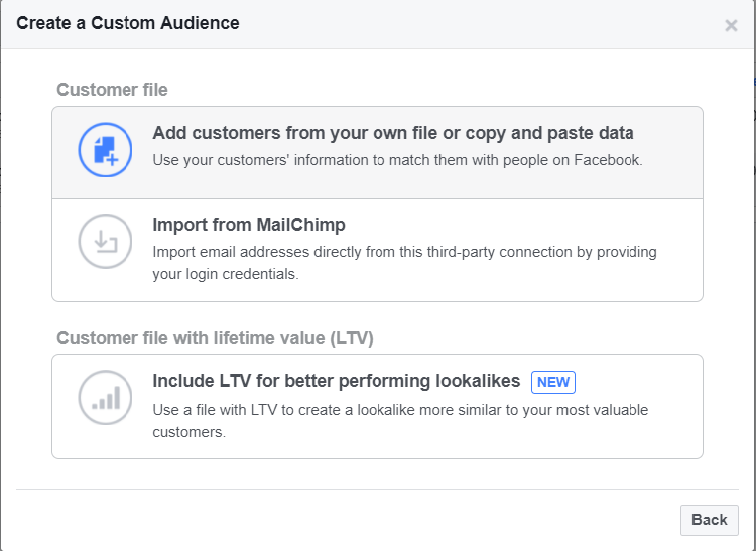
On the next screen, select Customer List to go and look for the file.

Next, select the option Add customers from your own file or copy paste data.
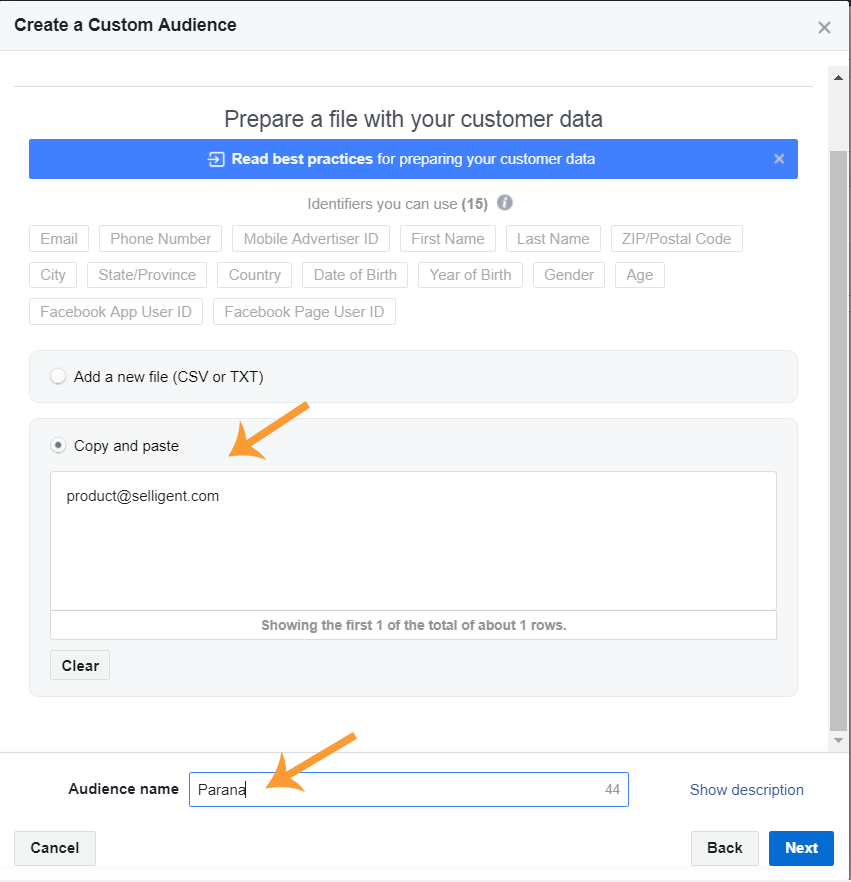
Choose Copy and paste and add an email address.
Click Upload and create.
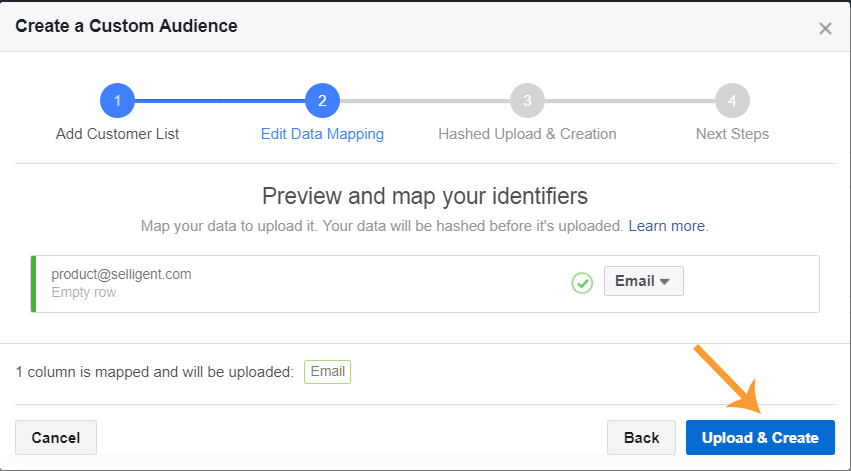
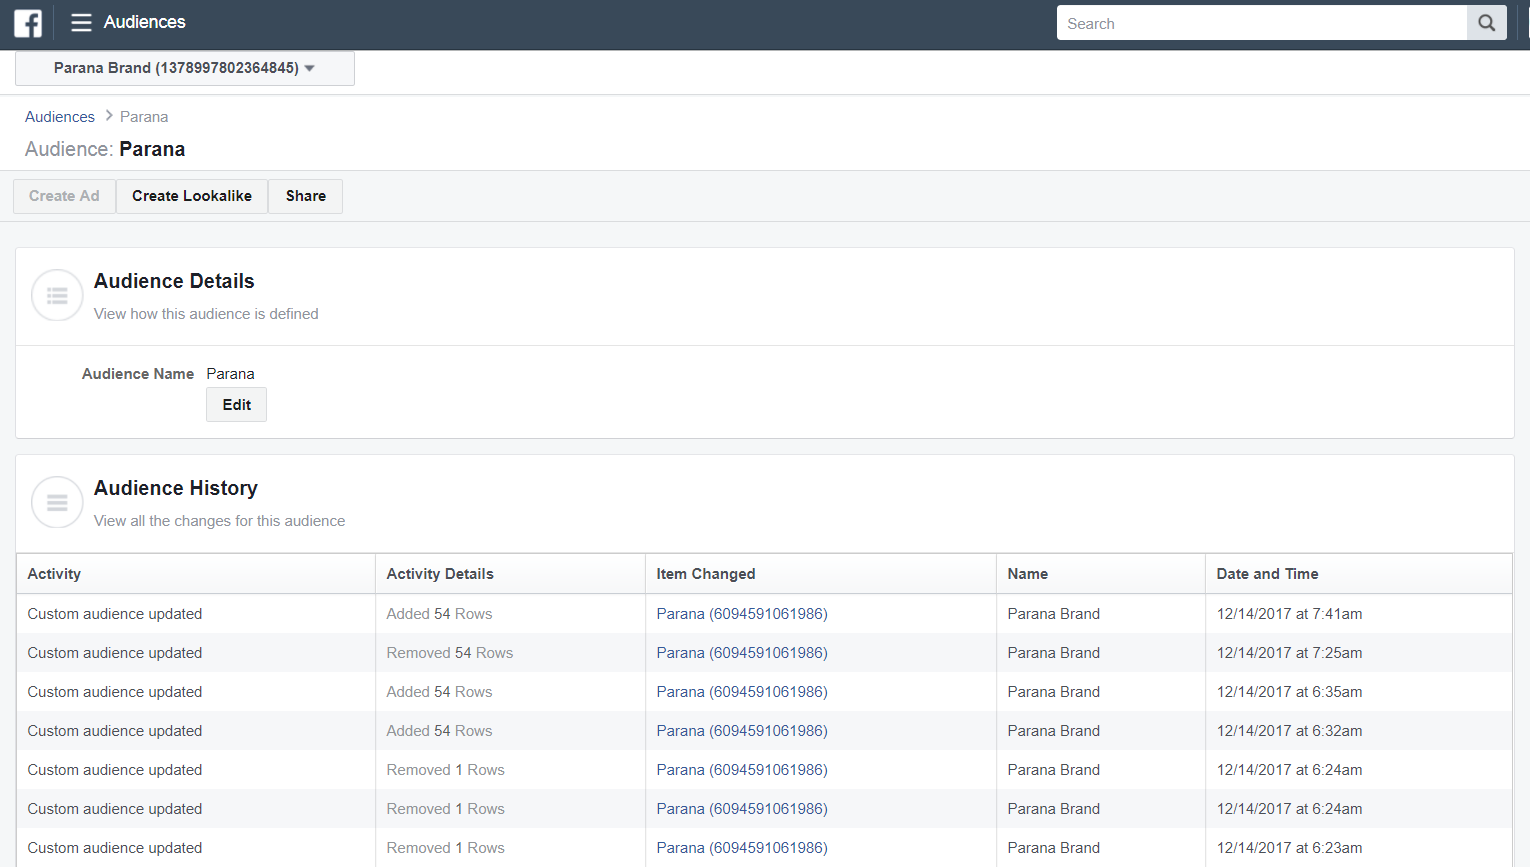
Then you’ll see the Audience.

A history of the audience is available. You can see when records are added or removed and how many.
Note: Please also check the following Meta documentation for more info about the Custom Audiences integration at Facebook side, troubleshooting and more :
- Meta for Developers - Guides : Custom Audiences
- Meta for Business - Business Help Center : About Custom Audiences from Customer Lists
- Meta for Developers - Tools : Access Token Debugger
