Abandoned Cart Use Case Example
The use case(s) described in this section and the steps to complete it are accurate, but please note that the visuals supporting the use case might not fully reflect the current state of the UI of the platform. We are doing continuous efforts to ensure all visuals are up to date and would like to apologize for any inconvenience caused.
When a customer adds products to the cart of a web shop but doesn’t act on the cart e.g. buys the products, an abandoned cart can be triggered. When triggered, the customer will receive an email containing the products that are still in his cart, waiting to get bought.
Note: Also check out the theoretical explanation on how the abandoned cart processes work here.
To set up this process, the following steps need to be completed:
1. Set up of the Product Catalog
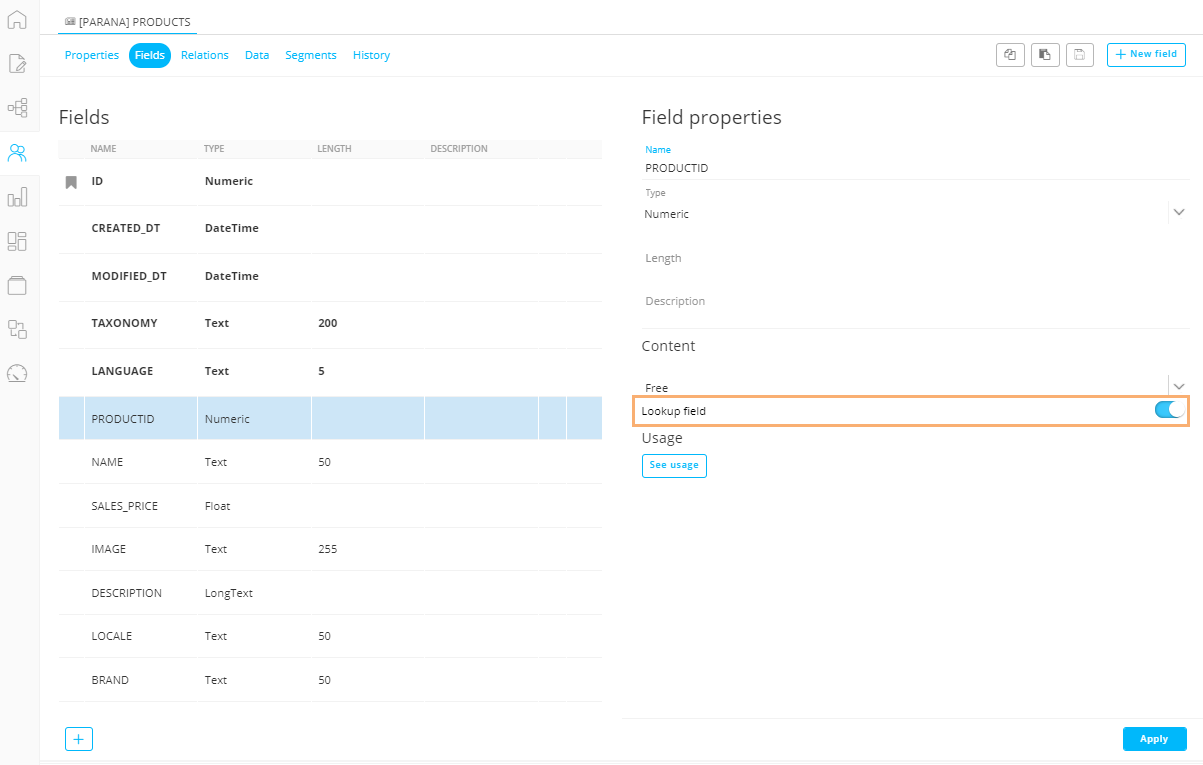
A product catalog needs to be setup in Marigold Engage. This can be done by creating a Data Selection List in the Lists chapter.
- PRODUCTID (numeric field, configured as lookup field)
- NAME (text field)
Other fields can be created, e.g. a description about the products, an image,…
2. Create a Cart in Site
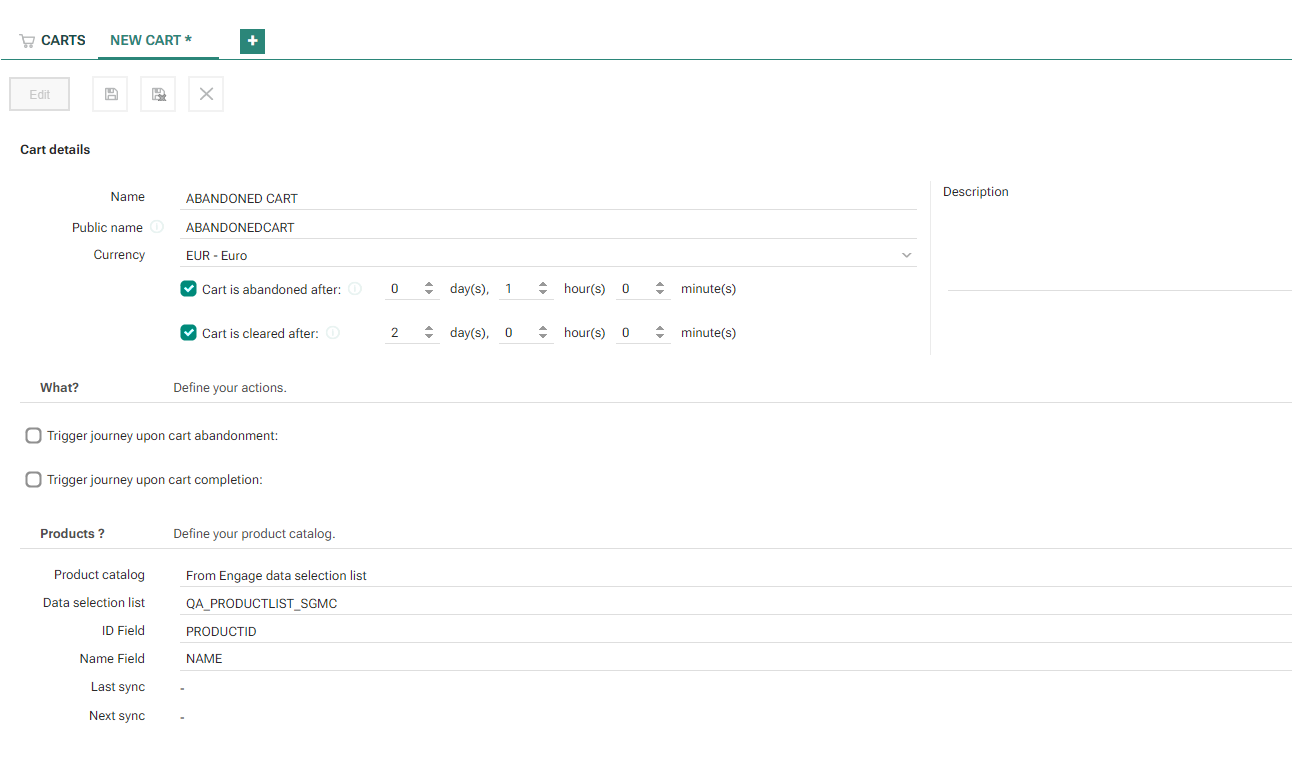
Go to the Site module and create a new cart from the Carts chapter.
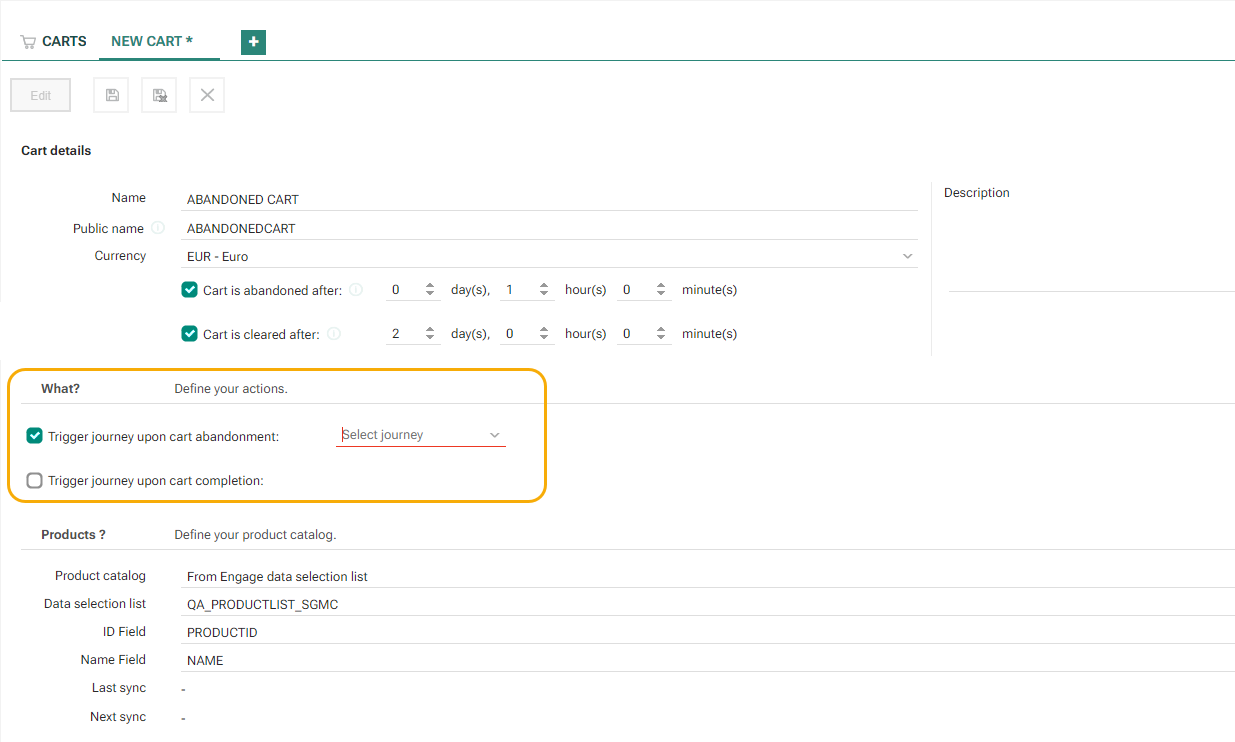
Make sure the following fields are filled out in the Cart Details’ section:
- Name: ABANDONED CART
- Public name: ABANDONEDCART
- Currency: Euro
- Cart is abandoned after: 1 hour
- Cart is cleared after: 2 days
The What? Section requires you to select the journey that needs to be triggered when an abandoned cart (or completed cart) is triggered. At this moment, leave this blank as the journey does not yet exist.
The Products? Section needs to be completed as follows:
- Product catalog: Select “From Marigold Engage data selection list”. The Data Selection List as created in the previous step will be used.
- Data Selection List: The list created in previous step named “[Parana] Products”.
- ID field: PRODUCTID field from the Data Selection List
- Name field: NAME field from the Data Selection List
Don’t forget to save your cart.
3. Create the Abandoned Cart Custom Journey
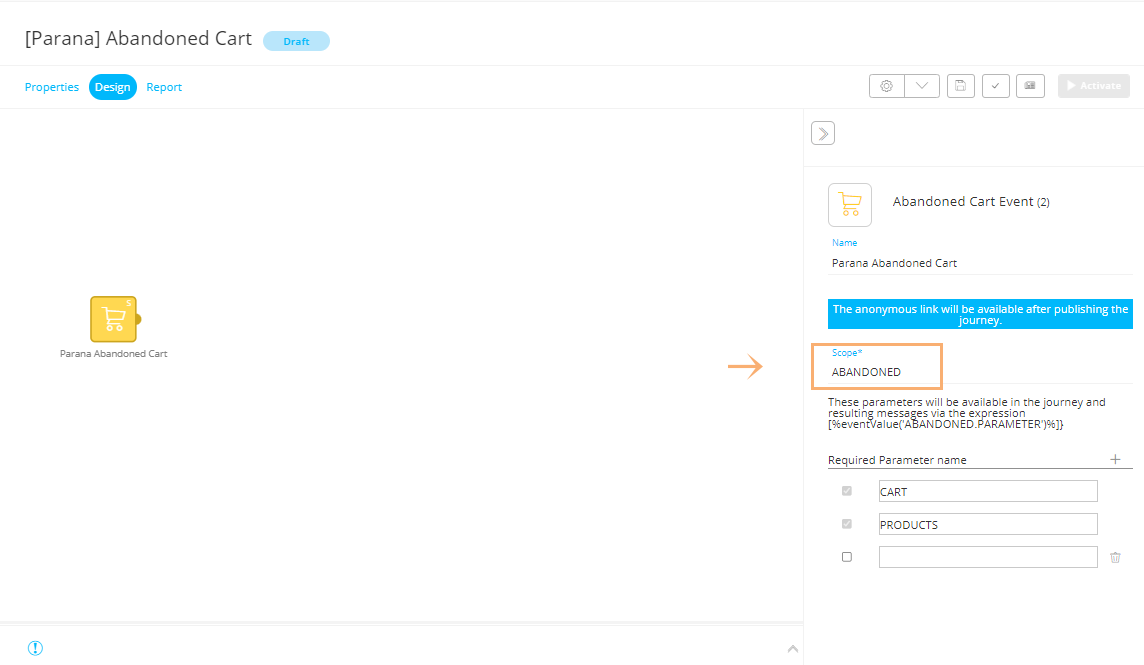
Before creating the Abandoned Cart email, create a Custom Journey and add an Abandoned Cart Event Component to it. Fill out a name for the component and the abandoned cart SCOPE which will be “ABANDONED” in this case. The name of this scope is important as it will also be used in the abandoned cart email. The required parameters are automatically filled in: “CART” and “PRODUCTS”.
4. Create the Abandoned Cart Email
The next step is setting up the actual Abandoned Cart email itself.
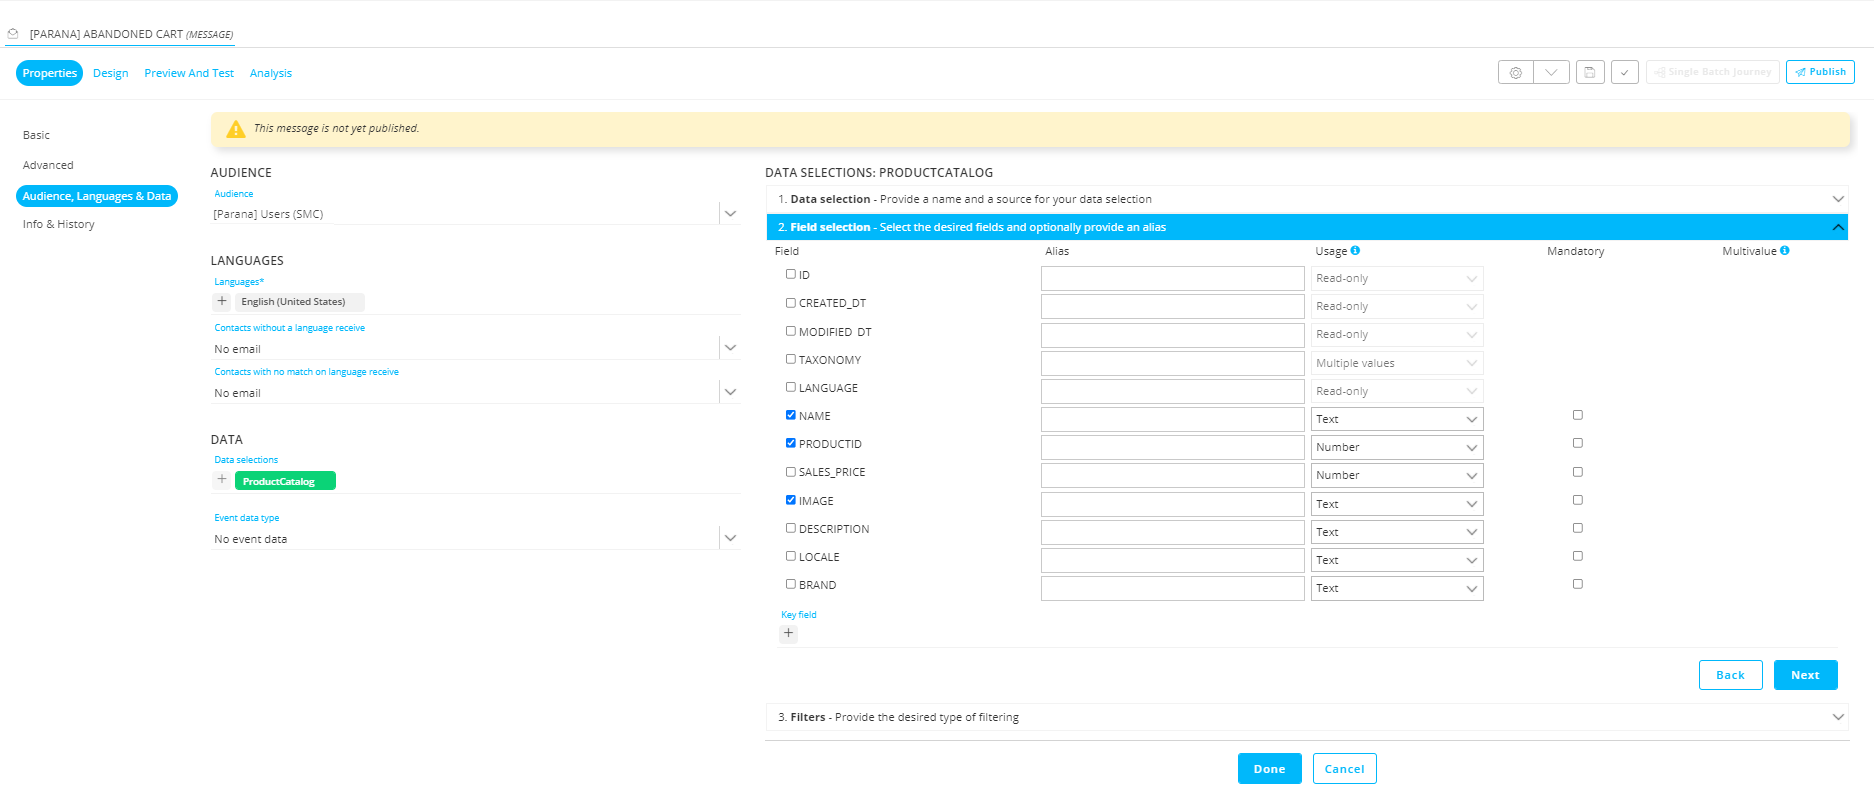
First, in the email go to the properties tab > Audience, Language & Data sub tab and create a new Data Selection. In the “Data Selection” section, fill in it the name “Product Catalog” and select the Data Selection List “[Parana] Products” created earlier.
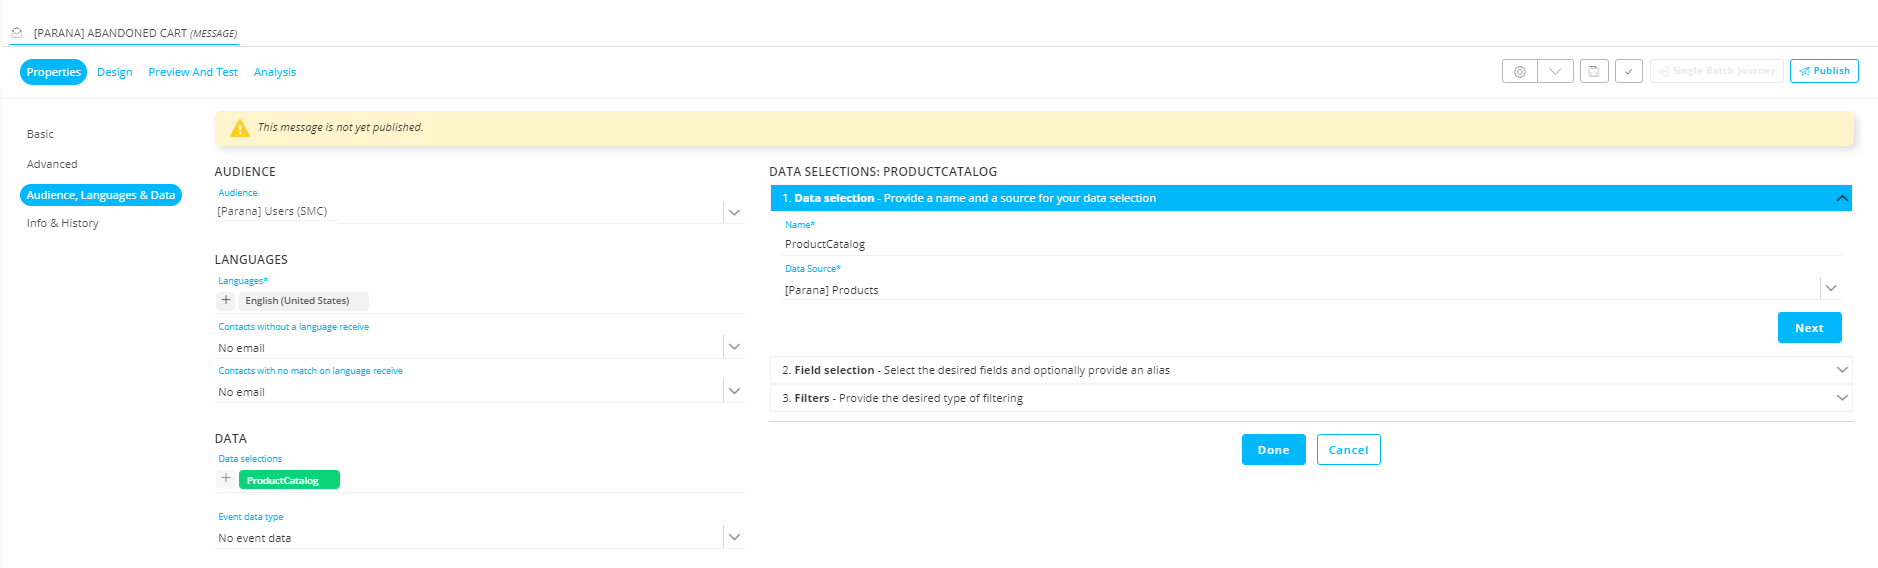
In the “Field selection” section, select the fields “NAME”, “PRODUCTID” and “IMAGE”. These will be used in the email for personalization or when defining “Filters”.
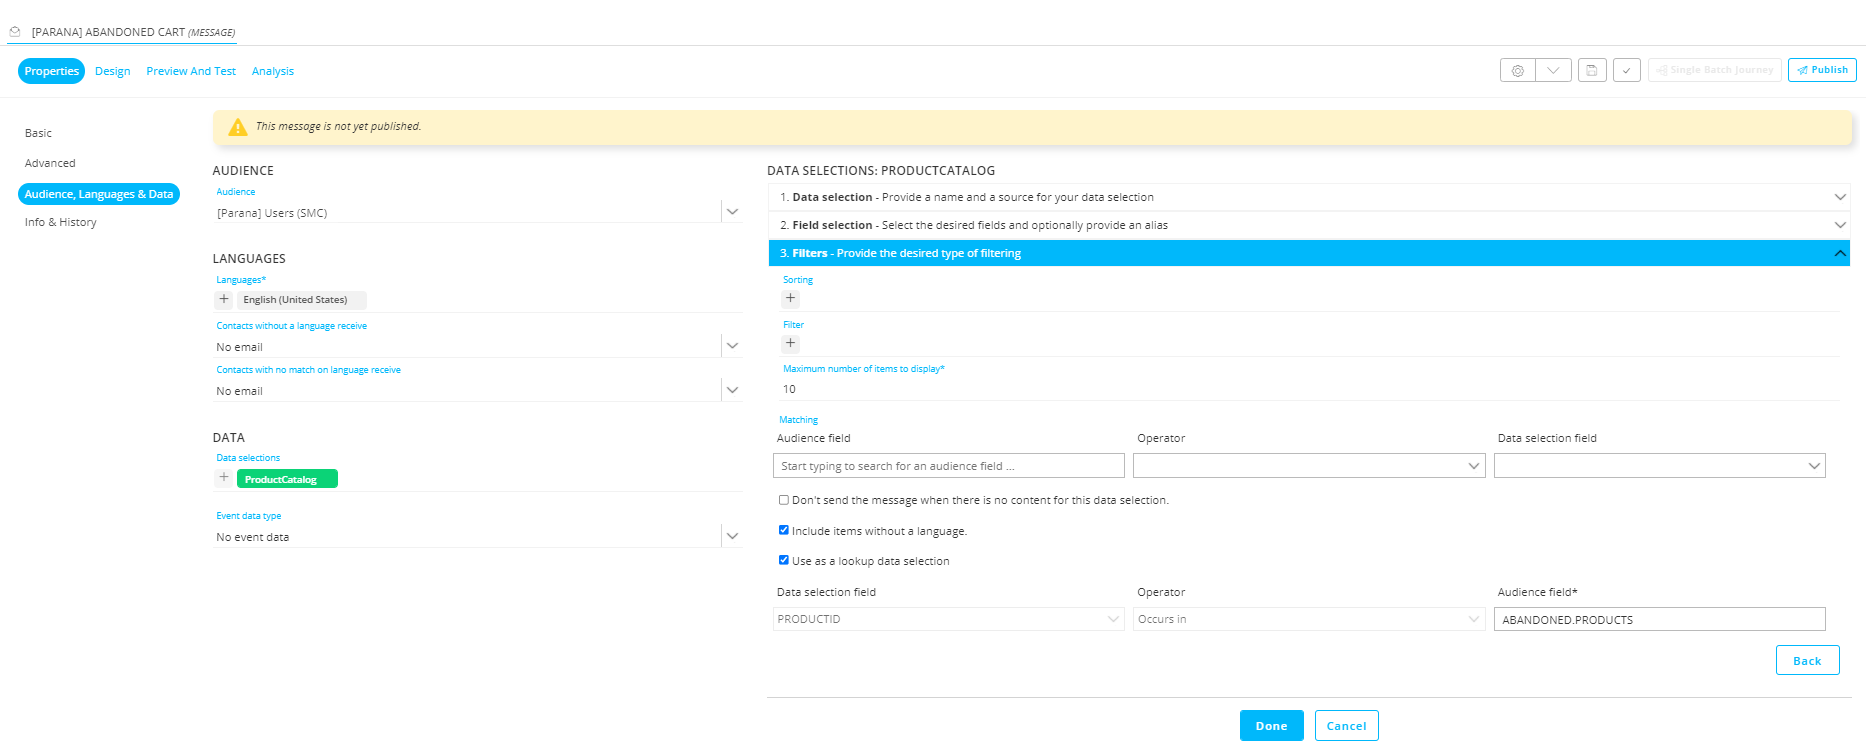
In the “Filters” section, check the fields “Include items without a language” and “Use as a lookup data selection”. A new section beneath becomes available where you need to fill out the Audience field. This would be “ABANDONED.PRODUCTS”.
“ABANDONED” is the scope defined in the Abandoned Cart Event Component of the Custom Journey created in the previous step.
“PRODUCTS” refers to one of the automatically populated parameters in the Abandoned Cart Event component.
This filter matches the ID fields of the products in the Data Selection List and the ID of the products in the cart data coming from Site. This way, Site cart data can be displayed in the repeater component of this email with additional information like “NAME” and “IMAGE” coming from the Data Selection List (Product Catalog).
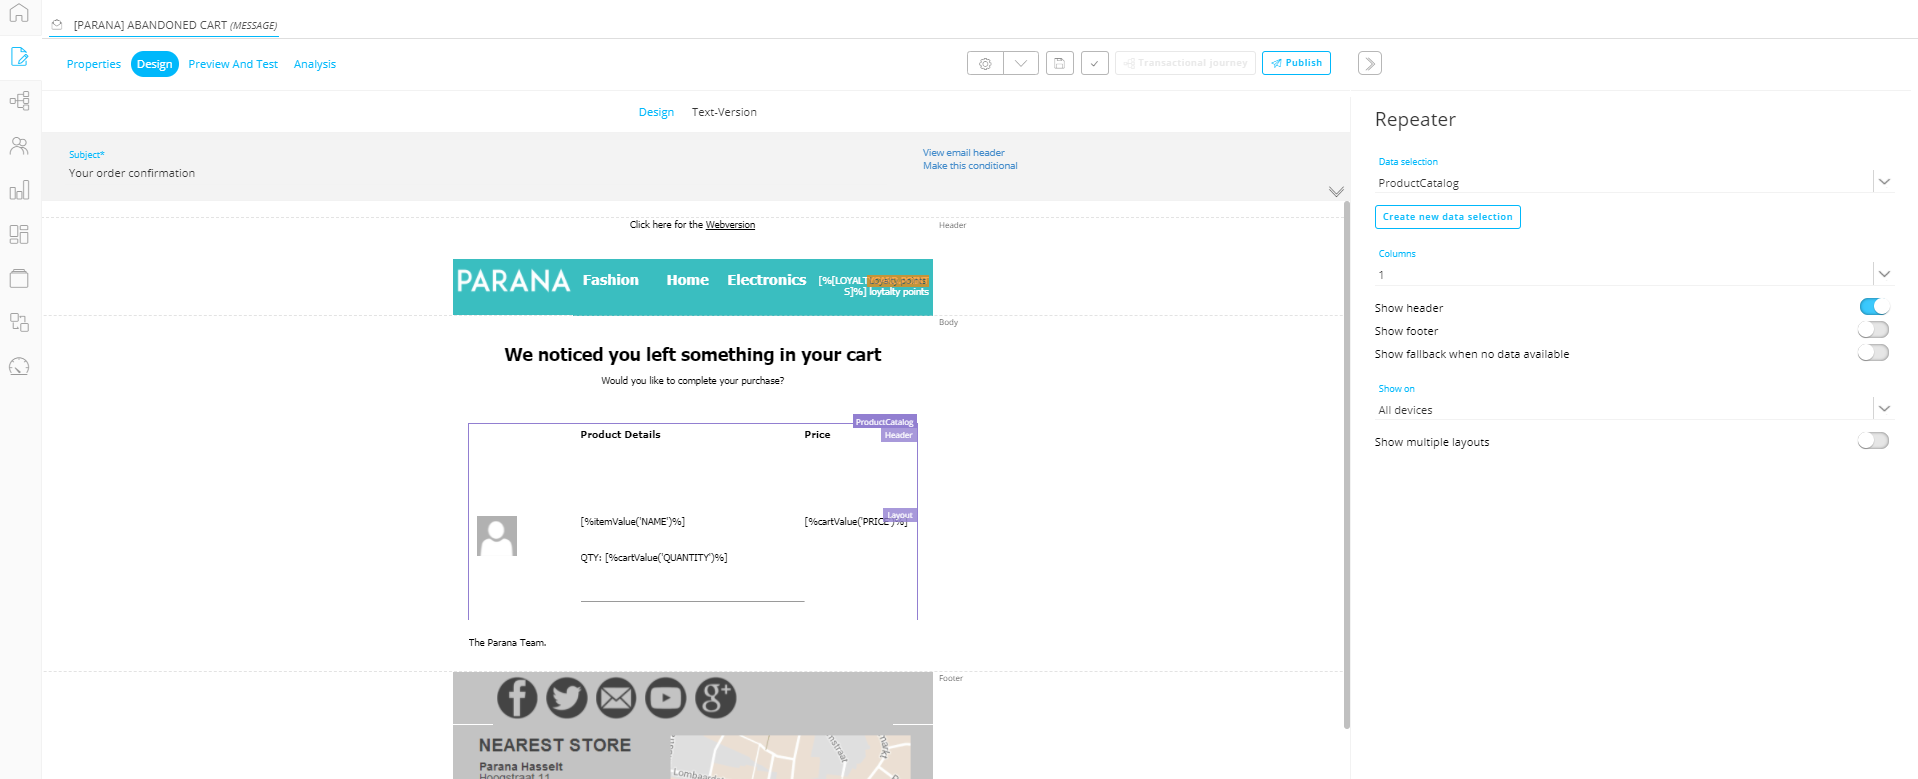
In the Design Mode of the email, configure a repeater component which makes use of our newly created Data Selection “ProductCatalog”. Design and include the following fields into the repeater:
- [%itemValue(“NAME”)%] where name refers to the Data Selection List.
- [%cartValue(“QUANTITY”)%] where quantity of an abandoned product comes from the Site cart data.
- [%cartValue(“PRICE”)%] where the price of an abandoned product comes from the Site cart data.
5. Finalize the Abandoned Cart Custom Journey
Now that the abandoned cart email is created, you simply need to add it into the Abandoned Cart Custom Journey and connect the email with the Abandoned Cart Event Component.
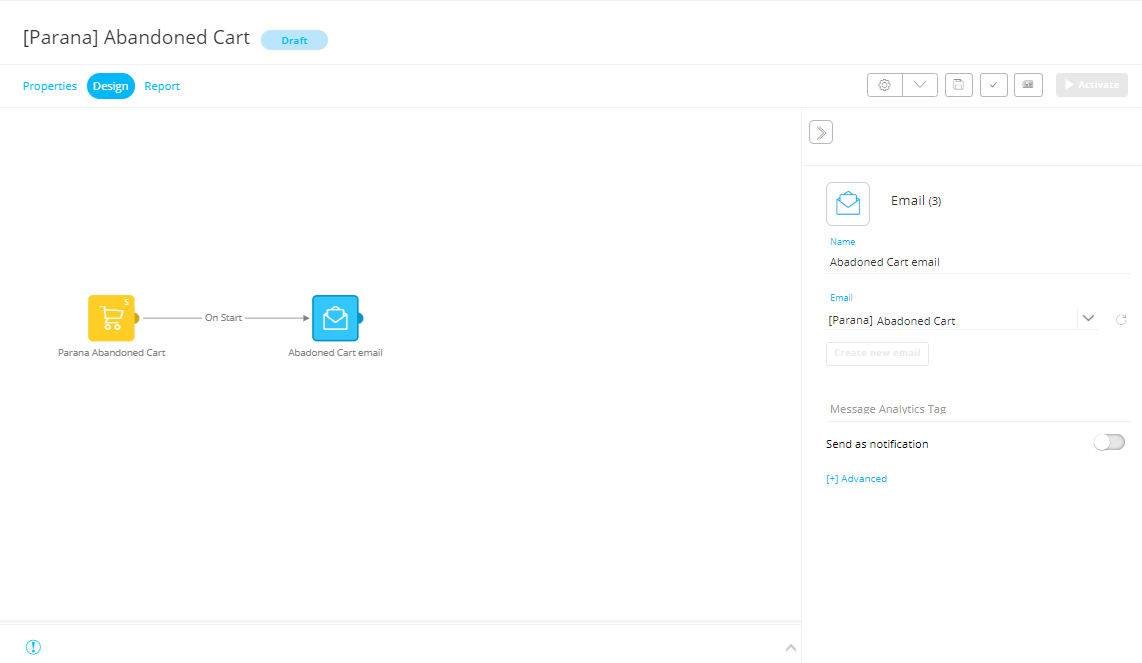
Before you can activate the Abandoned Cart Custom Journey, you first need to configure the journey inside the Site cart. This way the journey will be triggered and the email will be sent out once the Site cart is triggered.
Go back to the Abandoned Cart Custom Journey. Save, validate, publish and activate the Custom Journey. Now you are all set up for receiving abandoned cart emails.
6. An Abandoned Cart in the Parana Webshop
In order to receive an abandoned cart email, you first need to be identified on the Parana web shop. The easiest way to do this is to click on a link in a Parana email which will redirect you to the Parana web shop.
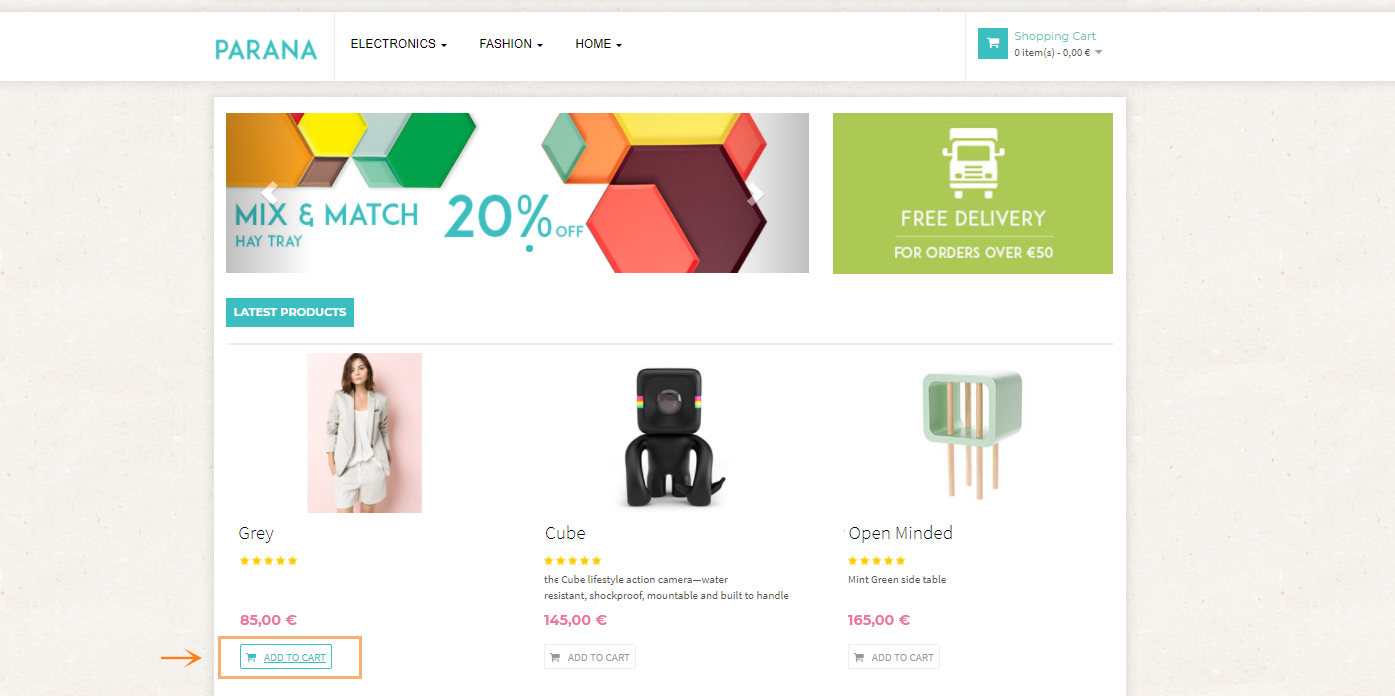
Once you are identified, you can add some products into your cart.
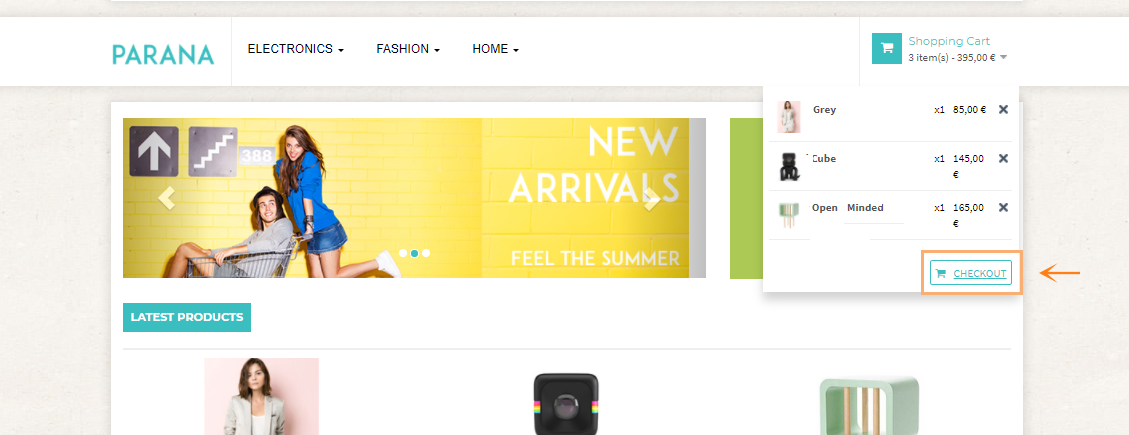
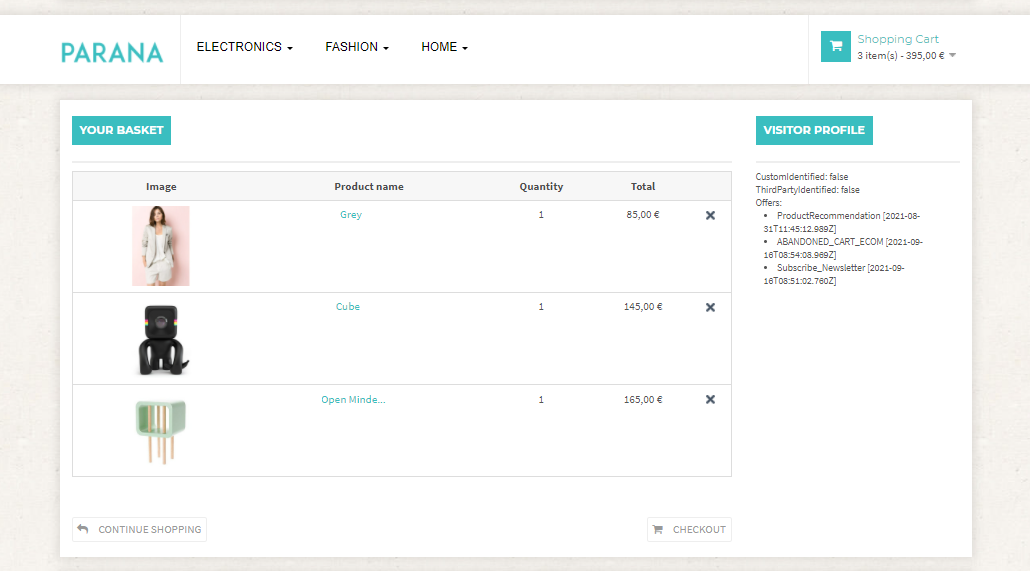
You can go to the Checkout page to see if your products are in your cart.
In this example 1 hour goes by before triggering the abandoned cart.
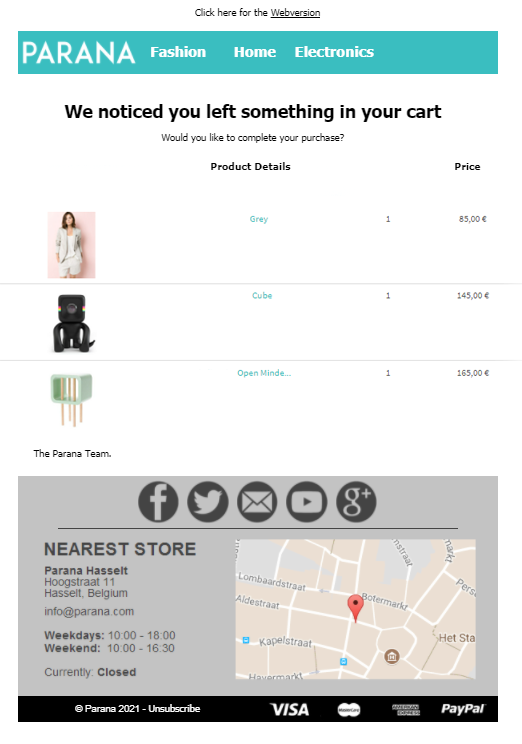
After one hour you receive your abandoned cart email with your abandoned products.
Technical note:
Instead of using the manual testing of the journey as explained above, it is also possible to force the abandoned cart for a specific contact through the console in the developer tools:
1. Open the browser developer tools while being on the website (F12 or Ctrl+Shift+i / Command+Option+i on Mac).
2. Start by identifying yourself on the website by entering the following code in the console:
wa.bt_queue.push({"customIdentifier": "1000"});
where the customIdentifier field value is retrieved from the Audience List. 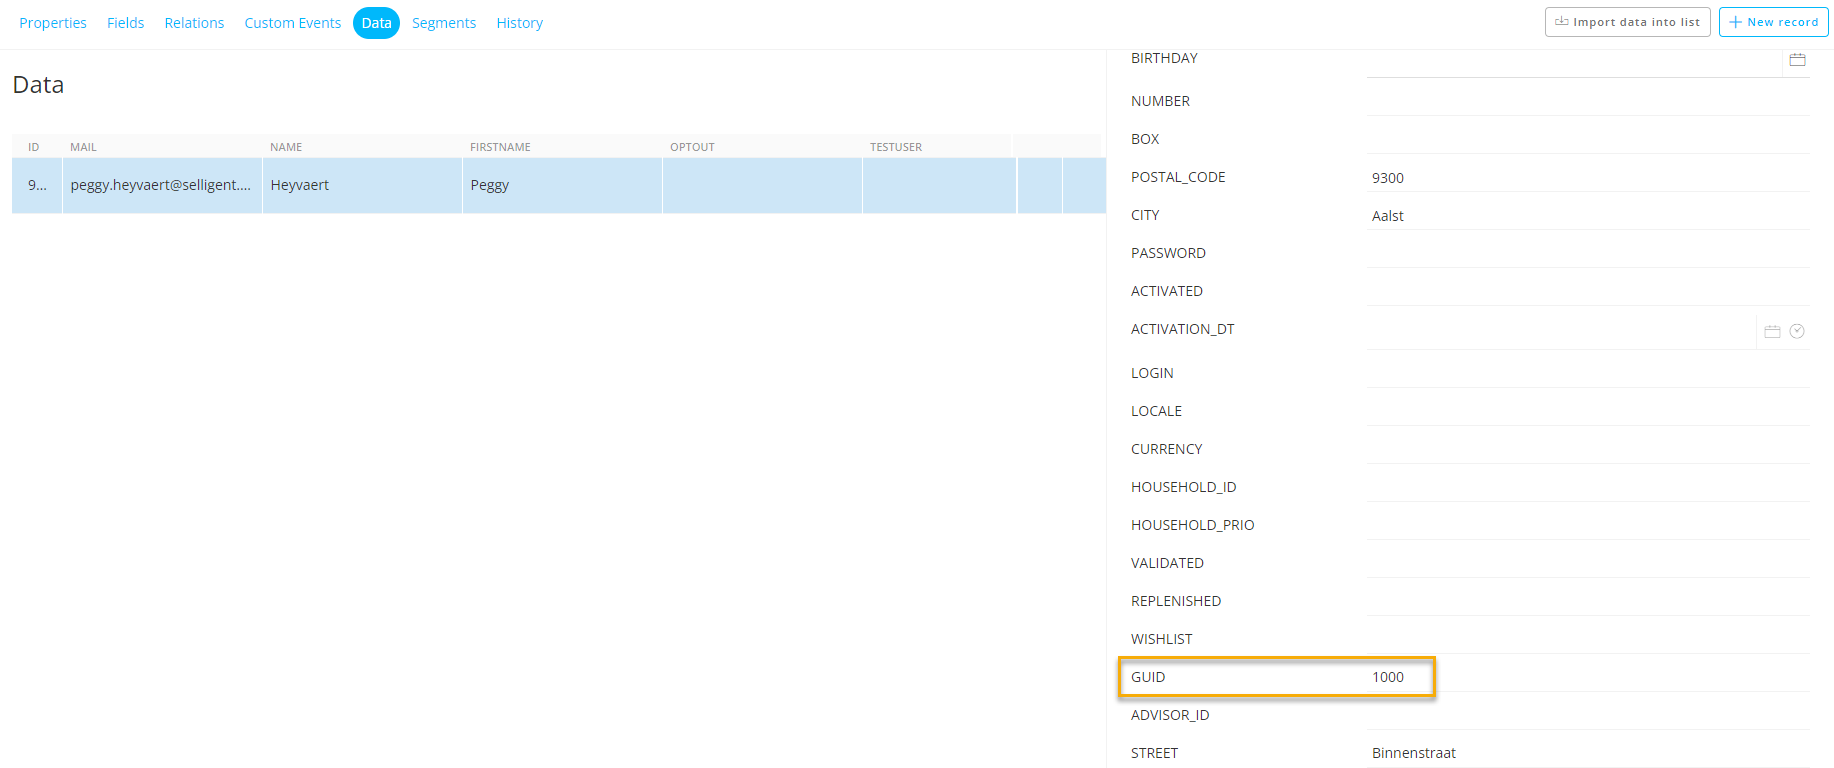
What field in the Audience is used to store this identifier is indicated in the Universe configuration setting.
Note: Ensure you select a contact with an email address you have access to.
3. Now that you are identified, you can add a few items to the cart with the following code:
BT.addCartItems("ABANDONEDCART",[{ "id": 12, "value": 5.99, "count": 2}],false);
Note: Ensure items with the given ID exist in the Product catalog used for this example. Only if the ID exists will these items be displayed in the email.
4. Wait the allotted time (as indicated in the Cart configuration) and see if emails are triggered.
