Prerequisites
Before you start configuring and placing Smart Content on your website and in your emails, you must have done the preliminary steps regarding the insertion of your JS tag and the export of your product catalog. If not, please refer to the installation page. If these steps are not completed, your Smart Content configuration will not work.
Smart Content configuration
Once you have completed the installation procedure and set up the catalog import, you can start configuring Smart Content for your site and emails :

You can create and display as many Smart Content blocks as you like on website pages and emails. You are also not limited in any way regarding the type of pages on which you want to display the Smart Content. They can be displayed on websites on the home page, cart page, popups/lightboxes, category pages, product pages, etc... and in any email you send. For each Smart Content channel, there are infinite possibilities of configurations in terms of graphics, algorithms and filters. We will go through the following steps in other paragraphs of this section :
- Graphics — Style your Smart Content : Change colors, fonts, margins and other graphics.
- Algorithms — Choose how the products in the Smart Content are selected based on data.
- Filters — Modify the standard behavior of algorithms to tune it to your exact needs.
- Smart Content placement — How to place Smart Content on a page.
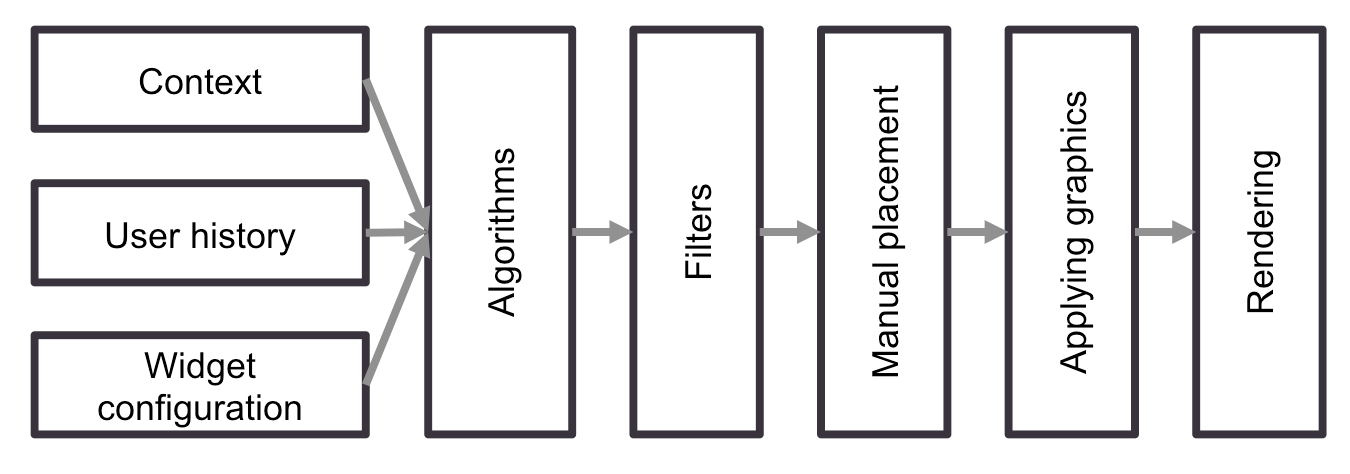
This is the actual order in which you should configure Smart Content and place it on a page. The following flowchart shows you the workflow applied during the generation of Smart Content :
Example : Include random recommendations in messages
Test your knowledge about Smart Content
In which types of content can Smart Content be used?
