2. Create Unsubscribe Pages
Two pages are required in this exercise:
- The Unsubscribe Confirmation Page - Displayed when the contact clicks the Unsubscribe link in the newsletter email Message
- The Unsubscribe Complete Page - When the Unsubscribe Confirmation Page is displayed, contacts need to reconfirm they want to unsubscribe. If they click the Unsubscribe link again on the Unsubscribe Confirmation Page, the Unsubscribe Complete Page is displayed and their record is updated in the Audience List.
The Unsubscribe Confirmation Page
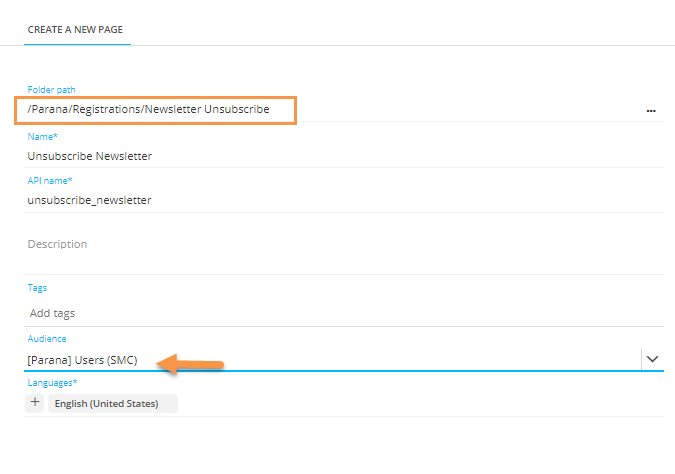
Note: Its a good idea to maintain some kind of folder structure. This email could go under a "Newsletter Unsubscribe" folder for instance.
2. Make sure the page is in 'Edit' mode. In the Design tab, create the following content:
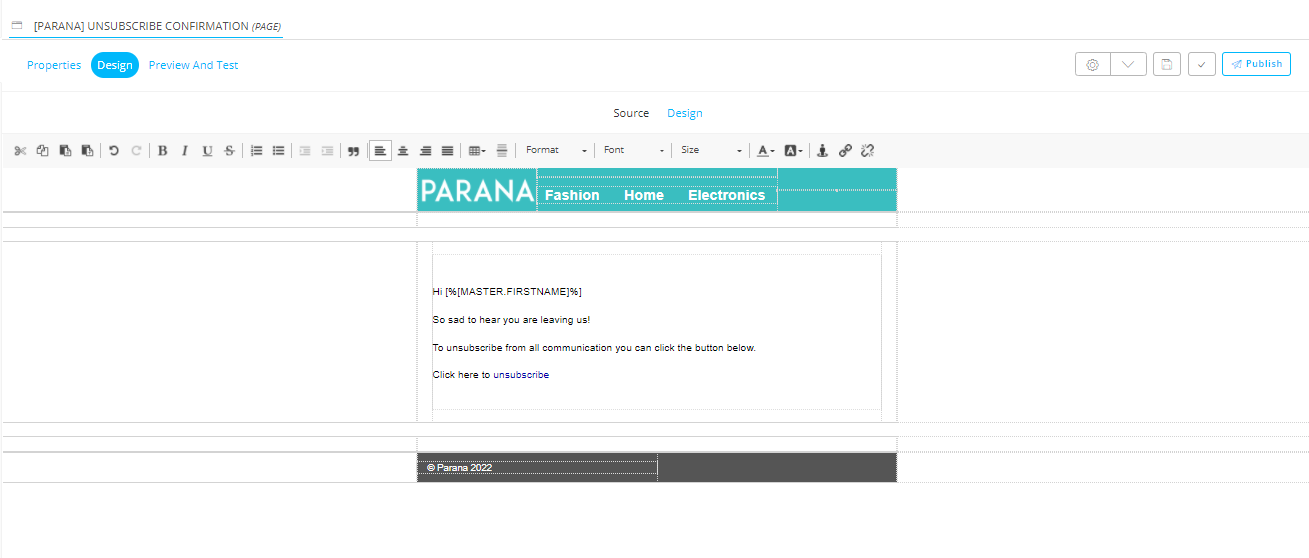
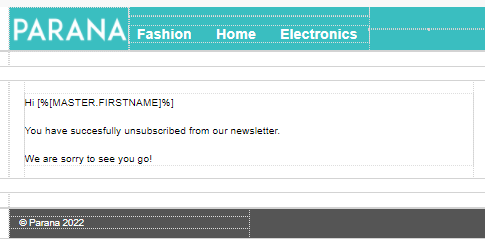
Note: In this example, a footer is added containing a predefined Content Block. The header contains the logo and some text links to specific sections on the website.
This example is very basic, there are better ways to deal with unsubscribes than this. The Unsubscribe page does not need to be the end of your communication with the contact. On the unsubscribe page you can try to change their minds. Give them other options, let them change the frequency of emails they receive. Ask them why they want to unsubscribe; perhaps the content is not right, or you are simply sending to the wrong email address. Let them know you are a person, not a machine. And if they definitely want to go, part on good terms, keep the unsubscribe process straight-forward.
You will however create a double-confirmation unsubscribe journey. First they have to click the unsubscribe link in the email, next a confirmation link on this page. We don't want to unsubscribe the contact immediately after clicking the unsubscribe link in the email. What if they accidentally click and inadvertently unsubscribe? It would cost you a valid customer you worked hard for to acquire.
3. Add a Text Component to the body of the page and add the text as shown in the image.
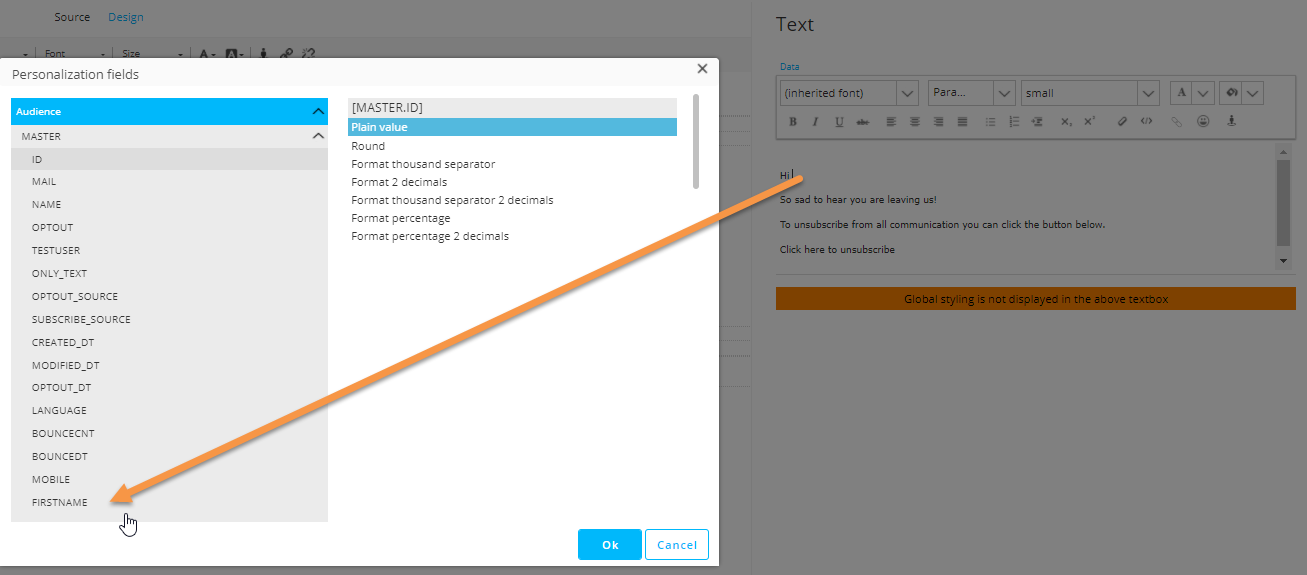
[%[MASTER.FIRSTNAME]%] will retrieve the contact's value of the field FIRSTNAME in the Audience List. Of course this field must exist and it must hold a value, otherwise nothing will be displayed.
Instead of typing [%[MASTER.FIRSTNAME]%] you can also position the cursor, click the Personalization icon and select the field from the Personalization Dialog. It will be inserted where you put the cursor.
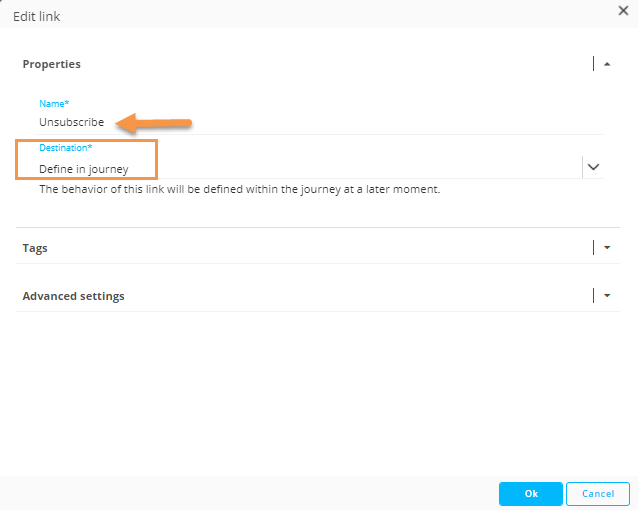
4. Create a link to go to the optout confirm page (this page is created in the second step). Select the text "Click here to Unsubscribe"and then click the 'Create link' button from the top bar to create a new link.

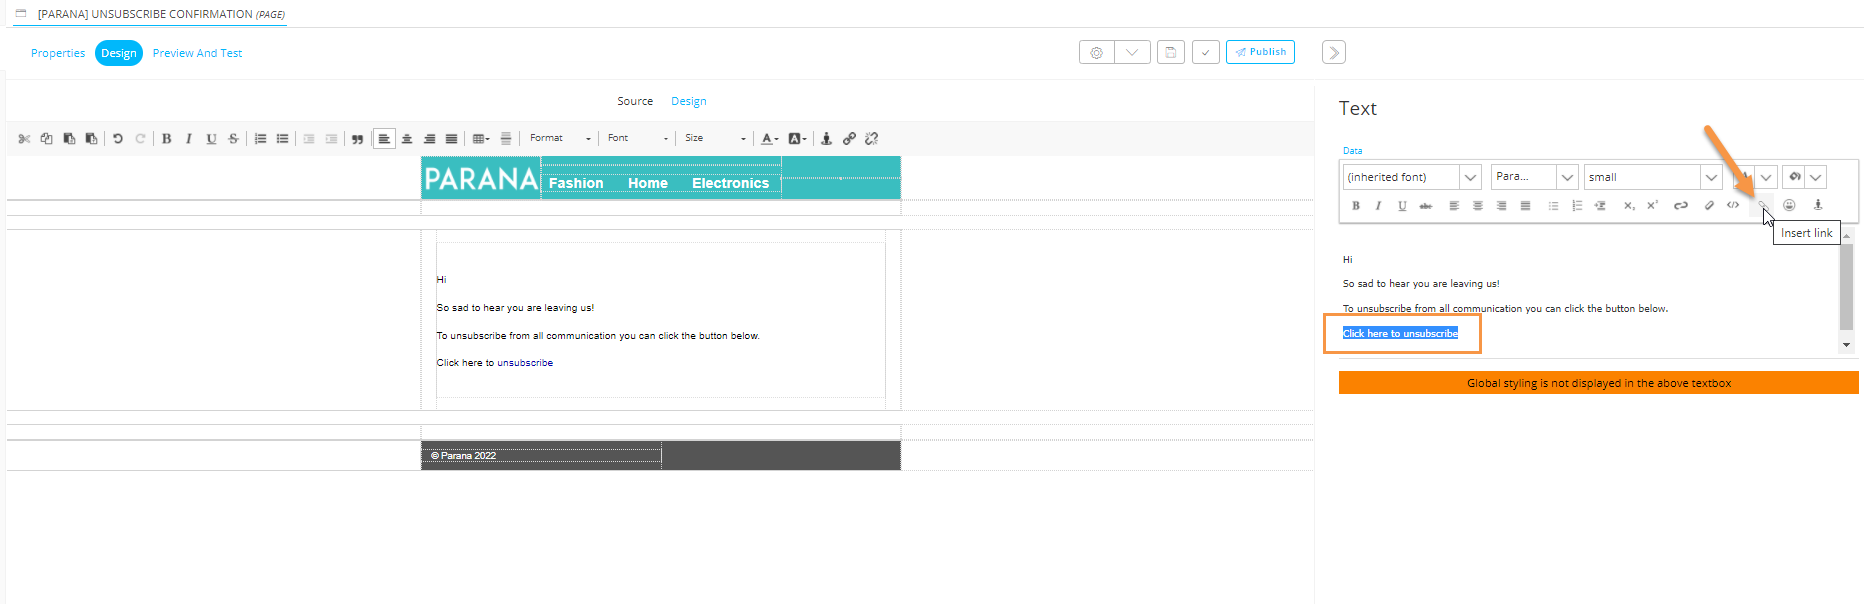
In the properties of the link select the option 'Define in journey'. We are going to define the reaction (draw an arrow) in the journey. Rename the link "Unsubscribe", this name is used in the reporting, so use short descriptive names for your links. Click 'OK' when done, the link will appear in the Links overview panel on the right. Don't forget to save your page.
The Unsubscribe Complete Page
Create a second page "Unsubscribe Complete" in the same folder. This will be the page following the click on the unsubscribe sensor on the "Unsubscribe Confirmation" Page. Add the following content:
Topics to review:
- 1. The Unsubscribe journey
- 2. Create the unsubscribe pages
- 3. Create the unsubscribe journey for one email type: the yearly promotional emails
- 4. Adapt the unsubscribe link of the newsletter email
- 5. Adapt the unsubscribe journey so it can be used for all email types (advanced, input parameters and posted values, technical knowledge required)
