You could create basic Unsubscribe journeys for each email type: the standard newsletter, promotional emails and others. But you can also adapt the Unsubscribe Journey, so it can be used for all email types. From each email, we will pass a value to the Unsubscribe Journey, so we know for which email type we have to display content on the Unsubscribe pages and which optin field value we need to set to zero in the Audience List: OPTIN_NEWSLETTER or OPTIN_PROMOTIONS. The value we pass from the email, will be the type of message.
Passing the value from within the email will be discussed last. First we will adapt the Unsubscribe journey, step-by-step.
Technical note:
This requires some technical knowledge about posted
values. A 'posted value' only lives during one request. Meaning from the
submitted page until the next page (default HTML behavior). In a
journey you can retrieve the posted value in between those two pages,
using [%requestValue('VARIABLE_NAME ')%] where VARIABLE_NAME is the name the
parameter. You can use it to validate and store in a Data Component, in
a constraint in a Decision Component, in a Lookup Component,
etc.
The posted value of the parameter can also be retrieved on the next page with
[%requestValue('VARIABLE_NAME ')%] , after the parameter has been submitted.
Now, you can assign the posted value to a new parameter on this next page to make it available beyond this page. . This is called 'posting a value along'. This is also what you will do in this exercise.
Following are the steps we need to execute
- Make sure the Input Component in the Unsubscribe journey can receive parameters
- Adapt the Unsubscribe Page and use the value of the parameter as a personalization field
- Pass the value of the parameter along in the journey so you can use it in the Data Component
- Make sure the Unsubscribe link in the Newsletter message passes the parameter on to the Unsubscribe Journey
Input parameter in Input Component
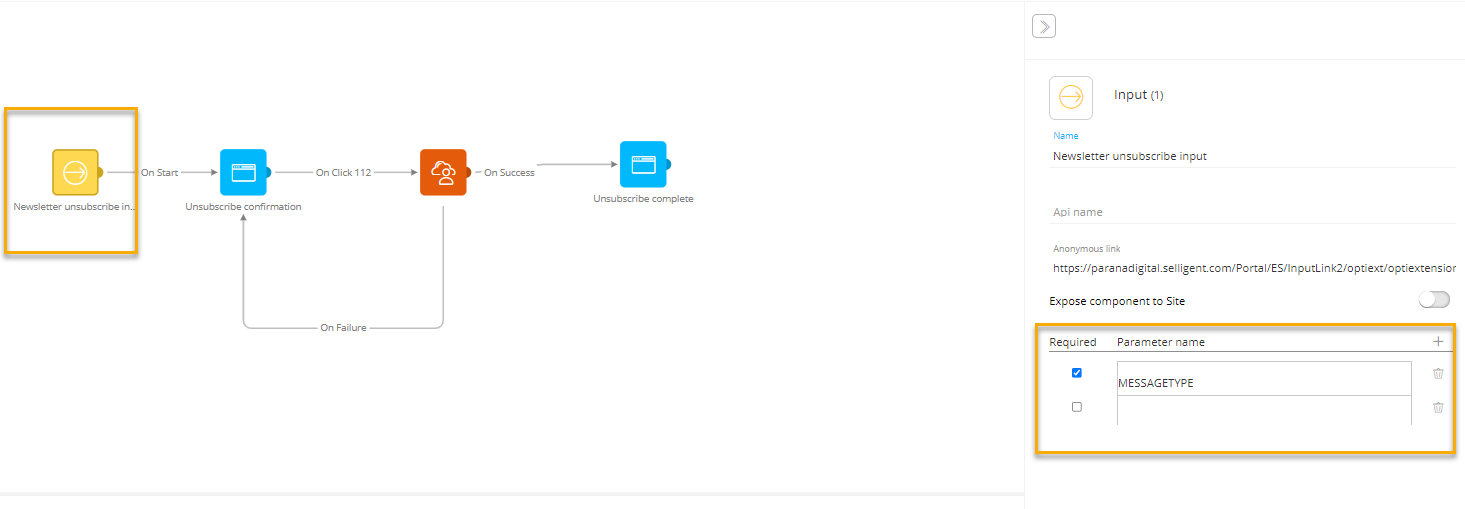
When a contact clicks the unsubscribe link in the Newsletter email, the link is redirected to an Input Component in the Unsubscribe Journey. The type of message can be passed as a value to this Input Component. But first we need to define the incoming parameters to receive this value in the Input Component. The parameter is defined in the Input Component properties, that's why it is also called an 'Input parameter'.
1. In the Unsubscribe Journey, Click the Input Component to open the properties, define a parameter "MESSAGETYPE" and check 'Required'. This means that when a link redirects to this Input Component, it has to pass on a value for this parameter.
Posted values
As you've learned from the technical note above, a 'posted value' only lives during one request. The posted value of this Input parameter can be retrieved with [%requestValue('MESSAGETYPE')%] on the next "Unsubscribe Confirmation" page, but not after this page. However, we still need to check in the Data Component which optin field should be set to zero (0) depending on the value of this parameter. So we will 'post the value along', by creating a new parameter 'MT' and setting its value to [%requestValue('MESSAGETYPE')%]. This new parameter needs to be passed along to the Data Component. You will add the new parameter 'MT' to the unsubscribe confirm link in the "Unsubscribe Confirmation" page.
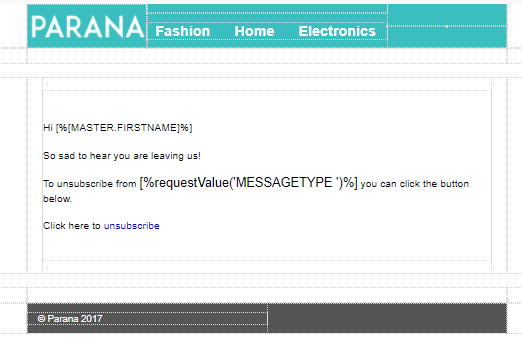
You will also personalize content on both pages depending on this parameter. For the Unsubscribe Confirmation page you will use, [%requestValue('MESSAGETYPE')%] . You will use [%requestValue('MT')%] for the Unsubscribe Complete page (next request). When the value is "Promotion" or "Newsletter" you need to display different content. Let's start with this.
2. Edit the "Unsubscribe Confirmation" page in the Editor. In the Text section replace "all communication" with the value of the parameter. When the page is displayed to a contact unsubscribing from the newsletter, it will display 'Newsletter'. When the page is displayed to a contact unsubscribing from a promotional email, the value will be 'promotions'.
3. Now, lets make sure that the new parameter 'MT' is created and passed on with the unsubscribe confirm
link in this page.
Remember that the unsubscribe confirm link had a link 'Unsubscribe' associated to it where the target was defined in the journey.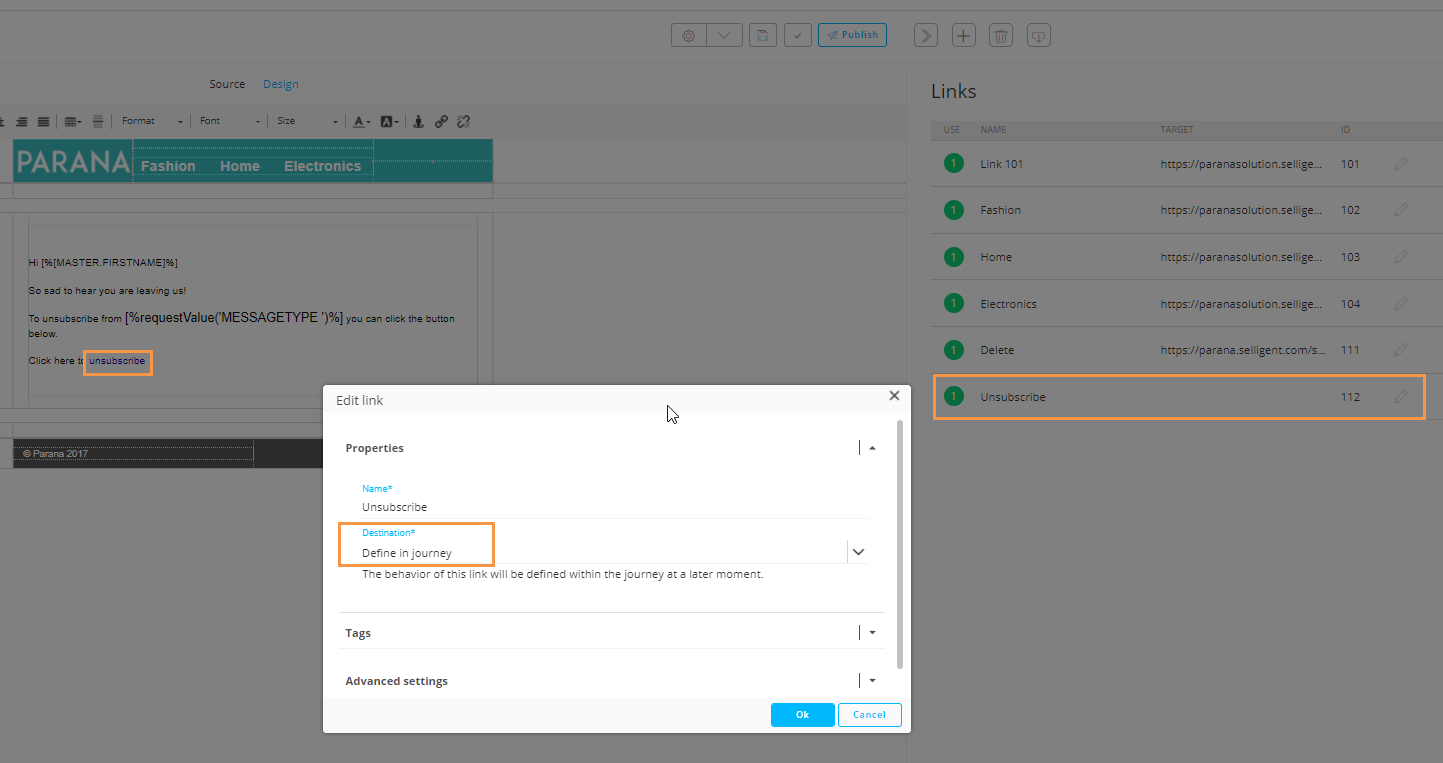
Clicking the link will take the contact to the next step in the journey, the Data Component.
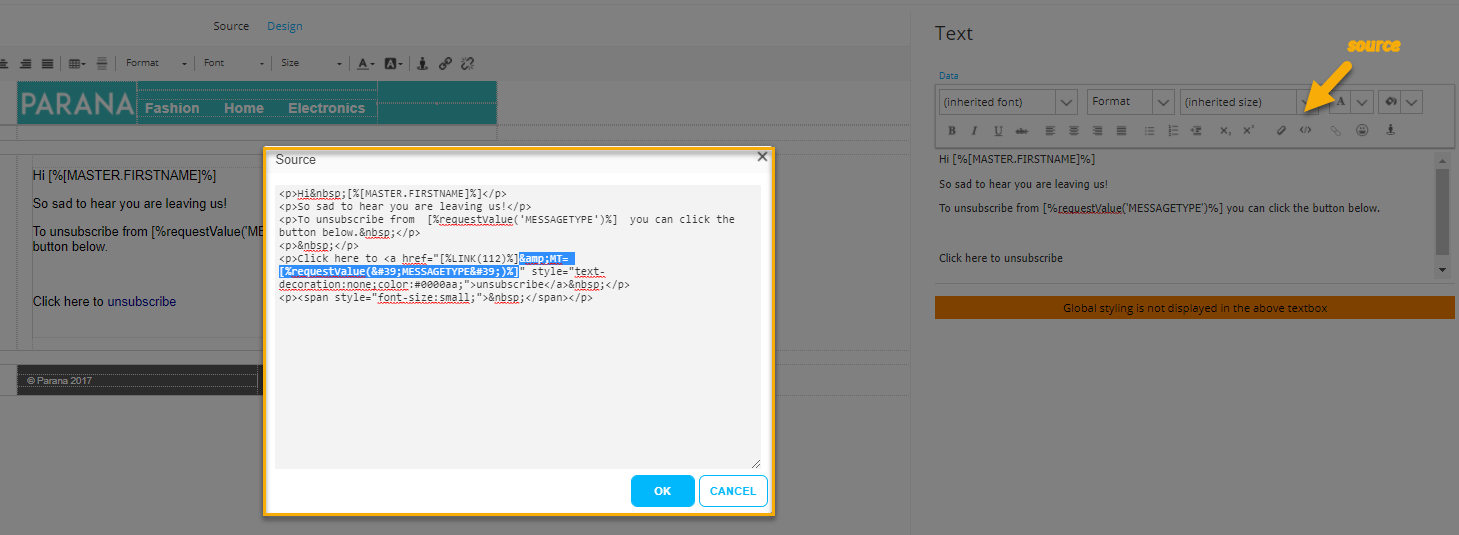
Now, we need to modify this link and add the parameter to it. This can only be done in the source. In the Text Component where the unsubscribe text is placed, click the Source button and make following changes to add the parameter:
<a href="[%LINK(112)%]&MT=[%requestValue('MESSAGETYPE')%]" style="text-decoration:none;color:#0000aa;">unsubscribe</a>
4. Go back to the Unsubscribe Journey. We can now use the posted value from the parameter "MT", to check in the Data Component which optin field should be set to zero (0).
- If [%requestValue('MT')%]='PROMOTIONS', we should set OPTIN_PROMO=0
- If [%requestValue('MT')%]='NEWSLETTER', we should set OPTIN_NEWSLETTER=0
In the properties of the Data Component, use a IF function to set the values. In the Data Component properties, in the fields section as following:
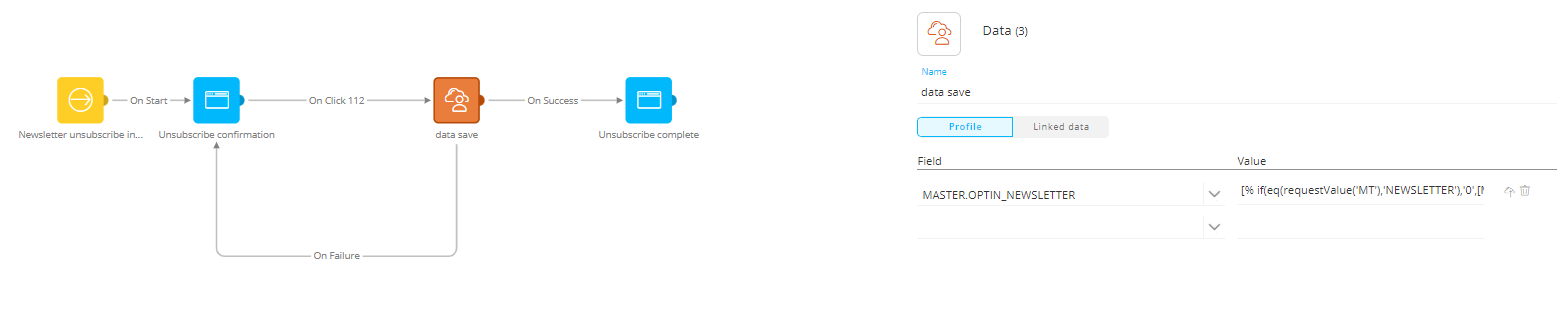
The exact condition is as follows:
[% if(eq(requestValue('MT'),'NEWSLETTER'),'0',[MASTER.OPTIN_NEWSLETTER]) %]
[% if(eq(requestValue('MT'),'PROMOTIONS'),'0',[MASTER.OPTIN_PROMO]) %]
If the value of the MT parameter is NEWSLETTER we set the value for OPTIN_NEWSLETTER field to 0. If it is not, we leave the current value in the field.
If requestValue('MT') is not a certain value, the IF function returns the value which
is already stored,
This way the value remains what it was, if requestValue('MT') is not the correct value
for a certain optin field.
You can also add the function for the [MASTER.OPTIN_PROMO]), this way the journey is already prepared to receive unsubscribes from promotional emails as well.
Adapt the unsubscribe link
The unsubscribe link of the "Newsletter" email has to pass the email's Message type to the Unsubscribe Journey Input Component.
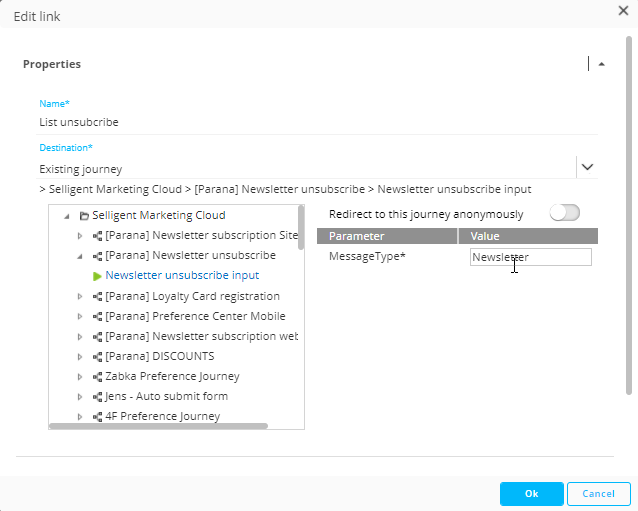
5. In the Links panel on the right, find the unsubscribe
link, double-click it to open the properties. Earlier
we have selected the option 'Existing
journey' and pointed it to the "Entry optout" Input component
of the "Unsubscribe" journey.
You should now see the Input parameter "MESSAGETYPE". As
a value enter Newsletter.
Note that you can do the same for the unsubscribe links in any of the promotional emails and set the value to promotions.
6. Click 'Ok' when done and save your email.
Clicking the link in the email will now redirect to the Unsubscribe Journey with 'Newsletter' as value for Input parameter MESSAGETYPE.
Note: An important requirement is that the MESSAGETYPE parameter MUST be
filled in. If someone forgets to fill it in, no value is passed and the
unsubscribe process does not work.
If you create a template for the newsletter emails, you can set the
unsubscribe link and MESSAGETYPE fixed in the template. The template
would only allow adding content for the body, the rest can be set fixed
(not editable) in the template. This way, no mistakes can be made when
creating new newsletter emails.
Topics to review:
- 1. The Unsubscribe journey
- 2. Create the unsubscribe pages
- 3. Create the unsubscribe journey for one email type: the yearly promotional emails
- 4. Adapt the unsubscribe link of the newsletter email
- 5. Adapt the unsubscribe journey so it can be used for all email types (advanced, input parameters and posted values, technical knowledge required)
