Create the journey
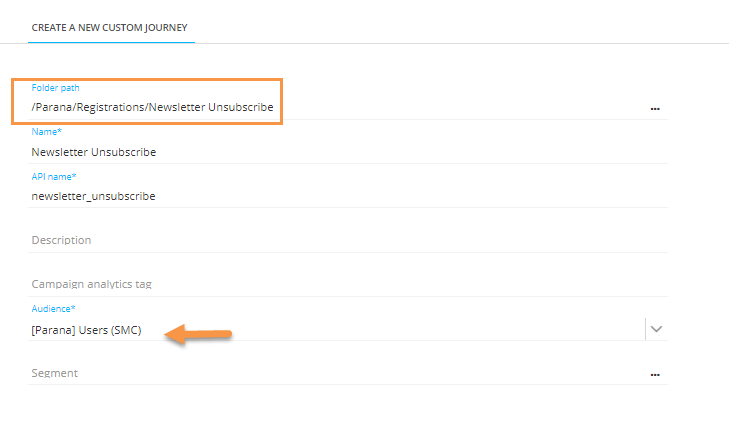
1. Select 'Journey' from the first-level navigation on the left and create a new Custom Journey "Newsletter unsubscribe" in a dedicated folder, here "Registrations". This is the folder where also the pages are stored.
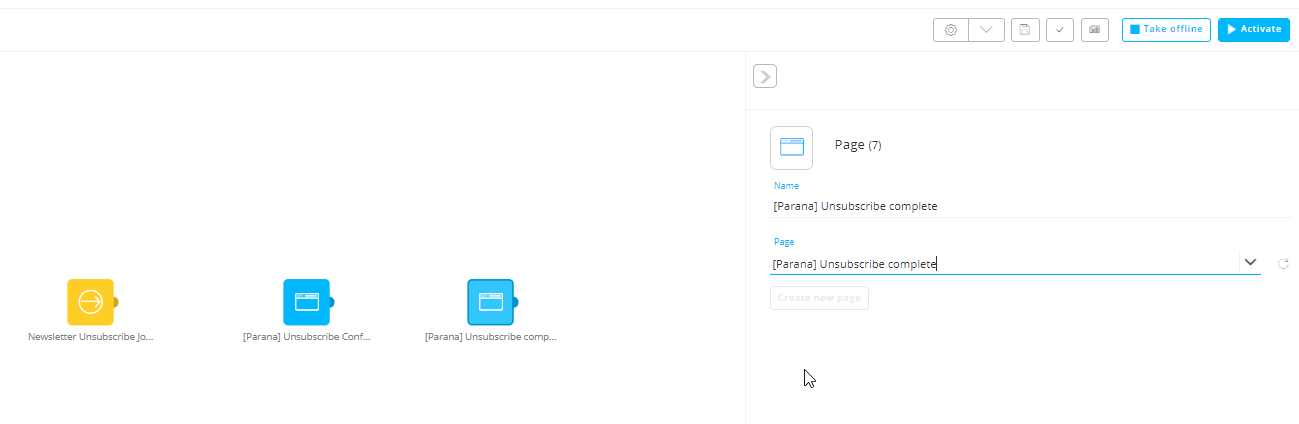
2. On the Design panel of the Custom Journey, drag an Input Component and 2 Page Components.
3. Select respectively the "Unsubscribe Confirm' and "Unsubscribe Complete" pages for these components.
4. When a contact clicks the unsubscribe link on the first page, you need to change to value of the contact's field OPTIN_NEWSLETTER in the Audience List to zero (0) so they are unsubscribed. To achieve this, add a Data Component in between the two pages from the Components panel on the right side.
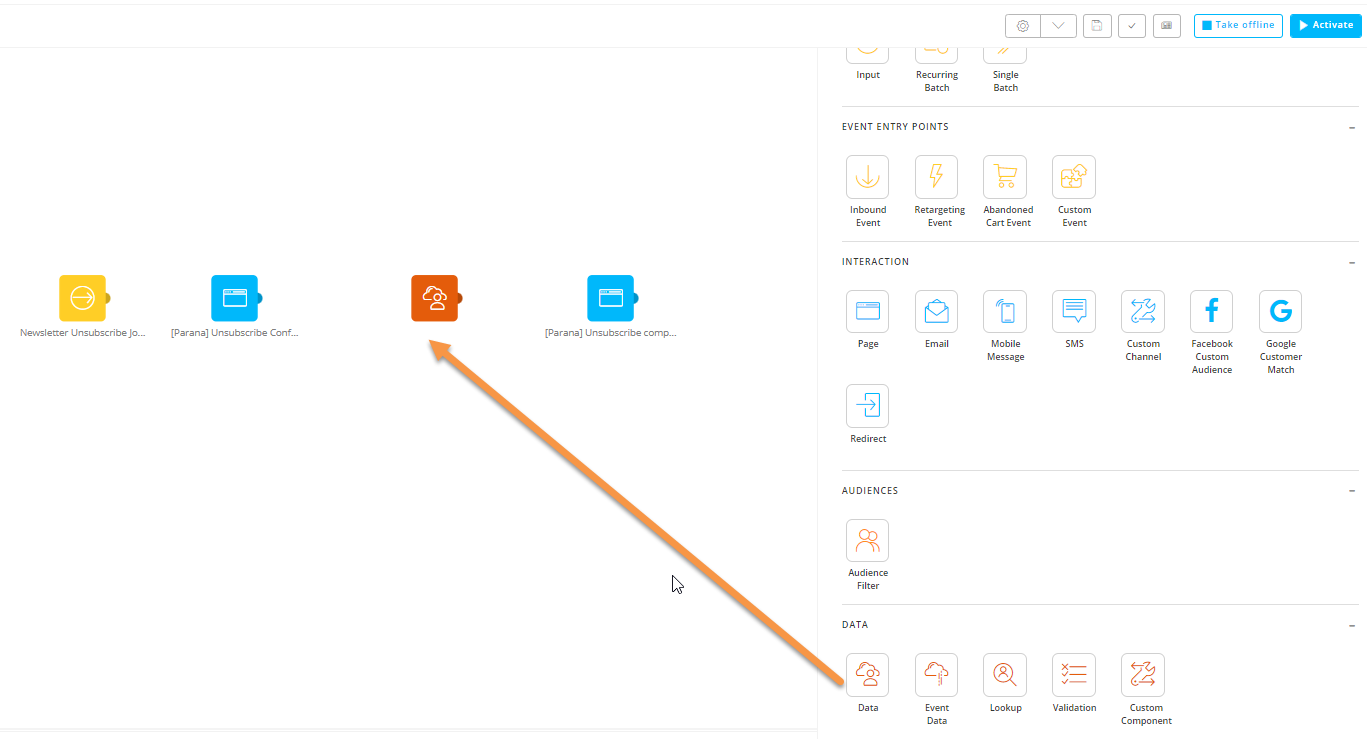
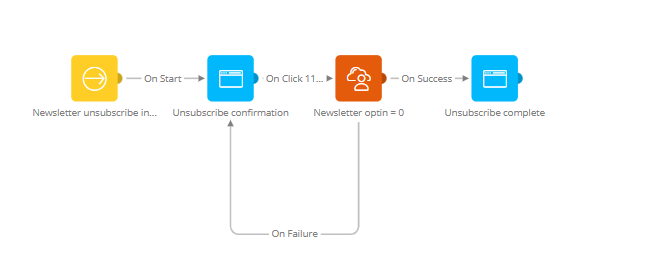
5. Connect the components as illustrated below. Drag an arrow from the Input Component to the Unsubscribe Confirmation page and again from the Unsubscribe Confirmation page to the Data Component. When you drag this last arrow, a panel will pop up where you can select the 'event'.
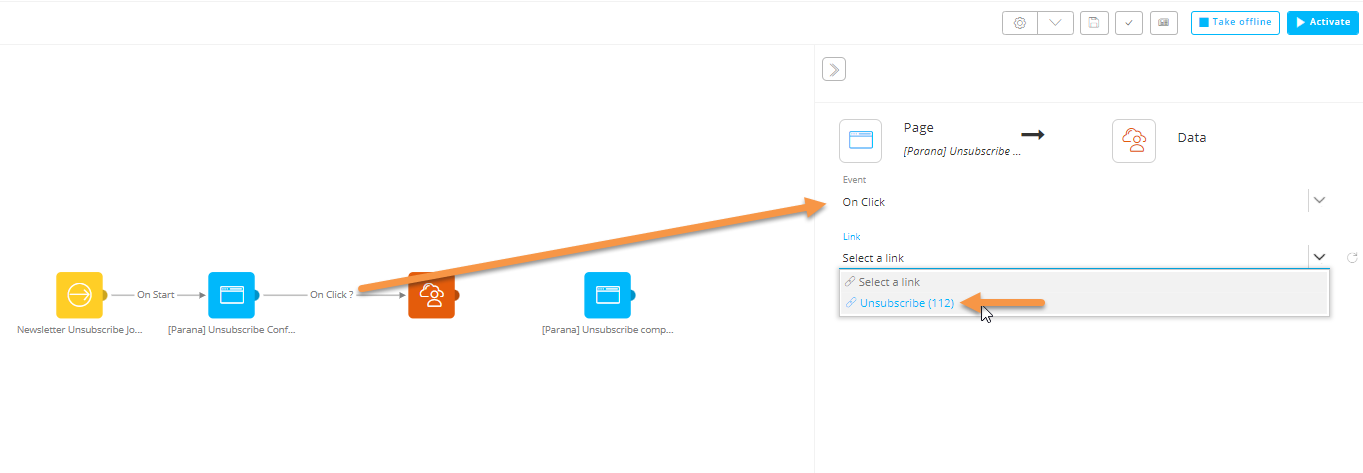
At this point the contact clicks the
unsubscribe link. Select "Unsubscribe
(112)" as event.
In the Data Component, as a result of this click, you need to change the OPTIN_NEWSLETTER value to
zero (0) in the Data component. .
Note: The "(112)" in the event "Unsubscribe (112)" refers to the link ID. It should match the number in the Links overview panel in the editor. Links can have the same name, but never the same ID.
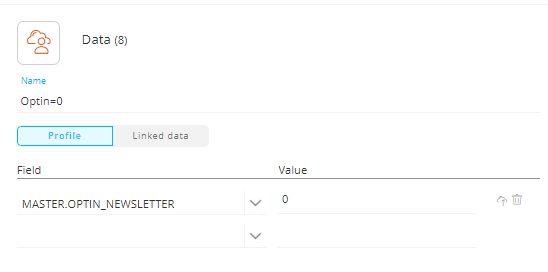
6. Click the Data Component to display the Properties. In the properties panel there are 2 tabs. Profile and Linked data. Profile refers to the Audience List. In this example, that is the list where the update will happen.
Give the Data Component a short descriptive name 'Optin=0", it will be displayed in the journey.
In the 'Fields section, find the field OPTIN_NEWSLETTER and enter the value zero (0). Click 'Save' when done.
7. The Data Component has 2 possible events: 'On Success' and 'On Failure'. If everything is stored correctly, 'On Success' is used to continue in the journey. 'On Failure' is used when issues occurred during save of the data.
Drag 2 events:
- From the Data Component to the "Unsubscribe Complete" page, select the 'On Success' event.
- And from the Data Component back to the "Unsubscribe Confirmation" page, select the 'On Failure' event.
8. Now, this journey has an Input Component as a starting point. This allows for other journeys to be redirected to this journey. Also, remember, in a Link, you can select "Send the contact to an existing journey". This is used to go from one journey to another. This is what we will also do with our email and this Unsubscribe Journey. The newsletter emails will be in different journeys and the unsubscribe link in these emails will all redirect to the Unsubscribe Journey. This way, we only have to create the Unsubscribe Journey once, for all emails.
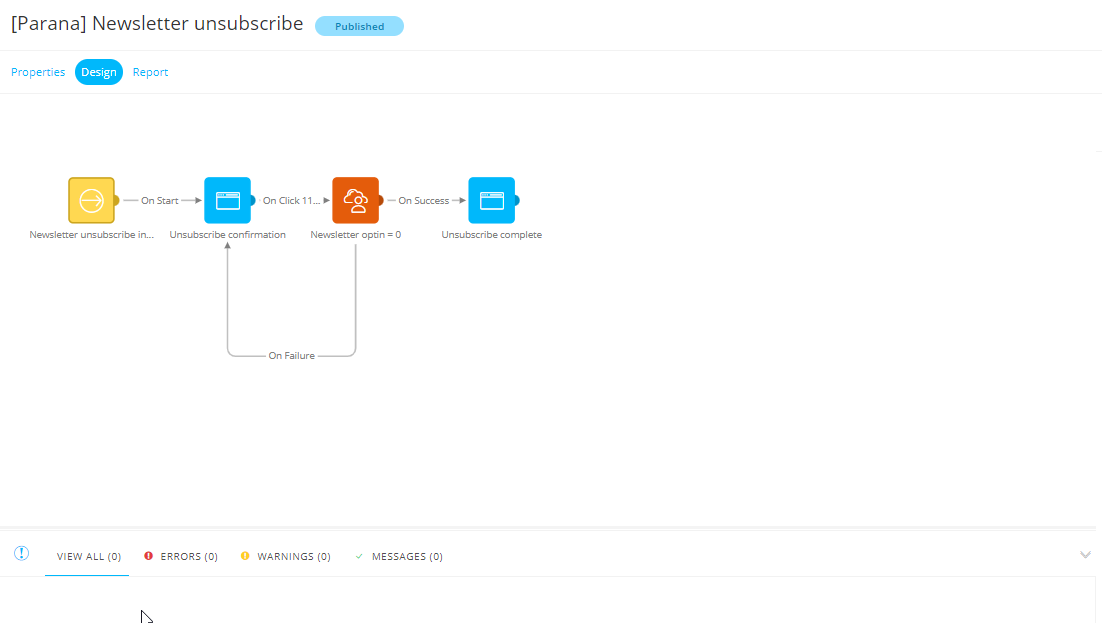
9. Save the journey, you should see '0 Errors & Warnings" at the bottom of the journey.
Test the journey
We will test starting from the Input component and go through each step to see if everything works correctly.
1. Select the Input component and click the 'Anonymous link' in the properties of the Input Component. This will take you through the different steps in the journey and display the pages.
2. The first page is displayed. Click the unsubscribe button.
3. Next; the second page is displayed, confirming the unsubscribe for the newsletter.
If you want to test the entire flow, from clicking the unsubscribe link in the newsletter to saving the data in the record, you can send a test email from the Newsletter and ensure your email exists in the Audience List.
Congratulations, the basic unsubscribe journey is ready! Lets continue and adapt the unsubscribe link of the "Newsletter" email.
Topics to review:
- 1. The Unsubscribe journey
- 2. Create the unsubscribe pages
- 3. Create the unsubscribe journey for one email type: the yearly promotional emails
- 4. Adapt the unsubscribe link of the newsletter email
- 5. Adapt the unsubscribe journey so it can be used for all email types (advanced, input parameters and posted values, technical knowledge required)
