Personalizing the message
Using List fields for message personalization
Messages can be personalized with the contact's data. Audience lists
and 1:1 profile extension fields can be incorporated as personalization
fields in the message. Fields from 1:n linked lists cannot be used for
personalization.
These lists and fields are accessible from the tree view on the left, in
the 'Audiences'folder:
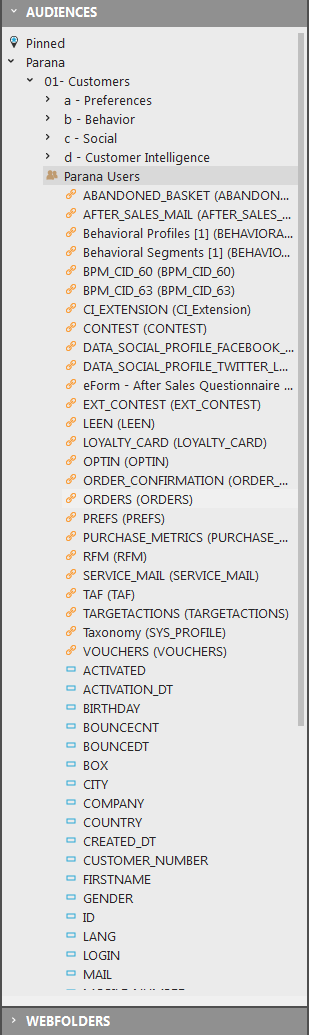
Clicking a list in the tree view expands/collapses the list.
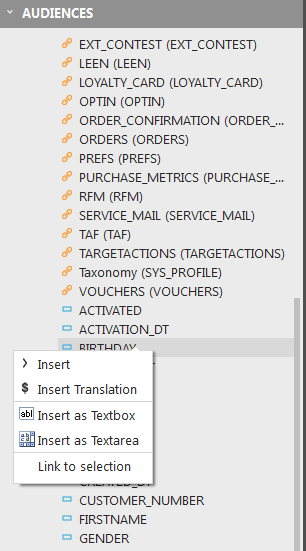
When right clicking an attribute in a list, the following options are at hand, depending on the properties of the attribute:
Use the database value of the field
Insert: the database value of the contact's attribute is inserted as a personalization field.
In the message, this looks like ~FIRSTNAME~.
Example: "Dear ~FIRSTNAME~" results in "Dear Kate"
Remark: for datetime fields, this value is not always taken from the database. When a profile is loaded, variables are loaded in memory as well, for performance reasons. As a result, on the following page, the values are not retrieved from the database, but from the memory. However, the value in memory (date) is not the same as the value in the DB (datetime)..
Use the translation of a value
Insert translation: the database translation of the contact's attribute is inserted as a personalization field. This option is available for fields with an option list linked to it.
In the message, this looks like ~$SALUTATION~
Example: "~$SALUTATION~ ~NAME~" results in "Madame Lupin" for the french translation
NOTE: to be able to use the translated value, the language of the message needs to be defined in the properties!
Use a field as input field
Insert as textbox: a text box is inserted. This is typically used for forms where the contact viewing the message has to enter some text.
In the message, this looks like: ~@NAME~ in a textbox

The source code: <input id="NAME" name="NAME" type="text" value="~@NAME~" />
The @ in front of the field indicates that a value will be retrieved from the database if available, or, the value entered by the contact in the form after the form is posted. I.e. a posted value.
Use a field as a text area
Insert as text area: the attribute is inserted as a text area. The @ in front of the field indicates that a value will be retrieved from the database, if available, or the value entered by the contact after the form is posted.
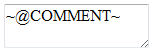
The source code: <textarea id="COMMENT" name="COMMENT">~@COMMENT~</textarea>
Use of fields with option lists
Insert as drop-down: If an option list is linked to the field and the field is set as type 'single value', the user attribute can be inserted as a drop down field. See list design and translations for more info on option lists
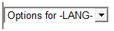
The source code: <select id="LANG" name="LANG" optifill="@LANG"><option selected="selected">Options for -LANG-</option></select>
The 'optifill' attribute will fill the drop down with the values from the option list.
Insert as list: If an option list is linked to the field and the field is set as type 'single value', a select list is created. See list design and translations for more info on option lists

The source code: <select id="LANG" name="LANG" optifill="@LANG" size="10"><option selected="selected">Options for -LANG-</option></select>
The 'optifill' attribute will fill the drop down with the values from the option list.
Insert as radio buttons: If an option list is linked to the field and the field is set as type 'single value', a radio list of options is created. See list design and translations for more info on option lists.
The source code:
<label><input id="COUNTRY_BE" msgchecked="~IF(CHKPROP(@COUNTRY,'BE'),CHECKED,)~" name="COUNTRY" type="radio" value="BE" />~OPTION(COUNTRYR.BE)~</label><br />
<label><input id="COUNTRYR_FR" msgchecked="~IF(CHKPROP(@COUNTRYR,'FR'),CHECKED,)~" name="COUNTRYR" type="radio" value="FR" />~OPTION(COUNTRY.FR)~</label>
The 'msgchecked' attribute will check the radio button if the posted value of the radio button is 'BE' or 'FR' respectively. If so, it will mark the radio button as checked. OPTION(COUNTRY.BE) will get the value from the option list for option value 'BE'.
Insert as checkboxes: If an option list is linked to the field and the field is set as type 'multiple value', checkboxes are created. See list design and translations for more info on option lists
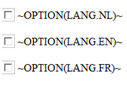
The source code:
<label><input id="LANG_NL" msgchecked="~IF(CHKPROP(@LANG,'NL'),CHECKED,)~"
name="LANG" type="checkbox" value="NL" />~OPTION(LANG.NL)~</label><br
/>
<label><input id="LANG_EN" msgchecked="~IF(CHKPROP(@LANG,'EN'),CHECKED,)~"
name="LANG" type="checkbox" value="EN" />~OPTION(LANG.EN)~</label><br
/>
<label><input id="LANG_FR" msgchecked="~IF(CHKPROP(@LANG,'FR'),CHECKED,)~"
name="LANG" type="checkbox" value="FR" />~OPTION(LANG.FR)~</label><br
/>
The 'msgchecked' attribute will check the checkbox if the posted value of the checkbox is 'nl, en or fr' respectively. If so, it will mark the check box as checked. OPTION(LANG.NL) will get the value from the option list for option value 'NL'
Link to selection: the user attribute is linked to a form element. This is used when you want to add or replace the value of an input field, radiobutton, etc. with a value from the list. Select the form element and click 'Link to selection' on an audience list field.
NOTE: inserting
properties can also be done manually.
To insert the value of a contact field: ~FIELDNAME~
To insert the translation value from an option list linked to a field:
~$FIELDNAME~
To insert the database value or posted value of a form: ~@FIELDNAME~
To insert a profile extension field, use the profile extension scope:
~SCOPENAME.FIELDNAME~
Using system tags
Apart from audience fields and profile extension fields, Selligent also recognizes system properties. These predefined properties are useful when the message is generated.
System tags are inserted in the same way as contact fields. Position the cursor at the desired position and select the option 'Insert system tags' from the toolbar in the message:
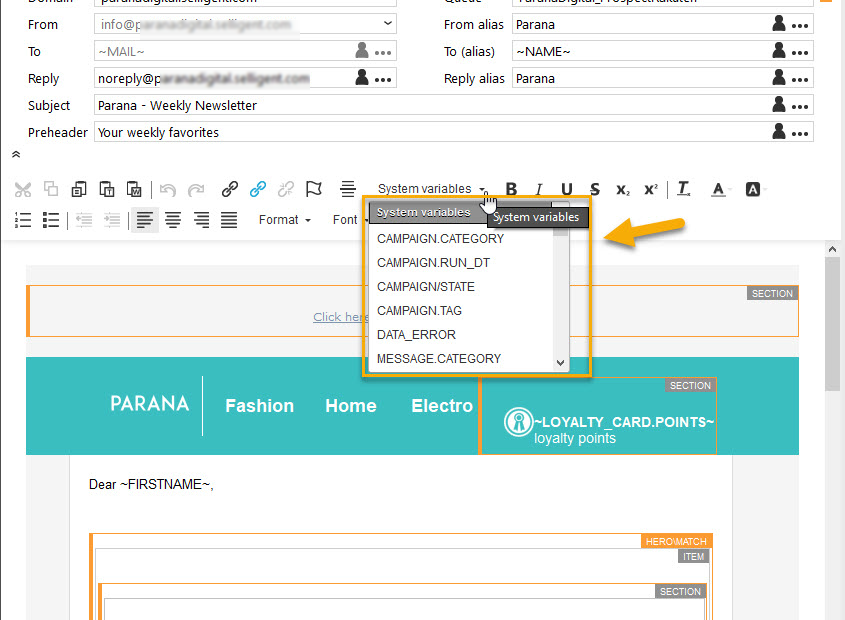
CAMPAIGN.RUN_DT: the last datetime when the journey has run
CAMPAIGN.STATE: the journey's current state (active, design, test, on hold or offline)
DATA_ERROR: error messages when they occur during validation. The content of the error message is defined on the validation tab of a Data component, used in a journey. With a Data component you can define an error message with a validation constraint. When validation fails, the error messages are added to this parameter DATA_ERROR. Errors are displayed with line brakes (<br>).
MESSAGE.CATEGORY: the email or page category, set in the properties of the message in the editor
MESSAGE.NAME: the email or page name, set in the editor
MESSAGE.SUBJECT: the subjectline of the email
MESSAGE.TAG: the message tag set in the journey, in the properties of a Webpage or Email component
PROBE.NAME: the sensor name
PROBE.TAG: the sensor tag, set in the properties of the sensor, on the advanced tab
REQUEST.REMOTE_ADDR: the contact's remote IP address
SYSTEM.ACTIONID: the id of the component in the journey
SYSTEM.CAMPAIGNID: the journey id
SYSTEM.CAMPAIGNNAME: the journey name
SYSTEM.COOKIE: returns the content of the cookies that are included in the request
SYSTEM.CR: if extra CSRF (Cross Site Request Forgery) handling is enabled, this value contains the CSRF tag to be used for the next post
SYSTEM.DAY: the current day returned by the server
SYSTEM.DAYOFWEEK: the current weekday returned by the server
SYSTEM.DEBUG: this value is set to 1 if the message is being tested in the preview mode
SYSTEM.HOUR: the current hour returned by the server
SYSTEM.LISTID: the audience list id
SYSTEM_LOCAL_DOMAIN: returns the local domain of the Selligent environment
SYSTEM.MAIL: used to retrieve
how an email is being viewed. When the value equals 1 the message is viewed
in an email client. If the value equals 0 the message is viewed in a web
browser. The system tag can be used to show or hide web version
sensor in a section.
E.g. <div id="masection" maconstraint="SYSTEM.MAIL=1"
mahidediv="true"><a href="~PROBE(0)~">View
this email in your browser</a></div>
SYSTEM.MAILAGENT: returns the URL of Selligent's optiextension url (http://DOMAINNAME/optiext/optiextension.dll?ID=%s) used to render all journey links.
SYSTEM.MAILID: returns the id of the actual message created in the editor. This is not the same as the action id in the journey.
SYSTEM.MINUTE: the current minute returned by the server
SYSTEM.MONTH: the current month returned by the server
SYSTEM.SECOND: the current second returned by the server
SYSTEM.TEMPLATETYPE: returns the message type (email, page or template)
SYSTEM.TEST: returns 1 if the journey was launched in test mode
SYSTEM.TESTMAIL: the tag can be used to display a specific text or section when the message is a test message. E.g. ~(IF(SYSTEM.TESTMAIL=1', 'text to display',''))~
SYSTEM.USERID: returns the contact's id from the audience list
SYSTEM.YEAR: the current year returned by the server
Environment variables: Under 'Setting' custom global environment variables can be defined. Use them in messages with ~SYSTEM.ENVIRONMENTVARIABLENAME~ where ENVIRONMENTVARIABLENAME is the name of your variable
Back to 'configuring a message'
