Journey Interface
The Journey section consists of
- a Home tab followed by a series of journey tabs, one per opened journey.
- a main window (called the canvas) where the journey is built. It is a graphical drag and drop environment to design your journey
- a tree view of journeys and assets with an overview of all folders and journeys, pages, emails and surveys that have been created within Selligent Campaign. You can drag pages, emails and surveys directly from the tree view on the canvas. Under Audience, you can drag the target selection for your journey. Interfaces lists interface components, like SMS, Print, custom interfaces, that can be dragged to the journey.
- a properties and components window on the right allowing to set the properties of the journey. It also provides a series of components to compose the journey.
Home
The 'Home' tab is always available and holds all recently modified journeys and pinned journeys. These favorites are added by the user, manually, by selecting the option 'Pin this' from the drop-down menu behind the 'Actions' button available on a journey tab. The journey is equally added to the 'Pinned' folder in the tree view.
A search field in the Recently modified journeys sections allows filtering the journeys by
- last modified from my location
- last modified by me
On the right hand side of every Home page, a news feed is provided.
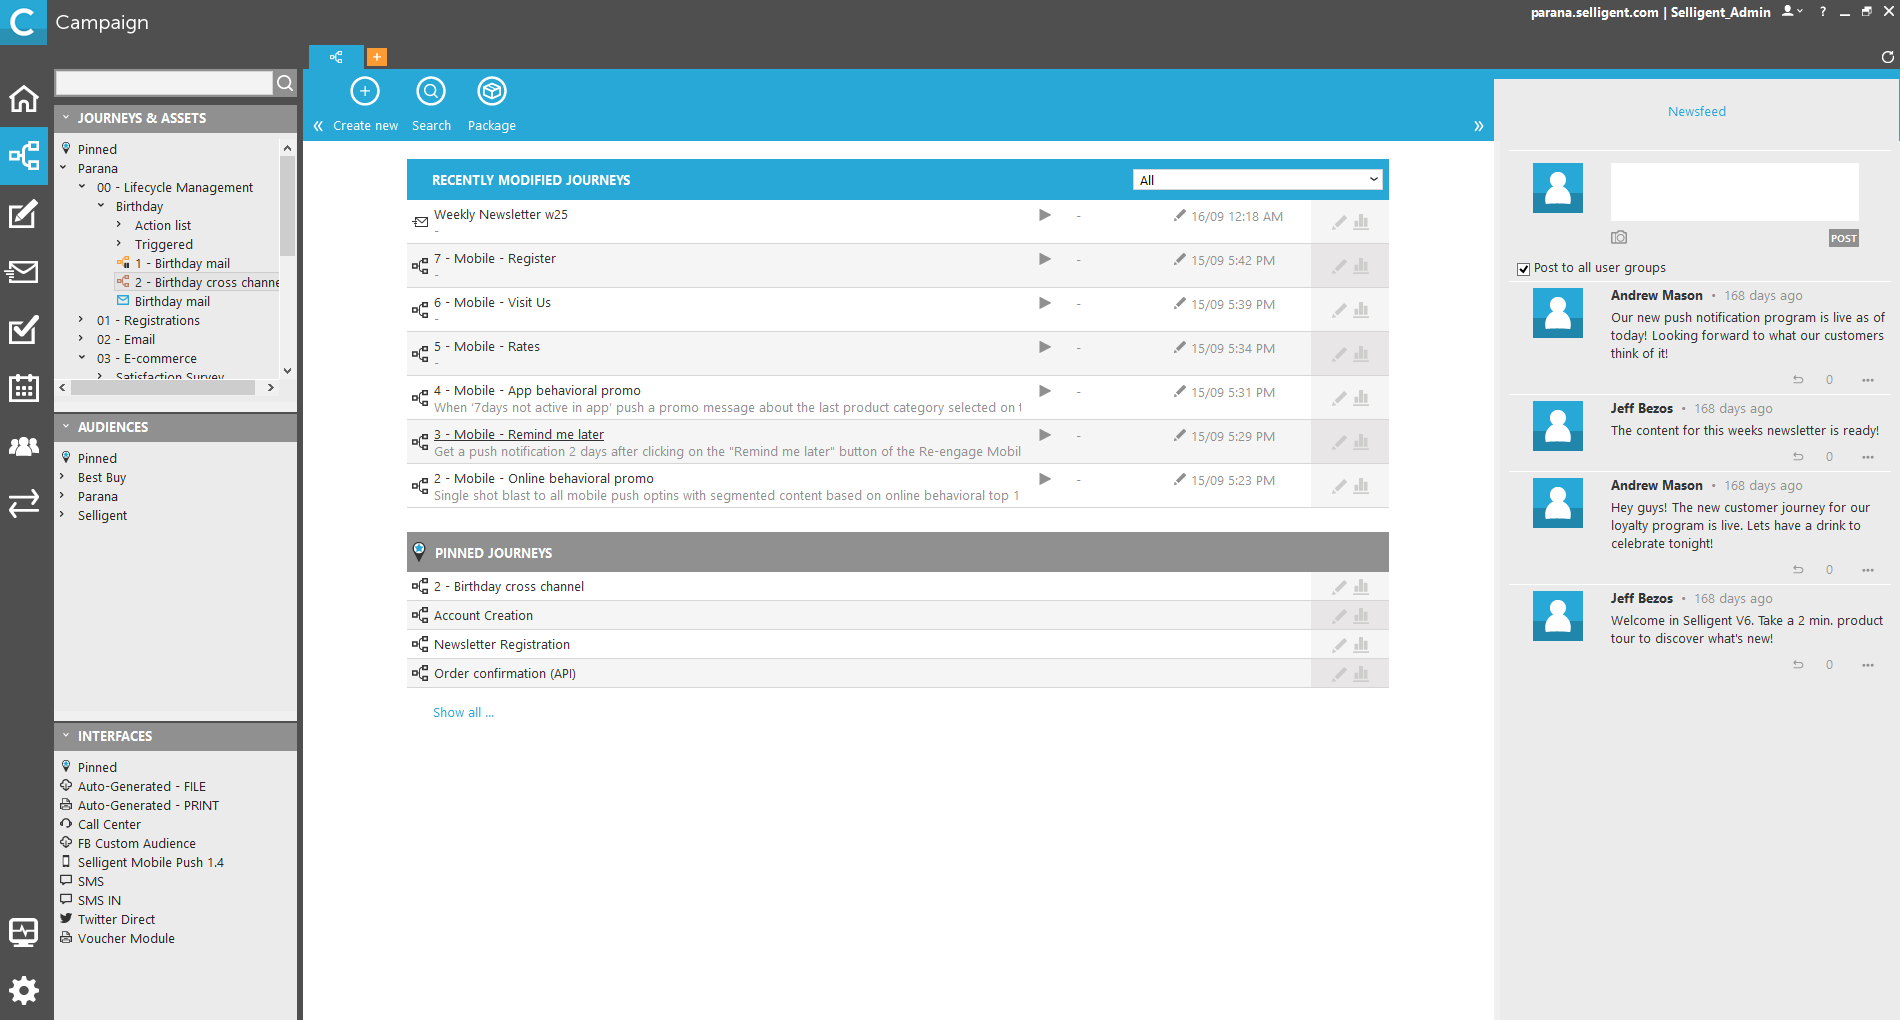
From the 'Home' tab a journey can be opened by clicking it or selecting the Edit icon in the overview.
The buttons in the 'Home' tab allow creating a new journey, search for an existing one or export/import a journey.
The + tab, displayed by default, is used to create a new journey. A page pops up where a name and description can be given:
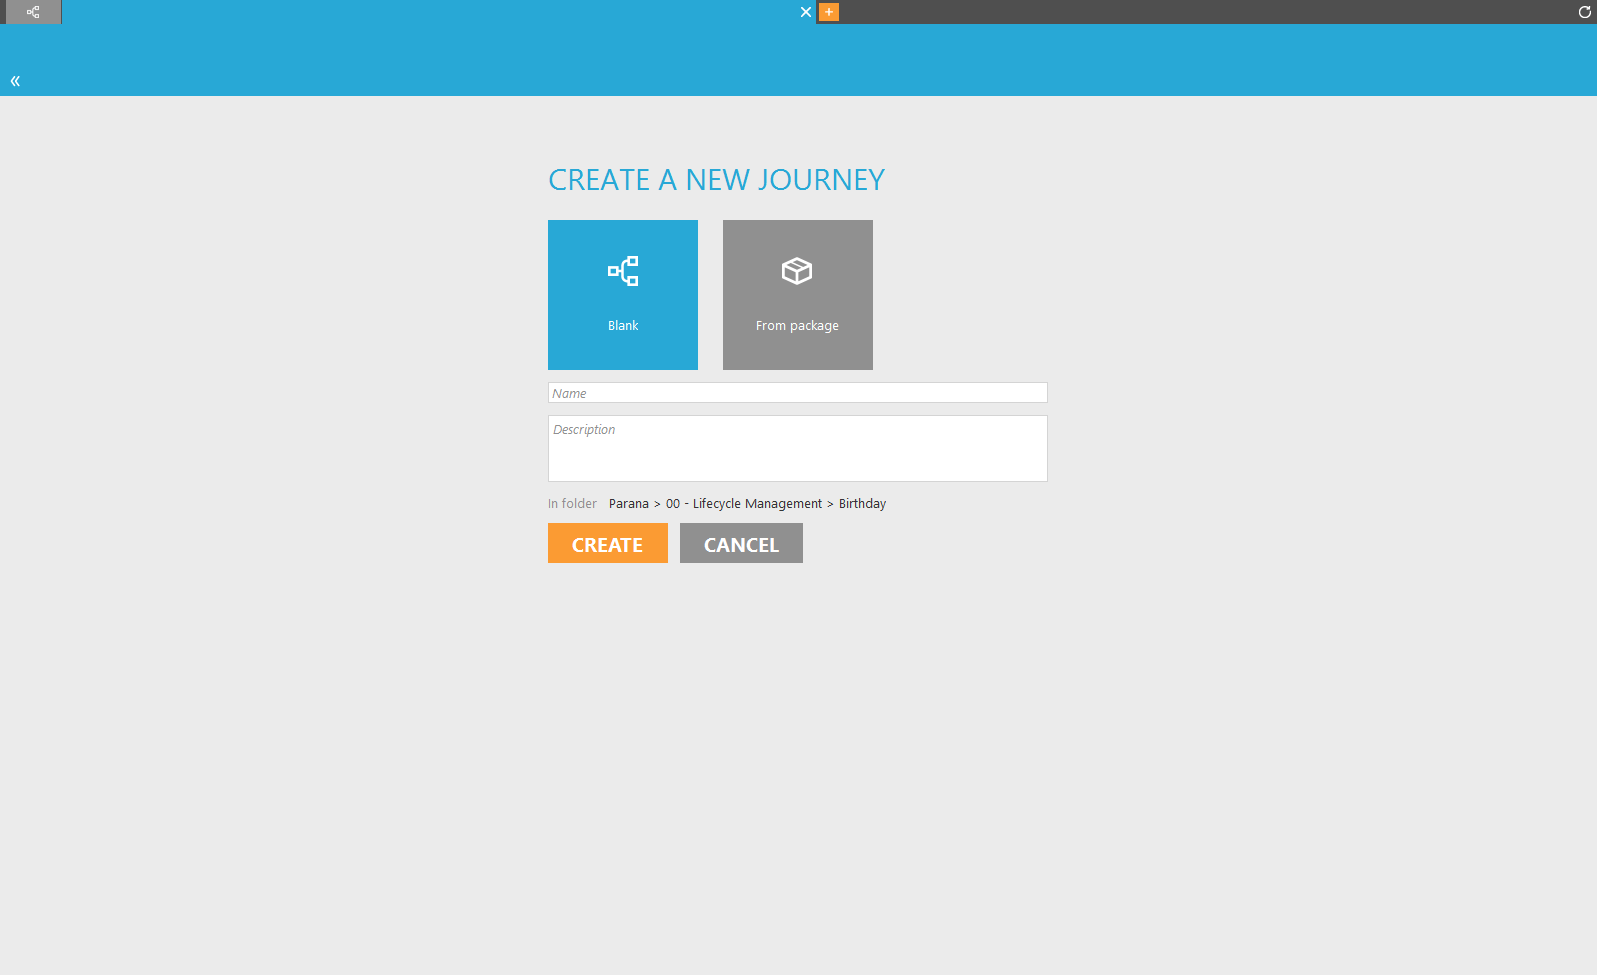
The user has the choice between creating a blank journey or import an existing one from a package created previously.
The 'In folder' field indicates in which folder the journey is stored. The folder corresponds to the selected folder in the tree view of folders on the left.
Press 'Create' to store the new journey. Automatically a new tab is added holding the name of the new journey. You can now start designing the journey and setting its properties.
Journey tabs
Whenever a journey is opened by double clicking it in the tree view or a new journey is created, an additional tab is added holding the name of the selected journey.
The body of the tab contains a status menu and buttons that are currently applicable to the journey. All non relevant buttons are by default hidden:

Following status menu is displayed. Only one status at a time can be selected:
- Read: the journey is displayed in'Read'mode, no changes can be made. This is the default status when opening a journey.
- Edit:
the'Edit'state
will lock the element by the current user. If the element was previously
locked by another user, that user's name will be displayed just below
the status menu. The journey can now be modified. At the right, the
Components and Properties tabs are now available to configure the
journey

- Test:
sets the journey in test and validation mode. Mails can be sent
to test users and pages are live. If scheduling is configured for
the journey, it is taken into account during the test. When in test
mode and Email On Acid integration is active
on the environment, emails can also be tested on different mail clients
and a spam analysis is provided.


In 'Edit' mode, the following buttons are displayed:

- Save: save the current journey. The journey is automatically compiled and if issues are detected error messages are provided at the bottom of the canvas. These error messages are by default collapsed.
- Launch/Stop: the Launch/Stop button changes depending on the state of the journey.
- Launch: launch is available when a journey is in design or test mode. It sets the journey active or in test. If 'Active' is selected, emails are sent to all contacts. If 'Test' is selected, emails are sent to all test contacts only.. Journeys with only pages and instant emails can remain in design mode. (Example: a journey with only instant emails does not need to be activated. The sending of the emails is the result of a trigger: a click from the contact.). Single shot or Data driven (scheduled) journeys containing scheduled (non instant) emails must be launched, either as 'Active' (send to all contacts or 'Test' (send to all test contacts only). To send test emails to specific test contacts, select 'Test' from the status menu (Read, Edit, Test), and select the specific test contacts in the 'Send testmails' panel.
-
When users have the 'Audience validation' right set, a dialog pops up when launching a journey with scheduled components. This dialog reports on the different actions in the journey and the number of contacts for each of these actions. If a constraint is applied to the audience it is listed as well and can be viewed with the View button. This report can also be saved in a HTML format and thus eventually be printed.
Audience validation only works for journeys that have scheduled components. As a result pages and instant emails for instance are not included. This implies also that audience validation is available for data driven as well as triggered journeys.
For triggered journeys, at least one trigger has to be defined.
For data driven journeys, only the first execution is tested ( this means that if you have a birthday journey, that the audience validation will only be used for the contacts that have their birthday today).
With scheduled components we refer to components in the journey that are executed by the Campaign agent. Scheduled components can be emails, interfaces such as sms and mobile push, wave components, etc.
When audience validation is activated, the Campaign agent will actually execute the journey once and report on the number of items that would be sent in each of the scheduled components. Again, this only applies to scheduled emails and components. Instant emails are not included, nor are pages.
When there is an AB test component, only the test run is executed. Same goes for MVT components.
For a Wave component, only the first wave is executed.Note that Audience validation does not take into account Marketing pressure. Moreover, if part of the audience already received the email, they will not be included in the calculated audience.
How to interpret audience counts in Campaign and in Communications Cadence.
- Stop: Stop is available when the journey is active, paused or stopped. The 'Stop' button gives access to two additional options: Pause or stop. When the journey is paused no emails are sent, pages are still live. When the journey is stopped, no emails are sent and pages are no longer live. For stopped journeys, clicks going to pages in the journey, will result in a redirect to a default location, usually the client's homepage. This can be overwritten in the properties of the journey. It can be an URL, any page created in Selligent Campaign or a certain page in a journey.
- Report: The reporting for the current journey is loaded.
-
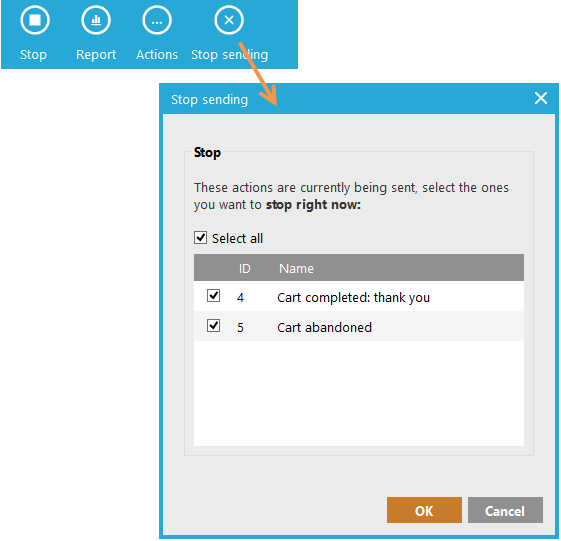
Stop sending: Any active journey can be canceled by using the STOP Sending button, visible when a journey is active. A dialog allows to select the different actions in the journey that need to be stopped. After having canceled the journey, it can be resumed and all recipients that were successfully reached prior to the cancellation will be excluded. Both emails as well as interfaces (e.g., SMS) can be canceled.
In 'Test' mode the following additional button is available:

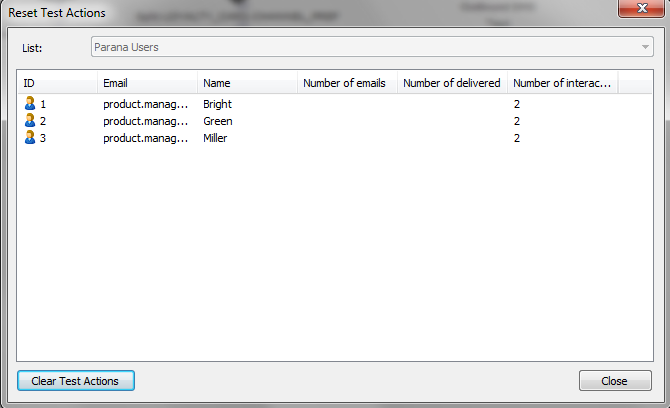
- Reset Test actions: the button 'Reset Test actions' clears the interactions (clicks, views) from test contacts to ensure these are not included in reporting. Note however that it is possible to exclude test actions by default from reporting through a setting in the Configuration/System Settings.
- Actions: is an access point to a drop-down menu with several options
- Pin this: adds the selected journey to the list of pinned records on the Home tab and to the folder 'Pinned' in the tree view
- Rename: renames the current journey
- Duplicate: copies the journey in the same folder
- Export: export the current journey to make it available for import later or in another environment. This is part of the Packaging function.
- Archive: allows archiving the selected journey. An archived journey is still available in view mode. Archiving is used for older journeys. It stores them in a separate database to free space on the operational database and improve performance. The delivery info (sent, delivered, viewed, clicked) of the journey will also be deleted from the operational database.
- Print: takes a snapshot of the current journey and allows printing
- Delete: deletes the selected journey. This will not delete the journeys delivery info from the operational database
Standard options are provided to close one tab, all tabs or all but this tab.

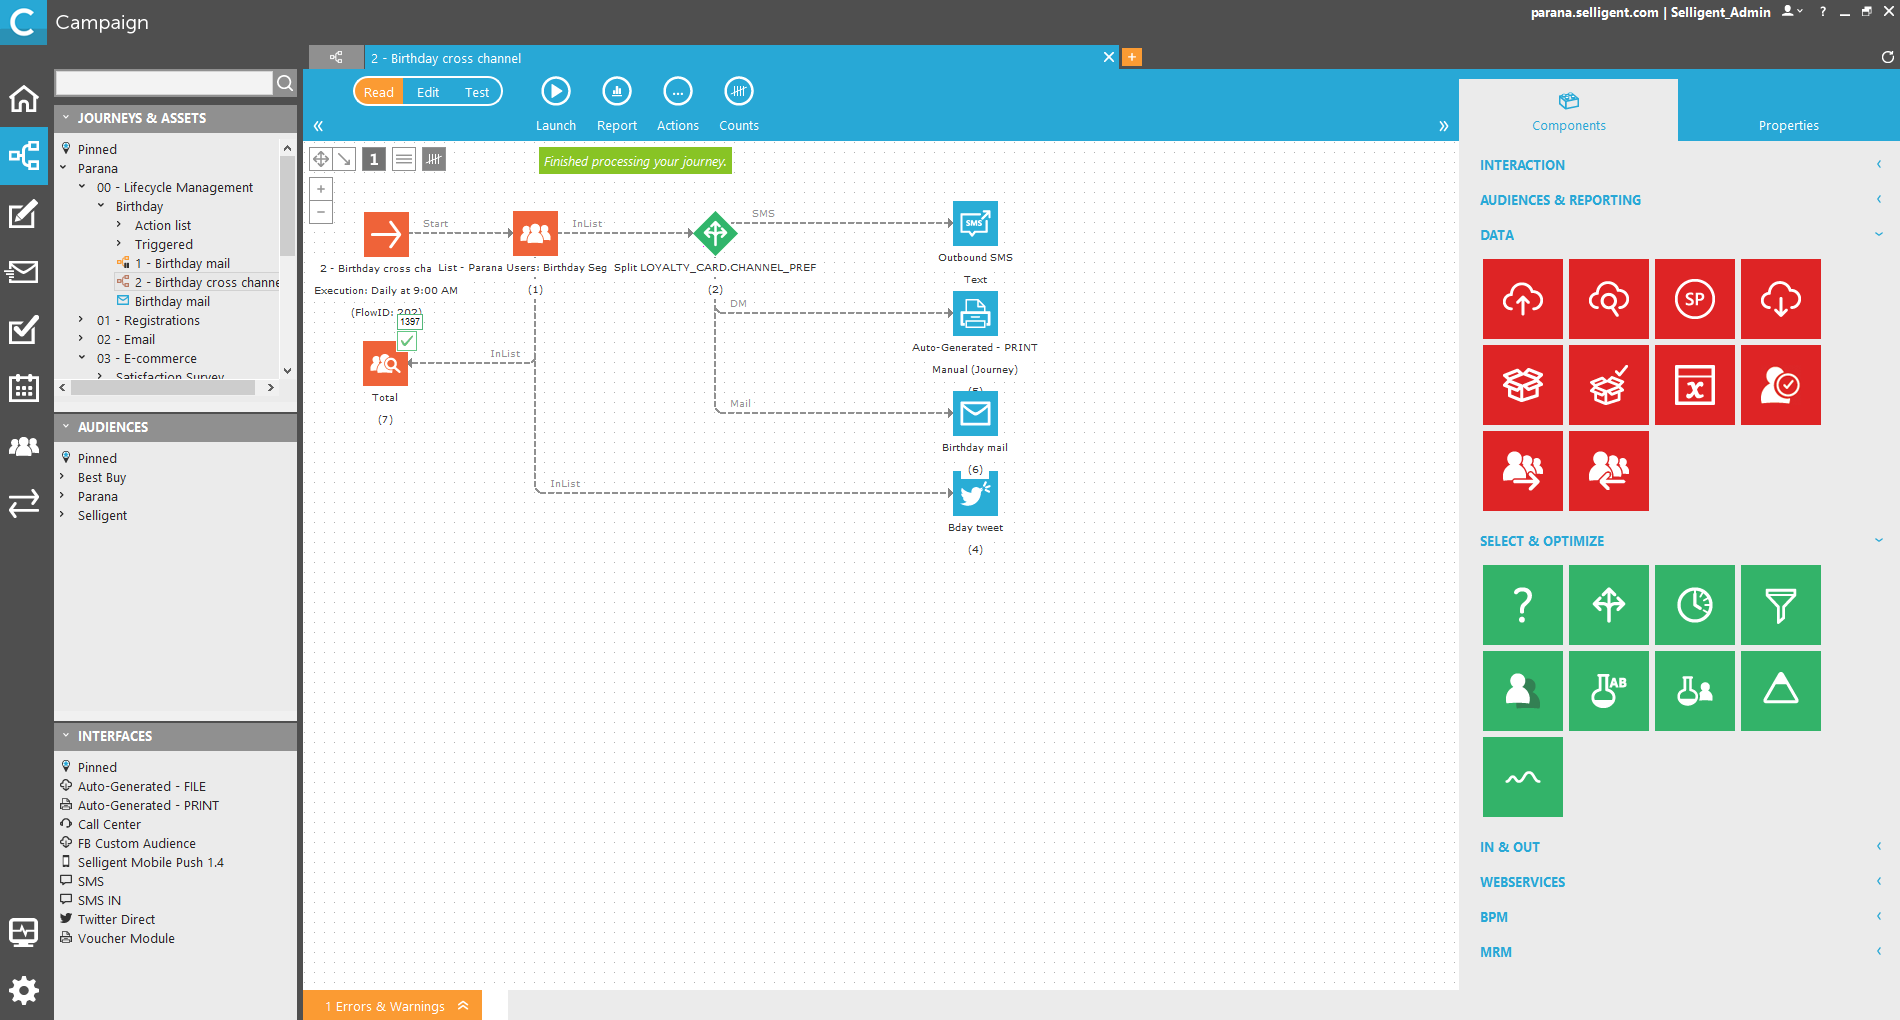
The Journey main window or canvas
The graphical environment of the main window allows creating or editing journeys in a graphical way.
The canvas displays the path that is followed throughout the components by the target contacts in the audience or segment.
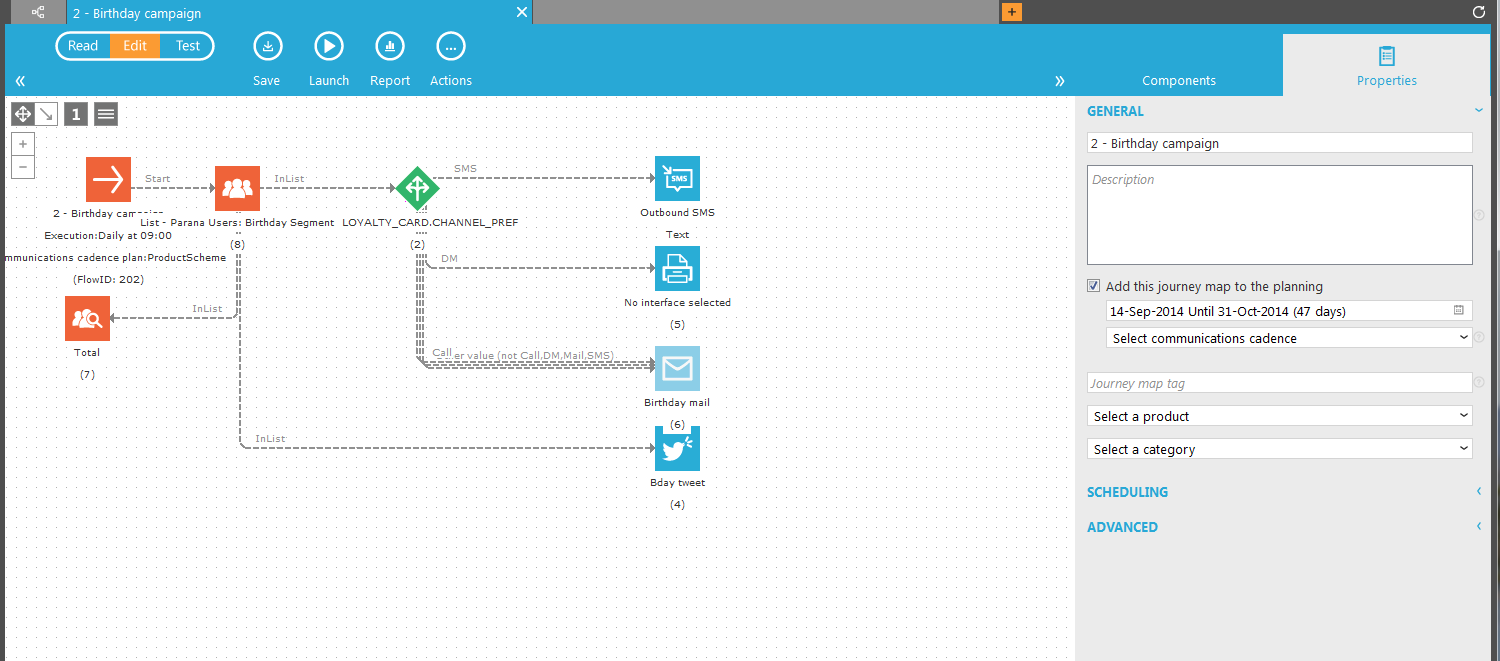
Each component (icon) in the journey represents a specific step. The lines between the components indicate how the different components are connected and thus how a contacts moves from one step to another.
The different components can be placed on the canvas by dragging and dropping them from the components section on the right.
It is also possible to add audiences, emails and pages or interfaces on the canvas from the tree view on the left.
Double clicking a component on the canvas displays the properties in a dialog. Double clicking the Start component displays the journey properties on the right.
A compiler window is displayed at the bottom of the main window when saving. The window shows the result of the compilation. Compilation returns 3 types of messages: informational, warnings and errors. All of them are self-explanatory, due to comprehensive descriptions. If a message applies to a specific component, the component will be highlighted on the canvas when you select the message. Errors in a journey should always be resolved.

NOTE: components dropped from the component section are non configured components. To configure a component double-click it to open the properties. It is however possible to add already configured audiences, emails, pages, forms or interfaces to the canvas by simply dragging and dropping them from the tree view on the left.
The interactive buttons in the upper left corner of the canvas are used to:
- zoom in or out
- Switch between 'Move' or 'Connect', to move components, or connect them together with links (arrows)
- toggle between hiding and showing the component numbers
- toggle between multi -and single line routing. When overlapping links are created between components it is possible to display them as one line to keep the interface light and clear
Tree view
The tree view comprises a series of folders and subfolders in which journeys are stored together with assets available for use in a journey. The way the tree view is built is different for each customer. Folder and subfolders are defined by the customer.
At the top a Search field is available to search for assets, based on name and id, in the tree view. The result of the search is displayed in the tree view.
The tree view is composed of following blocks:
Journeys and assets: a series of folders and subfolders where journeys are stored. Assets, such as emails, pages and surveys, are listed as well. They can be dragged and dropped from the tree view onto the canvas.
Double-clicking a journey in this tree view ), opens the journey in a new tab with a series of action buttons. The journey layout itself is visualized on the canvas.
journeys can be moved in different folders by drag and drop. They can be renamed as well.
Audiences: a series of folders and subfolders containing audience lists created within the Lists entry of Selligent Campaign
Audiences can be dragged and dropped from this folder directly into a journey. A List component pointing to the audience list is added to the journey. To select a segment of the audience list, double-click the List component and select the segment.
Interfaces:
Contains all interfaces configured within the Selligent Campaign environment and available for selection in a journey. These interfaces are created for all inbound and outbound channels that are not available through standard components. Interfaces are typically created for mobile messages (sms), direct 'X' (formerly Twitter) messages, file exports, Print, etc. They can also be custom build to interact with an external system.
The interfaces can be dragged and dropped from the tree view directly on the canvas.
For more information concerning the creation of these interface, click here.
Following operations can be performed within the tree view:
Right click an element in the tree view provides following actions:
- pin this: will add the current element (journey, mail, page) to the Home page
- rename: renames the selected element
- duplicate: copies the selected element within the same folder
- delete: deletes the selected element.
Double clickingan element opens the selected element in a new tab.
Clicking an element opens the selected element in the current tab.
Right click a folder in the tree view allows following:
- new form/email/page/journey:
- new folder: creates a new folder within the selected folder.
- rename: renames the folder
- delete: deletes the folder and all underlying elements
Standard operations on a folder are provided to expand/collapse a folder, rename or move it.
