Email Component
The Email component represents an email created in the Editor. The use of the Email components in a journey is unrestricted.
IMPORTANT NOTE: Do not remove Email components from a journey after it has been launched. After the journey has been launched, if you replace the Email component with another Email component, but with the same message, then all the contacts would receive the same email again. For Selligent Campaign, this is as if a new email was attached. Although the message is the same, the component is not. Also, all delivery info from the previous Email component will not be visible in the reporting (but still stored in the database).
NOTE: Since version 5.2, a restriction has been introduced on the use of email components after a data list. It is not possible to select an email after a data list.
Example: A typical
example of a single-shot email journey, with an Audience and an Email
component: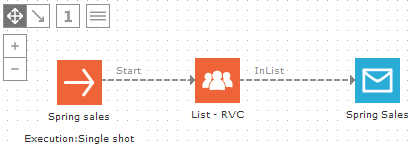
A special type of Email Component is the multivariate (MVT) email. The multivariate email allows creating multiple variants of one and the same message by combining variable subject lines, blocks of text, images and article containers. Each one of these combinations is tested against the audience and the best version is used to target the remainder of the contacts. See Multivariate testing.
Email-specific functionality
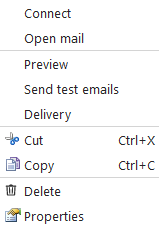
Right-clicking a Page Component displays a pop-up menu:
Preview
The 'Preview' option displays the journey in 'Test' mode and displays a preview of the email. In the upper right side of the window, under the 'Preview' tab in the List drop-down menu, it is possible to select an Audience list.
The User drop-down list allows selecting a specific test contact in the list. The content of the page is adapted to display information on the selected contact and to apply the personalization and content segmentation that applies to the profile of the contact. The content of the page may be different depending on the profile of the contact.
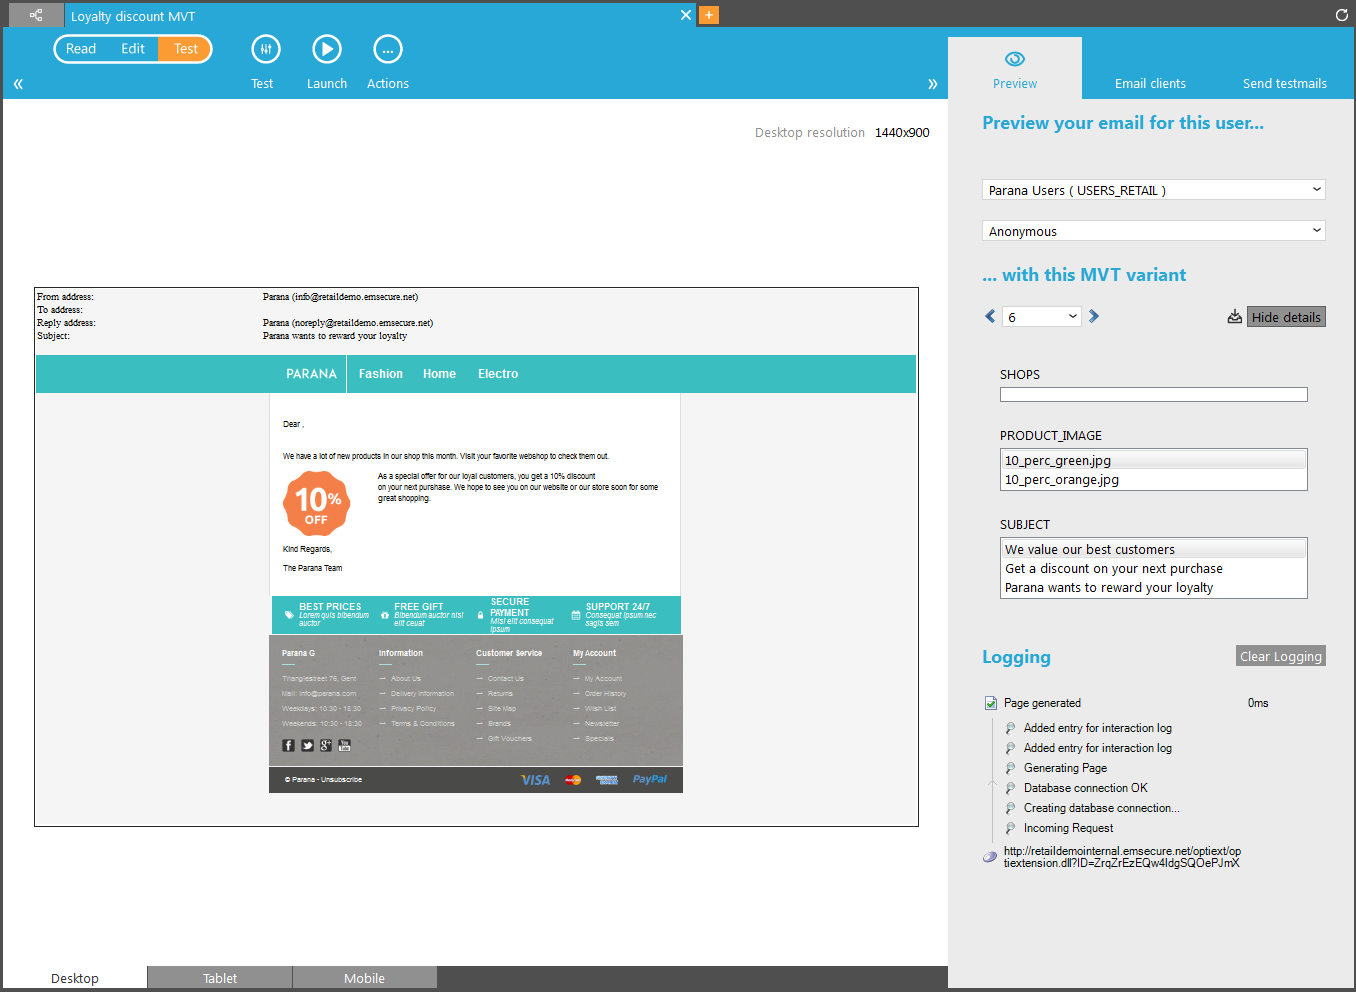
Note that fields regarding MVT are only displayed when the email contains an MVT component, added in the Editor. In the preview, it is possible to select the MVT variant. The button 'Show details'/'Hide details' allows accessing the possible values for each one of the MVT components in the email and selecting the combination of values that should be applied to the preview.
Send test email
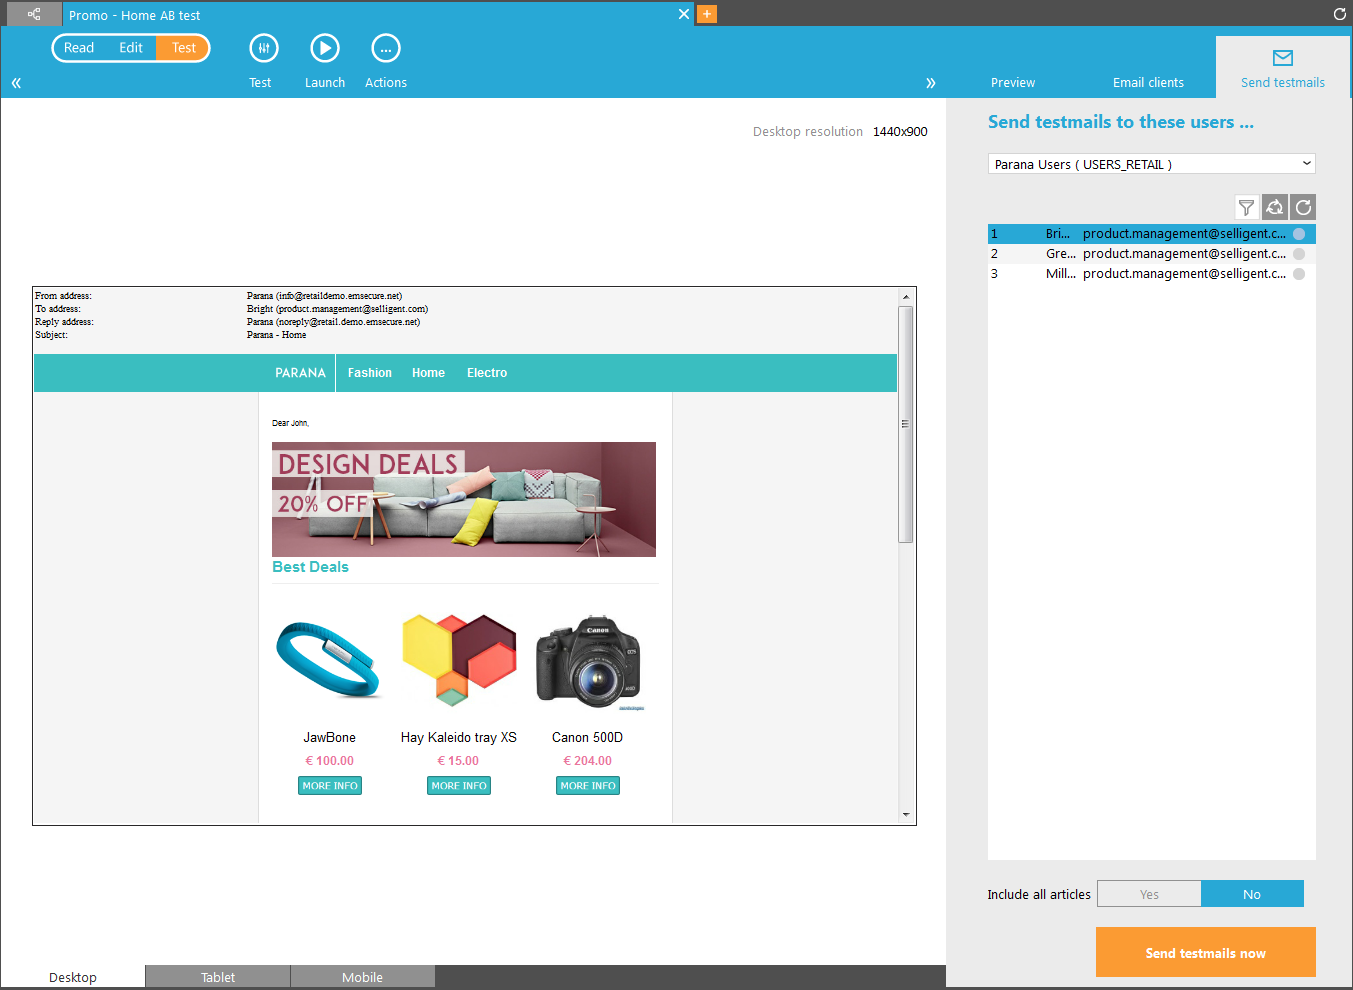
This option displays the journey in'Test'mode and enables sending a test email to all test contacts, or a selection of test contacts.
Selecting test contacts can be done simply by clicking and selecting the desired test contacts (ctrl & shift allows multiple selection) from the selected Audience list.)
The button 'Send test mail now' actually sends the email to the selected test contacts.
'Include all articles' is used for emails created from templates and adds all articles in the email, without taking into account the filters or matching defined on the article container. See Email templates and Designing templates for more info.
NOTE: The option ‘Send test emails’ is will not display action list data in the email, for journeys using action lists. To test the journey, the journey must be put in test mode.
When an MVT component is used in the email, some additional buttons are displayed:
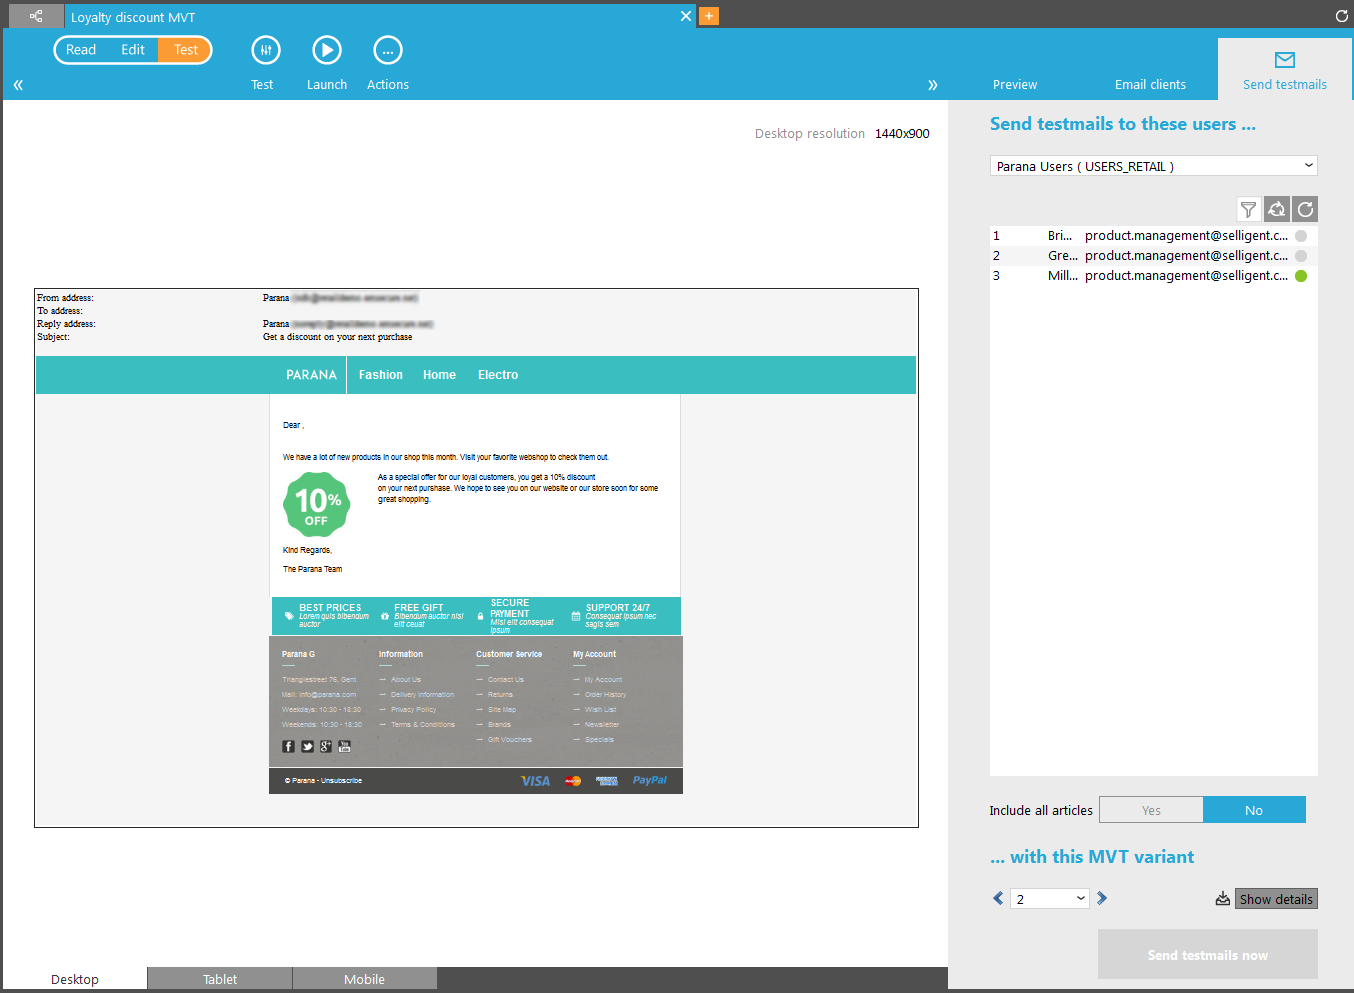
When sending a test email it is possible to select the MVT variant that should be used for the test email. The number of the variant can be selected from the drop down field. To view content of that combination, press the 'Show details' button:
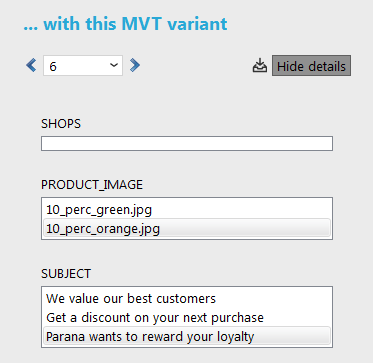
The combinations for the current selected variant are listed. This can easily be changed by selecting a different value from the different lists. The variant number is automatically updated to reflect the new selected combination. (In the above example, option 2 for product name and option 3 for subject represent variant 6).
Delivery
The Delivery view gives a graphical view of the delivery status of the email journey.
The left graph gives an overview of how many emails have been delivered,
have failed, are scheduled, etc. The number of retries is listed as well
as the number of pending emails.
The graph on the right gives an overview of the possible reasons why an
email has not been delivered and how many emails there are for each one
of these reasons.
A click on a specific element in the graph displays detailed information on the records within that section of the graph. You can also export the records to a text, csv file or Excel.
Example:
A click on the ‘Failed’ pie displays an overview of the targets for who
delivery failed and why.
Events
The email component can activate following types of events that lead to contact progression (the path that contacts follow in the journey):
- Undeliverable — The email couldn’t be delivered.
- Viewed/not viewed — The contact views/does not view the message.
- Send — The email has been sent
- Click — The contact clicks a specific sensor (a Selligent measurable hyperlink) in the message. Followed by many components to continue the journey, a Page, Data component, etc.
- NotClicked — The contact does not click a specific sensor (a Selligent measurable hyperlink) in the message within a certain timeframe (set a delay). Followed by another Email component to send a reminder email.
- Any link clicked — The contact has clicked at least one of the links in the message
- No links clicked — The contact has not clicked any of the links in the message
- Received spam complaint — When the contact reported a spam complaint, this can be custom handled in the journey. (If the template has also a spam complaint link, the reaction at journey level has priority)
Sending a reminder email this way only works for scheduled or triggered journeys. Thus a journey which is executed more than once. The first time the journey is executed there will be nobody that clicked, so there is no selection for "Not clicked after 3 days". Only the second run (3 days later) there might be contacts that have not clicked yet. Usually the original email journey is executed 'Single shot'. Create a second journey for the reminder email, with a selection only including the contacts that have not clicked after 3 days. See Filter Designer, History filter examples, for an example of a reminder email selection.
- After Delivery — After delivery of the email. Followed by a Data component to store a delivery date for instance. Or a BPM process component to change the contact's BPM state.
Properties
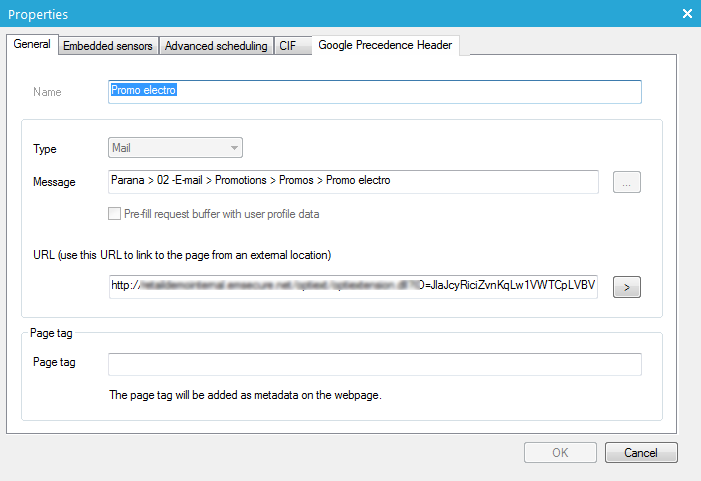
The properties of an Email component are mostly the same as for the Web page.
- General properties (link to Web page)
- Embedded sensors (link to Web page)
- Advanced scheduling
- CIF (link to Web page)
- Best version (link to Web page)
- Google Precedence Header
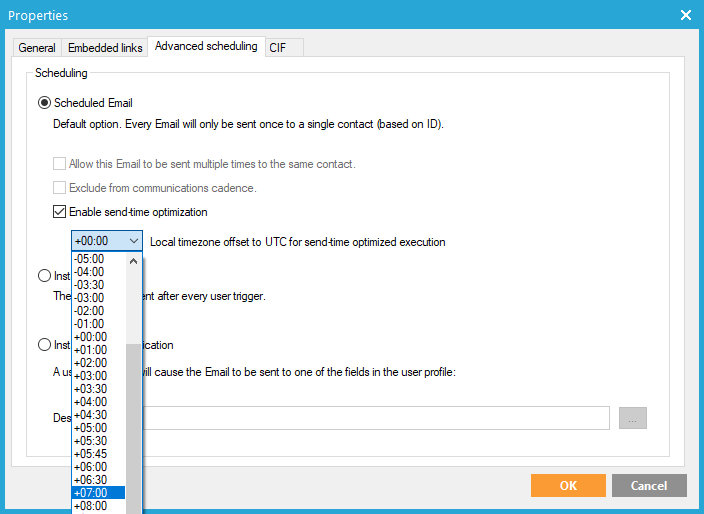
Advanced scheduling
There are 3 different methods to schedule emails:
- Scheduled Mail — this is the default setting. Selligent manages the email sending process and assures that every mail will only be sent once to a single contact.
Allow this mail to be sent multiple times to the same contact — Only for triggered journeys, by checking the option the standard behavior is overridden and the email can be sent multiple times to a contact. The email is sent each time the journey is executed and the contact is in the target selection.
Exclude from Communications cadence — This checkbox allows bypassing the rules defined in a Communications cadence Scheme. It means that the email is always sent without taking into account the limitation of the communication cadence plan of the maximum messages the contact can receive. (Consult Communications cadence for more information)
Enable Send-Time Optimization — Send-Time Optimization is used to send messages in journeys at the best time, optimized for the recipient with as goal to increase the open rate of a journey. This feature can be activated for each journey individually.
Once STO is activated, STO profiles are being built. Every contact with at least 1 interaction gets an STO profile.The best send-time is calculated for each recipient based on previous opening times and the best send-time of the audience.
Technical note:Why is the best send-time using a combination of the best send-time for the contact and for the audience?
There are several situations where this might be needed:
* when there are too little interactions and we cannot be confident about the hours of activity
* when there are a lot of interactions but spread across multiple hours
A Fallback send-time is available, using the best send-time for the audience. When a contact has no STO profile, the fallback STO time is used.
The fallback STO time is calculated automatically by the Selligent Cortex engine in the background.
Note: STO is only available for scheduled emails in single shot journeys. It can't be activated for other channels than email.
Note: Please reach out to your Selligent contact to activate the Send-Time Optimization feature.
As a result, messages are sent out in accordance with the following rules:
- All messages for contacts with an unknown best time are sent out on the fallback STO time (calculated automatically by the Selligent Cortex engine in the background) once the journey is launched.
- Contacts with a best send time in the past, before the journey was launched, are sent out immediately.
- All of the others will be sent out at the calculated optimized time.
It's advised to not use a Wave component in combination with Send-Time optimization in your journey, as they interfere with each other.
Note: When a user puts a scheduled launch time on a journey, the time is expressed in their timezone. The journey will be launched in the timezone of this user at that time.
When a user with a different timezone views the journey, the scheduled time will be translated to their timezone, to reflect the local time.
Internally, the system uses a universal timezone, to make it possible to translate times to localized versions for every user. This means that updates by one user will be correctly represented in the local timezones of all other users.
- Instant Mail — The mail will be sent each time a contact clicks a sensor. The sensor is the trigger that leads to this Email component. The component is displayed in the journey with "Instant" in front of its name.
Instant emails ignore the OPTOUT setting. If a contact
clicks, the email will always be sent, even if they opted out (OPTOUT>0).
The email will also be sent multiple times to the same contact, each time
he clicks.
Example: a contact is unsubscribed (optout=1) but wants to retrieve his
password. If the ‘forgotten password’ email is not used as an instant
email, e.g. in a data driven flow, it would not be sent because of the
optout flag.
Example: The contact fills in a participation form and needs to receive an email
confirming his participation. The email is sent each time the contact
filled in the form. The email must be
set to 'Instant' otherwise the email will not be sent. 
- Instant Mail – Notification — A click of the contact will cause the email to be sent, not to the contact itself, but to an email address retrieved from one of the fields in the contact profile. In this case, the mail will not be send to a contact in the Audience list used for this journey, but to a different person. The component is displayed in the journey with "Notification" in front of its name.
Example: A contact fills in a participation form,
but an account manager or dedicated customer care employee must be notified
by email so they can follow up on this contact's participation. The employee's
notification email address is stored on a field of the audience list or
a profile extension and selected in the properties of the notification
Email component. Note that in this example the contact itself will not
receive an email.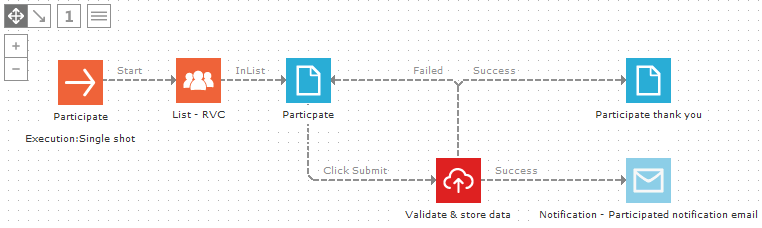
Note 1: When using ‘Instant mail-notification’ emails
are not sent with the Selligent Mail agent and therefore do not appear
in the statistics.
Note 2: This type slows down the journey. Do not use this option when it
is not really required. Alternatively, store the notification email
address in a 1-on-1 linked audience list (profile extension) and use this
list as an audience in a second journey.
Note 3: By default, emails are sent only once to the same contact. If you
would reactivate the journey again, the contacts that already received
the email, will not receive it a second time.. Therefore, contacts will
never receive the same message twice. The only exceptions are a
triggered journeys with the Email component allowed to send multiple times,
data driven (scheduled) journeys using action lists, and instant emails
that will be sent whenever a contact clicks a sensor.
Important note 4: If emails are deleted
from the canvas and replaced by the same email, Selligent will consider
this as a new email (new action ID).
Google Precedence Header
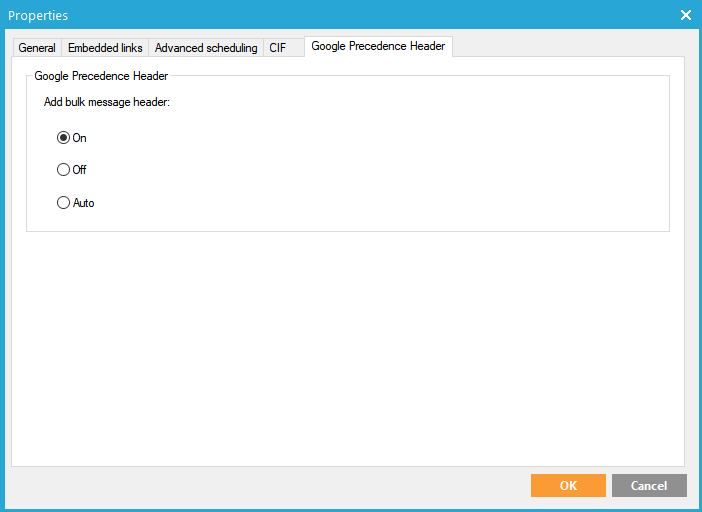
To improve deliverability on Google domains and ensure better Inbox placement, it is now possible to add a specific Google Precedence Header to a bulk email. By default no Google Precedence Header is added to your messages. Moreover, the Google Precedence Header functionality needs to be activated specifically on your environment to be able to use it. (Contact Selligent to activate it on your environment)
The following settings are available:
- Off — This is the default and means that no header will be added
- On — If set to on, the header is always added.
- Auto — Based on the number of emails sent out, the header is automatically added. This number is set to 5000 but can be adapted by your system administrator.
