Form Properties
The properties of a form are accessible via the 'Properties' button in the toolbar.

General
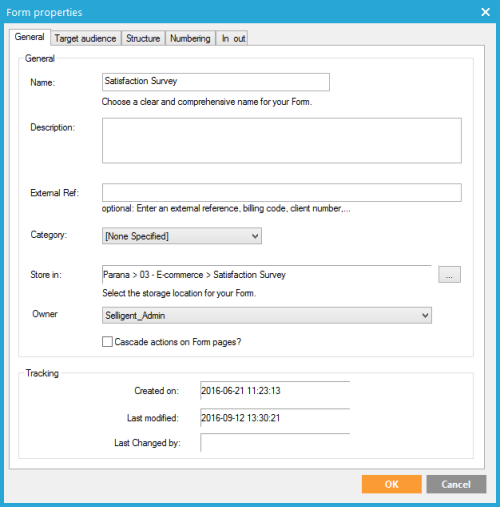
A Name and Description is defined for a form.
An external reference can be added, but is optional. This reference may refer to a client number, a billing code, etc. It can be used for tracking purposes.
A category can be defined for reporting purposes. (Categories are defined in the Configuration.)
The storage location of the form is set as well. A tree view of folders is available when clicking the ... button.
Additional information is provided on creation date, modification date and the user who last made changes.
Target audience
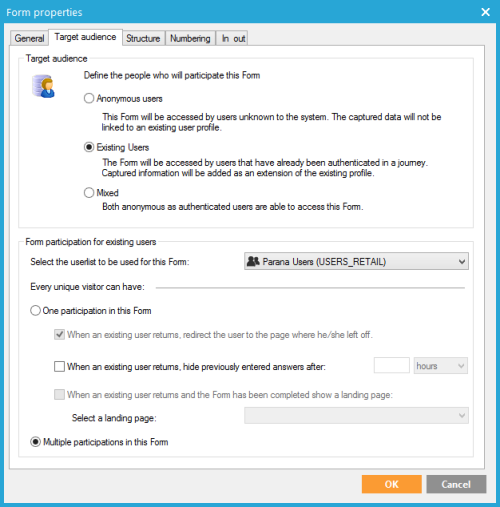
The 'TargetAudience' indicates who can fill out the form.
-
Anonymous entries: persons unrelated to an audience list and are therefore not known in the application. The answers are stored in the survey list but the values for the fields LISTID and USERID will be zero.
Example:
When publishing an online form directly on a website, any contact clicking the form hyperlink can fill out the form. This means that no information about the contact is known in the Selligent database.
This implies that a person can submit the form more than once, as it’s impossible to identify the contact performing the action. So, the “Form participation for Existing Users” panel will be disabled.
- Existing contacts: contacts which are included in an audience list
Example:
Inviting hotel clients contained in an audience list to respond to a customer satisfaction form.
Site customers are known in the environment because they are included in an audience list, so their answers will be related to the audience list record based on the USERID field (matching keys ID on USERID).
- Mixed: both known and unknown contacts.
If you are unsure what to select, select 'Mixed. Since an audience list is mandatory in a journey, even if only anonymous contacts can fill out the form. Selecting mixed and selecting the audience list in Form is usually the best option.
The following options are only available for existing contacts:
- Selecting an Audience list: the Audience list that contains the contacts linked to the form.
Now, every contact can either have only one participation or multiple participations:
- Single participation on this form: a defined contact can only participate once. This means that only one record is created for each contact in the form list. If the contact participates more then once, his record will be overwritten (i.e. answers are updated). The list will have a 1:1 relation with the Audience list. In case of one participation, the following rules can be defined:
-
- Redirect to the page where he left off: if the contact leaves the form and comes back again, the contact will be redirected to the last answered page; as its previous answers have already been stored in the database
- Hide previously entered answers after: after the defined time, all given answers are hidden and the contact has to answer the questions again.
- Show landing page: when the form is completed, a page indicating he already completed the survey is shown to the contact. This landing page is usually an exit page.
- Multiple participations to this form: a specific contact can fill out the form multiple times. This means that multiple records are created per contact in the form list. The list has a 1-on-N relation with the Audience list.
Structure
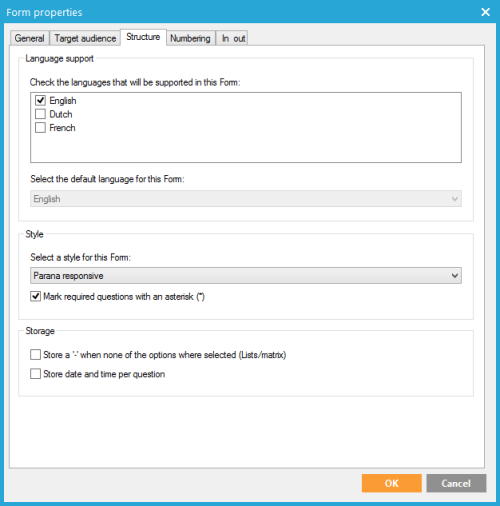
By selecting the available languages here, translations must be created for the different selected languages.
Under 'Style' select a the Style from the drop-down list. Each style has a CSS style sheet and other settings that are applied to the form layout. See 'Styles' for more information.
NOTE: styles can be responsive or not. Make sure to select the correct one for your survey.
Select the option 'Mark required questions with *' if you want mandatory questions to be marked with an asterisk.
Following storage options for the answers are available:
- Select the option'Store a “-”[…]'' if you want to be able to make the difference between contacts who have viewed a question and didn’t answer to it and contacts who didn’t see the question. It is possible to hide certain questions with rules. Of course the contact cannot answer hidden questions. This will result in empty values in the form list. If you select 'Store a dash (-) when none of the options were selected', you can make a distinction between questions the contact did not see (empty value) and the ones they did see but did not answer (-). Contacts who didn’t answer will get a “-“ as answer in the field value for this question. People who didn’t see the question will get a “blank value”.
- Store date and time per question: date and time when a question has been answered.The date and time will be stored in a separate table called 'SURVEY_XXX_DT' with XXX being the number of the form.
Numbering
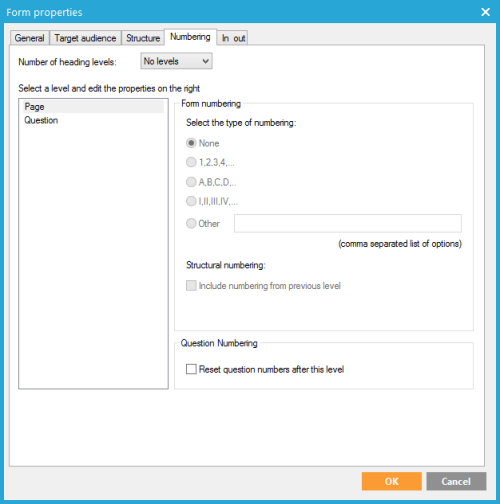
In this section it is possible to define a numbering and hierarchical position for questions in the form.
Number of heading levels: defines the number of levels used for the different questions. These levels can be compared to the Microsoft Word heading system allowing the definition of multiple headings to order your text. Creating headers on pages is done with the 'Header' component and follows the structure defined here. The selected levels appear in the list on the left and have to be configured.
Edit level properties:
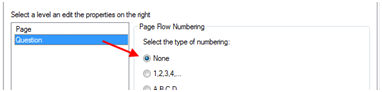
When no heading level is selected, only “Page” and “Question” options are available from the 'level selection panel' on the left side of the window.
Selecting the 'Page' option will enable the 'Question Numbering' option check box: Reset question numbers after this level. Enabling this option will reset the numbering on each page of the form.
Example:
Page 1:
1 first question
2 second question
Page 2: (question numbers are reset)
1 third question
2 fourth question
Selecting the 'Question' or the 'Level X' option enables the 'Form Numbering' option group.
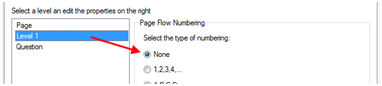
The numbering type is defined in this group (numbers, characters, roman numbers, etc). It’s possible to define a specific numbering type using the 'Other' value and then providing the numbering values separated by a comma.
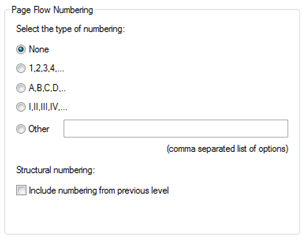
The option 'Include numbering from previous level' includes the value of each parent level for each question or custom level with the Header component. It’s useful when using more than one heading level.
Example
Checkbox disabled
1 First level Item (level 1)
1 Second level Item (level 2)
1 Question one (question level)
2 Question two (question level)
Checkbox enabled
1 First level Item (level 1)
1.1 Second level Item (level 2)
1.1.1 Question one (question level)
1.1.2 Question two (question level)
In/out
Form Input Interface:
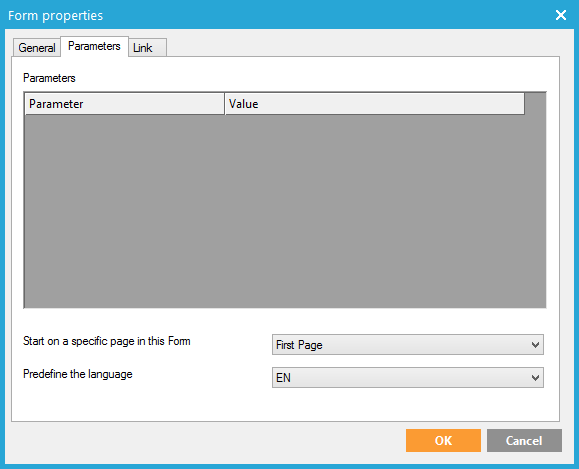
Pass parameter values from the journey to the form and use them in the form. E.g. Via which way the contact arrived at the form. Email, website, sms... The value is set in the properties of the Form component used in the journey. Multiple Form components can be used in the journey, each component using the same form but passing different values. When you add a parameter name here, a field will be added to the form table to store the value. The field name will always start with "P_" followed by the parameter name. E.g. P_VIA
Update the database to create the survey fields.
To add those parameters, click the “Add” button on the right of the panel. The following window will be displayed:
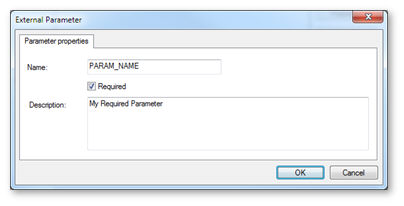
It’s possible to set parameters as mandatory by checking the 'Required' checkbox.
Below an example of the Form component properties in the journey:
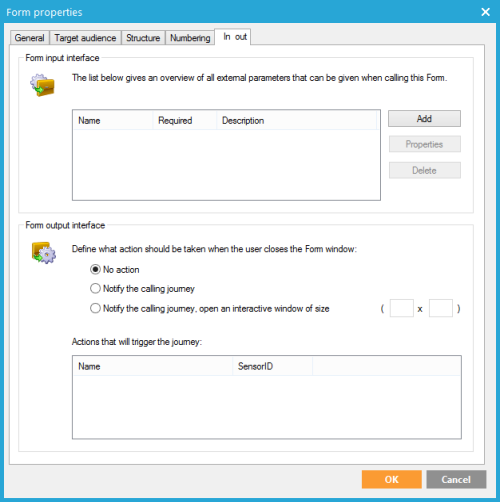
Form Output Interface:
When using a 'Hyperlink' component one of the options is to 'Return to journey'. Meaning you can continue a path in the journey when the contact clicks the hyperlink in the form. In the Hyperlink component you define the event name used as trigger in the journey. These event names are listed here.
Additionally, define how the event should be handled:
- No action:nothing is performed.
- Notify the calling journey: send a response to the journey. A trigger must be defined in the journey..

- Notify the calling journey, open an interactive window: same as the previous option, but also open an new window when the contact clicks the hyperlink component
