User Guide : Interest Tags
Introduction
EMIT is short for Engagement Metrics and Interest Tags. It allows measuring how your consumers are engaged and what their interests are. To measure the interest of consumers, tags are used. By tagging links in your communications, you can categorize the areas in which your contact is interested.
To find out more about Interest tags, what they are and how these can be used, please check out the following topic for a more functional introduction to this feature: Interest Tags .
Prerequisites
Interest tags need to be activated on request and several configuration steps are required to be able to use this feature. These steps are explained in this document.
Define the Tag List in the Admin Configuration
To be able to tag links in emails, a Tag List must be created. This is done in the Admin Configuration, in the Data integration section. The Tag List holds a series of tags with their tag name and description and these are subsequently used for tagging links in messages, Content Blocks and items in data selections.
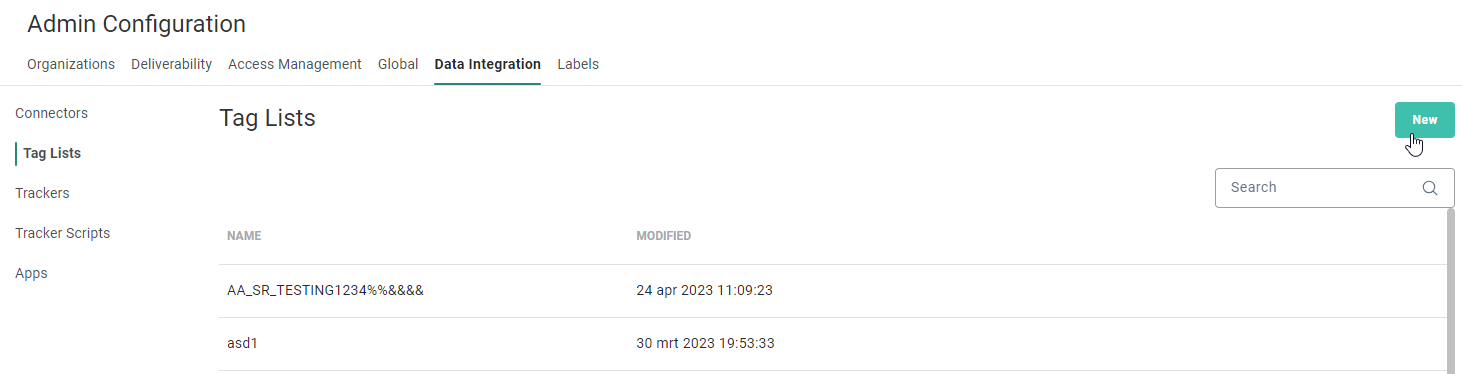
1. Go to the Admin configuration/ Data Integration tab and activate the entry 'Tag Lists'. An overview of existing Tag lists is available.
2. To create a new Tag List, click New.
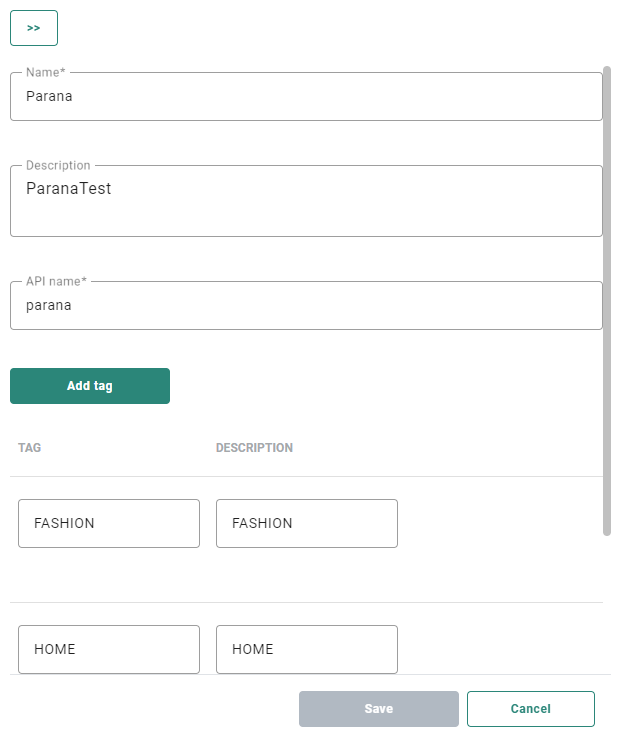
3. Provide a name and API Name. This name will be visible when linking the Tag List first to an organization and next to an Audience List. Make sure to use a descriptive name for this list, especially when multiple Tag Lists are needed.
4. Add for each tag the tag name and the description. The description is what you will see when tagging links in content so again, make sure the description provides a clear outline of what the tag represents..
Example:
A Tag List with name Retail categories.
Following categories are listed: Home, Fashion and Electro.
Note:
A maximum of 200 tags can be added.
Each tag name must be unique.
Only single-level tags are supported, not hierarchical tags.(Check out this topic for more info on how to work around this)
Note: Tag fields cannot be filled out with protected values, such as 'Code' and 'ID'.
The Description field is automatically populated by the Tag name but should contain further information that explains the purpose and context of that tag. A maximum of 128 characters is allowed.
5. Save the list.
Note: Once the list is in use, it is no longer possible to delete it.
(For more information on how to manage the Tag List, check out this topic.)
Assign the Tag List to the Organization
Once the Tag List has been created, it needs to be linked to one or more organizations to make it available to any messages created within that organization. To do this, go to the Organization section in the Admin configuration.

On the Data Integration tab,
Link the Tag List to the Audience List
Next, the Tag List needs to be linked to an Audience List. Only if the list is linked to the audience, you will be able to use the interest tags to tag links in email messages created for that audience.
In the Advanced settings of the List properties, link the Tag List to the audience. This allows marketers to tag links in content and track the interest of the recipients of the message.
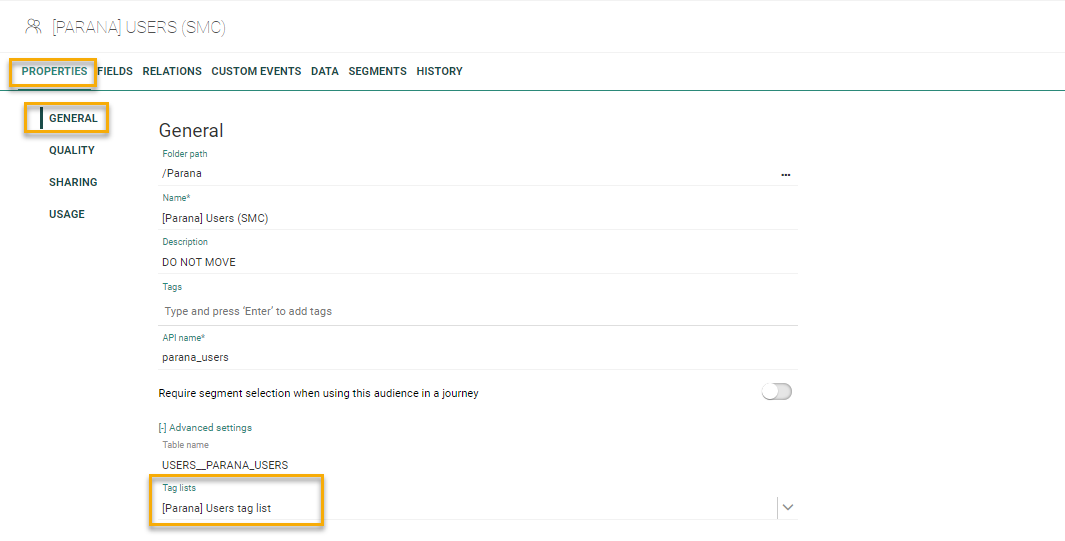
Note: Only one Tag List can be linked to the Audience List.
Technical note: When a Tag List is attached to a shared Audience List, this Tag List must also be linked to the other organization in order for the tags to be visible when creating content in the other organizations. The metrics collected and calculated are in this case cross-organization.
Technical note: The extended profile Email Interest is created when a Tag List is linked to the Audience List.
When Audience Lists are shared with other organizations, there will only be one profile extension for Interest Tags linked to that Audience List.
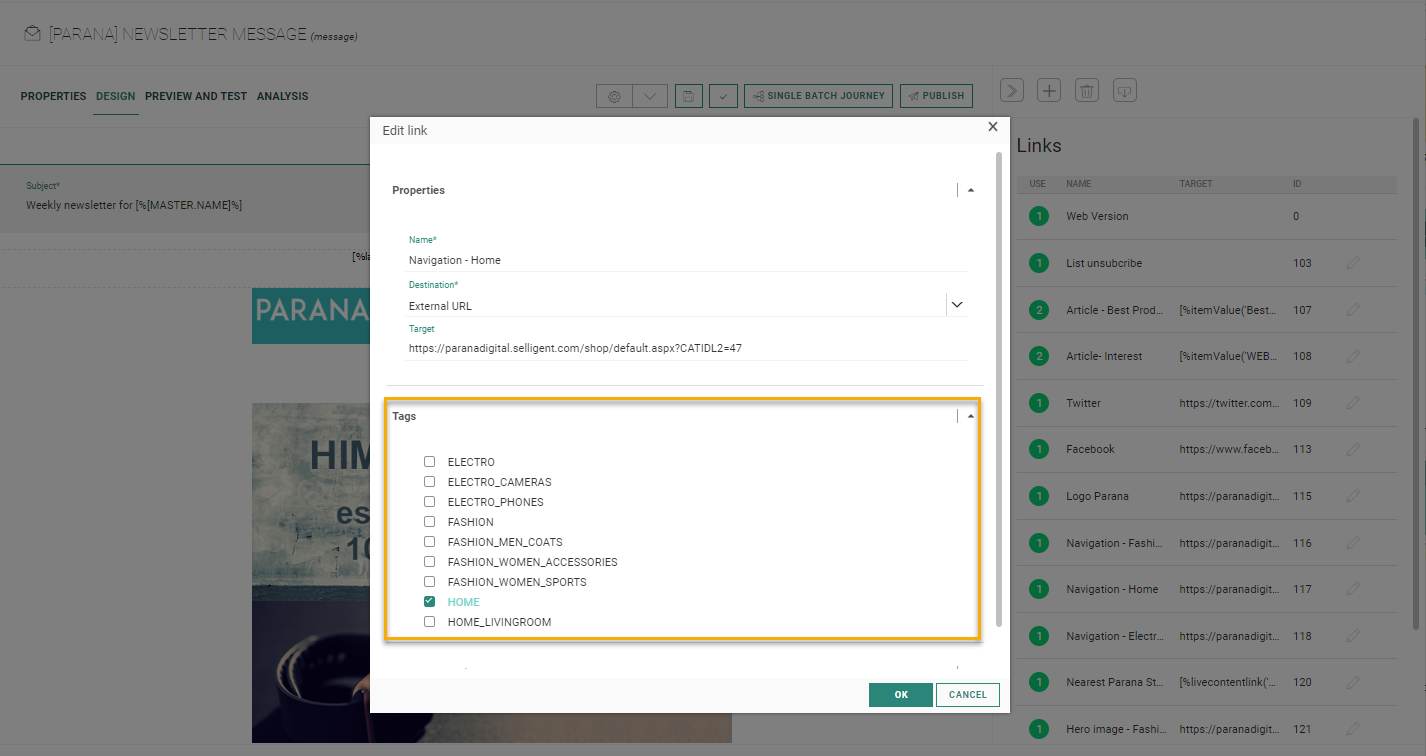
Tagging Links in Content
In the last step, you can start tagging links in content. For every tagged link that is clicked, interest data is gathered and stored in the extended profile.
Tagging of links can be done:
-
in the email message itself, in the Links properties.

(For more information on tagging links in content, check out this topic.) -
in the links added to a Content Block

(For more information on adding interest tags to links in Content Blocks, check out this topic) -
in the items of a repeater used in content of a Single Batch Journey
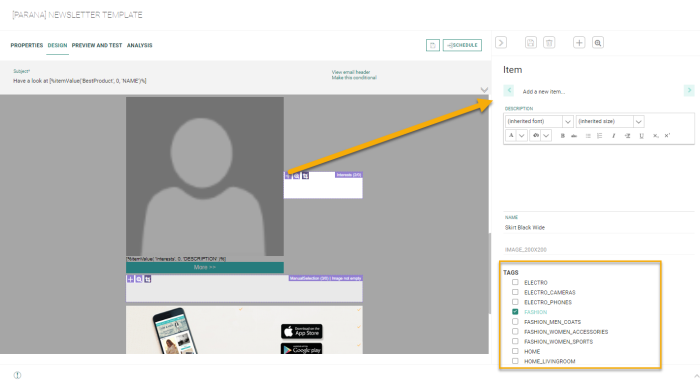
(For more information, check out this section on adding items to repeaters)